“`html
Table of Contents
- Restaurant-Style Pan Seared Scallops with Lemon Caper Sauce: Your Ultimate Guide
- Why Perfectly Seared Scallops are a Culinary Dream
- Ingredients for Lemony Perfection
- Timing Is Everything: Prep, Cook, and Enjoy
- How to Achieve Restaurant-Quality Seared Scallops
- Nutritional Highlights
- Healthier Swaps Without Sacrificing Flavor
- Serving Suggestions
- Common Mistakes to Avoid
- Storing Your Scrumptious Scallops
- Frequently Asked Questions
- Your Turn to Shine!
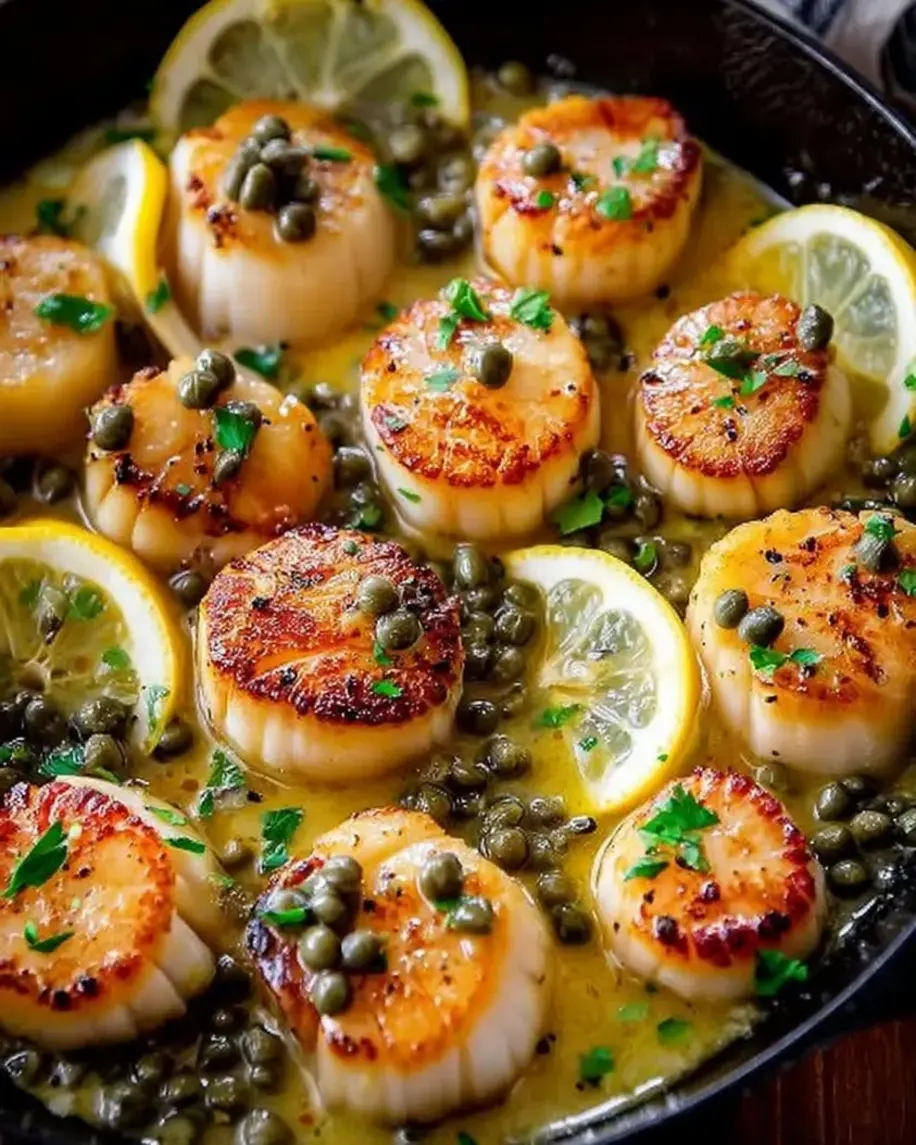
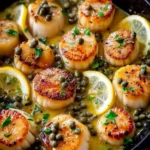
Master Restaurant-Style Pan Seared Scallops with Lemon Caper Sauce
Ever wondered what makes restaurant scallops so incredibly delicious and perfectly seared? You’re not alone! In fact, a quick search reveals that millions of home cooks struggle to achieve that coveted golden-brown crust and tender, succulent interior, often ending up with rubbery or unevenly cooked seafood. But what if we told you that achieving restaurant-quality pan-seared scallops with a vibrant lemon caper sauce at home is not only possible but surprisingly straightforward?
This isn’t just another seafood recipe; it’s your passport to elevating your home cooking to a professional level. Get ready to impress yourself and your loved ones with a dish that’s as elegant as it is easy to make. Let’s dive in!
Restaurant-Style Pan Seared Scallops with Lemon Caper Sauce: Your Ultimate Guide
There’s something undeniably special about perfectly pan-seared scallops. They boast a beautiful, caramelized crust that gives way to a sweet, tender, and almost buttery interior. When paired with a bright, zesty lemon caper sauce, the dish transforms into a symphony of flavors and textures that can rival any fine dining establishment. This recipe is designed to guide you through each step, ensuring you achieve restaurant-quality results in your own kitchen.
Why Perfectly Seared Scallops are a Culinary Dream
The allure of a perfectly seared scallop lies in its textural contrast and concentrated sweetness. The searing process, when done correctly, creates a Maillard reaction on the surface, developing complex, savory notes and a delightful crispness. This contrasts beautifully with the naturally tender and sweet flesh inside. Unlike other cooking methods that can make seafood tough or bland, a quick, hot sear locks in moisture and enhances the scallop’s inherent delicate flavor. This dish is more than just a meal; it’s an experience that tantalizes the taste buds with its simplicity and elegance.
Ingredients for Lemony Perfection
The magic of this dish relies on fresh, high-quality ingredients. Don’t skimp here, as each component plays a crucial role in the final flavor profile.
Scallops
- 1 lb large sea scallops (about 10-12): Look for “dry-packed” scallops, which haven’t been treated with preservatives. They sear much better (less moisture means better crust!). They should feel firm and smell fresh like the ocean, not fishy. If you can only find “wet-packed” scallops, rinse and thoroughly pat them dry before use.
Butter and Oil
- 2 tablespoons unsalted butter: Adds richness and helps with browning.
- 1 tablespoon olive oil or high smoke point oil (like avocado or grapeseed): Helps prevent the butter from burning and contributes to a higher searing temperature.
Garlic and Shallots
- 2 cloves garlic, minced: To impart aromatic depth to the sauce.
- 1 small shallot, finely minced: Offers a milder, sweeter onion flavor than regular onions.
Lemon Juice and Zest
- 2 tablespoons fresh lemon juice: The star of our tangy sauce. Fresh is non-negotiable for brightness.
- 1 teaspoon lemon zest: Adds an intense lemon aroma without additional liquid.
Capers
- 1 tablespoon capers, drained and rinsed: These briny little buds add a piquant burst of flavor and texture.
White Wine or Broth
- 1/4 cup dry white wine (like Sauvignon Blanc or Pinot Grigio) OR low-sodium chicken/vegetable broth: Creates the base for your sauce, deglazing the pan and adding depth.
Parsley
- 2 tablespoons fresh parsley, chopped: For a fresh, herbaceous finish and vibrant color.
Salt and Pepper
- Salt and freshly ground black pepper: To season generously.
Timing Is Everything: Prep, Cook, and Enjoy
The beauty of pan-seared scallops is their speed. They cook in mere minutes, making this an ideal weeknight meal or a quick appetizer. Precision and preparation are key to ensuring a seamless cooking process.
Compared to many elaborate seafood dishes, this recipe significantly cuts down on active cooking time. The average seafood recipe often spans 30-45 minutes of active cooking, but the scallops’ quick sear makes this a remarkably efficient culinary endeavor.
How to Achieve Restaurant-Quality Seared Scallops
Follow these steps meticulously, and you’ll be serving up scallops that taste like they came straight from your favorite bistro.
Step 1: Prep Your Scallops
This is arguably the MOST crucial step. Gently remove the small, tough side muscle (the “foot”) from each scallop. It’s usually a thin, rectangular piece of meat on the side. Pat the scallops DRY with paper towels. I mean *really* dry. Moisture is the enemy of a good sear. Think of it as giving them a spa treatment to ensure they get beautifully browned, not steamed.
Step 2: Heat the Pan
Place a heavy-bottomed skillet (cast iron is ideal) over medium-high heat. Add the olive oil and butter to the pan. Let the butter melt and begin to foam, but don’t let it brown. You want the pan to be hot enough to sizzle immediately when a scallop hits it, but not so hot that the oil or butter burns. Test by flicking a tiny drop of water into the pan; it should evaporate instantly with a sizzle.
Step 3: Sear to Perfection
Season your dry scallops generously with salt and pepper. Carefully place the scallops into the hot pan, ensuring they are not overcrowded. They should have enough space so they are searing, not steaming. You’ll hear that satisfying sizzle! Cook undisturbed for 2-3 minutes, until a deep golden-brown crust forms on the bottom. Resist the urge to move them around!
Step 4: Remove Scallops
Using tongs, flip each scallop. Cook for another 1-2 minutes on the second side, until just opaque and cooked through. They should still be slightly translucent in the very center if you like them medium, or cooked through if you prefer. Be careful not to overcook! Remove the scallops from the pan and set them aside on a plate. The pan will have browned bits (fond) stuck to it – this is pure flavor!
Step 5: Build the Lemon Caper Sauce
Reduce the heat to medium. Add the minced shallots and garlic to the same pan. Sauté for about 1 minute until fragrant, scraping up any browned bits from the bottom of the pan. Pour in the white wine (or broth) and let it bubble and reduce by about half, about 1-2 minutes. This deglazes the pan and creates the sauce base.
Step 6: Reintroduce Scallops to the Sauce
Stir in the lemon juice, lemon zest, capers, and remaining 1 tablespoon of butter. Swirl the pan until the butter is melted and the sauce is emulsified and slightly thickened. Add the chopped parsley. Taste and adjust seasoning with salt and pepper if needed. Return the seared scallops to the pan for just about 30 seconds to warm them through and coat them in the luscious sauce.
Step 7: Garnish and Serve
Serve immediately! Spoon any extra sauce over the scallops. Garnish with a little extra fresh parsley and maybe a tiny sprinkle of capers. The goal is to eat these as soon as they are ready for the best texture.
Nutritional Highlights
Scallops are a lean protein source, rich in essential nutrients. Here’s a general overview per typical serving (approx. 3-4 large scallops):
- Calories: 150-200 (depending on butter/oil used in sauce)
- Protein: 20-25g
- Fat: 5-10g (mostly healthy fats if using olive oil)
- Carbohydrates: Very low (negligible from scallops themselves)
- Vitamins & Minerals: Good source of Vitamin B12, Selenium, and Zinc.
Healthier Swaps Without Sacrificing Flavor
We believe in smart substitutions that keep the flavor booming!
- Less Butter: Use 1 tablespoon of butter and 1 tablespoon of olive oil for searing, and perhaps reduce the final butter in the sauce to 1 teaspoon, or omit entirely and rely on the wine reduction and olive oil for richness.
- Broth Over Wine: If you prefer to avoid alcohol, use low-sodium chicken or vegetable broth instead of white wine for the sauce base. It still deglazes wonderfully.
- Load up on Veggies: Serve with a generous portion of steamed asparagus, sautéed spinach, or a fresh green salad to increase fiber and nutrient intake.
- Gentle Searing: Ensure your pan isn’t smoking hot to avoid burning excess oil unnecessarily.
Serving Suggestions
These scallops are versatile! They pair beautifully with:
- Pasta: Toss with linguine or angel hair pasta for a light seafood pasta dish.
- Risotto: Serve over a creamy lemon or Parmesan risotto.
- Vegetables: Steamed asparagus, green beans, or sautéed spinach are classic companions.
- Rice: A simple bed of fluffy white or brown rice.
- Crusty Bread: Perfect for soaking up that divine lemon caper sauce!
Common Mistakes to Avoid
Don’t let these common pitfalls ruin your scallop dreams:
- Not Drying Scallops: This is the number one reason for no sear. Moisture steams, it doesn’t brown!
- Overcrowding the Pan: Leads to steaming instead of searing. Cook in batches if necessary.
- Low Pan Heat: You need a hot pan to get that beautiful crust quickly.
- Overcooking: Scallops cook very fast. Overcooked scallops are tough and rubbery.
- Moving Scallops Too Soon: Let them sit undisturbed for the crust to form.
Storing Your Scrumptious Scallops
While best enjoyed fresh, leftover cooked scallops can be stored in an airtight container in the refrigerator for up to 1-2 days. Reheat gently in a skillet with a little butter or sauce over low heat to avoid overcooking. Honestly, though, they’re so good you likely won’t have leftovers!
Frequently Asked Questions
What’s the difference between dry-packed and wet-packed scallops?
Dry-packed scallops have no added water or preservatives, making them ideal for searing as they have less moisture. Wet-packed scallops are often soaked in a phosphate solution, which adds water and makes them heavier and harder to sear properly. If you can, always opt for dry-packed.
Can I use frozen scallops?
Yes! Thaw them completely in the refrigerator. Once thawed, it’s crucial to pat them extremely dry with paper towels, as they will release more moisture than fresh scallops.
How do I know when scallops are cooked through?
They should be opaque with a pearly sheen. If you want a perfect sear, they can still have a slightly translucent center, but they should not be gooey or raw-looking. A quick sear ensures they won’t be tough.
What kind of pan is best for searing scallops?
A heavy-bottomed skillet, especially cast iron or stainless steel, is best. These pans retain heat well and distribute it evenly, which is essential for achieving a consistent, golden-brown crust.
My scallops are sticking to the pan. What went wrong?
This usually happens for one of two reasons: the pan wasn’t hot enough when the scallops were added, or you tried to move them too soon. Ensure your pan is properly preheated, and let the scallops sear undisturbed for a few minutes until they naturally release from the pan.
Your Turn to Shine!
Mastering pan-seared scallops with a lemon caper sauce is a culinary achievement that’s within your reach. This recipe breaks down the process into simple, manageable steps, empowering you to create a restaurant-quality dish in your own kitchen. The vibrant flavors, the perfect sear, and the succulent texture are sure to impress. So, gather your ingredients, heat up that skillet, and get ready to experience seafood perfection!
We’d love to hear about your culinary adventures. Did you try this recipe? What did you serve it with? Share your thoughts and photos with us in the comments below!
PrintMaster Restaurant-Style Pan Seared Scallops with Lemon Caper Sauce
A delicious seafood dish featuring perfectly seared scallops served with a tangy lemon caper sauce.
Ingredients
- 12large sea scallops
- Salt and pepper to taste
- 2 tablespoonsolive oil
- 2 tablespoonsbutter
- 2garlic cloves, minced
- 2 tablespoonscapers
- Juice of1lemon
- 1/4 cupwhite wine
Instructions
- Season the scallops with salt and pepper.
- Heat olive oil in a pan over medium-high heat and sear scallops for 2-3 minutes on each side until golden brown.
- Remove scallops from pan and set aside. In the same pan, add butter, garlic, and capers, and cook for 1 minute before adding lemon juice and wine. Stir well, then return scallops to the pan to coat in sauce.
Notes
You can customize the seasonings to taste.
“`