“`html
Table of Contents
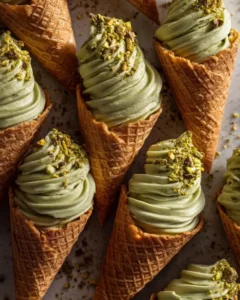
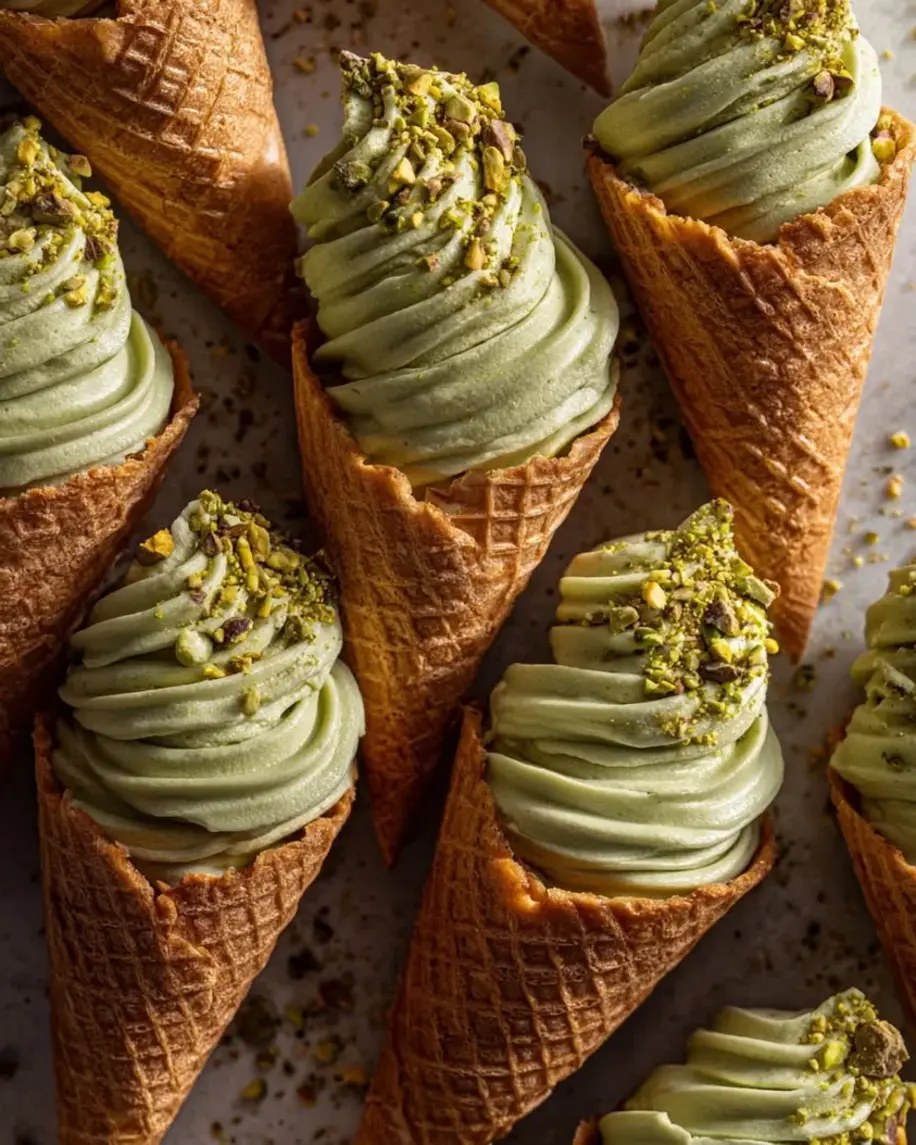
Luxury Italian Pistachio Gelato Cones: A Decadent Recipe
Introduction: Embrace the Art of Italian Gelato
Did you know that authentic Italian gelato typically contains less fat and air than American ice cream, resulting in a denser, more intense flavor? This is precisely the magic we’re aiming to capture with our Luxury Italian Pistachio Gelato Cones. Forget the ordinary; we’re diving into a world of creamy, savory, and utterly decadent flavors, perfectly encapsulated in crispy, golden cones. This recipe is designed to transport you straight to a charming Italian piazza, offering an elegant appetizer or a light, sophisticated dessert. Prepare to enchant your taste buds and impress your guests with this culinary masterpiece.
Ingredients for Pistachio Perfection
For the Gelato
- 1 cup shelled, unsalted pistachios: Look for vibrant green, high-quality nuts for the best flavor and color. These are the heart of our gelato, lending a rich, slightly sweet, and nutty depth.
- 2 cups whole milk: The creamy base of our gelato. Whole milk provides a luxurious mouthfeel and allows the pistachio flavor to shine. (Substitution: You can use a mix of whole milk and heavy cream for an even richer gelato, or a good quality oat milk for a dairy-free option, though the texture will differ slightly.)
- 1 cup heavy cream: Adds to the silky smoothness. Essential for that classic gelato texture. (Substitution: For a lighter version, replace half with more whole milk.)
- 3/4 cup granulated sugar: Balances the nutty flavor and ensures a smooth, scoopable texture. (Substitution: Raw cane sugar can add a subtle caramel note, or maple syrup for a refined sweetness, adjusting quantity to taste.)
- 5 large egg yolks: These act as a binder and emulsifier, contributing to the gelato’s incredible creaminess and velvety texture.
- 1 teaspoon pure vanilla extract: Enhances the other flavors and adds a layer of aromatic sweetness.
- Pinch of sea salt: A tiny amount amplifies all the flavors, especially the nutty pistachio.
For the Cones
- 1 cup all-purpose flour: The foundation of our crispy cones. (Substitution: A gluten-free all-purpose blend can be used.)
- 1/4 cup granulated sugar: For a touch of sweetness that complements the gelato.
- 2 large egg whites: Binds the batter and creates delicate, crisp cookies.
- 4 tablespoons unsalted butter, melted: Adds richness and crispness. (Substitution: Melted coconut oil can work, though may impart a slight flavor.)
- 1/4 teaspoon almond extract (optional): For an extra layer of sophisticated nutty aroma.
- Optional: 2 tablespoons finely chopped pistachios: To press into the cone batter for visual appeal and an extra crunch.
Timing Your Gelato Masterpiece
While the total time might seem long, most of it is inactive chilling and churning time. Our recipe is roughly 1 hour of active preparation, which is about 30 minutes less than average homemade ice cream recipes that often involve more complex custard steps or longer cooking times. The cone preparation is quick and efficient.
Step-by-Step Instructions
Step 1: Prepare the Pistachio Base
First, let’s create the heart of our gelato’s flavor. In a food processor, pulse the shelled pistachios until they form a coarse meal. Be careful not to over-process into a paste, unless you prefer a slightly smoother gelato. In a medium saucepan, combine the whole milk and half of the heavy cream (1 cup). Add the ground pistachios to the milk mixture. Gently heat over medium-low heat, stirring occasionally, until the milk is steaming but not boiling. Remove from heat, cover, and let it steep for at least 30 minutes (or up to an hour) to allow the pistachio flavor to fully infuse into the milk. This steeping process is key to achieving a deep, authentic pistachio essence.
Step 2: Infuse and Chill the Cream
While the pistachio milk mixture is steeping, prepare the custard base. In a separate bowl, whisk together the egg yolks and 3/4 cup of granulated sugar until pale and slightly thickened. This process, called “tempering,” is crucial for a smooth custard. After the pistachio milk has steeped, strain it through a fine-mesh sieve into a clean bowl, pressing gently on the solids to extract as much liquid and flavor as possible. Discard the solids. Now, reheat the infused milk mixture gently. Slowly ladle about half a cup of the warm pistachio-infused milk into the egg yolk mixture, whisking constantly. This gradually warms the yolks without cooking them. Pour the tempered egg yolk mixture back into the saucepan with the remaining pistachio-infused milk. Cook over low heat, stirring constantly with a wooden spoon or spatula, until the custard thickens enough to coat the back of the spoon (around 170-175°F / 77-79°C). Do not let it boil, or the eggs will scramble. Once thickened, immediately strain the custard through a fine-mesh sieve into a clean bowl set over an ice bath. Stir in the remaining 1/2 cup of heavy cream, vanilla extract, and the pinch of sea salt. Stir occasionally as it cools in the ice bath. Once cooled, cover the surface directly with plastic wrap to prevent a skin from forming, and refrigerate for at least 4 hours, or preferably overnight, until thoroughly chilled.
Step 3: Churn the Gelato
Once your pistachio custard base is well-chilled, it’s time to churn! Pour the cold base into your ice cream maker and churn according to the manufacturer’s instructions. This typically takes about 20-30 minutes, until the gelato reaches a soft-serve consistency. You’ll notice it becoming thicker and creamier as air is incorporated. For an even more intense pistachio flavor and lovely marbling, you can stir in 2-3 tablespoons of finely chopped pistachios during the last few minutes of churning.
Step 4: Make the Golden Cones
While the gelato is chilling or after it’s churned, let’s make our cones. Preheat your oven to 350°F (175°C). Line a baking sheet with parchment paper. In a medium bowl, whisk together the flour and sugar. In a separate small bowl, whisk together the egg whites, melted butter, and almond extract (if using) until well combined. Pour the wet ingredients into the dry ingredients and whisk until a smooth, thin batter forms. If using chopped pistachios, gently fold them in. Drop spoonfuls (about 1-2 tablespoons) of batter onto the prepared baking sheet, spacing them well apart. Use the back of the spoon to spread each dollop into a thin circle about 3-4 inches in diameter. These need to be thin to become crispy. Bake for 7-10 minutes, or until the edges are golden brown and the center is lightly colored. Work quickly! As soon as they come out of the oven, while they are still warm and flexible, carefully lift them off the baking sheet with a spatula and shape them into cones. You can use a cone mold or simply wrap them around a wooden spoon handle or a small piece of foil. Hold them in shape for about 30 seconds until they start to firm up. Place them on a wire rack to cool and crisp up completely. If they become too stiff to shape, briefly return them to the oven for a minute or two to soften.
Step 5: Assemble Your Masterpiece
Once your gelato has churned and your cones are completely cooled and crisp, it’s time for the final, delightful step. Spoon the freshly churned pistachio gelato generously into the cooled, golden cones. For an extra touch, you can sprinkle a few more finely chopped pistachios on top of the gelato. Serve immediately for the ultimate luxurious experience!
Nutritional Information
- Calories: Approximately 350-450 per serving (gelato + cone), depending on exact ingredients and portion size.
- Fat: 20-30g
- Carbohydrates: 35-45g
- Protein: 10-15g
- Sugar: 25-35g
(Note: Nutritional values are estimates and can vary based on specific ingredients and portion sizes.)
Healthier Alternatives
To make this recipe lighter without sacrificing too much flavor, consider these swaps:
- Reduce Fat: Use more whole milk and less heavy cream in the gelato base. You can also experiment with full-fat coconut milk for a dairy-free, creamy alternative, though it will impart a coconut flavor.
- Lower Sugar: Carefully reduce the amount of sugar. You might need to experiment to find the right balance for texture and sweetness. Using sugar substitutes like erythritol or stevia is possible, but may affect the final texture and freezing properties.
- Lighter Cones: For the cones, you can reduce the butter slightly or opt for a neutral oil, though this may make them less crisp. Consider baking thin, crispy wafer cookies instead of traditional cone shapes for a lighter crunch.
Serving Suggestions
These pistachio gelato cones are elegant on their own, but here are a few ideas to elevate them further:
- Garnish: A light dusting of finely chopped pistachios, a drizzle of honey, or a single fresh raspberry can add visual appeal and a complementary flavor note.
- Accompaniment: Serve alongside a delicate almond biscotti or a small plate of fresh berries.
- Dessert Platter: Include a cone as part of a larger dessert spread featuring tiramisu or panna cotta for a taste of Italy.
Common Mistakes to Avoid
- Overcooking the Custard: Boiling the custard will result in scrambled eggs, ruining the smooth texture. Stir constantly and watch the temperature closely.
- Not Chilling the Base Enough: A thoroughly chilled base is essential for proper churning. Letting it chill overnight yields the best results.
- Over-churning: While you want it thick, over-churning can lead to a butter-like texture rather than smooth gelato.
- Working Too Slowly with Cones: The cookie batter for the cones needs to be shaped while warm and pliable. Have your shaping tools ready before they bake.
Storing Your Gelato Creations
Gelato is best enjoyed fresh. If you have leftover churned gelato, transfer it to an airtight container and place it in the freezer. It will firm up considerably. For the best texture, let it sit at room temperature for 5-10 minutes before scooping. The cones, once completely cooled and crisp, can be stored in an airtight container at room temperature for up to 3 days. If they lose crispness, they can be briefly warmed in a low oven.
Frequently Asked Questions (FAQs)
***Can I make gelato without an ice cream maker?***
Yes, it’s possible, but tricky. You’ll need to freeze the custard base, stirring vigorously every 30-45 minutes for the first few hours to break up ice crystals. The texture won’t be as smooth as machine-churned gelato.
***Why is my gelato icy?***
This usually happens if the base wasn’t chilled enough before churning, the ice cream maker bowl wasn’t frozen properly, or if it contained too much water and not enough fat and sugar to prevent ice crystal formation.
***Can I use pre-made cones?***
Absolutely! If you’re short on time, high-quality pre-made ice cream cones will work beautifully as a base for your homemade pistachio gelato.
***How long does homemade gelato last?***
Homemade gelato is best consumed within 1-2 weeks when stored properly in an airtight container in the freezer. The texture may degrade over time.
***What kind of pistachios are best?***
Look for high-quality, unsalted pistachios, preferably shelled ones from regions known for good quality nuts, like Bronte in Sicily if you can find them. The brighter green the nut, generally the better the flavor.
Ready to indulge in a taste of Italian luxury? Make these Luxury Italian Pistachio Gelato Cones and share your creations with us! Tag us on social media and let us know what you think!
Luxury Italian Pistachio Gelato Cones: A Decadent Recipe

Crispy, golden cones filled with creamy, savory Italian-inspired fillings, perfect for an elegant appetizer or light meal.
Ingredients
- 12pre-made pizza dough cones or cannoli shells
- 1 cupricotta cheese
- 1/2 cupgrated Parmesan cheese
- 1/4 cupchopped fresh basil
- 1/4 cupsun-dried tomatoes, finely chopped
- 2cloves garlic, minced
- Salt and black pepper to taste
- 1 tablespoonolive oil
- Fresh parsley for garnish (optional)
Instructions
- Preheat oven to 375°F (190°C). Arrange the pizza dough cones or cannoli shells on a baking sheet and bake for 8-10 minutes, or until golden and crispy. Let cool completely.
- In a mixing bowl, combine ricotta, Parmesan, basil, sun-dried tomatoes, minced garlic, salt, and pepper. Mix until smooth and well-blended.
- Carefully spoon or pipe the ricotta mixture into the cooled cones. Drizzle with olive oil and garnish with fresh parsley if desired. Serve immediately.
Notes
You can customize the seasonings to taste.
“`