Table of Contents
Velvet Vanilla Rose Dream Domes with Gold Glaze – A Rose Cheesecake Masterpiece with a Velvet Finish
I can still picture my mother’s kitchen in Morocco — the aroma of orange blossom drifting from a copper pot, her hands dusted in powdered sugar as she shaped almond cookies for the Eid table. Years later, after training in pastry arts in Paris and building a career in New York City, I’ve learned that the most memorable desserts tell a story. When I was creating this Velvet Vanilla Rose Dream Domes with Gold Glaze recipe, I kept thinking about my grandmother’s rose-scented jam and the way she’d swirl it into morning yogurt. This dessert is that memory, reimagined as an elegant French-style mousse dome — and I’m so excited to share it with you today.
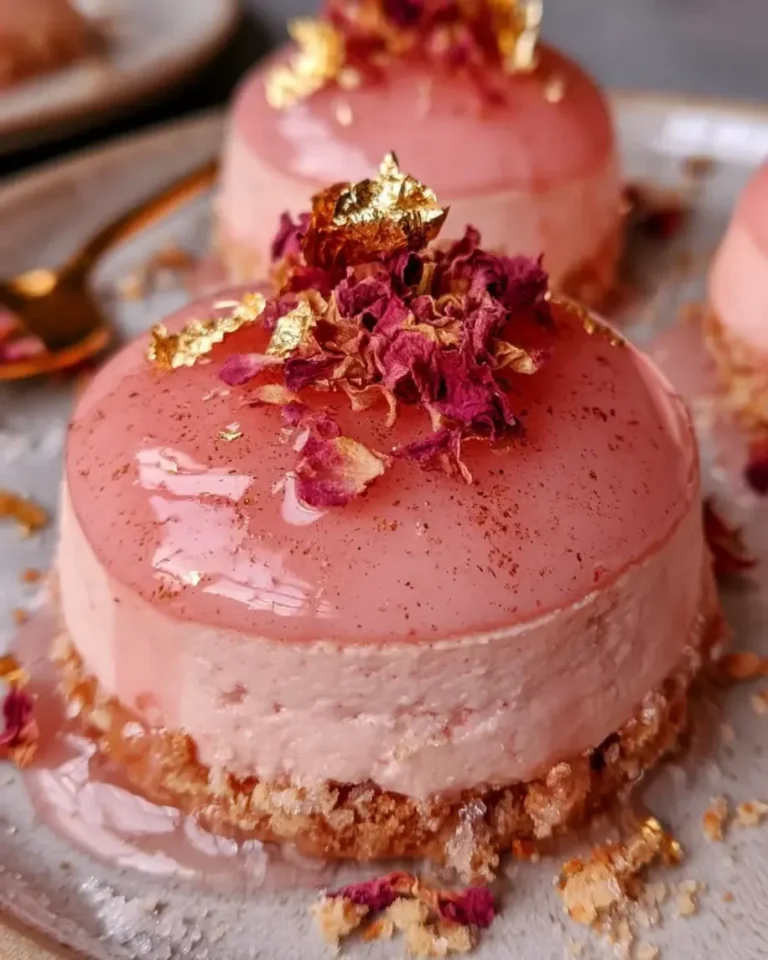
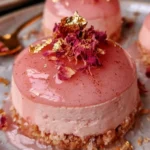
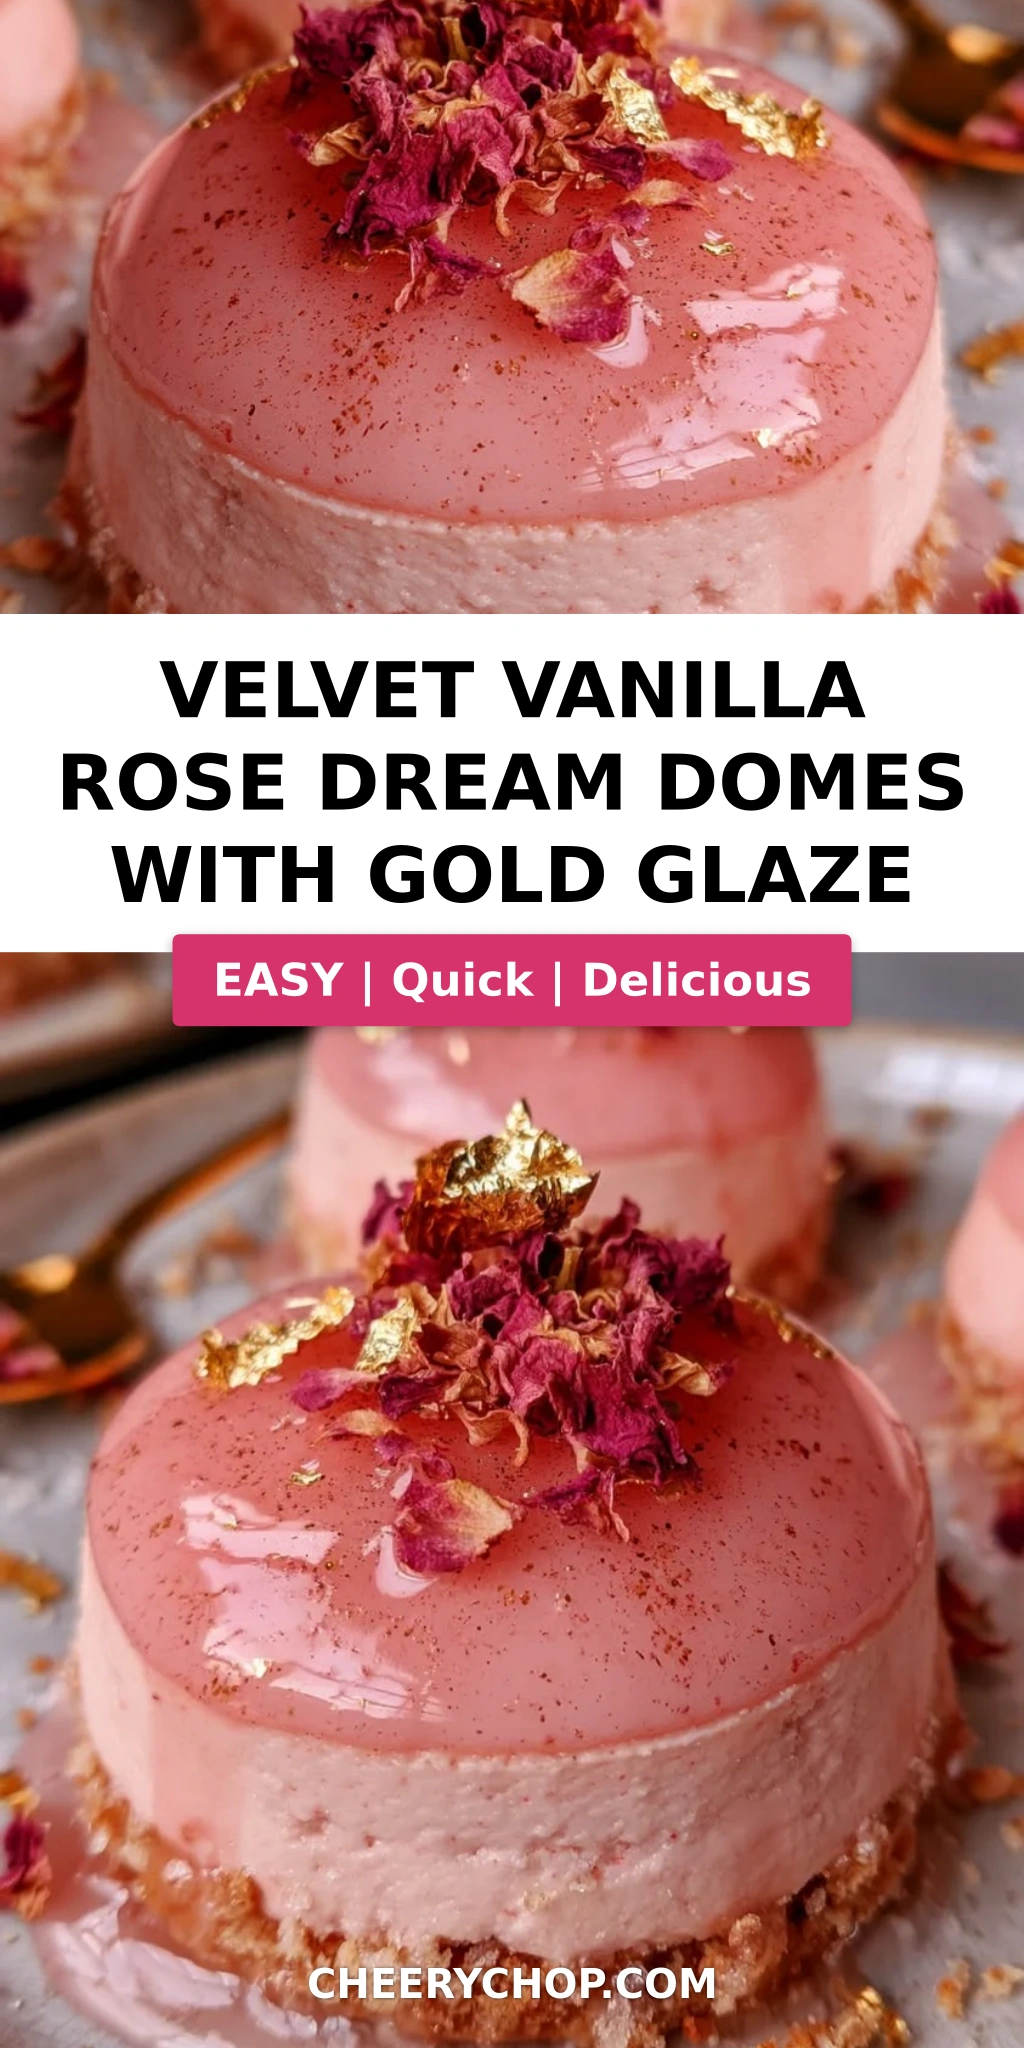
Let me paint you a picture: a smooth, glossy dome of liquid gold sits on your plate like a jewel. The first tap of your spoon cracks the thinnest mirror glaze, revealing a cloud of vanilla bean and rose-scented cheesecake mousse underneath. The texture is impossibly light — thanks to softly whipped cream folded through tangy cream cheese — and it finishes with the buttery crunch of a vanilla biscuit base. Every bite balances floral, sweet, creamy, and bright notes, with just a whisper of lemon lifting the whole thing. On a dinner table, these rose cheesecake domes don’t just feed people; they make them pause, smile, and reach for their cameras first.
I’ve made this vanilla rose dessert at least a dozen times in my test kitchen, and I’m sharing the exact methods that give these domes their unmistakable velvet texture. The key is understanding the role of gelatin, the temperature of your glaze, and why silicone molds are your best friend here. This isn’t a complicated recipe, but it does ask for a little patience — and I promise the payoff is worth every minute. In the sections below, I’ll walk you through the entire gold mirror glaze recipe step-by-step, share my best pro tip for a flawless finish, and warn you about the one mistake that can ruin your rose dome cake if you’re not careful.
| Nutrition Facts (per serving) | Amount |
|---|---|
| Calories | 390 kcal |
| Carbohydrates | 31 g |
| Fat | 29 g |
| Protein | 6 g |
| Sugar | 24 g |
Why This Velvet Vanilla Rose Dream Domes with Gold Glaze Recipe Is the Best
The Flavor Secret: The flavor secret of this rose cheesecake recipe is all about restraint and balance. Rose water can easily overwhelm a dessert and turn a delicate bite into a mouthful of perfume, so I use exactly one teaspoon — enough to transport you to a Moroccan rose garden without drowning out the sweet vanilla bean and tangy cream cheese. Adding a tablespoon of fresh lemon juice gives the mousse a gentle brightness that makes the floral notes sing. And the golden mirror glaze ties everything together with its rich, condensed-milk sweetness, creating a dome that tastes as luxurious as it looks.
Perfected Texture: Texture is where my Paris training really comes into play. In classic French pastry, we learn that air is the most important ingredient in a mousse. That’s why the heavy cream is whipped to soft peaks before being folded into the cream cheese mixture — this trapping of air is what makes the filling feel like velvet on your tongue. The gelatin is there for structure, allowing the domes to hold their shape while still melting into a silky, spoonable softness after a short time in the fridge. The contrast between the crisp gold mirror glaze and the cloud-like mousse is the reason these rose dome cakes taste so unforgettable.
Foolproof & Fast: Despite the advanced-sounding name, these Velvet Vanilla Rose Dream Domes with Gold Glaze are more than manageable for a home baker. Silicone dome molds do the shaping work for you, and the mirror glaze comes together in about 20 minutes with just a handful of ingredients. Because the domes can be made days ahead and glazed the day you serve them, they’re also a host’s dream — you get a showstopper dessert without the day-of panic. Even if it’s your first time working with a mirror glaze, my step-by-step instructions and troubleshooting tips will keep you on the right track.
Velvet Vanilla Rose Dream Domes with Gold Glaze Ingredients
I pick up most of these ingredients at my local Whole Foods or at Kalustyan’s in Manhattan when I want that authentic rose water — the kind my mother always kept in her pantry. The quality of your rose water and vanilla bean paste will absolutely make or break your rose dome cake, so crack open the ingredient spotlight below before you start.
Ingredients List
- For the Vanilla Rose Cheesecake Filling:
- 16 oz (450 g) cream cheese, softened
- 1/2 cup powdered sugar
- 1 tsp vanilla bean paste
- 1 tsp rose water
- 1 tbsp fresh lemon juice
- 1 cup heavy cream, whipped to soft peaks
- 2 tsp unflavored gelatin
- 2 tbsp cold water
- For the Vanilla Biscuit Base:
- 1 1/2 cups vanilla biscuit crumbs
- 5 tbsp unsalted butter, melted
- 1 tbsp granulated sugar
- Pinch of sea salt
- For the Gold Mirror Glaze:
- 1/2 cup sweetened condensed milk
- 1/4 cup water
- 2 tsp unflavored gelatin
- 2 tbsp cold water
- 7 oz (200 g) white chocolate, finely chopped
- 1 tsp light corn syrup
- Gold edible food coloring, as needed
- 1 tsp vanilla extract
- For Garnish (optional):
- Dried edible rose petals (optional)
- Edible gold leaf (optional)
- Vanilla bean seeds (optional)
Ingredient Spotlight
Rose Water: Rose water is the soul of this recipe. Look for food-grade rose water in the international aisle of your grocery store or at Middle Eastern markets. A good quality rose water should smell fragrant but not soapy. If you can only find rose extract, use just 1/4 teaspoon — it’s much more concentrated and can easily overpower your vanilla rose dessert if you measure it like water.
Vanilla Bean Paste: Vanilla bean paste gives you those beautiful tiny seeds and a deeper, rounder vanilla flavor than extract. You can substitute the same amount of pure vanilla extract, but you’ll lose the visual speckles that make these rose cheesecake domes look so elegant when sliced open. If you have a whole vanilla bean, scrape the seeds from 1 1/2 inches of the pod and add them with the cream cheese.
White Chocolate: For the gold mirror glaze recipe, choose a good-quality white chocolate with at least 30% cocoa butter — I like Valrhona or Callebaut. Avoid white chocolate chips, which often contain stabilizers that can make the glaze grainy and clumpy. If you’re in a pinch, chopped white chocolate baking bars from the supermarket baking aisle work perfectly.
Unflavored Gelatin: The gelatin is crucial for both the filling and the glaze. I recommend Knox powdered gelatin, which is widely available in US supermarkets. For a vegetarian version, you can use agar agar, but know that the texture will be slightly less silky and you’ll need to boil the liquid to activate it properly.
| Original Ingredient | Best Substitution | Flavor / Texture Impact |
|---|---|---|
| Rose water (1 tsp) | 1/4 tsp rose extract | More concentrated; reduce by 3/4 and adjust to taste |
| Vanilla bean paste (1 tsp) | 1 tsp pure vanilla extract | Loses the seeds; flavor slightly less round |
| White chocolate bar (7 oz) | White chocolate chips | May need extra condensed milk for smooth melting |
| Unflavored gelatin (2 tsp) | Agar agar (vegetarian) | Firmer set; requires boiling to activate fully |
How to Make Velvet Vanilla Rose Dream Domes with Gold Glaze — Step-by-Step
Ready to make these gorgeous Velvet Vanilla Rose Dream Domes with Gold Glaze? Here’s everything you need to know, step by step, just the way I’d teach it in my Paris classroom. Take your time, read each step fully, and you’ll nail it.
Step 1: Prepare the Vanilla Biscuit Base
Combine the vanilla biscuit crumbs, melted butter, granulated sugar, and a pinch of sea salt in a medium bowl. Stir thoroughly with a fork until every crumb is evenly moistened and the mixture clumps when pressed. Firmly press about 1 1/2 tablespoons of the crumb mixture into the bottom of each silicone dome mold, using your fingers or the back of a measuring spoon to pack it down flat and tight. Chill the molds in the refrigerator for 15 minutes while you make the filling.
💡 Sara’s Pro Tip: Use vanilla wafers or Lotus Biscoff cookies and pulse them in a food processor for the finest, most even crumbs. If you only have graham crackers, add an extra 1/4 teaspoon of vanilla extract to the melted butter to mimic that warm vanilla flavor.
Step 2: Make the Rose Cheesecake Filling
In a small bowl, sprinkle the gelatin over 2 tablespoons of cold water and let it bloom for 5 minutes — it will look spongy and thick. Meanwhile, beat the softened cream cheese with powdered sugar, vanilla bean paste, rose water, and fresh lemon juice until completely smooth, scraping down the sides of the bowl as you go. Gently warm 2 tablespoons of the cheesecake mixture in a small saucepan (or microwave in 10-second bursts) and stir in the bloomed gelatin until fully dissolved. Stir this gelatin mixture back into the remaining filling. Finally, gently fold the whipped heavy cream into the mixture using a spatula until light and airy — the texture should be like a soft mousse that holds a ribbon trail for a few seconds.
⚠️ Common Mistake to Avoid: If you dump the gelatin straight into the cold cream cheese mixture without blooming it first, you’ll end up with rubbery lumps. And don’t overmix the whipped cream in, or the air bubbles will deflate and your rose dome cake will turn out dense instead of velvet-light.
Step 3: Fill & Freeze the Domes
Spoon the vanilla rose cheesecake filling into a piping bag (or use a spoon) and fill each chilled mold right to the top. Use a small offset spatula to smooth the filling level with the rim of the mold. Tap the molds gently on the counter a few times to release any trapped air bubbles. Freeze for at least 6 hours, or overnight, until completely firm to the touch.
💡 Sara’s Pro Tip: Freezing the domes for the full 6 hours is non-negotiable — they must be completely solid before glazing or they’ll crack and lose their shape. I usually make the domes the night before and leave them in the freezer overnight. Patience here pays off with that flawless velvet dome.
Step 4: Prepare the Gold Mirror Glaze
Bloom the 2 teaspoons of gelatin in 2 tablespoons of cold water for 5 minutes. Heat the sweetened condensed milk and 1/4 cup water in a small saucepan until steaming — do not let it boil. Remove from the heat and stir in the bloomed gelatin until completely dissolved. Pour this hot mixture over the finely chopped white chocolate and let it stand for 1 minute. Gently stir with a spatula until smooth, then mix in the corn syrup, vanilla extract, and enough gold edible food coloring to reach a rich, molten-gold shade. Pass the glaze through a fine-mesh strainer to remove any stubborn lumps. Cool it to about 90°F (32°C) — it should be thick but still pourable, like warm honey.
⚠️ Common Mistake to Avoid: Glazing too early (while the glaze is warmer than 95°F) will make it run right off the dome and pool at the base. If your glaze cools too much and thickens, warm it in the microwave for 5-second bursts, stirring between each, until it flows again. An instant-read thermometer is worth its weight in gold here.
Step 5: Glaze the Frozen Domes
Remove the frozen domes from the molds by gently pressing on the bottom of each silicone cavity — they should pop right out. Place them on a wire rack set over a baking tray lined with parchment paper. Working with one dome at a time, pour the gold mirror glaze evenly over the top, starting from the center and letting it cascade down the sides in one steady stream. Let the excess drip off for a few seconds, then use an offset spatula to lift each dome onto its serving plate, glazed side up.
💡 Sara’s Pro Tip: For the smoothest mirror finish, pour the glaze quickly in one continuous motion — don’t hesitate, and never go back to touch the glaze once it’s on the dome. The glaze sets in seconds, and any fingerprint will be permanently etched into that beautiful gold surface.
Step 6: Garnish & Serve
Before the glaze sets completely, sprinkle dried rose petals and a few delicate flakes of edible gold leaf over each dome. Add a light dusting of vanilla bean seeds for extra elegance. Transfer the glazed domes to serving plates and refrigerate for 20–30 minutes before serving — this allows the glaze to set into that signature shell while the filling softens to a velvety, mousse-like consistency.
⚠️ Common Mistake to Avoid: Don’t serve the domes straight from the freezer — they’ll be rock-hard and the flavor won’t shine. Refrigerate for exactly 20–30 minutes. If you leave them in the fridge for more than 2 hours, the glaze may develop tiny cracks as the filling expands slightly. Set a timer!
| Step | Action | Duration | Key Visual Cue |
|---|---|---|---|
| 1 | Press biscuit base into dome molds | 15 mins chill | Crumb mixture holds together when pressed |
| 2 | Make rose cheesecake filling | 15 mins | Smooth, silky, no lumps |
| 3 | Fill molds and freeze | 6+ hours | Domes are solid to the touch |
| 4 | Make gold mirror glaze | 20 mins | Glaze flows off spatula like warm honey |
| 5 | Glaze frozen domes | 5 mins | Glaze cascades evenly, mirror-smooth shine |
| 6 | Garnish and refrigerate | 30 mins | Glaze is set, filling is just soft |
Serving & Presentation
This rose dome cake recipe is all about drama, so don’t be shy when you plate it. Arrange the domes on a large white platter with scattered dried rose petals and a few flakes of edible gold leaf around the base — it looks like a jeweler’s display case. Each dome should be served with a small dessert spoon so your guests can crack through the glaze and scoop up the velvet mousse beneath. For a French-bistro touch, dust the plate with a little sifted powdered sugar before setting the dome down, then add a single rose petal on top.
I love serving these vanilla rose dessert domes after a Moroccan-inspired dinner or a cozy Sunday supper in my Brooklyn apartment. They also pair beautifully with fresh raspberries, which cut through the sweetness with their tart, juicy brightness, or a quenelle of crème fraîche if you want to add a tangy French accent. For a truly New York moment, serve them with an espresso — the bitterness of the coffee is the perfect counterpoint to the floral, golden-sweet dome.
| Pairing Type | Suggestions | Why It Works |
|---|---|---|
| Side Dish | Fresh raspberries, macerated strawberries, vanilla shortbread cookies | Tart fruit cuts richness; cookies add a buttery crunch |
| Sauce / Dip | Warm raspberry coulis, salted caramel, white chocolate drizzle | Adds contrasting color, temperature, and layered flavor |
| Beverage | Café au lait, Moroccan mint tea, dry Champagne | Mint tea echoes the floral rose; Champagne makes it festive |
| Garnish | Sifted powdered sugar, crushed pistachios, fresh rose petals | Pistachios add color and a nutty contrast to the sweet glaze |
Make-Ahead, Storage & Reheating
This is the ultimate make-ahead dessert — a lifesaver when you’re hosting Thanksgiving, a birthday dinner, or a holiday cookie swap. I often prepare the domes on a Sunday, glaze them on Tuesday, and serve them on Thursday. The rose cheesecake domes actually benefit from time in the freezer, as it helps the flavors meld and the texture set properly.
| Method | Container | Duration | Reheating Tip |
|---|---|---|---|
| Refrigerator | Airtight container, single layer | Up to 3 days | Let sit at room temp 5 mins before serving |
| Freezer (unglazed) | Wrap each dome in plastic wrap, then foil; place in zip-top bag | Up to 1 month | Thaw in fridge 45 mins before glazing |
| Freezer (glazed) | Airtight container with parchment between layers | Up to 2 weeks | Refrigerate 25 mins before serving; do not refreeze |
One important note from my NYC kitchen: if you’ve already glazed the domes, store them in the fridge, not the freezer — the glaze can sweat and lose its mirror shine in the freezer. If you’re planning ahead, store the unglazed frozen domes and mix up the fresh mirror glaze on the day you plan to serve them. The glaze itself keeps well in an airtight container in the fridge for up to 5 days, but freshly made is always shinier and more dramatic on your rose dome cake.
Variations & Easy Swaps
| Variation | Key Change | Best For | Difficulty Impact |
|---|---|---|---|
| Chocolate Rose Variation | Chocolate wafer crumbs in base + dark chocolate drizzle | Chocolate lovers | Easy |
| Gluten-Free / Dairy-Free Version | GF cookies, dairy-free cream cheese, oat-milk condensed milk | Allergy-friendly entertaining | Medium |
| Raspberry Rose Twist | Fold 1/4 cup raspberry purée into filling | Summer entertaining | Easy |
Chocolate Rose Variation
If you want to give this rose cheesecake recipe a deeper, darker edge, swap the vanilla biscuit crumbs for chocolate wafer crumbs and add a tablespoon of cocoa powder to the melted butter for the base. For the glaze, add a drop of dark pink food coloring along with the gold to create a stunning sunset marble effect — swirl it gently with a toothpick before pouring. It’s a classic French chocolate-rose pairing, and it makes these domes feel even more decadent for a romantic occasion like Valentine’s Day.
Gluten-Free / Dairy-Free Version
For a dairy-free version that still tastes indulgent, use dairy-free cream cheese (Philadelphia makes an excellent one) and a dairy-free sweetened condensed milk like Nature’s Charm for the glaze. For the base, look for gluten-free vanilla cookies or shortbread — I’ve tested this with Schär brand cookies and the texture holds together beautifully. The filling will be slightly less tangy, so add an extra teaspoon of lemon juice to balance the sweetness. This version is perfect for guests with dietary restrictions, and honestly, nobody at the table will even notice the difference.
Raspberry Rose Twist
When raspberries hit their peak at New York City farmers markets in July, I love folding a 1/4 cup of fresh raspberry purée into the cheesecake filling before freezing. Swirl it in gently so you get ribbons of rosy red running through the white mousse — it looks stunning when you cut the dome open. Top the finished domes with fresh raspberries and skip the gold leaf if you prefer a more rustic, berry-forward presentation. This is a brilliant summer twist on the classic gold mirror glaze recipe.
Frequently Asked Questions
What is a velvet cake technique and how does it keep the vanilla rose dome moist?
The “velvet” technique in this recipe isn’t the same as a traditional red velvet cake; rather, it refers to the textural contrast between a smooth, glossy gold mirror glaze and an aerated, mousse-like cheesecake filling. Because the filling is made with whipped cream, gelatin, and cream cheese, it retains a fine, moist, cloud-like softness after thawing. The gelatin stabilizes the structure while the trapped air keeps it light — so each bite feels creamy, airy, and velvety on your tongue, never dry or dense.
Can I use a different type of rose water or extract in the velvet vanilla rose dream domes?
Yes, you can substitute rose extract or rose essence, but be careful — rose extract is significantly more concentrated than rose water. If a recipe calls for 1 teaspoon of rose water, use only 1/4 teaspoon of rose extract to start, then taste and adjust. You can also use rose syrup, but it’s sweeter and will change the sugar balance slightly; in that case, reduce the powdered sugar by a tablespoon. Always purchase food-grade rose products, never those marketed for skincare or aromatherapy.
How far in advance can I make and freeze the velvet vanilla rose dream domes before glazing?
You can make and freeze the unglazed rose cheesecake domes up to one month ahead. Once they’re fully set in the silicone molds (after at least 6 hours), pop them out, wrap each one individually in plastic wrap, and transfer to an airtight container or zip-top freezer bag. When you’re ready to serve, make the gold mirror glaze fresh — it takes less than 30 minutes — and pour it over the still-frozen domes. This is the absolute best make-ahead strategy, because the glaze retains its mirror shine when applied fresh to the frozen surface.
What is the best way to apply a gold glaze so it shines without ruining the dome’s velvet texture?
The best technique is to pour the gold mirror glaze over fully frozen domes set on a wire rack over a baking tray. The glaze should be cooled to exactly 90°F (32°C) — use an instant-read thermometer for accuracy. Pour quickly and steadily in one go, letting the excess drip off naturally. Don’t use a spatula to smooth it, or you’ll leave streaks on the shine. Once coated, refrigerate the glazed domes for 20–30 minutes until the glaze “skins over” while the inside becomes soft and mousse-like — that contrast is the velvet effect.
Can I make these rose cheesecake domes without gelatin?
Yes, if you’re vegetarian or you don’t eat pork, you can swap the gelatin for agar agar. For the filling, use 1 teaspoon of agar agar powder bloomed in the same 2 tablespoons of cold water, but you’ll need to bring the mixture to a gentle boil for at least 1 minute to activate a gelling agent before stirring it into the filling. The texture will be slightly firmer and a bit less creamy than the original. For the mirror glaze, use 1 1/2 teaspoons of agar agar and make sure to boil it fully — the glaze will set a touch faster, so work quickly.
Why did my gold mirror glaze crack or weep on the rose cheesecake domes?
Cracking is almost always caused by a temperature mismatch. If the glaze is too hot, it will slide off the dome and pool at the base; if the frozen dome is too cold or the glaze is too cool, the set will be uneven and can crack as the dessert thaws. Make sure your glaze is exactly 90°F, your domes are fully frozen, and you refrigerate the finished glazed domes for at least 20 minutes before serving. Also, avoid moving the domes between extreme temperatures — no hot kitchen counter to cold fridge shocks.
What can I use instead of silicone dome molds?
No dome molds? You can still make this recipe using a muffin tin lined with plastic wrap (use a 1/2-cup scoop of filling per cup) or even small ramekins. The final shape will be more of a half-sphere or straightforward round, but the flavors and textures will be identical. To unmold, simply lift the plastic wrap out and invert. If you’re using ramekins without plastic wrap, let them sit at room temperature for 3–4 minutes before gently loosening the edges with a butter knife, then invert onto the wire rack.
Is rose water safe for kids and how floral is it in this dessert?
Absolutely — as long as you’re using food-grade rose water, it’s safe for children. The flavor in this dessert is gentle; one teaspoon doesn’t make it taste like perfume. Instead, it adds a subtle aromatic lift that most kids actually compare to candy, marshmallows, or a rose-flavored Turkish delight. If you’re serving sensitive palates, you can reduce the rose water to 1/2 teaspoon and increase the vanilla bean paste to 1 1/2 teaspoons. The gold mirror glaze and buttery biscuit base are universally kid-approved.
Share Your Version!
I can’t wait to see how your Velvet Vanilla Rose Dream Domes with Gold Glaze turn out! If you make this rose cheesecake dome recipe, leave a star rating and share a photo in the comments below — it honestly makes my day to see these golden domes on your table. Are you planning to try the raspberry rose twist, the gluten-free version, or the chocolate rose variation? Let me know which one catches your eye, and don’t hesitate to ask if you hit a tricky step with the mirror glaze.
From my NYC kitchen to yours — I hope this recipe brings as much warmth to your table as it does to mine. — Sara 🧡
Love This Recipe? Save It to Pinterest!
If you enjoyed this Velvet Vanilla Rose Dream Domes with Gold Glaze recipe, don’t let it get lost in your browser tabs! 😄 Pin it now so you can find it again anytime — and explore hundreds more tried-and-tested recipes waiting for you on my Pinterest boards.
👉 Follow Sara on Pinterest @chefrecipes2
📌 Pin this recipe · 🔁 Re-pin your favorites · 💬 Tag me when you make it — I love seeing your creations!
🌹 Got a Question or a Twist of Your Own?
I’d love to hear how you made these Velvet Vanilla Rose Dream Domes with Gold Glaze your own! Drop a comment below with your question, star rating, or creative variation — I read every single one and answer personally, usually within 24 hours. After all, baking is always sweeter when we share it. — Sara 🧡
Velvet Vanilla Rose Dream Domes with Gold Glaze
- Yield: 8 1x
Ingredients
- For the Vanilla Rose Cheesecake Filling:
- 16 oz (450 g) cream cheese, softened
- 1/2 cup powdered sugar
- 1 tsp vanilla bean paste
- 1 tsp rose water
- 1 tbsp fresh lemon juice
- 1 cup heavy cream, whipped to soft peaks
- 2 tsp unflavored gelatin
- 2 tbsp cold water
- For the Vanilla Biscuit Base:
- 1 1/2 cups vanilla biscuit crumbs
- 5 tbsp unsalted butter, melted
- 1 tbsp granulated sugar
- Pinch of sea salt
- For the Gold Mirror Glaze:
- 1/2 cup sweetened condensed milk
- 1/4 cup water
- 2 tsp unflavored gelatin
- 2 tbsp cold water
- 7 oz (200 g) white chocolate, finely chopped
- 1 tsp light corn syrup
- Gold edible food coloring, as needed
- 1 tsp vanilla extract
- For Garnish (optional):
- Dried edible rose petals
- Edible gold leaf
- Vanilla bean seeds
Instructions
- Combine the vanilla biscuit crumbs, melted butter, sugar, and sea salt until evenly moistened.
- Press the crumb mixture into the bottoms of silicone dome molds to create a thin base. Chill for 15 minutes.
- Bloom the gelatin for the filling in the cold water for 5 minutes.
- Beat the cream cheese, powdered sugar, vanilla bean paste, rose water, and lemon juice until smooth.
- Warm 2 tablespoons of the cheesecake mixture and dissolve the bloomed gelatin into it. Stir back into the remaining filling.
- Gently fold the whipped cream into the cheesecake mixture until light and airy.
- Fill the molds, smooth the tops, and freeze for at least 6 hours or until completely firm.
- Bloom the gelatin for the mirror glaze in the cold water.
- Heat the condensed milk and water until steaming, then stir in the gelatin until dissolved.
- Pour the hot mixture over the white chocolate. Let stand for 1 minute, then stir until smooth. Mix in the corn syrup, vanilla extract, and gold edible food coloring. Cool the glaze to about 90°F (32°C).
- Remove the frozen domes from the molds and place them on a wire rack over a baking tray.
- Pour the gold mirror glaze evenly over each dome until fully coated.
- Transfer the glazed domes to serving plates.
- Garnish with dried rose petals, edible gold leaf, and vanilla bean seeds. Refrigerate for 20–30 minutes before serving.
Nutrition
- Calories: 390
- Sugar: 24 g
- Fat: 29 g
- Carbohydrates: 31 g
- Protein: 6 g
Tried This Recipe? Leave a Comment!
Did you make this recipe? I’d love to hear how it turned out! Please leave a comment and a rating below. Your feedback helps other home cooks and supports cheerychop.com!
For more delicious inspiration, follow me on Pinterest!