“`html
Table of Contents
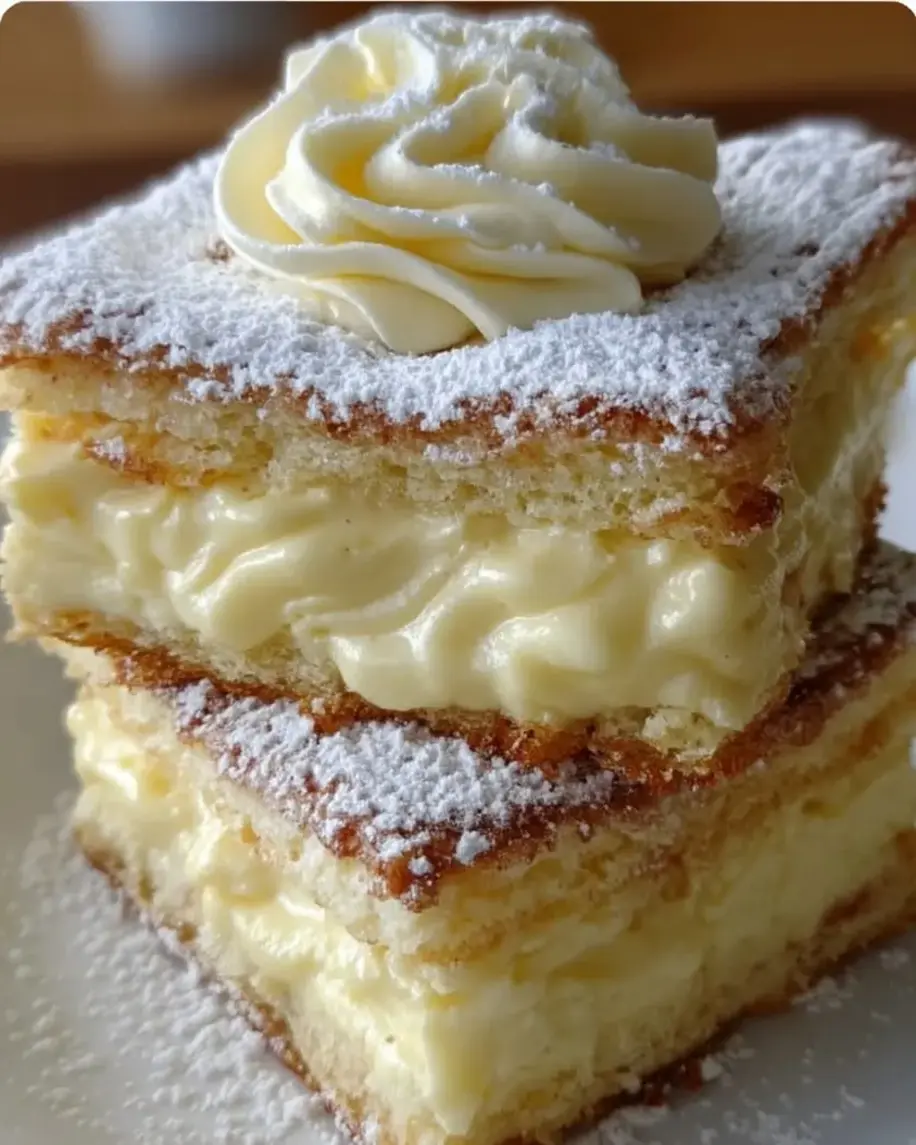
Cloud-Soft Vanilla Dream Squares Recipe – Easy & Delicious
The Quest for the Perfect Vanilla Treat
Are you constantly on the hunt for that quintessential sweet treat that’s both incredibly easy to make and irresistibly delicious? If you’ve ever found yourself craving a dessert that’s light, fluffy, and melts in your mouth with every bite, then you’ve landed in the right place! We’re talking about a treat so delightful, it’s like a vanilla cloud designed to grace your palate. The “Cloud-Soft Vanilla Dream Squares” are precisely that – a testament to simple ingredients transforming into pure bliss. In a world brimming with complex baking endeavors, there’s a special charm in mastering a recipe that delivers such a profound sensory experience with minimal fuss. This recipe promises to become your go-to for any occasion, from a quiet afternoon indulgence to a star performance at your next gathering. Let’s dive into creating these dreamy squares and discover why they might just be the best vanilla baked good you’ve ever made!
Ingredients: The Foundation of Your Dreamy Creation
The magic of these Cloud-Soft Vanilla Dream Squares lies in its simplicity. We’re using everyday pantry staples to create something truly extraordinary. Here’s what you’ll need:
- All-Purpose Flour: 2 ½ cups. This forms the tender structure of our squares. Substitution: For a slightly softer crumb, you can use cake flour, but you might need to adjust liquid slightly.
- Granulated Sugar: 1 ½ cups. Sweetness is key, and this provides a lovely, clean taste. Substitution: For a denser, more caramel-like sweetness, you could use part brown sugar, but it will alter the texture and color.
- Unsalted Butter: 1 cup (2 sticks), softened. This is crucial for that melt-in-your-mouth tenderness and rich flavor. Ensure it’s at room temperature – not melted, not cold. Substitution: You can use salted butter, but reduce the added salt in the recipe by ¼ teaspoon. For a dairy-free option, use a good quality vegan butter stick.
- Large Eggs: 3. They bind everything together and contribute to the airy texture. Room temperature eggs incorporate better. Substitution: While not ideal for texture, for an egg-free version, you could try a flax egg (3 tbsp flaxseed meal + 9 tbsp water, rested for 5 mins) or commercial egg replacer, but expect a slightly denser result.
- Vanilla Extract: 2 teaspoons. The star of the show! Use a good quality extract for the best flavor. Substitution: Vanilla bean paste can be used for more intense vanilla flecks and flavor, or even the seeds scraped from 1-2 vanilla beans, though these are more expensive.
- Baking Powder: 1 ½ teaspoons. Our leavening agent, ensuring these squares rise beautifully and stay cloud-like.
- Salt: ½ teaspoon. Balances the sweetness and enhances all the flavors. Substitution: Sea salt or kosher salt works well.
- Milk (Whole or 2%): 1 cup. Adds moisture and contributes to the tender crumb. It should be at room temperature. Substitution: Buttermilk would add a delightful tang and extra tenderness, or you can use a non-dairy milk like almond or soy milk.
Timing is Everything
Compared to average baked goods that can often take over an hour for prep and baking, these Cloud-Soft Vanilla Dream Squares are remarkably quick. The straightforward mixing method and relatively short bake time make them perfect for last-minute cravings or when you’re short on time. Most cloud-like cakes and bars require similar prep time, but these stand out for their efficient total timeframe.
Step-by-Step Instructions
Let’s get baking! Follow these simple steps to create your dreamy vanilla squares.
Step 1: Preheat and Prep
First things first, get your oven roaring! Preheat it to 350°F (175°C). Next, prepare your baking pan. An 8×8 inch square pan is perfect for these dimensions. Grease it well and then lightly flour it. Alternatively, you can line it with parchment paper, leaving an overhang on two sides – this makes lifting the beautiful squares out so much easier!
Step 2: Cream Butter and Sugar
In a large mixing bowl, combine the softened unsalted butter and granulated sugar. Using an electric mixer (or a sturdy whisk and some elbow grease!), beat them together until the mixture is light, fluffy, and pale yellow. This process, known as creaming, is vital for incorporating air, which contributes to the cloud-like texture of your squares. Scrape down the sides of the bowl as needed.
Step 3: Add Eggs and Vanilla
Add the eggs, one at a time, beating well after each addition. Don’t rush this step; ensure each egg is fully incorporated before adding the next. This helps create a stable emulsion. Stir in the vanilla extract. The aroma at this stage is already heavenly!
Step 4: Combine Dry Ingredients
In a separate medium bowl, whisk together the all-purpose flour, baking powder, and salt. Whisking ensures that the leavening agent and salt are evenly distributed throughout the flour, which is key for an even rise and consistent flavor.
Step 5: Alternate Adding Dry and Wet Ingredients
Now, we’ll combine the wet and dry components. Add about one-third of the dry ingredients to the butter-sugar-egg mixture. Mix on low speed until just combined. Then, add half of the milk and mix again. Continue this process, alternating dry and wet ingredients, ending with the dry ingredients. Be sure to scrape down the sides of the bowl frequently. Mix only until no dry streaks of flour remain. Overmixing at this stage can develop the gluten too much, leading to tougher squares.
Step 6: Divide and Bake
Pour the batter evenly into your prepared baking pan. Use a spatula to spread it out into an even layer. Place the pan in the preheated oven and bake for 25-30 minutes, or until a wooden skewer or toothpick inserted into the center comes out clean. The top should be golden brown and spring back lightly when touched.
Step 7: Cool and Cut
Once baked, remove the pan from the oven and let it cool in the pan on a wire rack for at least 15-20 minutes. This allows the structure to set. After this initial cooling, if you used parchment paper, you can lift the entire block out of the pan to finish cooling on the rack. Once completely cool, use a sharp knife to cut them into squares. For cleaner cuts, you can run your knife under hot water and wipe it dry between slices.
Nutritional Snapshot
While these are a treat, understanding their nutritional profile is helpful. Exact figures can vary based on ingredient brands and precise measurements, but a typical serving (assuming 16 squares from an 8×8 pan) contains approximately:
- Calories: ~250-300 kcal
- Fat: ~12-15g
- Carbohydrates: ~30-35g
- Protein: ~3-4g
- Sugar: ~20-25g
Healthier Twists on Your Vanilla Dream
While this recipe is designed for indulgence, we can make some tweaks to lighten it up without sacrificing too much flavor and texture:
- Reduced Sugar: Try reducing the granulated sugar by ¼ to ½ cup. You might notice a slight change in texture, but the vanilla flavor will still shine.
- Whole Wheat Flour: Substitute half of the all-purpose flour with whole wheat pastry flour for added fiber. The texture will be slightly denser and nuttier.
- Greek Yogurt or Applesauce: Replace some of the butter with an equal amount of plain Greek yogurt or unsweetened applesauce. This can reduce fat and increase moisture, though it might alter the richness and density.
- Almond Extract: Add ¼ teaspoon of almond extract along with the vanilla for a more complex flavor profile, allowing you to perhaps slightly reduce the overall sweetness perception.
Serving Suggestions for Your Dreamy Squares
These Cloud-Soft Vanilla Dream Squares are wonderfully versatile:
- Plain & Perfect: Enjoy them as is with a glass of milk or a cup of coffee.
- With Berries: A handful of fresh berries, like raspberries or blueberries, adds a lovely burst of freshness and color.
- Whipped Cream: Top generously with a dollop of freshly whipped cream for an extra layer of indulgence.
- Icing Drizzle: A simple glaze made with powdered sugar and a splash of milk or lemon juice can add a sweet finish.
Common Mistakes to Avoid
To ensure your squares are as perfect as possible, keep these common pitfalls in mind:
- Overmixing: This is the biggest culprit for tough baked goods. Mix the batter until just combined, especially after adding the flour.
- Incorrect Butter Temperature: Using butter that’s too cold won’t cream properly, and butter that’s melted will result in greasy squares. Aim for soft but not greasy.
- Opening the Oven Door Too Soon: Resist the urge to peek too early! Significant temperature fluctuations can cause your squares to sink in the middle.
- Underbaking: A toothpick should come out clean. Underbaked squares will be gooey and may fall apart.
Storing Your Cloud-Soft Treasures
Proper storage will keep your dream squares wonderfully fresh:
- Room Temperature: Store cooled squares in an airtight container at room temperature for up to 3-4 days.
- Refrigeration: If your kitchen is very warm or humid, or if you’ve added a perishable topping like cream cheese frosting, refrigerate them. They’ll last up to a week, but let them come to room temperature before serving for the best texture.
- Freezing: You can freeze cooled, uncut squares or individual cut squares. Wrap them tightly in plastic wrap, then in foil or a freezer bag. They’ll keep for up to 2-3 months. Thaw overnight at room temperature.
Embrace the Vanilla Dream!
There you have it – the recipe for Cloud-Soft Vanilla Dream Squares. This delightful treat proves that sometimes, the simplest recipes yield the most profound satisfaction. With their impossibly light and tender crumb, infused with the pure, comforting essence of vanilla, these squares are destined to become a beloved staple in your baking repertoire. They’re easy enough for a weeknight treat but special enough to impress guests. So, gather your ingredients, preheat your oven, and get ready to bake your way to pure vanilla bliss. We hope you love them as much as we do!
Frequently Asked Questions
***Are these squares similar to a pound cake?***
While both are butter-based cakes, these squares are designed to be significantly lighter and airier, almost cake-like but with the structural integrity of a bar cookie. Pound cake is typically denser and moister.
***Can I add other flavors?***
Absolutely! You can add a touch of lemon zest, orange zest, or even spices like cinnamon or nutmeg to the dry ingredients. For chocolate chip swirls, fold in about ½ cup of chocolate chips after the batter is mixed.
***My squares sank in the middle. What went wrong?***
This usually happens due to overmixing the batter, opening the oven door too early, or sometimes due to too much leavening agent. Ensure you follow the mixing instructions carefully and only bake until a toothpick comes out clean.
***Can I make these squares ahead of time?***
Yes! They store well at room temperature for a few days, making them perfect for making ahead for parties or just to have on hand.
Cloud-Soft Vanilla Dream Squares Recipe – Easy & Delicious
Light, fluffy vanilla squares with a melt-in-your-mouth texture, perfect for a sweet treat.
Ingredients
- 1 cupall-purpose flour
- 1/2 cupgranulated sugar
- 1/4 cupunsalted butter, softened
- 1large egg
- 1 tspvanilla extract
- 1/2 tspbaking powder
- 1/4 tspsalt
- 1/4 cupwhole milk
- Powdered sugar for dusting
Instructions
- Preheat oven to 350°F (175°C) and grease an 8×8-inch baking pan.
- In a bowl, cream together butter and sugar until light and fluffy. Beat in egg and vanilla.
- Whisk flour, baking powder, and salt in a separate bowl. Gradually mix into the butter mixture, alternating with milk.
- Spread batter evenly into the prepared pan and bake for 20-25 minutes or until edges are golden.
- Let cool completely, then dust with powdered sugar and cut into squares.
Notes
You can customize the seasonings to taste.
“`