
Table of Contents
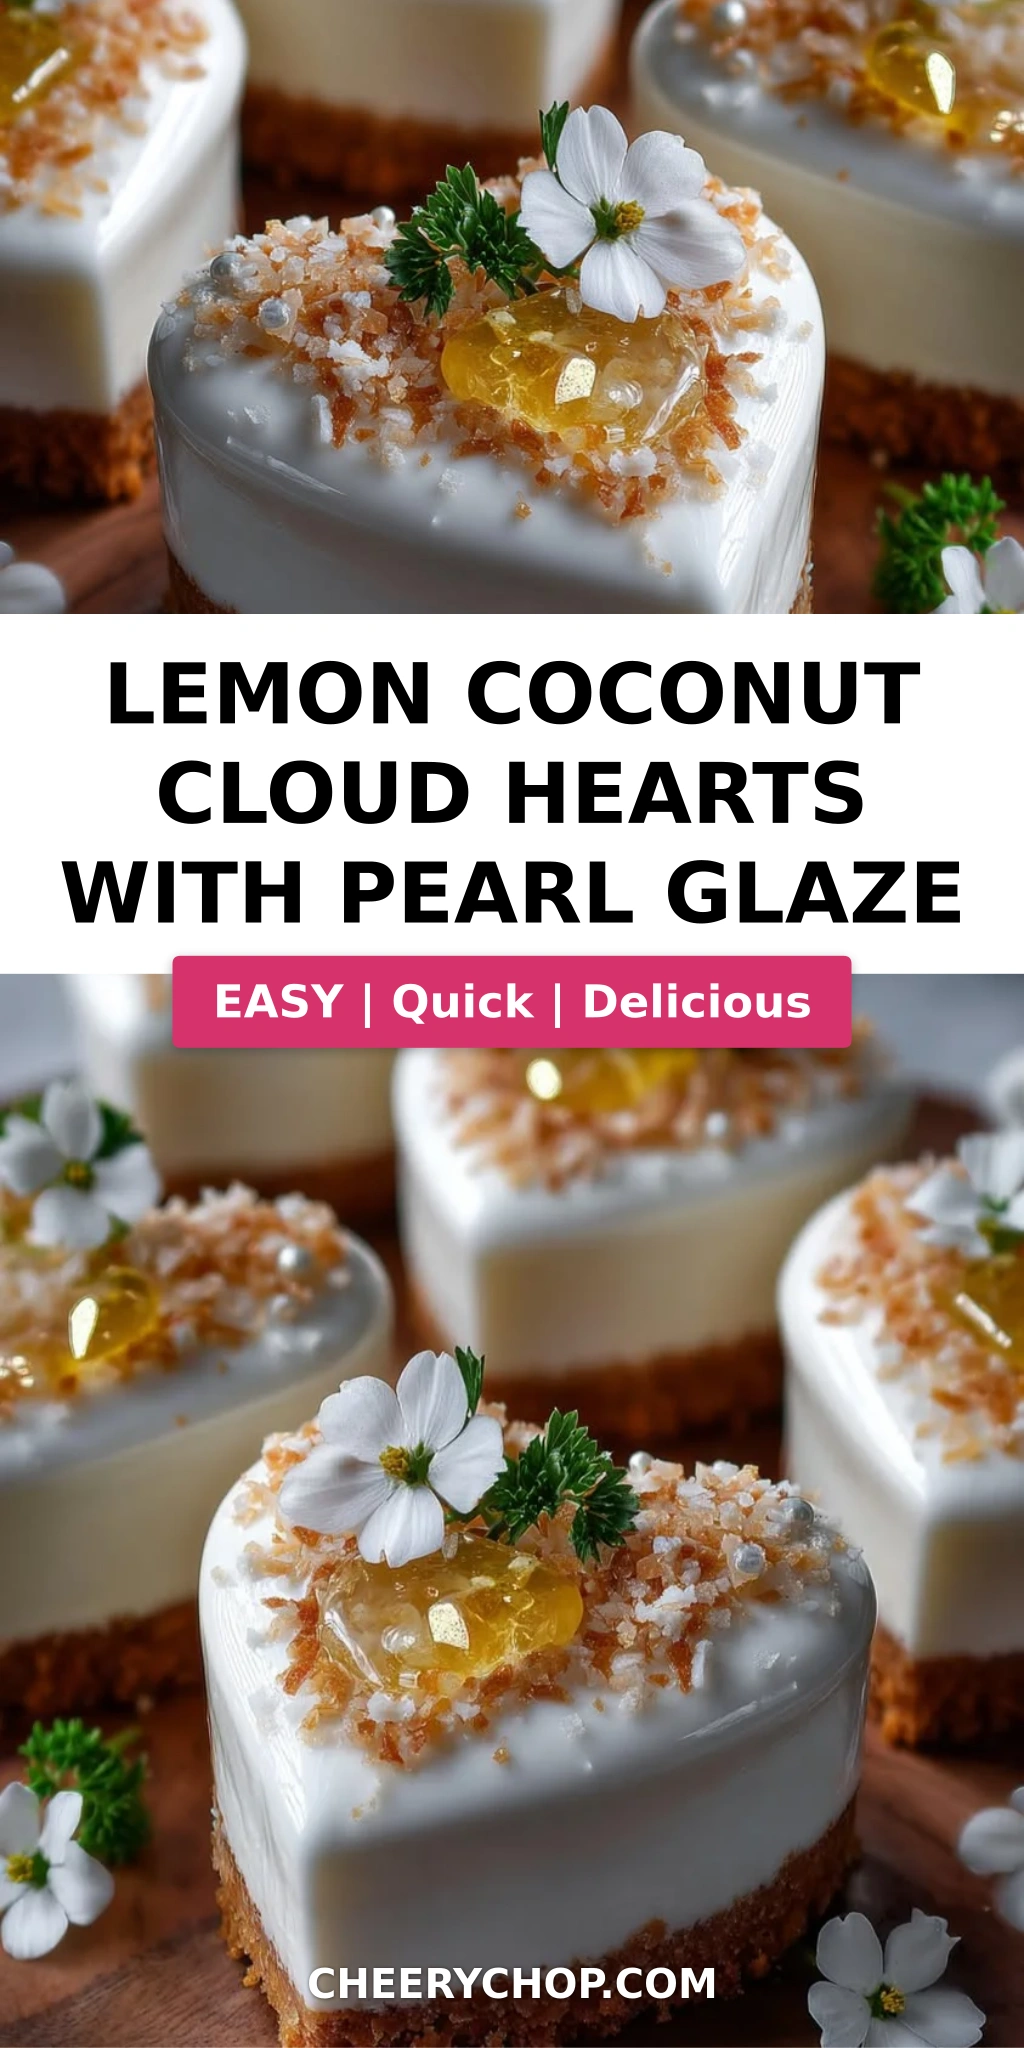
Lemon Coconut Cloud Hearts with Pearl Glaze – Light, Airy Mousse Hearts
I still remember the first time I made a mousse that felt like clouds on a plate. It was in my Paris pastry class, and my instructor – a stern but brilliant French chef – taught me that the secret is in the fold. This lemon coconut cloud hearts recipe is a love letter to that moment. Born from my Moroccan childhood where coconut and citrus appeared in every celebration, and refined with French technique in New York City, these heart-shaped desserts are truly special. The pearl glaze adds an ethereal, shimmering finish that makes them perfect for Valentine’s Day, anniversaries, or any time you want to show someone you care. I make these in my tiny Manhattan kitchen, and they never fail to impress.
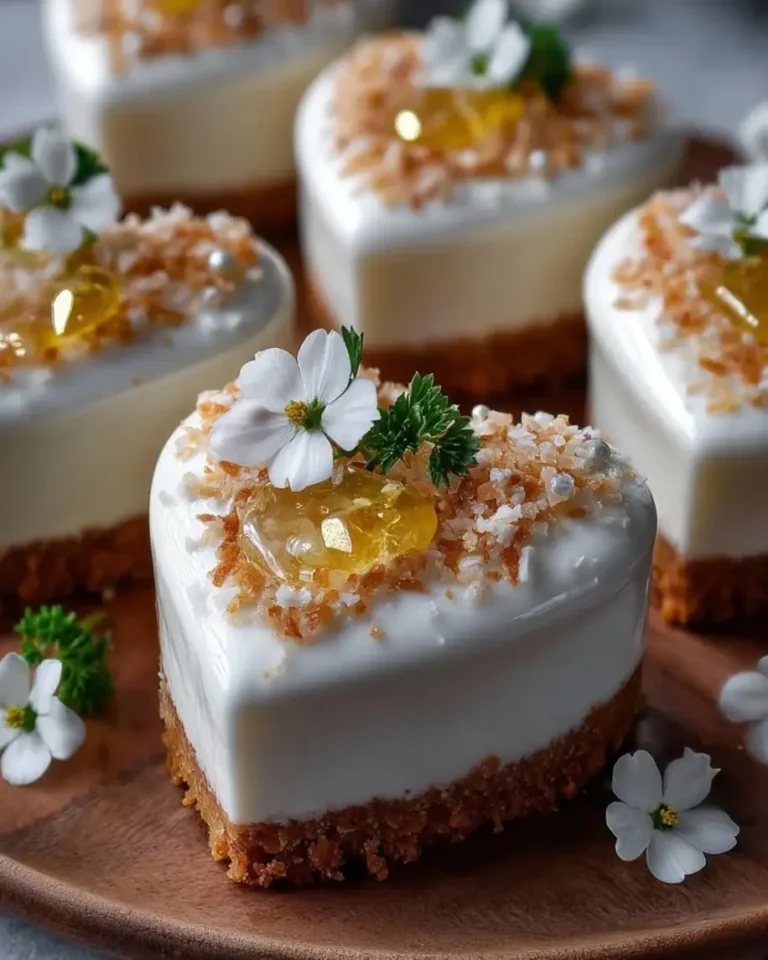
Imagine biting into a light-as-air lemon coconut mousse with a subtle crunch from the coconut biscuit base. The lemon zest and juice brighten the creamy richness, while the coconut cream adds a tropical whisper. The pearl glaze – a glossy, pearlescent white chocolate shell – not only looks stunning but also gives a gentle sweetness that ties everything together. Toasted coconut flakes and a sprinkle of fine lemon zest on top add texture and a burst of aroma. It’s a dessert that dances on your palate: creamy, tart, sweet, and crunchy all at once. And the best part? It’s a no bake valentine dessert that looks like you spent hours in a professional pastry kitchen.
My version of these heart shaped dessert hearts is intentionally foolproof. I’ve tested it with both American and European ingredients, and I’ll share my best tips to avoid a grainy mousse or a dull glaze. The key is using full-fat cream cheese and cold heavy cream – never skip that! And for the pearl glaze, the edible luster dust is what gives it that magical sheen. One common mistake is overmixing the mousse, which deflates the air. I’ll show you exactly how to fold like a Parisian pro. Ready to make your own cloud of love? Let’s get started.
Why This Lemon Coconut Cloud Hearts Recipe Is the Best
The Flavor Secret: My combination of cream cheese, coconut cream, and fresh lemon juice is a balancing act I perfected in my NYC test kitchen. The cream cheese adds body without heaviness, and the coconut cream (from a can – I prefer Chaokoh or Thai Kitchen) gives a silky texture that regular coconut milk can’t match. The lemon zest is non-negotiable; it carries the essential oils that make this mousse sing. I learned the importance of zest in my mother’s kitchen in Morocco, where we rubbed sugar with lemon peel before baking.
Perfected Texture: The technique from my Paris training: always whip the cream to soft peaks before folding. That’s what gives the lemon coconut mousse its cloud-like lightness. And the base – a press-in crust of vanilla cookie crumbs, shredded coconut, and melted butter – stays crunchy because we freeze it. No soggy bottoms here! The pearl glaze is another texture triumph; using coconut oil keeps it glossy and prevents it from seizing when it hits the cold mousse.
Foolproof & Fast: Even though this is a no bake valentine dessert, it’s incredibly forgiving. If you don’t have heart-shaped silicone molds, you can use a small loaf pan and cut shapes later – I’ve done that when my molds were in the dishwasher! The mousse freezes beautifully, so you can make it a week ahead. And the glaze takes only 2 minutes to whisk together. I’ve taught this recipe to beginners, and they always succeed on the first try.
Lemon Coconut Cloud Hearts Ingredients
I love sourcing ingredients for this recipe. The cream cheese I always buy from my local Brooklyn creamery, but Philadelphia works perfectly. The coconut cream I find at the Asian market near Union Square – the thick, creamy portion at the top of the can is gold. And the edible pearl luster dust? I order it online, but some specialty baking stores in NYC carry it. Here’s everything you need:
Ingredients List
- For the Lemon Coconut Mousse:
- 8 oz (225 g) cream cheese, softened
- 1 cup heavy whipping cream, chilled
- 1/3 cup powdered sugar
- 1/4 cup coconut cream (the thick part from a can of full-fat coconut milk)
- 1 tbsp lemon zest (from about 1 large lemon)
- 2 tbsp fresh lemon juice
- 1 tsp vanilla extract
- For the Coconut Biscuit Base:
- 1 cup vanilla cookie crumbs (from about 20 vanilla wafers or shortbread cookies)
- 1/4 cup shredded coconut (unsweetened or sweetened, both work)
- 3 tbsp unsalted butter, melted
- For the Pearl Glaze:
- 1/2 cup white chocolate, melted (chips or chopped bar – use good quality like Ghirardelli)
- 2 tbsp sweetened condensed milk
- 1 tbsp coconut oil (refined for neutral flavor)
- 1 tsp edible pearl luster dust
- For Garnish (optional):
- Toasted coconut flakes
- Fine lemon zest
Ingredient Spotlight
Cream Cheese: This is the backbone of the mousse. Use full-fat, block-style cream cheese (not the spreadable tub). Let it come to room temperature so it blends smoothly. If you’re dairy-free, you can use a vegan cream cheese, but the texture will be slightly less stable. I’ve tested with Kite Hill and it works, but the mousse will be a bit softer.
Coconut Cream: Don’t confuse this with cream of coconut (which is sweetened). Look for full-fat coconut milk in a can and scoop the thick white cream off the top. The liquid below can be saved for smoothies. If you can’t find coconut cream, you can use the same amount of heavy cream mixed with 1/8 tsp coconut extract – but the texture won’t be as rich.
Edible Pearl Luster Dust: This is what gives the glaze its shimmering “pearl” effect. It’s available online or at specialty baking stores. You can substitute with a pinch of edible gold or silver luster dust, or skip it for a simple white glaze. But for that wow factor, don’t skip it!
White Chocolate: Use a good melting brand like Ghirardelli or Callebaut. Avoid white chocolate chips that contain stabilizers – they often seize. If you only have chips, add 1/2 tsp coconut oil extra to keep it fluid.
| Original Ingredient | Best Substitution | Flavor / Texture Impact |
|---|---|---|
| Cream Cheese | Vegan cream cheese (Kite Hill) | Softer mousse, less stable; add 1 tsp cornstarch |
| Coconut Cream (canned) | Heavy cream + 1/8 tsp coconut extract | Less coconut depth; still creamy |
| White Chocolate | White chocolate chips + 1/2 tsp extra coconut oil | Slightly thicker glaze, still glossy |
| Edible Pearl Luster Dust | Gold luster dust or omit | Loses pearl shimmer but still pretty |
How to Make Lemon Coconut Cloud Hearts — Step-by-Step
Making these heart shaped dessert treats is easier than you think. Just follow these steps, and you’ll have a stunning, professional-looking result. I’ve broken it down so even if it’s your first time making mousse, you’ll feel confident.
Step 1: Prepare the Coconut Biscuit Base
In a medium bowl, combine 1 cup vanilla cookie crumbs, 1/4 cup shredded coconut, and 3 tbsp melted unsalted butter. Mix with a fork until the crumbs are evenly moistened. The mixture should hold together when pressed.
💡 Sara’s Pro Tip: Use a food processor to crush the cookies into fine crumbs – pulse 10-12 times. For the shredded coconut, give it a quick chop in the processor too; that prevents long strands from poking out of the base.
Step 2: Press into Molds and Chill
Press about 1½ tablespoons of the crumb mixture into the bottom of each heart-shaped silicone mold. Use the back of a small measuring spoon to pack it firmly and evenly. Place the molds on a baking sheet and chill in the refrigerator for 15 minutes while you make the mousse.
⚠️ Common Mistake to Avoid: Don’t skip the chilling step! If the base isn’t cold, it will mix with the mousse when you fill the molds. You want a separate, crunchy layer.
Step 3: Make the Lemon Coconut Mousse
In a large bowl, beat 8 oz softened cream cheese, 1/3 cup powdered sugar, 1/4 cup coconut cream, 1 tbsp lemon zest, 2 tbsp lemon juice, and 1 tsp vanilla extract. Use a hand mixer on medium speed until smooth and creamy, about 2 minutes. Scrape down the sides.
💡 Sara’s Pro Tip: Make sure your cream cheese is truly room temperature – if it’s too cold, the mixture will be lumpy. Let it sit out for 30 minutes. Also, use fresh lemon juice, not bottled – it makes a big difference in brightness.
Step 4: Whip the Cream
In a separate chilled bowl, whip 1 cup cold heavy whipping cream to soft peaks. This takes about 3 – 4 minutes with a hand mixer on high. Soft peaks mean the cream holds a shape but the tips curl over slightly when you lift the beater.
⚠️ Common Mistake to Avoid: Overwhipping the cream will make it grainy and buttery. Stop as soon as you see soft, billowy peaks. If you accidentally overwhip, you can rescue it by adding 1 tbsp of fresh cold cream and gently folding.
Step 5: Fold and Fill
Add one third of the whipped cream to the cream cheese mixture and fold gently with a rubber spatula until just combined. Add the remaining cream in two additions, folding until no white streaks remain. The mousse should be light and airy. Divide the mousse evenly among the 8 molds, filling to the top. Smooth the tops with the back of a spoon.
💡 Sara’s Pro Tip: Use a gentle hand when folding – you want to keep as much air as possible. I use a figure-8 motion, scraping the bottom and sides. This technique I learned in Paris is the key to a cloud-like texture.
Step 6: Freeze
Place the baking sheet with the filled molds in the freezer. Freeze for at least 3 hours, or until the mousse is completely firm. You can freeze overnight – just cover with plastic wrap after an hour.
⚠️ Common Mistake to Avoid: Don’t rush the freezing. If the mousse isn’t fully frozen, it will lose its shape when you unmold and glaze. Press the top gently with your finger; it should feel solid.
Step 7: Make the Pearl Glaze
Just before you’re ready to glaze, combine 1/2 cup melted white chocolate, 2 tbsp sweetened condensed milk, 1 tbsp coconut oil, and 1 tsp edible pearl luster dust in a small bowl. Stir with a fork until smooth and glossy. The mixture should be fluid but not runny.
💡 Sara’s Pro Tip: Melt the white chocolate in 30-second bursts in the microwave, stirring between each, until just melted. Overheating will cause it to seize. If the glaze is too thick, add another 1 tsp of coconut oil. Too thin? Add a little more melted white chocolate.
Step 8: Unmold and Glaze
Remove the molds from the freezer. Gently press the bottom of each silicone mold to release the hearts. Place them on a wire rack set over a parchment-lined baking sheet to catch drips. Working one at a time, pour the pearl glaze evenly over each heart, letting the excess drip off. You can also use a spoon to drizzle.
⚠️ Common Mistake to Avoid: Work quickly – the glaze will start to set as soon as it hits the cold mousse. If it thickens while you’re working, reheat it in the microwave for 5 seconds and stir. Also, don’t pour too much at once; you want a thin, even coat.
Step 9: Garnish and Chill
Immediately after glazing, sprinkle with toasted coconut flakes and fine lemon zest if desired. Place the glazed hearts on a tray and chill in the refrigerator for at least 20 minutes to set the glaze. This step is important – the glaze needs to firm up a bit.
💡 Sara’s Pro Tip: To toast coconut flakes, spread them on a baking sheet and bake at 350°F for 3-5 minutes, watching carefully – they burn quickly. Or toast them in a dry skillet over medium heat, stirring, for 2-3 minutes.
| Step | Action | Duration | Key Visual Cue |
|---|---|---|---|
| 1 | Mix base crumbs | 2 min | Mixture holds together when squeezed |
| 2 | Press into molds & chill | 15 min | Base feels firm and cold |
| 3 | Beat cream cheese mixture | 2 min | Smooth, no lumps |
| 4 | Whip cream to soft peaks | 3-4 min | Cream holds shape, tips curl |
| 5 | Fold cream into cheese mixture | 2 min | Light, airy, no streaks |
| 6 | Fill molds & freeze | ≥ 3 hours | Mousse is solid to the touch |
| 7 | Make pearl glaze | 2 min | Glossy, smooth, no lumps |
| 8 | Unmold & glaze | 5 min | Even coating, drips stop |
| 9 | Garnish & chill | 20 min | Glaze is set, not sticky |
Serving & Presentation
These lemon coconut cloud hearts are stunning on their own, but a little extra care in presentation makes them unforgettable. Unmold them onto individual dessert plates or a large serving platter. I like to place each heart on a small pool of raspberry coulis or a sprinkle of crushed pistachios for color contrast. The pearl glaze catches the light beautifully – a perfect centerpiece for a Valentine’s Day dinner or an anniversary celebration.
In my Moroccan home, we often served sweet treats with mint tea. Here in New York, I pair these hearts with a crisp prosecco or a lemony herbal tea like verbena. The bright citrus notes complement the coconut richness. For garnish, a few edible flowers (like pansies) scattered around the plate add a romantic touch. Remember to let them sit at room temperature for about 5 minutes before serving – the mousse softens slightly, making it even more luscious.
If you’re making these for a party, you can keep them in the fridge for up to 2 hours after glazing. They’re best eaten within 24 hours while the base stays crunchy and the glaze is shiny. I once brought a batch to a friend’s dinner party in Brooklyn, and they disappeared in minutes – everyone asked for the recipe!
| Pairing Type | Suggestions | Why It Works |
|---|---|---|
| Side Dish | Fresh berries, citrus segments, pineapple sorbet | Bright acidity cuts the richness; textures contrast |
| Sauce / Dip | Raspberry coulis, mango puree, chocolate ganache (dark) | Fruit sauces enhance lemon; dark chocolate balances sweetness |
| Beverage | Prosecco, lemon verbena tea, white wine (Riesling or Pinot Grigio) | Fizz and acidity refresh the palate; herbal tea complements citrus |
| Garnish | Toasted coconut flakes, fine lemon zest, edible flowers, crushed pistachios | Adds texture, color, and aroma; edible flowers romanticize the plate |
Make-Ahead, Storage & Reheating
As a busy NYC food blogger, I’m all about make-ahead magic. These hearts are perfect for that. You can prepare the mousse and base, freeze them, and glaze on the day you serve. Here’s my tried-and-true storage guide:
| Method | Container | Duration | Reheating Tip |
|---|---|---|---|
| Refrigerator | Airtight container | Up to 3 days | Serve cold; no reheating needed |
| Freezer | Freezer-safe container (un-glazed) | Up to 1 month | Thaw in fridge 1 hour before glazing |
| Make-Ahead | Assemble in molds, cover with plastic | Freeze up to 1 week; glaze day of serving | Unmold frozen, glaze, then chill 20 min |
I love making a double batch and keeping the un-glazed hearts in the freezer for up to a month. Then, when unexpected guests arrive or I need a quick dessert, I simply thaw them for 30 minutes at room temperature, whip up the glaze, and have a showstopper in minutes. The glaze is best made fresh – it doesn’t store well because the luster dust can dull over time.
If you have leftovers (unlikely!), store them in the fridge. The base might soften slightly, but they’ll still be delicious. Do not microwave – the mousse will deflate and the glaze will melt into a puddle. Just eat them cold – they’re like a creamy frozen treat.
Variations & Easy Swaps
This recipe is wonderfully adaptable. Here are a few variations I’ve tested in my kitchen – all guaranteed delicious:
| Variation | Key Change | Best For | Difficulty Impact |
|---|---|---|---|
| Raspberry Lemon Hearts | Add 1/4 cup raspberry puree to the mousse | Berry lovers, Valentine’s Day color | Same level; stir gently to avoid streaks |
| Gluten-Free Version | Use gluten-free vanilla cookies (e.g., Pamela’s) | Gluten-sensitive guests | Same level; texture identical |
| Matcha Coconut Hearts | Add 1 tsp matcha powder to the mousse | Earthy flavor, green color contrast | Same level; sift matcha to avoid clumps |
Raspberry Lemon Hearts
A favorite twist from my Paris days: swirl in 1/4 cup of raspberry puree just before filling the molds. The tart berries and lemon are a classic French pairing. I like to use frozen raspberries, thawed and pushed through a sieve to remove seeds. Fold it in with two gentles swirls – you want ribbons of color, not a fully pink mousse. It looks stunning with the white pearl glaze.
Gluten-Free Version
This is so simple that you won’t miss the gluten. Just swap the vanilla cookie crumbs for gluten-free vanilla wafers or shortbread cookies. I’ve tested this with the Schär brand and it’s perfect. The rest of the recipe is naturally gluten-free. Always check your shredded coconut and luster dust labels – most are gluten-free, but it’s good to verify if your guests are sensitive.
Matcha Coconut Hearts
Inspired by my love for Japanese tea and New York’s matcha latte trend, I add 1 tsp of culinary matcha to the cream cheese mixture. The earthiness works beautifully with the coconut and lemon – my NYC friends adore this version. Sift the matcha first to avoid green clumps. You might want to reduce the lemon juice to 1½ tbsp to keep the matcha flavor prominent.
What are Lemon Coconut Cloud Hearts made of?
These hearts are made of three components: a crunchy coconut biscuit base (vanilla cookie crumbs, shredded coconut, and melted butter), a light lemon coconut mousse (cream cheese, heavy cream, powdered sugar, coconut cream, lemon zest and juice, and vanilla), and a glossy pearl glaze (white chocolate, sweetened condensed milk, coconut oil, and edible pearl luster dust). Optionally, they are garnished with toasted coconut flakes and fine lemon zest.
How do you make Pearl Glaze for Lemon Coconut Cloud Hearts?
To make the pearl glaze, melt 1/2 cup white chocolate in the microwave in 30-second bursts, stirring until smooth. Whisk in 2 tablespoons sweetened condensed milk, 1 tablespoon coconut oil, and 1 teaspoon edible pearl luster dust until the mixture is glossy and smooth. Use it immediately while it’s fluid; you should have enough for 8 hearts. The glaze sets quickly on frozen mousse, so work fast for an even coat.
Can I use dried coconut instead of fresh for Lemon Coconut Cloud Hearts?
Yes, you can use dried shredded coconut! In fact, the recipe calls for shredded coconut (which is already dried) for the biscuit base. For garnishing, I recommend using dried coconut flakes, but make sure they are unsweetened if you want to control sweetness. If you want a “fresh” coconut taste, you can use fresh coconut flakes, but they have higher moisture and may soften the base; toast them lightly first.
How long do Lemon Coconut Cloud Hearts stay fresh?
When stored properly in an airtight container in the refrigerator, these hearts stay fresh for up to 3 days. The base may soften slightly over time, but the mousse remains creamy and the glaze stays glossy for the first 24 hours. For best results, I recommend glazing and serving within 24 hours. You can freeze the un-glazed hearts for up to 1 month – just thaw in the fridge before glazing.
Can I make these hearts without a heart-shaped mold?
Absolutely! If you don’t have heart-shaped silicone molds, you can use a small loaf pan or even a muffin tin. Line the pan with plastic wrap for easy removal. Press the base mixture into the bottom, add the mousse, and freeze. Once frozen, lift out and cut into heart shapes with a small cookie cutter, or simply serve as squares. The presentation will be different but equally delicious.
Is this recipe suitable for a gluten-free diet?
Yes, with a simple swap! Use gluten-free vanilla wafers or shortbread cookies for the base. The mousse and glaze are naturally gluten-free. Always check your shredded coconut and luster dust labels to ensure they are certified gluten-free if you are serving guests with celiac disease. I’ve tested this with Schär brand cookies and the texture is perfect.
Can I substitute the coconut cream with something else?
Yes, if you don’t have canned coconut cream, you can use the same amount of heavy cream mixed with 1/8 teaspoon of coconut extract for flavor. The texture will be slightly less rich but still very good. Another option is to use full-fat coconut milk (the thick part from the can) – just skim off the cream at the top. Avoid using light coconut milk or cream of coconut, as they are too thin or too sweet.
What can I use instead of edible pearl luster dust?
If you don’t have pearl luster dust, you can omit it for a simple white glaze, or use a pinch of edible gold or silver luster dust for a different shimmer. The glaze will still be delicious and visually appealing. If you want a colored glaze, you can add a tiny drop of food coloring (gel works best) – but note that the pearl effect comes specifically from the luster dust.
How do I store leftover glaze?
I don’t recommend storing leftover glaze because the luster dust can settle and lose its shine. However, if you have extra, you can refrigerate it in an airtight container for up to 1 week. Reheat gently in the microwave in 5-second intervals, stirring well, and add a tiny bit more coconut oil if it’s too thick. The glaze may not be as glossy as fresh, but it’s still usable.
Can I freeze the hearts after glazing?
I don’t recommend freezing the hearts after glazing because the glaze can become tacky or develop condensation when thawed, losing its beautiful finish. It’s best to freeze the un-glazed hearts and glaze them after thawing. If you absolutely must freeze glazed hearts, place them on a baking sheet in the freezer until the glaze is firm, then wrap individually in plastic wrap and store in a freezer bag for up to 2 weeks. Thaw in the refrigerator, uncovered, to minimize moisture.
Share Your Version!
I absolutely love hearing how these lemon coconut cloud hearts turn out in your kitchen. Did you try the raspberry swirl? Or maybe you added an extra dose of lemon zest? Drop a comment below and let me know – your feedback helps other readers too! If you snap a photo, share it on Instagram or Pinterest and tag @cheerychop – I’d love to see your beautiful creations.
And here’s a question for you: What’s one ingredient you’d love to see me use in a future heart-shaped dessert? I’m always experimenting in my NYC kitchen, inspired by my Moroccan roots and French training. Your suggestion might just be the next recipe on the blog! From my NYC kitchen to yours — I hope this recipe brings as much warmth to your table as it does to mine. — Sara 🧡
Love This Recipe? Save It to Pinterest!
If you enjoyed this Lemon Coconut Cloud Hearts recipe, don’t let it get lost in your browser tabs! 😄 Pin it now so you can find it again anytime — and explore hundreds more tried-and-tested recipes waiting for you on my Pinterest boards.
👉 Follow Sara on Pinterest @chefrecipes2
📌 Pin this recipe · 🔁 Re-pin your favorites · 💬 Tag me when you make it — I love seeing your creations!
Lemon Coconut Cloud Hearts with Pearl Glaze

Lemon and coconut combine in these light, airy mousse hearts with a crunchy coconut biscuit base and a glossy pearl glaze, perfect for a special occasion.
- Yield: 8 1x
Ingredients
- For the Lemon Coconut Mousse:
- 8 oz (225 g) cream cheese, softened
- 1 cup heavy whipping cream, chilled
- 1/3 cup powdered sugar
- 1/4 cup coconut cream
- 1 tbsp lemon zest
- 2 tbsp fresh lemon juice
- 1 tsp vanilla extract
- For the Coconut Biscuit Base:
- 1 cup vanilla cookie crumbs
- 1/4 cup shredded coconut
- 3 tbsp unsalted butter, melted
- For the Pearl Glaze:
- 1/2 cup white chocolate, melted
- 2 tbsp sweetened condensed milk
- 1 tbsp coconut oil
- 1 tsp edible pearl luster dust
- For Garnish (optional):
- Toasted coconut flakes
- Fine lemon zest
Instructions
- 1. Mix the cookie crumbs, shredded coconut, and melted butter until combined.
- 2. Press the mixture into heart-shaped silicone molds to form a thin base layer and chill for 15 minutes.
- 3. Beat the cream cheese, powdered sugar, coconut cream, lemon zest, lemon juice, and vanilla until smooth.
- 4. In a separate bowl, whip the heavy cream to soft peaks.
- 5. Fold the whipped cream into the lemon mixture until light and airy.
- 6. Fill the heart molds with the mousse mixture and smooth the tops.
- 7. Freeze for at least 3 hours or until firm.
- 8. Combine melted white chocolate, condensed milk, coconut oil, and pearl luster dust until glossy.
- 9. Unmold the frozen hearts and place on a wire rack.
- 10. Pour the pearl glaze evenly over each heart, allowing excess to drip off.
- 11. Garnish with toasted coconut flakes and fine lemon zest if desired.
- 12. Chill for 20 minutes before serving.
Nutrition
- Calories: 295
- Sugar: 16 g
- Fat: 23 g
- Carbohydrates: 20 g
- Protein: 3 g
Tried This Recipe? Leave a Comment!
Did you make this recipe? I’d love to hear how it turned out! Please leave a comment and a rating below. Your feedback helps other home cooks and supports cheerychop.com!
For more delicious inspiration, follow me on Pinterest!


