
Table of Contents
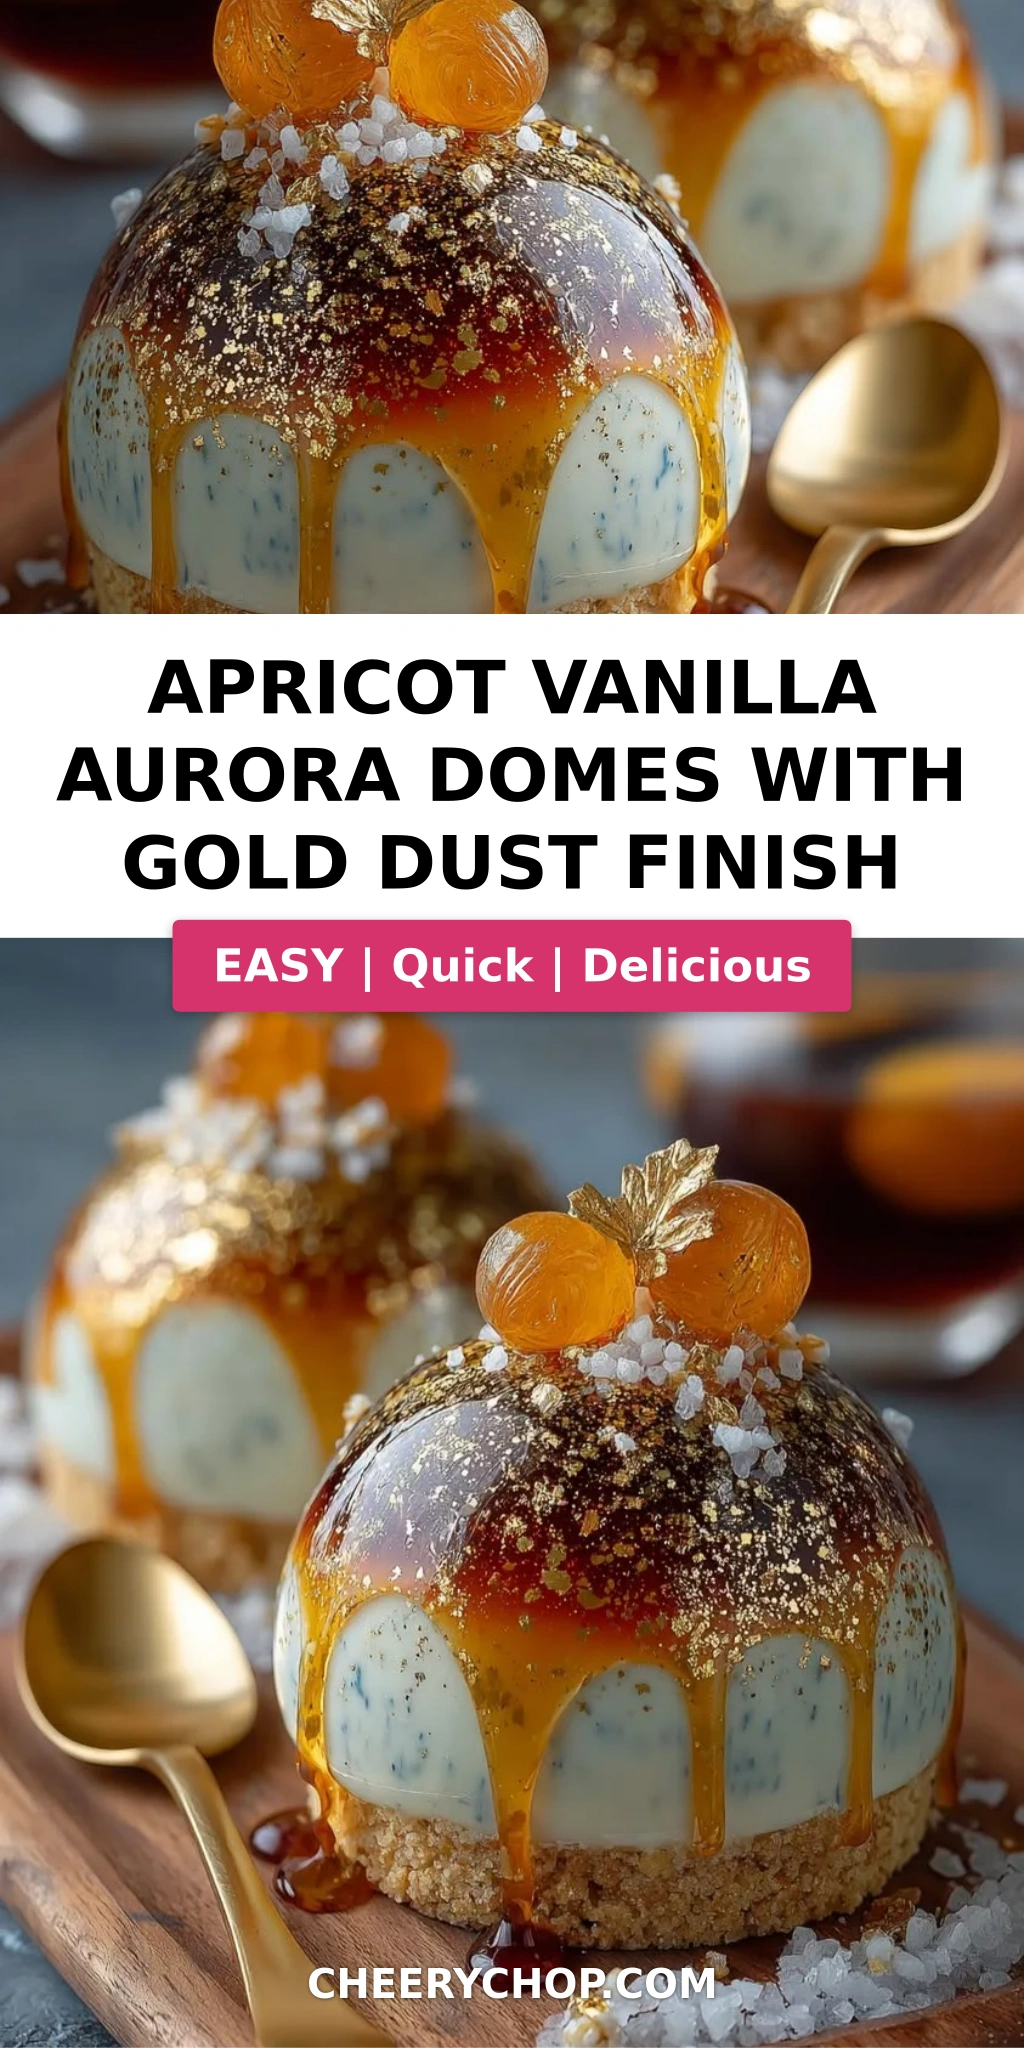
Apricot Vanilla Aurora Domes with Gold Dust Finish – A Luxurious Edible Gold Dessert
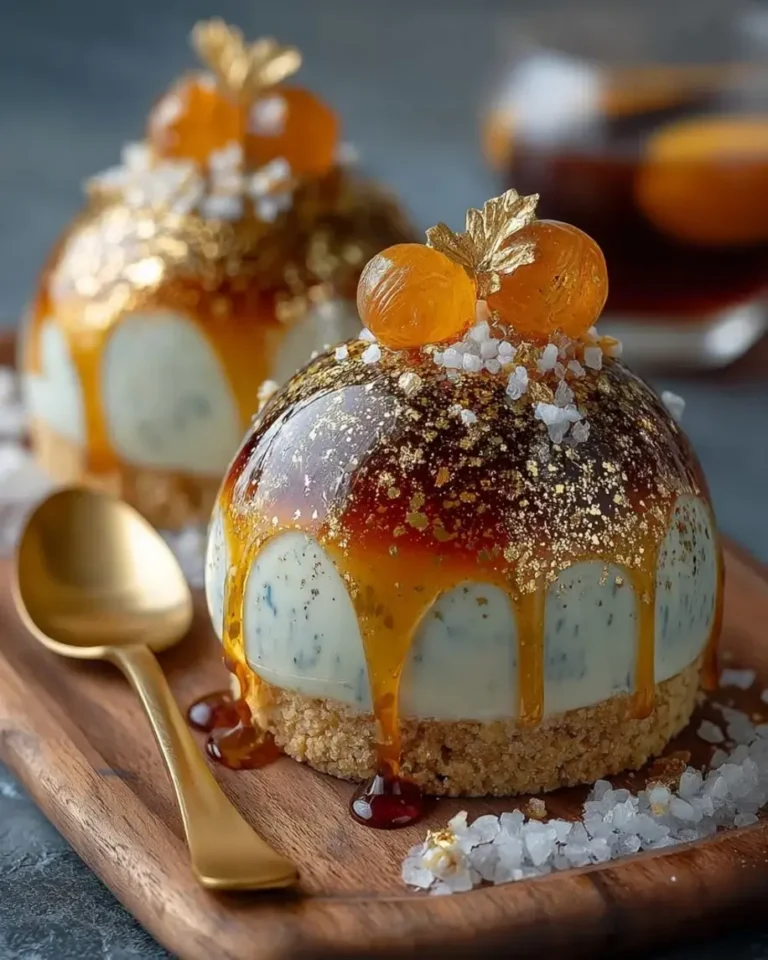
I still remember the first time I made these apricot vanilla aurora domes — it was a chilly November afternoon in my tiny Parisian apartment, and I was determined to create a dessert that captured the ethereal glow of a northern lights sky. The apricot vanilla aurora domes recipe I developed that day has since become my signature showstopper, blending the sun-drenched sweetness of Moroccan apricots with the refined elegance of French mirror glaze technique. The edible gold dessert finish adds a final flourish that makes these gourmet mini domes feel like jewelry on a plate. Every time I bring a tray of these to a dinner party, they disappear before the coffee even arrives.
The first bite reveals a surprisingly delicate interplay of textures: a buttery biscuit base gives way to an airy apricot vanilla mousse, which then surrenders to a rich, cool mascarpone-vanilla cream core at the center. The mirror glaze — tinted with edible gold luster dust — shatters slightly under your spoon and melts into the mousse, carrying notes of caramelized white chocolate and warm vanilla. The aroma alone, with bright apricot notes rising through the creamy sweetness, transports me straight back to my mother’s kitchen in Marrakech, where she would simmer fresh apricots with cinnamon and honey for hours, filling the whole house with that unforgettable fragrance.
What sets my version apart is the layered approach to flavor and the precision of the gold dust finish. I trained at Le Cordon Bleu in Paris, where I learned that a mirror glaze is as much about temperature control as it is about ingredients — and over years of testing, I’ve honed a method that works reliably even for home bakers who’ve never attempted a glazed dome before. Throughout this post, I’ll share my best techniques, including a pro tip for achieving a flawless mirror surface and a common mistake to avoid when working with gelatin. Follow this apricot vanilla mousse domes recipe carefully, and you’ll be rewarded with a dessert that looks like it came from a high-end patisserie — but was made in your own kitchen.
Why This Apricot Vanilla Aurora Domes Recipe Is the Best
The Flavor Secret. Most apricot desserts rely solely on the fruit for sweetness, but I borrowed a technique from my Moroccan heritage: I accentuate the apricot’s natural acidity with a touch of cream cheese in the mousse, which adds a subtle tang that balances the sweet vanilla and white chocolate glaze. The mascarpone core provides a cool, lush counterpoint that keeps every bite interesting. This apricot vanilla aurora domes recipe doesn’t just taste fruity — it tastes like a conversation between sweet, tangy, creamy, and floral notes.
Perfected Texture. The hallmark of a professional-quality dome is the texture of the mousse — light enough to feel airy, yet sturdy enough to hold its shape when glazed. I achieve this by whipping the heavy cream to soft peaks before folding it into the apricot-cream cheese base, and by blooming the gelatin in cold water (never hot!) to ensure even distribution. The result is a mousse that slices cleanly and melts on the tongue. This edible gold dessert demands precision, and I’ve tested every variable so you don’t have to.
Foolproof & Fast. Yes, there are multiple components, but I’ve streamlined the process so you can spread the work across two days. The biscuit base and vanilla cream core can be made and frozen a week ahead. The mousse comes together in under 20 minutes, and the glaze takes about 15. Even if you’ve never made a mirror-glazed dessert before, my step-by-step instructions and visual cues will guide you to a stunning result. These gourmet mini domes look intimidating, but they’re surprisingly forgiving — and I’ll show you exactly where to focus your attention for the best outcome.
Apricot Vanilla Aurora Domes Recipe Ingredients
I source my apricot puree from a little stall at the Union Square Greenmarket in NYC, where they sell the most fragrant Blenheim apricots in early summer. In Paris, I used to buy white chocolate from a small chocolatier in the 6th arrondissement — here in New York, I’ve found that Valrhona or Guittard work beautifully for the glaze. The edible gold luster dust is available at most baking supply stores or online; a little jar goes a long way. When I close my eyes and smell the apricot and vanilla coming together, I’m right back in that Paris apartment, dreaming up my next creation.
Ingredients List
- For the Apricot Vanilla Mousse: 1 1/4 cups apricot puree, 8 oz cream cheese (softened), 1 cup heavy cream, 1/2 cup granulated sugar, 2 tsp vanilla extract, 2 tsp powdered gelatin, 3 tbsp cold water
- For the Vanilla Cream Core: 3/4 cup mascarpone cheese, 2 tbsp powdered sugar, 1 tsp vanilla extract
- For the Biscuit Base: 1 cup digestive biscuits (finely crushed), 3 tbsp melted butter
- For the Gold Dust Finish: 1 cup granulated sugar, 1/2 cup water, 1/2 cup sweetened condensed milk, 1 cup white chocolate (finely chopped), 1 tbsp powdered gelatin, 3 tbsp cold water, 1 tsp clear vanilla extract, 1–2 tsp edible gold luster dust
- For Garnish (optional): Dried apricot slices, white chocolate curls, edible gold flakes
Ingredient Spotlight
Apricot Puree. This is the soul of the dish. I use high-quality, unsweetened apricot puree (Blenheim or Moorpark varieties are best). In a pinch, you can blitz canned apricots in heavy syrup — drain them first, then puree and strain to remove fibers. The puree provides both flavor and natural acidity that cuts through the richness of the cream cheese and white chocolate glaze.
Mascarpone Cheese. Italian mascarpone gives the vanilla cream core its luxurious, silky texture. It’s richer than cream cheese and has a higher fat content, which means it freezes beautifully without becoming icy. I recommend BelGioioso or Galbani brands, which are widely available in US grocery stores. Do not substitute with cream cheese here — the texture will be too dense.
White Chocolate. For the gold dust finish, use a high-quality white chocolate with at least 28% cocoa butter. Callebaut or Valrhona Ivoire are my go-to choices. Avoid white chocolate chips, which often contain stabilizers that prevent smooth melting. Finely chop the chocolate so it melts evenly when added to the hot glaze base.
Edible Gold Luster Dust. This is what gives the domes their aurora-inspired shimmer. Look for “edible gold luster dust” — not pearl dust or glitter, which may not be food-safe. A little goes a long way; 1 to 2 teaspoons is enough for a full batch. You can find it at specialty baking shops or online at brands like Chefmaster or The Sugar Art.
Gelatin. Powdered gelatin is the backbone of both the mousse and the mirror glaze. I use Knox brand (standard in US supermarkets). The key is to bloom it in cold water for exactly 5 minutes before gently warming it to dissolve — never let it boil, or it will lose its setting power. This applies to both the mousse gelatin and the glaze gelatin.
| Original Ingredient | Best Substitution | Flavor / Texture Impact |
|---|---|---|
| Apricot Puree | Mango puree or peach puree (unsweetened) | Sweeter, less acidic; still pairs beautifully with vanilla |
| Mascarpone Cheese | Full-fat cream cheese blended with 2 tbsp heavy cream | Slightly tangier and denser; still creamy but less silky |
| White Chocolate | High-quality white chocolate baking bars (not chips) | Same if using good brand; avoid chips with stabilizers |
| Edible Gold Luster Dust | Edible pearl dust or silver luster dust | Different shimmer color; same glossy finish effect |
| Digestive Biscuits | Graham crackers or shortbread cookies | Slightly sweeter or more buttery; still provides a sturdy base |
How to Make Apricot Vanilla Aurora Domes — Step-by-Step
Don’t let the number of steps intimidate you — I’ve broken down every stage into clear, manageable actions. If you prep your ingredients and read through the full recipe first, you’ll move through the process with confidence.
Step 1: Make the Biscuit Base
In a small bowl, combine 1 cup finely crushed digestive biscuits with 3 tbsp melted butter. Stir until the mixture resembles wet sand and holds together when pressed. Divide evenly among 8 dome molds (about 1 tablespoon each) and press firmly into a thin, even layer at the bottom of each mold. Place the molds in the refrigerator to chill for 15 minutes while you prepare the next component.
💡 Sara’s Pro Tip: Use the flat bottom of a small measuring cup or a tart tamper to press the crumbs evenly. An uneven base can cause the dome to tilt when unmolded.
Step 2: Prepare the Vanilla Cream Core
In a small bowl, whisk together 3/4 cup mascarpone cheese, 2 tbsp powdered sugar, and 1 tsp vanilla extract until completely smooth and creamy. Transfer the mixture to a small piping bag or a zip-top bag with a tiny corner snipped off. Pipe small dollops (about 1 rounded teaspoon each) into silicone ice cube trays or small hemisphere molds. Freeze for at least 1 hour, or until firm enough to handle.
⚠️ Common Mistake to Avoid: Don’t skip freezing the cream cores — if they aren’t solidly frozen, they’ll sink into the mousse when you add them to the domes.
Step 3: Bloom the Gelatin and Start the Mousse
In a small bowl, sprinkle 2 tsp powdered gelatin over 3 tbsp cold water. Let it sit undisturbed for 5 minutes — this is called blooming and ensures the gelatin dissolves smoothly. Meanwhile, in a large mixing bowl, beat 8 oz softened cream cheese, 1 1/4 cups apricot puree, 1/2 cup granulated sugar, and 2 tsp vanilla extract on medium speed until completely smooth and free of lumps, about 2 minutes.
💡 Sara’s Pro Tip: Make sure your cream cheese is truly at room temperature — cold cream cheese will create lumps that are nearly impossible to smooth out. Let it sit on the counter for at least 30 minutes before starting.
Step 4: Fold in Whipped Cream
In a separate bowl, pour 1 cup heavy cream. Using a hand mixer or a stand mixer with the whisk attachment, whip the cream on medium-high speed until it reaches soft peaks — the cream should hold its shape briefly but droop slightly when you lift the whisk. Take about 1/4 cup of the whipped cream and warm it gently in a small saucepan or microwave (about 15 seconds), then whisk in the bloomed gelatin until completely dissolved. Immediately stir this gelatin mixture into the apricot-cream cheese base. Then, gently fold the remaining whipped cream into the apricot mixture in two additions, using a rubber spatula. Fold just until no white streaks remain — overmixing will deflate the mousse.
⚠️ Common Mistake to Avoid: If the gelatin mixture seizes or becomes lumpy when you add it to the cold cream, you can briefly warm the apricot base slightly before adding the gelatin. Cold shock causes gelatin to clump.
Step 5: Assemble the Domes
Remove the silicone dome molds from the refrigerator (they should have a chilled biscuit base at the bottom). Spoon or pipe the apricot vanilla mousse into each mold, filling them about halfway. Remove the frozen vanilla cream cores from the freezer and place one core gently into the center of each mold, pressing it slightly into the mousse. Immediately cover with the remaining mousse, smoothing the tops with an offset spatula so they’re flush with the rim of the mold. Tap each mold gently on the counter to release any air bubbles.
💡 Sara’s Pro Tip: For perfectly centered cream cores, freeze the cores in small hemisphere molds that match the curve of your dome molds. This keeps them suspended in the middle as the mousse sets.
Step 6: Freeze the Domes
Place the filled dome molds on a small baking sheet or tray and transfer to the freezer. Freeze for at least 6 hours, or preferably overnight. The domes must be completely frozen solid — this is crucial for the glazing step. If the mousse is even slightly soft, the warm glaze will melt it on contact and ruin the shape.
⚠️ Common Mistake to Avoid: Do not rush the freezing time. Six hours is the minimum; 8 to 12 hours produces the cleanest glazing results. A partially frozen dome will collapse under the glaze.
Step 7: Make the Gold Dust Glaze
In a small bowl, bloom 1 tbsp powdered gelatin in 3 tbsp cold water for 5 minutes. In a medium saucepan, combine 1 cup granulated sugar, 1/2 cup water, and 1/2 cup sweetened condensed milk. Heat over medium heat, stirring occasionally, until the mixture is steaming and the sugar is fully dissolved — do not let it boil. Remove from heat and immediately add the bloomed gelatin and 1 cup finely chopped white chocolate. Stir gently until both are completely melted and smooth. Add 1 tsp clear vanilla extract and 1 to 2 tsp edible gold luster dust, then use an immersion blender to blend until the glaze is glossy and uniform in color. Strain through a fine-mesh sieve into a tall measuring cup or a bowl with a pouring spout. Allow the glaze to cool to 90°F (32°C), checking with a digital thermometer — this temperature is critical for a smooth, shiny finish.
💡 Sara’s Pro Tip: Use an immersion blender (stick blender) to emulsify the glaze — this eliminates air bubbles and gives the mirror finish its characteristic shine. Do not whisk, as whisking incorporates air.
Step 8: Glaze the Domes
Remove the frozen domes from the molds — if they stick, gently flex the silicone or briefly dip the bottom of the molds in warm water (no more than 5 seconds). Place the frozen domes on a wire rack set over a baking sheet lined with parchment paper. Working one dome at a time, pour the gold dust finish evenly over each dome, starting from the top and allowing the glaze to cascade down the sides. Let the excess drip off on the rack for a few seconds, then use a small offset spatula to clean the bottom edge. Transfer each glazed dome to a serving plate or a parchment-lined tray.
⚠️ Common Mistake to Avoid: If the glaze is too thick, it will clump rather than flow smoothly. Reheat it very gently (in 5-second bursts in the microwave, stirring in between) to bring it back to 90°F. If it’s too thin, let it cool a few more degrees.
Step 9: Garnish and Serve
Refrigerate the glazed domes for at least 30 minutes to allow the glaze to set completely. Just before serving, garnish each dome with a thin slice of dried apricot, a few delicate white chocolate curls, and a scattering of edible gold flakes. Serve chilled but not icy — the mousse should be soft and creamy, not rock-hard. The domes are best enjoyed within 4 hours of glazing, while the mirror finish is at its most dramatic.
💡 Sara’s Pro Tip: For the most dramatic presentation, serve the domes on dark plates — the contrast makes the gold finish pop. I like to add a tiny pinch of flaky sea salt on top to balance the sweetness.
| Step | Action | Duration | Key Visual Cue |
|---|---|---|---|
| 1 | Make Biscuit Base | 5 mins + 15 mins chill | Mixture holds together when pressed |
| 2 | Prepare Vanilla Cream Core | 5 mins + 1 hr freeze | Firm enough to handle without deforming |
| 3 | Bloom Gelatin & Start Mousse | 10 mins | Gelatin is fully absorbed; mixture is smooth |
| 4 | Fold in Whipped Cream | 5 mins | Soft peaks hold briefly; no white streaks remain |
| 5 | Assemble Domes | 10 mins | Cream core centered; surface smooth with rim |
| 6 | Freeze Domes | 6+ hours | Solid to the touch; no give when pressed |
| 7 | Make Gold Dust Glaze | 15 mins + cooling | Glossy, smooth, no lumps; 90°F |
| 8 | Glaze Domes | 10 mins | Even coating; glaze flows in a continuous sheet |
| 9 | Garnish & Serve | 30 mins set + 5 mins garnish | Glaze is firm to the touch; garnish adheres |
Serving & Presentation
When I serve these apricot vanilla aurora domes at dinner parties in my New York apartment, I love to plate them on sleek black ceramic dishes — the contrast makes the gold dust finish look like liquid metal. I place one dome at the center of each plate and add a small quenelle of crème fraîche on the side to balance the sweetness. A few thin slices of dried apricot arranged like petals around the dome add a pop of amber color that echoes the apricot flavor within. For special occasions, I’ll scatter a few edible gold flakes on the plate and add a tiny sprig of mint for freshness. The presentation is pure theater — guests always lean in for a closer look before they even pick up their spoons.
In my mother’s kitchen in Morocco, desserts were always served with mint tea and fresh fruit. I’ve carried that tradition into my own home by pairing these domes with a small glass of Moroccan mint tea — the herbal freshness cuts through the richness of the white chocolate glaze. If you’re serving these for a holiday dinner, a dessert wine like a late-harvest Riesling or a Muscat de Beaumes-de-Venise complements the apricot and vanilla notes beautifully.
For a truly show-stopping dessert table, arrange the domes on a tiered stand with white chocolate curls, fresh raspberries, and edible flowers scattered around the base. The domes can be refrigerated for up to 4 hours after glazing before the finish begins to lose its luster, so plan your timeline accordingly. I often glaze them just before guests arrive and let them set in the fridge while we enjoy dinner — then they’re perfectly chilled and ready to impress.
| Pairing Type | Suggestions | Why It Works |
|---|---|---|
| Side Dish | Crème fraîche, fresh raspberries, mint leaves | Tangy and fresh elements balance the sweet, rich glaze |
| Sauce / Dip | Passion fruit coulis, salted caramel, honey drizzle | Bright acidity or salt cuts through sweetness |
| Beverage | Moroccan mint tea, late-harvest Riesling, espresso | Herbal, sweet wine, or bitter coffee complements the dessert |
| Garnish | Dried apricot slices, white chocolate curls, gold flakes | Adds visual height, texture contrast, and luxury feel |
Make-Ahead, Storage & Reheating
As a busy NYC food blogger and mom, I rely on make-ahead strategies constantly. These domes are actually ideal for preparing in stages — the components freeze beautifully, and the final glazing takes only minutes. Here’s how I break it down for my own weekly meal prep: I make the biscuit base and vanilla cream cores on a Sunday afternoon, freeze them, and then make the mousse and assemble the domes on Monday. They freeze solid until Thursday or Friday, when I glaze them fresh for a dinner party. This apricot vanilla aurora domes recipe was designed with real life in mind — you can spread the work across several days with zero compromise on quality.
| Method | Container | Duration | Reheating Tip |
|---|---|---|---|
| Refrigerator | Airtight container in single layer | Up to 4 hours after glazing | Serve directly from fridge; do not reheat |
| Freezer | Wrap each dome individually in plastic wrap, then foil | Up to 1 month | Thaw in fridge 2 hours; glaze fresh after thawing |
| Make-Ahead | Assembled but unglazed in freezer | Up to 1 week before glazing | Glaze directly from frozen — no thawing needed |
A quick word on glaze storage: If you have leftover gold dust finish, you can refrigerate it in an airtight container for up to 5 days. To reuse, warm it gently in a double boiler or microwave in 10-second bursts, stirring frequently, until it returns to 90°F. You may need to add a tiny splash of water if it has thickened. The glaze can be reheated and strained again before using — just don’t let it boil, as this can cause the white chocolate to separate.
One thing I learned the hard way: never freeze a glazed dome. The glaze will crack and weep when thawed, ruining the mirror finish. Always freeze the domes unglazed, then glaze them fresh on the day you plan to serve. This is the single most important storage rule for this apricot vanilla aurora domes recipe — trust me, I’ve made that mistake so you don’t have to!
Variations & Easy Swaps
| Variation | Key Change | Best For | Difficulty Impact |
|---|---|---|---|
| Rose & Pistachio | Add 1 tsp rose water to mousse; garnish with crushed pistachios | Middle Eastern flavor profile; elegant floral note | Easy (same process) |
| Gluten-Free | Use gluten-free graham crackers or almond flour crust | Celiac or gluten-sensitive guests | Easy (ingredient swap) |
| Mango & Lime | Replace apricot puree with mango puree; add 1 tbsp lime juice to mousse | Tropical summer dessert; bright, tangy flavor | Easy (same process) |
Rose & Pistachio Variation
This is my personal favorite twist — it nods to the flavors I grew up with in Morocco, where rose water and pistachios appear in everything from pastries to tagines. Simply add 1 teaspoon of food-grade rose water to the apricot mousse along with the vanilla extract. Replace the vanilla cream core with a rose-infused mascarpone (add 1/2 tsp rose water to the core mixture). For the garnish, swap the dried apricot for chopped toasted pistachios and a few dried rose petals. The rose and pistachio add a floral, nutty depth that pairs beautifully with the apricot and gold dust finish. The French-trained side of me loves how the rose echoes the apricot’s natural floral notes.
Gluten-Free Version
Making these domes gluten-free is surprisingly straightforward. Replace the digestive biscuits with gluten-free graham crackers or a simple almond flour crust (1 cup almond flour + 2 tbsp melted butter + 1 tbsp maple syrup, pressed into the molds and chilled). The texture will be slightly more delicate than the original, so handle the bases gently when unmolding. All other components — the mousse, cream core, and gold dust finish — are naturally gluten-free. I’ve tested this version multiple times for friends with celiac disease, and it’s always a hit. Just be sure to use certified gluten-free vanilla extract and check your white chocolate label.
Mango & Lime Twist
When summer hits its peak at the Union Square Greenmarket, I swap the apricot puree for an equal amount of fresh mango puree and add 1 tablespoon of fresh lime juice to the mousse base. The mango brings a lush, tropical sweetness that pairs brilliantly with the vanilla mascarpone core, while the lime cuts through the richness of the white chocolate glaze. For the gold dust finish, I sometimes add a tiny pinch of turmeric (about 1/8 tsp) along with the gold luster dust to give the glaze a warmer, sunset-gold hue. This variation is a showstopper at summer gatherings and feels somehow both lighter and more indulgent at the same time.
What is the best way to achieve a smooth, shiny finish on apricot vanilla domes?
The key to a flawless mirror glaze on these apricot vanilla aurora domes is temperature control. First, make sure your domes are frozen solid — at least 6 hours in the freezer, preferably overnight. Second, cool the gold dust finish glaze to exactly 90°F (32°C) and use an immersion blender to emulsify it, which eliminates air bubbles. Third, pour the glaze in one continuous motion over the center of each dome, allowing it to flow naturally over the sides. Work quickly but deliberately, and don’t go back to touch the glaze once it’s set. Using a wire rack over a baking sheet allows excess glaze to drip off cleanly. If you notice small bubbles on the surface of your glazed dome, a quick pass with a kitchen torch (or even a lighter held at a safe distance) will pop them instantly, leaving a pristine mirror finish.
Can I use dried apricots instead of fresh for the apricot filling in these domes?
Yes, you can absolutely use dried apricots to make the puree for this apricot vanilla aurora domes recipe, though you’ll need to rehydrate them first. Combine 1 1/2 cups of dried apricots (preferably unsulfured Turkish or Blenheim) with 1 cup of water in a small saucepan. Bring to a gentle simmer and cook for 10 to 15 minutes, until the apricots are plump and tender. Drain any excess liquid (reserve it for adjusting consistency), then puree the apricots in a blender or food processor until completely smooth. You may need to add a tablespoon or two of the reserved cooking liquid to achieve the right consistency — the puree should be thick but pourable, similar to a smooth fruit butter. Note that dried apricots are more concentrated in sugar, so you may want to reduce the granulated sugar in the mousse by 1 to 2 tablespoons to compensate.
How far in advance can I prepare Apricot Vanilla Aurora Domes before serving?
You can prepare these edible gold dessert domes several days ahead, but the timing depends on which stage you’re at. The unglazed frozen domes can be stored in an airtight container in the freezer for up to 1 month — this is the best make-ahead strategy. The vanilla cream cores and biscuit bases can be frozen separately for up to 2 weeks before assembly. The gold dust finish glaze can be made up to 5 days in advance and stored in the fridge, then gently rewarmed to 90°F when you’re ready to glaze. However, once the domes are glazed, they should be served within 4 hours for the best mirror finish. I recommend glazing them on the day of serving, ideally no more than 2 to 3 hours before your guests arrive. This timeline gives you plenty of flexibility without sacrificing the stunning visual impact.
What can I substitute for gold dust to still get a glamorous finish on these domes?
If you don’t have edible gold luster dust, there are several other ways to achieve a glamorous finish on these apricot vanilla aurora domes. Edible pearl dust (also called “super pearl” or “white pearl”) creates a luminous, moonlit shimmer that looks incredibly elegant — use the same quantity as the gold dust (1 to 2 teaspoons). For a pink or champagne glow, try edible rose gold luster dust or a pinch of beetroot powder mixed with pearl dust. Another option is to skip the luster dust entirely and add 1/2 teaspoon of clear vanilla extract and a drop of yellow food coloring (gel-based works best) to create a warm, honey-toned glaze that catches the light beautifully. You can also garnish generously with edible gold flakes on top of a clear mirror glaze for a metallic effect without mixing dust into the glaze itself.
Why did my mirror glaze crack or not set properly?
Cracked or unset mirror glaze is usually caused by one of three issues when making this apricot vanilla aurora domes recipe. First, the domes may not have been frozen solid enough — if the mousse is still soft, the warmth of the glaze causes it to contract unevenly as it chills, leading to cracks. Freeze the domes for at least 6 hours, ideally overnight. Second, the glaze temperature might have been off — if it’s too hot (above 95°F), it will melt the mousse and slide off; if it’s too cool (below 85°F), it will thicken and clump rather than flowing smoothly. Always use a digital thermometer and aim for exactly 90°F. Third, the gelatin-to-liquid ratio could be off — make sure you bloom the full tablespoon of gelatin in exactly 3 tablespoons of cold water, and that you stir it until fully dissolved. If the glaze still doesn’t set, you can gently rewarm it, add 1/2 teaspoon more bloomed gelatin, and try again.
Share Your Version!
I absolutely love seeing how this apricot vanilla aurora domes recipe turns out in your kitchen! Did you try the rose and pistachio variation, or did you go with the classic gold dust finish? Maybe you invented a whole new flavor combination I haven’t even thought of yet. Drop a comment below and let me know how it went — your feedback helps other home cooks decide which version to try first.
If you share a photo on Instagram or Pinterest, tag me @cheerychop so I can see your gorgeous creations. I personally check every tag and love to feature my favorites in my stories. And if you’re feeling generous, leave a star rating right here — it takes two seconds and it genuinely helps this recipe reach more people who might be looking for that perfect showstopper dessert for their next celebration.
From my NYC kitchen to yours — I hope this recipe brings as much warmth to your table as it does to mine. — Sara 🧡
Love This Recipe? Save It to Pinterest!
If you enjoyed this Apricot Vanilla Aurora Domes with Gold Dust Finish recipe, don’t let it get lost in your browser tabs! 😄 Pin it now so you can find it again anytime — and explore hundreds more tried-and-tested recipes waiting for you on my Pinterest boards.
👉 Follow Sara on Pinterest @chefrecipes2
📌 Pin this recipe · 🔁 Re-pin your favorites · 💬 Tag me when you make it — I love seeing your creations!
Apricot Vanilla Aurora Domes with Gold Dust Finish
- Yield: 8 1x
Ingredients
- For the Apricot Vanilla Mousse:
- 1 1/4 cups apricot puree
- 8 oz cream cheese, softened
- 1 cup heavy cream
- 1/2 cup granulated sugar
- 2 tsp vanilla extract
- 2 tsp powdered gelatin
- 3 tbsp cold water
- For the Vanilla Cream Core:
- 3/4 cup mascarpone cheese
- 2 tbsp powdered sugar
- 1 tsp vanilla extract
- For the Biscuit Base:
- 1 cup digestive biscuits, finely crushed
- 3 tbsp melted butter
- For the Gold Dust Finish:
- 1 cup granulated sugar
- 1/2 cup water
- 1/2 cup sweetened condensed milk
- 1 cup white chocolate, finely chopped
- 1 tbsp powdered gelatin
- 3 tbsp cold water
- 1 tsp clear vanilla extract
- 1–2 tsp edible gold luster dust
- For Garnish (optional):
- Dried apricot slices
- White chocolate curls
- Edible gold flakes
Instructions
- Mix crushed biscuits with melted butter and press into dome molds as a thin base layer. Chill for 15 minutes.
- Combine mascarpone, powdered sugar, and vanilla extract until smooth.
- Spoon into small silicone inserts and freeze until firm.
- Bloom gelatin for the mousse in cold water for 5 minutes.
- Beat cream cheese, apricot puree, sugar, and vanilla extract until smooth.
- Warm a small portion of the cream and dissolve gelatin, then mix into the apricot mixture.
- Whip the remaining cream to soft peaks and fold into the mixture.
- Fill dome molds halfway with mousse.
- Place a frozen vanilla cream core into the center of each mold.
- Cover with remaining mousse and smooth the tops.
- Freeze for at least 6 hours or until completely firm.
- Bloom gelatin for the glaze in cold water.
- Heat sugar, water, and condensed milk until steaming.
- Remove from heat and stir in gelatin and white chocolate until smooth.
- Add vanilla extract and gold luster dust, then blend until glossy.
- Cool glaze to about 90°F (32°C).
- Unmold frozen domes and place on a wire rack.
- Pour the gold dust finish evenly over each dome until fully coated.
- Refrigerate for 30 minutes before serving.
- Garnish with dried apricot slices, white chocolate curls, and gold flakes.
Nutrition
- Calories: 345
- Sugar: 34g
- Fat: 19g
- Carbohydrates: 39g
- Protein: 4g
Tried This Recipe? Leave a Comment!
Did you make this recipe? I’d love to hear how it turned out! Please leave a comment and a rating below. Your feedback helps other home cooks and supports cheerychop.com!
For more delicious inspiration, follow me on Pinterest!


