

“`html
Table of Contents
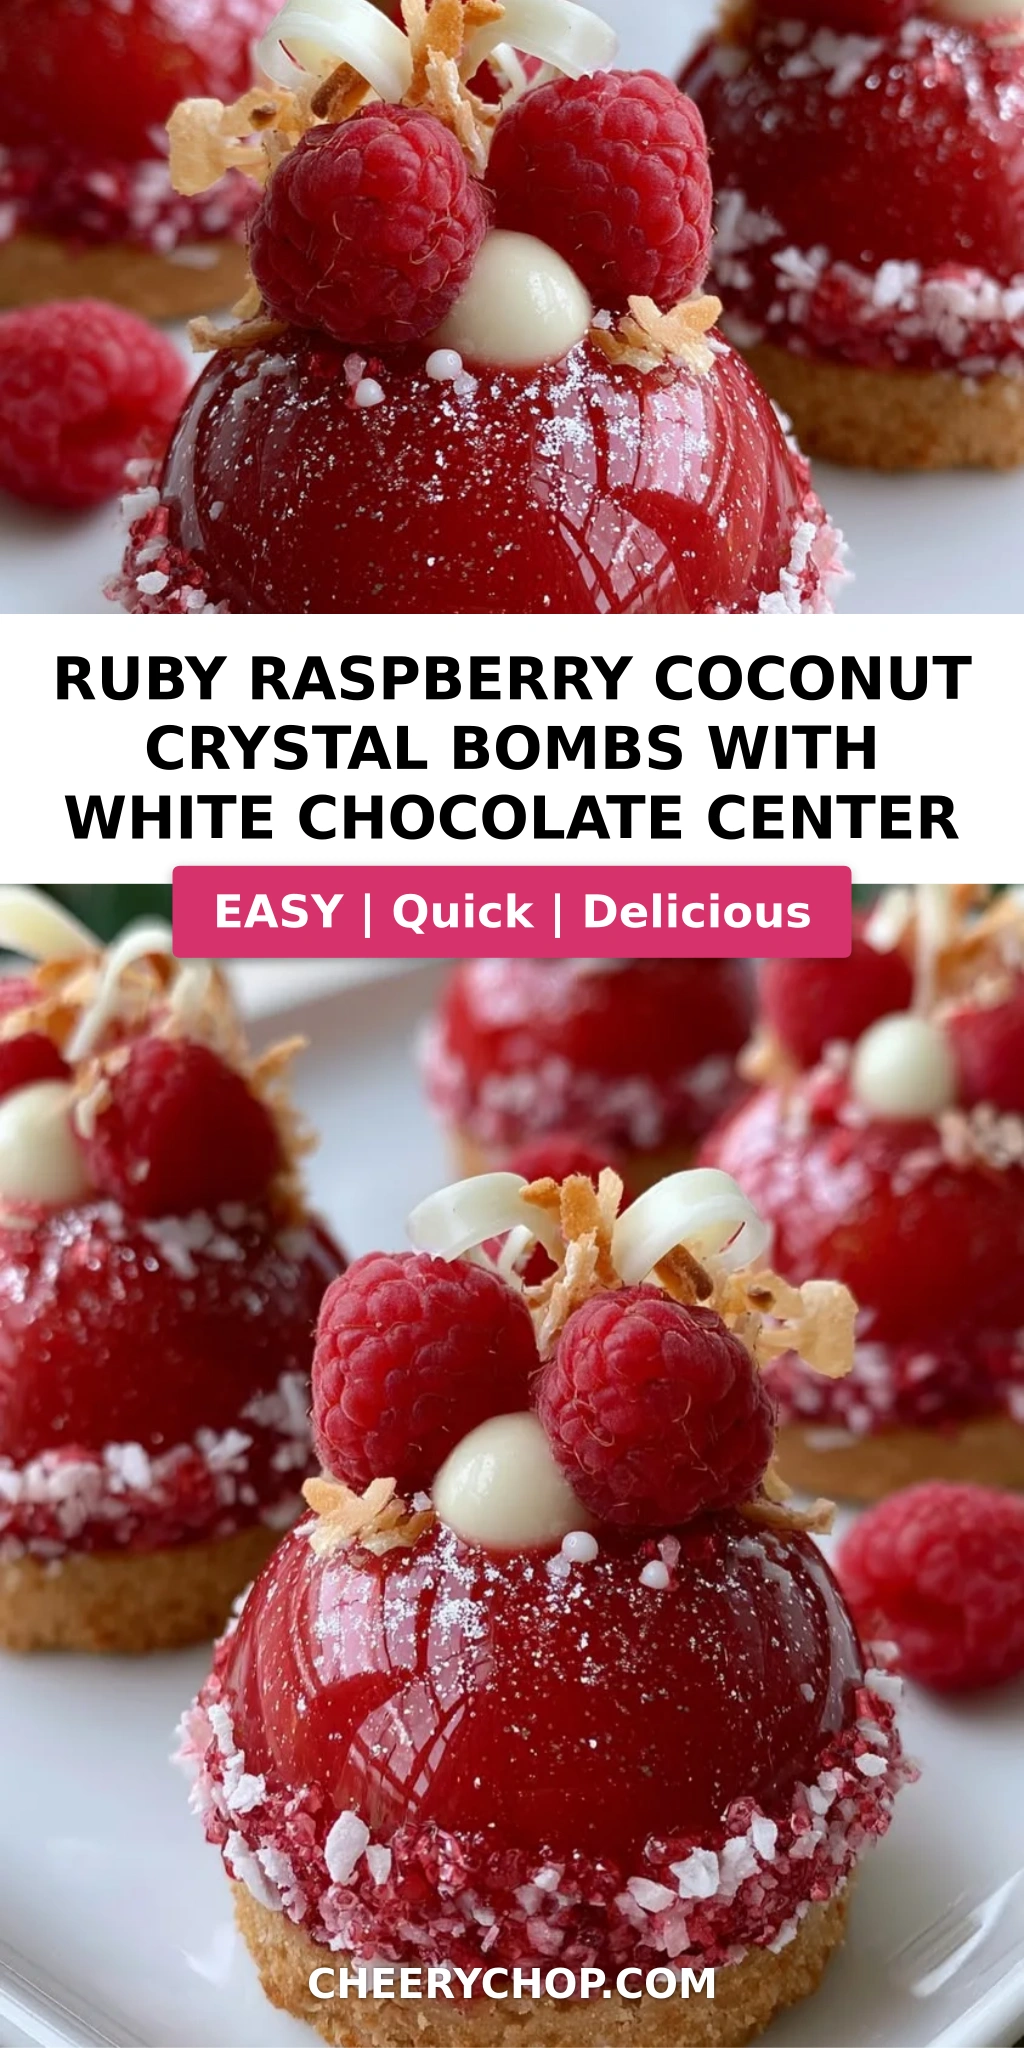
Ruby Raspberry Coconut Crystal Bombs with White Chocolate Center – A Jewel-Like Dessert That Wows
I still remember the first time I saw a ruby crystal glaze catch the light in a Parisian patisserie window. I was 22, fresh out of culinary school, and completely mesmerized by the way the glossy, jewel-toned shell seemed to glow from within. Years later, here in my New York City kitchen, I knew I had to create my own version — one that married that French elegance with the warm, tropical notes I grew up with in Morocco. This Ruby Raspberry Coconut Crystal Bombs with White Chocolate Center recipe is the result of that vision: a show-stopping dessert that looks like a precious gem and tastes like a dream.
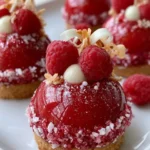
Imagine this: a crisp, buttery coconut cookie base cradles a dome of light-as-air raspberry coconut mousse. Hidden inside is a creamy white chocolate center that melts ever so softly on your tongue. The entire bomb is enrobed in a translucent ruby red glaze that shimmers with pearl shimmer dust — it catches the light like a faceted crystal. Each bite brings a burst of tart raspberry, sweet coconut, and rich white chocolate, all balanced with a delicate floral finish. The texture is pure magic: silky mousse, creamy center, crisp base, and a glossy, jelly-like shell that gives way with a gentle crack.
What makes my version truly special is the technique I developed during my training in Paris — a stabilized mousse that holds its shape perfectly while remaining incredibly light, and a gelatin-based mirror glaze that sets to a flawless, streak-free finish. I’ve tested this ruby raspberry coconut crystal bombs recipe dozens of times to make sure every step is foolproof, even for home bakers who have never worked with gelatin or mirror glaze before. I’ll walk you through each stage with the tips I wish someone had given me. Trust me — if you can make Jell-O, you can master this crystal glaze. Let’s create something beautiful together.
Why This Ruby Raspberry Coconut Crystal Bombs Recipe Is the Best
The Flavor Secret: Growing up in Morocco, my mother would make a simple raspberry and coconut cream dessert that always disappeared in minutes. That memory stayed with me. For this ruby raspberry coconut crystal bombs recipe, I’ve elevated that classic pairing by adding a white chocolate center — a trick I learned from a pastry chef in Lyon. The white chocolate adds a buttery sweetness that mellows the tartness of the raspberries and complements the toasted coconut beautifully. It’s a trio of flavors that feels both nostalgic and entirely new.
Perfected Texture: The real magic of these gourmet raspberry chocolate bombs is the contrast between the silky mousse, the creamy center, and the firm, glossy glaze. I use a stabilized mousse technique — blooming gelatin and folding in whipped cream at just the right stage — so the bombs hold their dome shape even after glazing. The ruby crystal glaze is made with white chocolate and condensed milk, giving it a rich, smooth consistency that sets to a mirror finish without any of the cracking or weeping you sometimes get with simpler glazes.
Foolproof & Fast: I know working with gelatin and mirror glaze can feel intimidating, so I’ve broken this down into manageable steps with clear visual cues. You don’t need a pastry degree to nail this — just a little patience and my pro tips along the way. The components can be made over two days, which makes it perfect for holiday entertaining. Every time I teach this in my NYC workshops, students tell me it’s easier than it looks, and the wow factor is off the charts.
Ruby Raspberry Coconut Crystal Bombs Recipe Ingredients
When I shop for ingredients for this ruby raspberry coconut crystal bombs recipe, I head straight to my favorite spots: the raspberry puree I source from a specialty vendor at the Union Square Greenmarket, and the coconut I pick up from a little Moroccan market in Astoria. The quality of each component matters here. Below is everything you’ll need, split into five distinct components. I’ve included notes on where to find specialty items and easy swaps you can make without compromising the final result.
Ingredients List
- For the Raspberry Coconut Mousse:
- 1 cup raspberry puree (fresh or thawed frozen, strained)
- 8 oz cream cheese, softened to room temperature
- 1/2 cup powdered sugar
- 1 cup heavy cream
- 1/2 cup shredded coconut (sweetened or unsweetened)
- 1 tsp vanilla extract
- 1 tbsp gelatin powder (plain, not flavored)
- 3 tbsp warm water (for blooming gelatin)
- For the White Chocolate Center:
- 4 oz white chocolate, melted and cooled slightly
- 2 tbsp heavy cream
- 1 tbsp powdered sugar
- 1/2 tsp vanilla extract
- For the Ruby Crystal Glaze:
- 1 cup white chocolate, finely chopped
- 1/2 cup sweetened condensed milk
- 1 tbsp gelatin powder
- 3 tbsp warm water
- Ruby red food coloring (gel or liquid, as needed)
- Pearl shimmer dust (optional, for sparkle)
- For the Cookie Base:
- 1 cup coconut cookie crumbs (about 10-12 coconut cookies, or use shortbread)
- 3 tbsp melted butter
- 1 tbsp granulated sugar
- Pinch of salt
- For Garnish (optional):
- Fresh raspberries
- Toasted coconut flakes
- White chocolate curls
Ingredient Spotlight
Raspberry Puree: This is the heart of the mousse. I prefer using frozen raspberries that I thaw and strain through a fine-mesh sieve to remove the seeds. The puree should be thick and deeply flavored. If you’re using store-bought puree, look for one with no added sugar — you’ll control the sweetness yourself. In a pinch, you can substitute with an equal amount of raspberry preserves that have been heated and strained, but the mousse will be slightly sweeter.
White Chocolate (for the center and glaze): Quality matters immensely here. I use a good couverture white chocolate with at least 30% cocoa butter for both the center and the glaze. Cheap white chocolate often contains vegetable oils that can cause the glaze to seize or become grainy. If you can’t find couverture, Ghirardelli or Lindt white chocolate bars work beautifully. For the glaze, the white chocolate provides the base that gives the crystal finish its glossy, translucent quality.
Gelatin Powder: This is the structural backbone of both the mousse and the glaze. I use plain gelatin powder (Knox is my go-to) and bloom it in warm water for exactly 5 minutes. It’s crucial not to over-bloom or under-bloom — the gelatin should be fully dissolved and look like a soft, clear gel before you incorporate it. If you’re vegetarian, you can use agar-agar, but the texture will be firmer and the glaze may set more quickly, so work fast.
Shredded Coconut: I like using medium-shred unsweetened coconut for the mousse — it adds texture without making the mousse gritty. For the garnish, I toast large coconut flakes in a dry pan until golden, which brings out their nutty, aromatic quality. If you only have sweetened coconut, reduce the powdered sugar in the mousse by 1-2 tablespoons to keep the sweetness balanced.
| Original Ingredient | Best Substitution | Flavor / Texture Impact |
|---|---|---|
| Raspberry puree | Strawberry puree or thawed frozen raspberries, strained | Slightly less tart; mousse will be a bit sweeter. Color may be less vibrant. |
| White chocolate (center) | Cream cheese + powdered sugar (omit white chocolate) | Center will be tangy and less sweet. Texture will be more like cheesecake. |
| Shredded coconut | Ground almonds or finely chopped pistachios | Nutty flavor replaces coconut. Texture will be more granular. |
| Gelatin powder | Agar-agar (vegan) | Firmer set; glaze sets faster. Must work quickly. Slightly different mouthfeel. |
| Ruby red food coloring | Natural beet powder + a drop of rose food coloring | Less vibrant; earthy undertones. Glaze may be slightly opaque. |
How to Make Ruby Raspberry Coconut Crystal Bombs — Step-by-Step
I’ve broken this down into eight clear steps. Take your time with each one — this is a dessert you build layer by layer, and each stage has its own reward. The first time I made these, I was in my tiny NYC apartment kitchen with a hand mixer and a prayer, and they still came out stunning. You’ve got this.
Step 1: Bloom the Gelatin
In a small bowl, sprinkle 1 tablespoon of gelatin powder over 3 tablespoons of warm water (not hot — about 110°F). Let it stand for 5 minutes without stirring. The gelatin will absorb the water and turn into a soft, translucent gel. This is called blooming, and it’s essential for even distribution. If you skip this step or use water that’s too hot, the gelatin can become stringy or lose its setting power.
💡 Sara’s Pro Tip: Always bloom gelatin in a separate bowl before adding it to your mixture. This ensures it dissolves completely and gives you a smooth, lump-free mousse and glaze.
Step 2: Make the Raspberry Coconut Mousse
In a large mixing bowl, beat the softened cream cheese and powdered sugar together until smooth and fluffy — about 2 minutes with a hand mixer on medium speed. Mix in the raspberry puree, shredded coconut, and vanilla extract until fully combined. In a separate bowl, whip the heavy cream to soft peaks (the cream should hold a gentle shape but still be soft). Gently fold the whipped cream into the raspberry mixture using a spatula, being careful not to deflate the air you’ve incorporated. Finally, warm the bloomed gelatin gently (about 5 seconds in the microwave) until it liquifies, then quickly stir it into the mousse base until fully incorporated. Set the mousse aside at room temperature while you prepare the centers.
⚠️ Common Mistake to Avoid: Over-whipping the cream to stiff peaks will make the mousse dense and heavy. Stop at soft peaks — the cream should look like cloud-like dollops that gently fold in.
Step 3: Prepare the White Chocolate Center
Melt 4 oz of white chocolate in a heatproof bowl set over a pan of simmering water (or in the microwave in 20-second bursts, stirring between each). Let it cool slightly until it’s warm to the touch but no longer hot. In a small bowl, whisk together the melted white chocolate, 2 tablespoons heavy cream, 1 tablespoon powdered sugar, and 1/2 teaspoon vanilla extract until smooth and glossy. The mixture should be thick but pipeable. Transfer it to a small piping bag or a ziplock bag with the corner snipped off. Pipe small discs (about 1 teaspoon each) into a silicone mini dome mold or onto a parchment-lined tray. Place the tray in the freezer and freeze until completely firm — at least 2 hours.
💡 Sara’s Pro Tip: For the best texture, use a couverture white chocolate with at least 30% cocoa butter. This ensures the center stays creamy even after freezing, not waxy or grainy.
Step 4: Assemble the Bombs
Take your silicone dome molds (each dome should be about 2.5 inches in diameter and hold about 1/3 cup of mousse). Fill each dome cavity halfway with the raspberry coconut mousse. Remove the frozen white chocolate centers from the freezer and place one center into the middle of each dome, gently pressing it down into the mousse. Cover the center with the remaining mousse, filling each dome to the top and smoothing the surface with an offset spatula. Tap the mold gently on the counter to release any air bubbles. Place the filled mold in the freezer and freeze until completely firm — at least 3 hours, but overnight is ideal.
⚠️ Common Mistake to Avoid: If the white chocolate centers aren’t fully frozen, they’ll sink to the bottom of the mousse during freezing. Make sure they’re solid before you assemble.
Step 5: Make the Ruby Crystal Glaze
In a medium heatproof bowl, combine 1 cup finely chopped white chocolate and 1/2 cup sweetened condensed milk. Bloom 1 tablespoon of gelatin in 3 tablespoons of warm water as you did earlier. Gently heat the white chocolate and condensed milk together over a double boiler or in the microwave, stirring frequently, until the chocolate is fully melted and the mixture is smooth. Add the bloomed and liquefied gelatin to the white chocolate mixture and stir until fully incorporated. Add the ruby red food coloring a drop at a time until you achieve a deep, jewel-like red. Stir in a pinch of pearl shimmer dust for that crystal sparkle. The glaze should be smooth, glossy, and pourable. Let it cool to about 90°F — it should feel warm to the touch but not hot — before glazing.
💡 Sara’s Pro Tip: Test the glaze on the back of a spoon first. If it runs off in a smooth, even ribbon, it’s ready. If it’s too thick, add a teaspoon of warm water. If it’s too thin, let it cool a minute longer.
Step 6: Glaze the Bombs
Remove the frozen bombs from the mold by gently flexing the silicone. Place each bomb on a wire rack set over a baking sheet (to catch the excess glaze). Working one at a time, pour the ruby crystal glaze over each bomb, starting from the top and letting it flow evenly down the sides. Use a small spatula or the back of a spoon to gently nudge the glaze over any bare spots — but work quickly, as the glaze sets fast on the frozen mousse. Let the excess drip off for about 30 seconds, then transfer each glazed bomb to a clean tray or plate. Return them to the refrigerator to set for at least 15 minutes.
⚠️ Common Mistake to Avoid: If the glaze is too hot (above 95°F), it will melt the mousse and create a wrinkled, uneven surface. Always let the glaze cool to 88-90°F before glazing.
Step 7: Make the Cookie Base
In a small bowl, combine the coconut cookie crumbs, melted butter, granulated sugar, and a pinch of salt. Stir together until the mixture looks like wet sand and holds together when pressed. Using a tablespoon measure, portion the crumb mixture and press it firmly into small round discs, about 2 inches wide and 1/4 inch thick, on a parchment-lined tray. Place the bases in the refrigerator to chill while you finish the bombs.
💡 Sara’s Pro Tip: For the best cookie crumbs, pulse coconut cookies in a food processor until they’re fine crumbs with no large pieces. If you can’t find coconut cookies, shortbread cookies work just as well — just add an extra tablespoon of shredded coconut to the crumb mix.
Step 8: Final Assembly and Garnish
Remove the chilled cookie bases from the refrigerator. Place a small dab of leftover mousse or a tiny bit of melted white chocolate on the center of each base — this acts as glue. Gently place a glazed bomb on top of each base, pressing down lightly to secure it. Now for the fun part: garnish each bomb with a fresh raspberry, a sprinkle of toasted coconut flakes, and a few white chocolate curls. Use a vegetable peeler to create the curls from a block of white chocolate at room temperature. Arrange the finished bombs on a serving platter and chill for at least 15 minutes before serving. The wait is worth it — the glaze sets to a brilliant shine, and the mousse softens slightly for the perfect creamy texture.
⚠️ Common Mistake to Avoid: Don’t skip the 15-minute chill after glazing! This allows the glaze to fully set and bond to the mousse, so it doesn’t crack or slide off when you cut into the bomb.
| Step | Action | Duration | Key Visual Cue |
|---|---|---|---|
| 1 | Bloom gelatin | 5 mins | Gelatin becomes a soft, clear gel |
| 2 | Make mousse | 10 mins | Light, airy, pale pink mixture |
| 3 | Prepare white chocolate center | 5 mins + 2 hrs freeze | Firm, solid white discs |
| 4 | Assemble bombs | 10 mins + 3 hrs freeze | Domes are firm to the touch |
| 5 | Make ruby crystal glaze | 10 mins | Smooth, glossy, deep red |
| 6 | Glaze the bombs | 5 mins | Even, shiny red coating |
| 7 | Make cookie base | 5 mins | Crumbly mixture holds together |
| 8 | Final assembly and garnish | 10 mins + 15 mins chill | Bombs sit securely on base, glaze is set |
Serving & Presentation
These Ruby Raspberry Coconut Crystal Bombs are designed to be the centerpiece of any dessert table. I love serving them on a large white platter — the ruby red glaze pops beautifully against the white background, and the fresh raspberries and white chocolate curls add an elegant, candied look. For a dinner party, I sometimes place each bomb on a small square of black slate or a mirrored tile for that extra dramatic effect. The contrast between the glossy red dome, the crisp cookie base, and the bright green of a fresh mint leaf (if using) is absolutely stunning.
When it comes to serving, I recommend letting the bombs sit at room temperature for about 5-7 minutes after removing them from the fridge. This softens the mousse slightly, making it silky and luscious without losing its structure. The white chocolate center will still be firm but will melt on the tongue. For an extra touch of indulgence, drizzle a little warm raspberry coulis around the base of each bomb just before serving. I learned this trick from a Parisian pastry chef who said it “wakes up” the raspberry flavor — and she was right.
My favorite way to enjoy these is with a glass of chilled sparkling wine or a strong Moroccan mint tea — the contrast between the sweet, creamy dessert and the bright, tannic tea is something I grew up with and still adore. If you’re serving a crowd, consider pairing them with a light coconut sorbet or a simple fresh fruit salad to balance the richness.
| Pairing Type | Suggestions | Why It Works |
|---|---|---|
| Side Dish | Coconut sorbet, fresh fruit salad, or a light berry compote | Brightens the richness of the mousse and adds a fresh contrast. |
| Sauce / Dip | Warm raspberry coulis, dark chocolate ganache, or coconut caramel | Adds extra layer of flavor and visual appeal. Raspberry coulis echoes the mousse. |
| Beverage | Sparkling wine, Moroccan mint tea, espresso, or a light Pinot Noir | Acidity in tea/wine cuts through the creaminess; espresso adds contrast. |
| Garnish | Fresh mint leaves, edible gold leaf, or a dusting of powdered sugar | Adds color contrast and elevates the presentation for special occasions. |
Make-Ahead, Storage & Reheating
One of the best things about this ruby raspberry coconut crystal bombs recipe is how well it works for entertaining. In my busy NYC life, I rarely make these all in one day. I break it up: make the white chocolate centers and the mousse on a Friday evening, assemble and freeze the bombs on Saturday, and glaze and serve on Sunday. The components are very forgiving, and the final result is just as stunning as if you’d done it all in one go.
| Method | Container | Duration | Reheating Tip |
|---|---|---|---|
| Refrigerator | Airtight container, single layer | Up to 3 days | Serve straight from fridge. Let sit 5 mins at room temp. |
| Freezer | Airtight container, separated by parchment | Up to 2 months | Thaw in fridge overnight. Do not microwave. |
| Make-Ahead | Un-glazed bombs in freezer | Up to 1 week before glazing | Glaze directly from frozen — no need to thaw. |
If you’re storing already-glazed bombs, the most important thing is to keep them in a single layer in an airtight container. Stacking them will smudge the glaze and ruin that beautiful mirror finish. I learned this the hard way when I brought a batch to a friend’s party — they still tasted amazing, but they looked a little worse for wear. For the best texture, always serve these chilled, not frozen. The mousse should be firm but creamy, and the white chocolate center should still have a slight bite to it.
If you’re reheating (though honestly, these are best served cold), the only thing you might want to warm slightly is the cookie base. You can pop each bomb in a 300°F oven for 2-3 minutes, which will warm the base without melting the glaze or the mousse. But honestly, I prefer them straight from the fridge — the contrast between the cold, creamy mousse and the crisp base is part of the magic.
Variations & Easy Swaps
One of the things I love most about this recipe is how adaptable it is. Over the years, I’ve experimented with different flavors and dietary needs, and I’ve found that the basic structure — mousse, center, glaze, base — works beautifully with a wide range of ingredients. Here are three of my favorite variations.
| Variation | Key Change | Best For | Difficulty Impact |
|---|---|---|---|
| Dark Chocolate & Raspberry | Replace white chocolate center with dark chocolate ganache + raspberry | Darker, richer flavor profile | Same — medium |
| Vegan Coconut & Berry | Use coconut cream, vegan white chocolate, and agar-agar | Plant-based diet | Slightly harder — agar sets faster |
| Passion Fruit & Coconut | Replace raspberry puree with passion fruit pulp | Tropical, tangy flavor | Same — medium |
Dark Chocolate & Raspberry Variation
This is the variation I make when I’m craving something deeper and more intense. Instead of the white chocolate center, I use a dark chocolate ganache: 4 oz of 70% dark chocolate melted with 1/4 cup of heavy cream and a teaspoon of raspberry extract. The dark chocolate pairs beautifully with the tart raspberry mousse and the coconut base, creating a more sophisticated, almost French-style dessert. I sometimes add a pinch of sea salt to the ganache to bring out the cocoa notes.
Vegan Coconut & Berry Variation
For my plant-based friends, I swap the cream cheese and heavy cream for full-fat coconut cream (chilled and whipped) and use a vegan cream cheese like Miyoko’s. The gelatin can be replaced with agar-agar, but note that agar sets more firmly and at a higher temperature — you’ll need to work quickly when folding it into the mousse. For the white chocolate center, I use a vegan white chocolate bar from brands like Hu or Enjoy Life. The glaze also works with vegan white chocolate and condensed coconut milk. The texture is slightly less creamy but still delicious, and the coconut flavor is even more pronounced.
Passion Fruit & Coconut Variation
One of my favorite discoveries at the NYC farmers market was fresh passion fruit — I tried swapping the raspberry puree for passion fruit pulp in this recipe, and the result was incredible. The tangy, floral passion fruit cuts through the richness of the white chocolate and coconut in a way that feels bright and tropical. If you can’t find fresh passion fruit, use frozen passion fruit pulp (available at most Latin grocery stores). The color will be more golden than ruby red, so I adjust the food coloring accordingly — a drop of yellow and a touch of pink gives it a sunset hue. This version is a huge hit at summer parties.
Frequently Asked Questions
What is the best way to melt white chocolate for the center of Ruby Raspberry Coconut Crystal Bombs?
The best way to melt white chocolate for the white chocolate center is using a double boiler or a heatproof bowl set over a pan of simmering water. White chocolate is more delicate than dark or milk chocolate — it can seize or burn easily if exposed to high heat. Chop the white chocolate into small, even pieces and stir it gently as it melts. You can also use the microwave: heat in 20-second bursts at 50% power, stirring thoroughly between each burst. Stop as soon as the chocolate is mostly melted, then stir until the residual heat finishes the job. Never heat white chocolate above 110°F, as it can turn grainy. If you’re in a hurry, a good-quality couverture white chocolate will melt more smoothly than a standard baking bar.
Can I use frozen raspberries instead of freeze-dried for the coconut coating?
Yes, absolutely — and in fact, frozen raspberries are my preferred choice for the mousse in this ruby raspberry coconut crystal bombs recipe. The recipe calls for raspberry puree, which is best made from fresh or frozen raspberries that you thaw, blend, and strain through a fine-mesh sieve to remove the seeds. Frozen raspberries are typically picked at peak ripeness and have excellent flavor. If you’re thinking of freeze-dried raspberries, they’re better suited for a crunchy garnish or to intensify the raspberry flavor in a dry component, like the cookie base. For the mousse, stick with fresh or frozen — they provide the moisture and acidity that balances the richness of the white chocolate and coconut.
How long do these Ruby Raspberry Coconut Crystal Bombs need to set in the fridge before serving?
After the entire assembly is complete — including the glaze and final garnish — these Ruby Raspberry Coconut Crystal Bombs need at least 15 minutes in the refrigerator to let the glaze fully set and bond to the mousse. However, I recommend letting them chill for about 30 minutes for the best texture. The cookie base will firm up, the glaze will achieve that flawless mirror finish, and the mousse will soften slightly from its frozen state to a creamy, mousse-like consistency. If you’re making them ahead, you can keep them in the fridge for up to 3 days, but for the most dramatic presentation, serve them within 24 hours of glazing.
What can I substitute for ruby chocolate if I can’t find it for this recipe?
This recipe doesn’t actually use ruby chocolate — the ruby color in the glaze comes from ruby red food coloring and pearl shimmer dust. Ruby chocolate (the naturally pink variety from Callebaut) is made from the ruby cocoa bean and has a naturally fruity, berry-like flavor. If you want to replicate that flavor profile without searching for ruby chocolate, use white chocolate as the base and add a few drops of raspberry or strawberry extract along with the red food coloring. The taste will be slightly different — less fruity, more creamy — but the visual effect will be just as stunning. You can also add a teaspoon of freeze-dried raspberry powder to the glaze for natural color and flavor.
Why did my ruby crystal glaze turn out cloudy instead of clear?
A cloudy glaze is usually the result of one of three things: the glaze was too cold when you poured it, the white chocolate wasn’t fully emulsified, or the gelatin wasn’t properly dissolved. To avoid this, always let the glaze cool to about 88-90°F before glazing — if it’s too cool, it will set before it smooths out. Make sure your white chocolate is finely chopped and fully melted before you add the condensed milk and gelatin. And always bloom the gelatin in warm water (not hot) and stir until it’s completely liquefied before incorporating it into the glaze. If your glaze does turn cloudy, you can gently reheat it to 90°F and whisk it smooth again — just be careful not to overheat it.
Can I make these bombs without a silicone dome mold?
Yes, you can! While a silicone dome mold makes it easier to achieve that classic half-sphere shape, you can also use a regular muffin tin or even small glass bowls. Line the cavities with plastic wrap for easier removal. The bombs won’t be perfectly dome-shaped, but they’ll still look beautiful — think of them as more organic, “rustic crystal” shapes. Alternatively, you can pipe the mousse into small, free-form mounds on a parchment-lined tray and freeze them solid, then shape them gently with your hands before glazing. The white chocolate center can be rolled into balls by hand and frozen. I’ve made these many ways over the years, and they always turn out gorgeous.
How do I get the mirror glaze to be perfectly smooth without any streaks?
The secret to a streak-free mirror glaze is all in the temperature and technique. First, make sure your glaze is at the right temperature — 88-90°F — and that it’s been strained through a fine-mesh sieve to remove any lumps. Second, the frozen bomb must be completely smooth and free of frost or ice crystals before you pour the glaze. Wipe the frozen bombs with a clean, dry paper towel if needed. Third, pour the glaze in one steady motion over the center of the bomb, letting it flow naturally over the sides. Don’t touch it with a spatula unless absolutely necessary, and if you do, use a light touch. Finally, let the excess drip off completely before moving the bomb to a clean tray. Practice on a test bomb first — it’s worth the extra step.
Can I use a different fruit instead of raspberry for the mousse?
Absolutely! This recipe is very flexible when it comes to the fruit component. Strawberry, blackberry, or mango puree all work beautifully in place of raspberry. Keep in mind that the acidity level varies between fruits — strawberries are milder and less tart, so you may want to add a teaspoon of lemon juice to brighten the flavor. Mango is sweeter and will produce a less tangy mousse. The color will also change: strawberries give a softer pink, blackberries a deeper purple, and mango a golden yellow. Adjust the food coloring in the glaze accordingly to match your fruit choice. I’ve made a mango version that I glaze with a yellow-orange mirror — it’s like a tropical jewel.
Why did my white chocolate center sink to the bottom of the mousse?
This happens when the white chocolate centers aren’t fully frozen before you assemble the bombs. The frozen center needs to be solid enough to hold its shape and stay suspended in the mousse. If it’s even slightly soft, gravity will pull it down as the mousse sets. Make sure you freeze the white chocolate discs for at least 2 hours, or until they are rock-solid. When you place them into the mousse, gently press them down about halfway — they should be completely encased by the mousse on all sides. Another tip: don’t let the mousse sit too long at room temperature before freezing, or it will start to set around a partially thawed center, pushing it downward.
What is the best way to store leftover Ruby Raspberry Coconut Crystal Bombs?
The best way to store leftover Ruby Raspberry Coconut Crystal Bombs is in an airtight container in the refrigerator, arranged in a single layer so the glaze doesn’t get smudged or cracked. They will keep well for up to 3 days. If you need to store them for longer, you can freeze them — but do so on a tray first to set the glaze, then wrap each bomb individually in plastic wrap and place them in a freezer-safe container. They’ll keep for up to 2 months. To thaw, transfer them to the refrigerator overnight. Do not thaw at room temperature, as the glaze can sweat and lose its mirror finish. I always make an extra batch to keep in the freezer for unexpected guests — just glaze them fresh when you’re ready to serve.
Share Your Version!
I absolutely love hearing how these Ruby Raspberry Coconut Crystal Bombs turn out in your kitchen — especially the variations you come up with! Did you try the passion fruit version? Did you add a pinch of cardamom to the mousse (a trick my mother taught me that works beautifully with raspberries)? Did your kids help press the cookie bases? Drop a comment below and let me know how it went. If you’re feeling proud (and you should be!), snap a photo and tag me on Instagram or Pinterest @cheerychop — I love featuring reader creations.
And if you have a question I didn’t cover in the FAQ, please ask — I read every comment and try to respond within 24 hours. This is the kind of dessert that brings people together, and I’m honored to be part of your table.
From my NYC kitchen to yours — I hope this recipe brings as much warmth to your table as it does to mine. — Sara 🧡
Love This Recipe? Save It to Pinterest!
If you enjoyed this Ruby Raspberry Coconut Crystal Bombs recipe, don’t let it get lost in your browser tabs! 😄 Pin it now so you can find it again anytime — and explore hundreds more tried-and-tested recipes waiting for you on my Pinterest boards.
👉 Follow Sara on Pinterest @chefrecipes2
📌 Pin this recipe · 🔁 Re-pin your favorites · 💬 Tag me when you make it — I love seeing your creations!
“`
Print
Ruby Raspberry Coconut Crystal Bombs with White Chocolate Center
- Yield: 8 1x
Ingredients
- For the Raspberry Coconut Mousse:
- 1 cup raspberry puree
- 8 oz cream cheese, softened
- 1/2 cup powdered sugar
- 1 cup heavy cream
- 1/2 cup shredded coconut
- 1 tsp vanilla extract
- 1 tbsp gelatin powder
- 3 tbsp warm water
- For the White Chocolate Center:
- 4 oz white chocolate, melted
- 2 tbsp heavy cream
- 1 tbsp powdered sugar
- 1/2 tsp vanilla extract
- For the Ruby Crystal Glaze:
- 1 cup white chocolate, finely chopped
- 1/2 cup sweetened condensed milk
- 1 tbsp gelatin powder
- 3 tbsp warm water
- Ruby red food coloring, as needed
- Pearl shimmer dust, as needed
- For the Cookie Base:
- 1 cup coconut cookie crumbs
- 3 tbsp melted butter
- 1 tbsp granulated sugar
- Pinch of salt
- For Garnish (optional):
- Fresh raspberries
- Toasted coconut flakes
- White chocolate curls
Instructions
- 1. Bloom gelatin in warm water and let stand for 5 minutes.
- 2. Beat cream cheese and powdered sugar until smooth.
- 3. Mix in raspberry puree, shredded coconut, and vanilla extract.
- 4. Whip heavy cream to soft peaks and fold into the raspberry mixture.
- 5. Stir in dissolved gelatin until fully incorporated.
- 6. Whisk melted white chocolate, heavy cream, powdered sugar, and vanilla until smooth.
- 7. Pipe the white chocolate mixture into small molds and freeze until firm.
- 8. Fill silicone dome molds halfway with the raspberry coconut mousse.
- 9. Place a frozen white chocolate center into the middle of each mold.
- 10. Cover with remaining mousse and freeze until completely firm.
- 11. Combine white chocolate, condensed milk, dissolved gelatin, ruby red food coloring, and pearl shimmer dust until smooth and glossy.
- 12. Unmold the frozen bombs and place on a wire rack.
- 13. Pour the ruby crystal glaze evenly over each bomb.
- 14. Mix cookie crumbs, melted butter, sugar, and salt, then press into small round bases.
- 15. Place each glazed bomb onto a prepared base.
- 16. Garnish with fresh raspberries, toasted coconut flakes, and white chocolate curls.
- 17. Chill for 15 minutes before serving.
Nutrition
- Calories: 440
- Sugar: 33 g
- Fat: 30 g
- Carbohydrates: 39 g
- Protein: 6 g
Tried This Recipe? Leave a Comment!
Did you make this recipe? I’d love to hear how it turned out! Please leave a comment and a rating below. Your feedback helps other home cooks and supports cheerychop.com!
For more delicious inspiration, follow me on Pinterest!


