
Table of Contents
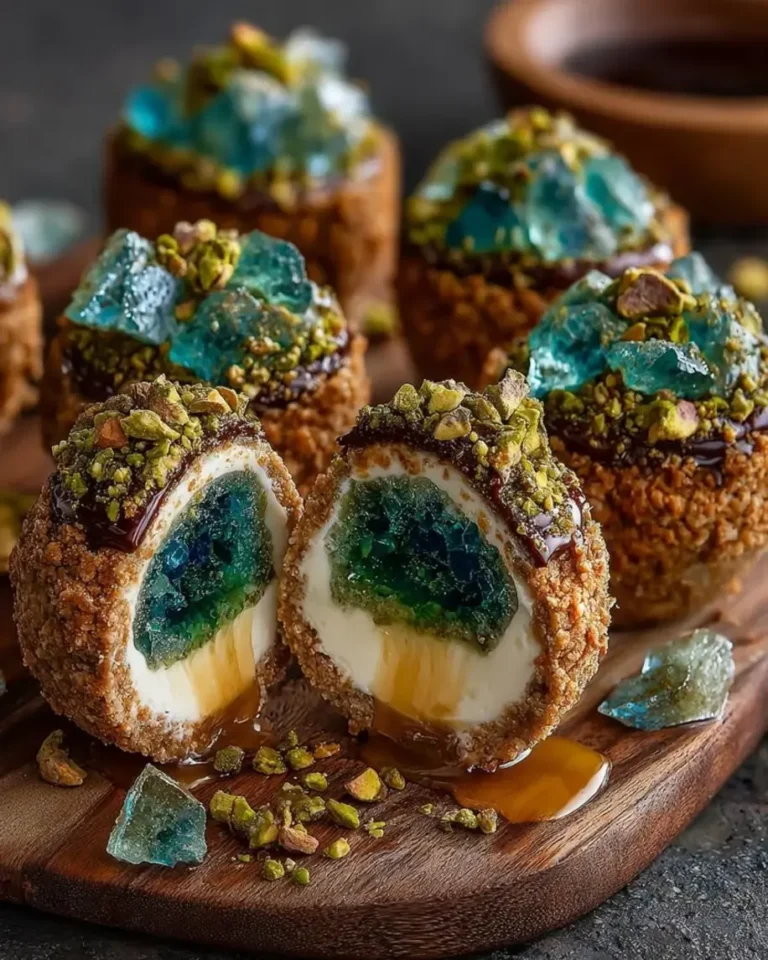
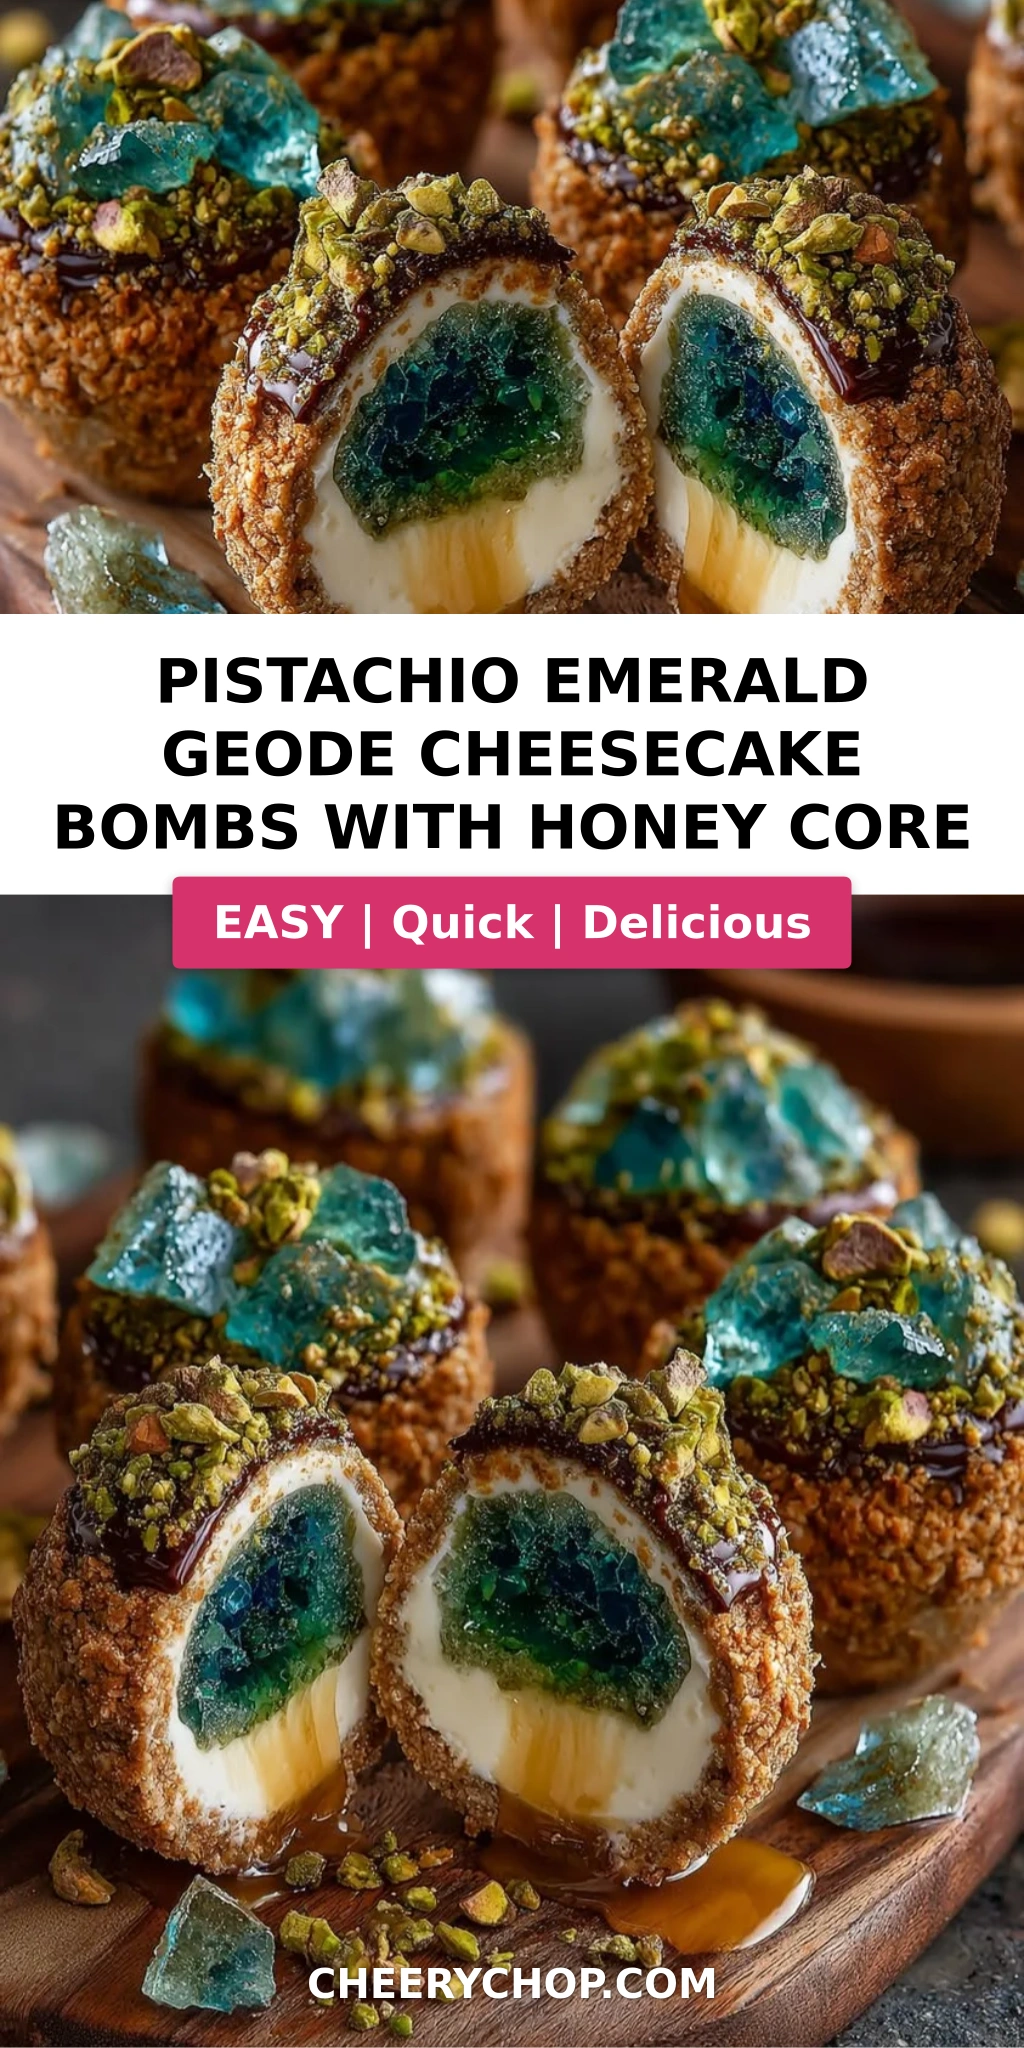
Pistachio Emerald Geode Cheesecake Bombs with Honey Core – A Spectacular Hidden-Surprise Dessert
I still remember the first time I cracked open a geode as a child in Morocco — my grandmother handed me a dull-looking rock from the Atlas Mountains, and when I tapped it with a hammer, the inside glittered with amethyst crystals. That moment of hidden beauty inspired these pistachio emerald geode cheesecake bombs with honey core, a dessert that surprises and delights with every bite. The creamy pistachio cheesecake exterior gives way to a liquid honey center, all wrapped in a crackling emerald geode candy shell that shatters like gemstone crystals.
After training at Le Cordon Bleu in Paris, I spent years perfecting the art of hidden-center desserts — from chocolate bombs to filled macarons. But this pistachio cheesecake recipe is something special. The pistachio paste brings a rich, nutty depth that pairs beautifully with the floral honey core, while the emerald geode glaze adds a theatrical crunch that makes every serving feel like a celebration. I love serving these at dinner parties in my NYC apartment — they never fail to draw gasps when guests cut into them.
What sets these pistachio dessert ideas apart from ordinary cheesecake is the technique. I use a frozen dome method that lets you build layers without mixing, and the geode candy glaze is actually simpler than it looks — I’ll show you exactly how to get that crystalline finish without a candy thermometer. One common mistake I see is rushing the freezing step, which causes the honey core to leak — but I’ll share my tested timing so yours come out perfect every time. From my NYC kitchen to yours, let’s make something stunning.
Why This Pistachio Emerald Geode Cheesecake Bombs Recipe Is the Best
The Flavor Secret: Most pistachio cheesecake recipes rely on extract alone, but I use real pistachio paste made from Sicilian pistachios — it gives a deep, almost savory nuttiness that balances the sweet honey core. Growing up in Morocco, we used pistachios in both savory and sweet dishes, and that dual-purpose approach is what makes this dessert so well-rounded. The honey core, brightened with lemon juice, cuts through the richness of the cream cheese and mascarpone in a way that feels light, not heavy.
Perfected Texture: The secret to that luscious, mousse-like texture is the gelatin-stabilized cheesecake base. I learned this technique in Paris, where we used gelatin to create silky bavarois that held their shape without being dense. By blooming the gelatin in cold water and dissolving it into a small portion of the warmed mixture, you get a dome that slices cleanly but melts on the tongue — no graininess, no brittleness. The biscuit base adds a buttery crunch that contrasts beautifully with the creamy cheesecake and the hard candy shell.
Foolproof & Fast: Despite the impressive look, this recipe is surprisingly beginner-friendly if you follow the freezing times. The components can be made in stages — the biscuit base, the cheesecake filling, the honey core, and the glaze — so you never feel overwhelmed. I’ve tested this with home cooks in my NYC cooking workshops, and even first-timers nail the geode effect. The key is patience: let the domes freeze solid, and your glaze will flow like magic.
Pistachio Emerald Geode Cheesecake Bombs Ingredients
I source my ingredients from a mix of places — the pistachio paste I get from a little Italian specialty shop in Greenwich Village, the honey from a farmer’s market in Union Square that brings in wildflower honey from the Hudson Valley, and the cream cheese from my local bodega. These pistachio emerald geode cheesecake bombs use everyday staples transformed into something extraordinary. Here’s exactly what you need.
Ingredients List
- For the Pistachio Cheesecake Shells:
- 12 oz cream cheese, softened
- 1/2 cup mascarpone cheese
- 1/2 cup heavy cream
- 1/3 cup granulated sugar
- 1 tsp vanilla extract
- 1/2 cup pistachio paste
- 2 tsp gelatin powder
- 2 tbsp cold water
- Pinch of salt
- For the Honey Core:
- 1/2 cup thick honey
- 1 tbsp lemon juice
- 1/2 tsp vanilla extract
- For the Biscuit Base:
- 1 cup digestive biscuit crumbs
- 3 tbsp melted butter
- 1 tbsp sugar
- 1/2 tsp cinnamon
- For the Emerald Geode Candy Crystals:
- 1 cup granulated sugar
- 1/2 cup water
- 1/2 cup light corn syrup
- 1 tbsp gelatin powder
- 3 tbsp cold water
- Green food coloring (emerald shade)
- 1 tsp vanilla extract
- 1 tbsp coconut oil
- For Garnish (optional):
- 2 tbsp crushed pistachios
- 1 tbsp edible gold dust
- White chocolate shards
Ingredient Spotlight
Pistachio Paste: This is the soul of the recipe. Look for 100% pistachio paste without added sugar or oils — brands like Sicilian IGP or specialty imports from Italy work beautifully. You’ll find it in well-stocked grocery stores or online. If you can’t find it, you can make your own by grinding shelled pistachios with a little oil until smooth, but it won’t be as vibrant. The paste gives the cheesecake its emerald undertone and that unmistakable nutty aroma.
Mascarpone: This Italian cream cheese adds a velvety richness that regular cream cheese alone can’t achieve. It’s higher in fat and has a delicate tang that balances the sweetness. I use it in my French-style bavarois base to keep the texture light but luxurious. Find it in the specialty cheese section of your supermarket — never substitute with more cream cheese, or the texture will be too dense.
Honey: Use a thick, flavorful honey — wildflower, orange blossom, or even chestnut honey from a farmers market. The honey core needs to be dense enough to stay in place during freezing, so avoid thin honey that will seep into the cheesecake. I love using Hudson Valley wildflower honey for its floral notes that echo the pistachio’s earthiness.
| Original Ingredient | Best Substitution | Flavor / Texture Impact |
|---|---|---|
| Pistachio paste | Homemade ground pistachios + oil | Less vibrant color, slightly grittier texture |
| Mascarpone | Full-fat cream cheese + 1 tbsp heavy cream | Denser, less velvety; still delicious |
| Digestive biscuits | Graham crackers or shortbread cookies | Sweeter base, slightly different crunch |
| Light corn syrup | Glucose syrup or agave syrup | Glaze may be slightly less clear |
| Gelatin powder | Agar agar (vegan option) | Firmer set, different mouthfeel; use 1 tbsp agar |
How to Make Pistachio Emerald Geode Cheesecake Bombs — Step-by-Step
I’ve broken this into clear stages so you can work through it without stress. The key is to keep your silicone dome molds ready and your workspace chilled — warm hands are the enemy of neat layers. Let’s make these geode cake recipe bombs shine.
Step 1: Prepare the Biscuit Base
Mix the digestive biscuit crumbs, melted butter, sugar, and cinnamon until the mixture feels like wet sand. Press a small amount (about 1 tablespoon) into the bottom of each silicone dome mold, using the back of a spoon to compact it firmly. This layer should be about 1/4 inch thick. Place the molds in the freezer while you prepare the cheesecake mixture.
💡 Sara’s Pro Tip: For an extra-crunchy base, toast the biscuit crumbs in a dry pan over medium heat for 2-3 minutes before mixing with butter. It brings out a nutty, caramelized flavor that pairs beautifully with the pistachio.
Step 2: Bloom the Gelatin
Sprinkle the 2 teaspoons of gelatin powder over the 2 tablespoons of cold water in a small bowl. Let it sit for 5 minutes until it becomes a firm, jiggly mass — this is the bloom. Meanwhile, soften your cream cheese and mascarpone to room temperature so they whip smoothly.
Step 3: Whip the Cheesecake Mixture
In a large bowl, beat the cream cheese, mascarpone, heavy cream, sugar, vanilla extract, pistachio paste, and salt with an electric mixer on medium speed until smooth and fluffy — about 3 minutes. Scrape the bowl well. In a small saucepan, gently warm about 1/2 cup of the mixture until just warm to the touch (not hot), then whisk in the bloomed gelatin until fully dissolved. Fold this back into the main cheesecake mixture until completely combined.
⚠️ Common Mistake to Avoid: Do not overheat the portion with gelatin — it should be warm, not hot. If it gets too hot, the gelatin will lose its setting power and your domes won’t hold their shape.
Step 4: Fill and Core
Spoon the cheesecake mixture into each mold until half full. In a small bowl, mix the honey with lemon juice and vanilla. Drop about 1 teaspoon of the honey mixture into the center of each mold — don’t press it in, just let it sit on top of the cheesecake layer. Carefully cover the honey with the remaining cheesecake mixture, filling the molds to the top. Smooth the tops with a small offset spatula.
Step 5: Freeze Solid
Place the filled molds in the freezer for at least 4 hours, preferably overnight. The domes need to be frozen solid to hold their shape during glazing. If you try to unmold them too early, the honey core will leak and the cheesecake will be too soft to handle.
💡 Sara’s Pro Tip: After freezing, run the outside of the silicone molds under warm water for 5 seconds before unmolding. The domes pop out cleanly without sticking, and the surface stays smooth for the glaze.
Step 6: Prepare the Geode Glaze
Bloom the 1 tablespoon of gelatin in 3 tablespoons of cold water for 5 minutes. In a small saucepan, combine the granulated sugar, water, and corn syrup. Heat over medium heat, stirring gently, until the sugar dissolves and the liquid becomes clear — about 5 minutes. Remove from heat and stir in the bloomed gelatin, vanilla extract, coconut oil, and enough green food coloring to achieve a deep emerald shade. Let the glaze cool for 10-15 minutes until it’s thick but still pourable — it should fall from a spoon in a ribbon.
⚠️ Common Mistake to Avoid: If the glaze is too hot, it will melt the frozen domes and create a mess. Test it on a spoon first — it should coat the back of the spoon in a smooth, glossy layer without running off too quickly.
Step 7: Glaze the Domes
Unmold the frozen domes and place them on a wire rack set over a baking sheet. Working quickly, pour the emerald glaze over each dome, letting it cascade down the sides in a smooth, crystalline layer. Let the excess drip off for about 30 seconds before transferring to serving plates. If the glaze in the bowl becomes too thick, gently reheat it for a few seconds in the microwave.
Step 8: Garnish and Serve
While the glaze is still slightly tacky, sprinkle crushed pistachios, edible gold dust, and white chocolate shards over the top of each dome. Serve immediately while the glaze is firm but the interior is still chilled — the contrast between the crackling shell and the creamy cheesecake is pure magic.
💡 Sara’s Pro Tip: For the white chocolate shards, melt white chocolate, spread it thin on a parchment-lined baking sheet, and let it set. Break it into irregular shards for a geode-like crystal effect that matches the emerald glaze.
| Step | Action | Duration | Key Visual Cue |
|---|---|---|---|
| 1 | Mix & press biscuit base | 5 mins | Wet sand consistency |
| 2 | Bloom gelatin | 5 mins | Firm jiggly mass |
| 3 | Whip cheesecake mixture | 3-4 mins | Smooth, fluffy, pale green |
| 4 | Fill molds & add honey core | 10 mins | Honey sits centered |
| 5 | Freeze domes | 4+ hrs | Solid to the touch |
| 6 | Cook & cool geode glaze | 15-20 mins | Glossy emerald ribbon |
| 7 | Glaze frozen domes | 5 mins | Smooth, even coating |
| 8 | Garnish & serve | 5 mins | Gold dust glistens |
Serving & Presentation
These pistachio emerald geode cheesecake bombs are a showstopper on any dessert table. I love serving them on a dark slate board or a white ceramic platter that contrasts with the emerald glaze. Place each dome with a small pool of honey or pistachio crumble underneath to anchor it, and scatter a few extra white chocolate shards and gold dust flakes around the plate for a gemstone-like display.
For a truly memorable dessert course, serve these after a Moroccan-inspired dinner like lamb tagine or couscous — the pistachio and honey notes tie everything together beautifully. In the summer, I pair them with a dollop of whipped cream and fresh berries; in winter, a dusting of cinnamon and a drizzle of warm honey sauce. The bombs are meant to be eaten within 30 minutes of glazing for the best contrast between the crackling shell and the creamy center.
| Pairing Type | Suggestions | Why It Works |
|---|---|---|
| Side Dish | Fresh berries, citrus segments, mint leaves | Bright acidity cuts the sweetness |
| Sauce / Dip | Warm honey, salted caramel, dark chocolate sauce | Enhances the honey core flavor |
| Beverage | Mint tea, espresso, dessert wine (Moscato) | Cleanses the palate, complements nuttiness |
| Garnish | Crushed pistachios, gold dust, white chocolate shards, edible flowers | Adds color, crunch, and elegance |
Make-Ahead, Storage & Reheating
As a busy NYC home cook, I rely on make-ahead strategies for entertaining. These pistachio cheesecake bombs are ideal because the domes can be frozen weeks in advance, and the glaze can be made fresh on the day you serve. Here’s my tested storage system so you always have a stunning dessert ready to go.
| Method | Container | Duration | Reheating Tip |
|---|---|---|---|
| Refrigerator | Airtight container, layered with parchment | Up to 3 days | Serve chilled, no reheating needed |
| Freezer | Freezer-safe bag or container, domes separated | Up to 2 months | Thaw in fridge 2 hrs before glazing |
| Make-Ahead | Freeze domes without glaze | Up to 2 weeks in advance | Glaze fresh on serving day for best shine |
If you’re making these for a party, I recommend freezing the domes up to 2 weeks ahead. On the day of your event, prepare the geode glaze, unmold the domes, glaze them, and garnish — all in about 30 minutes. The glazed bombs should be served within 2 hours of glazing for the best texture; after that, the candy shell may start to soften from the moisture of the cheesecake. If you have leftovers (unlikely, but possible), store them in the refrigerator and enjoy within 3 days — the shell will lose some crunch but the flavor will still be wonderful.
Variations & Easy Swaps
One of the things I love about this geode cake recipe base is how adaptable it is. Whether you need a dairy-free version or want to play with seasonal flavors, here are my favorite ways to switch it up. These variations have all been tested in my NYC kitchen — I share them with confidence.
| Variation | Key Change | Best For | Difficulty Impact |
|---|---|---|---|
| Rose & Pistachio | Add 1 tsp rose water to cheesecake mixture and use rose petals for garnish | Middle Eastern-inspired flavor | Same |
| Dairy-Free | Use vegan cream cheese, coconut cream instead of mascarpone | Dairy-sensitive guests | Slightly harder |
| Saffron Honey Core | Infuse honey with a pinch of saffron threads | Luxurious twist for special occasions | Same |
Rose & Pistachio Variation
This is my Moroccan-inspired version — adding rose water to the cheesecake mixture gives it a floral lift that reminds me of my mother’s kitchen in Marrakech. Use food-grade rose petals as garnish alongside the pistachios. The rose pairs beautifully with the honey core and the emerald glaze. Start with 1 teaspoon of rose water and adjust to taste — too much can taste like perfume.
Dairy-Free / Gluten-Free Variation
For dairy-free, substitute the cream cheese with a high-quality vegan cream cheese (I like Miyoko’s), use full-fat coconut cream for the mascarpone, and swap the heavy cream for canned coconut cream. The texture will be slightly less dense but still creamy. For gluten-free, use gluten-free graham crackers or almond flour biscuits for the base — both work perfectly. The gelatin keeps the structure stable regardless of the dairy swap.
Seasonal Fruit Core Variation
In summer, I swap the honey core for a passion fruit or raspberry curd — the tartness cuts through the pistachio richness beautifully. In fall, try a spiced apple butter or caramel core. The key is to use a thick, spoonable filling that won’t seep into the cheesecake during freezing. I found this trick at a NYC farmers market when I discovered a local farm’s stone fruit preserves that were thick enough to hold their shape.
What is the best way to create a geode effect on a pistachio cheesecake bomb?
The best way to create a geode effect is with a gelatin-based candy glaze that you pour over frozen cheesecake domes. The key is to cook the sugar, water, and corn syrup until clear, then add bloomed gelatin, vanilla, coconut oil, and emerald-green food coloring. Let the glaze cool until it’s thick but pourable — it should coat the back of a spoon in a glossy ribbon. Pour it over the frozen domes on a wire rack, letting it cascade naturally. The rapid cooling on the frozen surface creates a smooth, crystalline finish that looks like polished emerald. For extra geode texture, you can also press crushed pistachios into the glaze while it’s still tacky, and add edible gold dust for shimmer.
Can I substitute the honey core with another flavored syrup in this recipe?
Absolutely — you can substitute the honey core with other thick syrups or preserves, though the flavor profile will change. Maple syrup, date syrup, or agave nectar all work well, but they need to be thick enough to stay in place during freezing. If using a thinner syrup like maple, reduce it by simmering for 3-4 minutes until it thickens to a honey-like consistency. Fruit preserves like fig, apricot, or raspberry also make excellent cores — just warm them slightly to make them spoonable, then cool before adding. For a savory-sweet twist, try balsamic glaze or a spiced caramel. The key is always the same: the filling must be thick enough to hold its shape in the center of the cheesecake dome.
How long do I need to chill the pistachio cheesecake bombs before serving?
These pistachio cheesecake bombs need to freeze for at least 4 hours, but I recommend freezing them overnight for the best results. The domes must be completely solid to hold their shape when you unmold and glaze them — if they’re too soft, the honey core can leak and the glaze won’t set properly. After glazing, they can be served immediately while the shell is firm and the interior is still chilled. If you’ve stored them in the refrigerator after glazing, let them sit at room temperature for 5-10 minutes before serving to soften slightly — this makes the honey core runny and the cheesecake luxuriously creamy.
What type of pistachios should I use for the emerald crust coating on the bombs?
For the best emerald color and nutty flavor, use raw, unsalted shelled pistachios from Sicily or California. Sicilian pistachios from Bronte have a vibrant green hue and a slightly sweet taste that’s ideal for this dessert. If you can’t find those, California-grown raw pistachios work beautifully — just make sure they’re unsalted so the garnish stays sweet. To crush them for coating, pulse in a food processor until coarsely ground — you want pieces, not a powder. You can also toast them lightly in a dry pan for 2 minutes to deepen their flavor, but watch carefully as they burn quickly. Avoid pistachios that are dyed red or heavily salted, as those will alter the color and taste of your final dish.
Can I make these pistachio cheesecake bombs without a silicone dome mold?
Yes, you can make these without silicone dome molds by using a muffin tin or small bowls as a substitute. Line a standard 12-cup muffin tin with plastic wrap, leaving overhang on each cup. Press the biscuit base into the bottom, then fill with the cheesecake mixture and honey core as directed. Freeze until solid, then use the plastic wrap to lift the domes out. The shape will be more like a muffin top than a perfect dome, but the flavor and texture will be identical. For a more spherical shape, you can use half-sphere molds from craft stores or online — just make sure they’re food-grade silicone. The key is to have a smooth, rounded surface for the glaze to flow over.
How do I store leftover pistachio emerald geode cheesecake bombs?
Store leftover glazed pistachio emerald geode cheesecake bombs in an airtight container in the refrigerator for up to 3 days. Place them on a parchment-lined tray in a single layer, with enough space between each dome so they don’t stick together. Avoid stacking them, as the glaze can crack or stick. If you’re storing unglazed frozen domes, wrap each one individually in plastic wrap and place them in a freezer-safe bag — they’ll keep for up to 2 months. Note that after refrigeration, the geode candy shell will soften and lose some of its crackling texture. To restore some crunch, you can briefly re-glaze with a fresh warm layer, though I find they’re still delicious with a softer shell.
Can I use a different color for the geode glaze?
Absolutely — the geode glaze technique works with any color, and changing the hue creates a whole new look. For a sapphire geode, use royal blue food coloring; for a ruby, use deep red; for an amethyst, use purple. The process is identical: cook the sugar syrup, add the gelatin, and stir in your chosen color. You can also make a rainbow geode by dividing the glaze into separate bowls and coloring each portion differently, then pouring them in layers. For a more natural look, use food-grade natural colorings like matcha for green, beet powder for pink, or turmeric for gold. Just remember that natural colors may be less vibrant than artificial ones, so adjust the quantity accordingly.
Why did my geode glaze become cloudy instead of clear?
A cloudy geode glaze is usually caused by one of three issues: the sugar wasn’t fully dissolved before boiling, the gelatin bloomed improperly, or the glaze was stirred too aggressively after cooling. To prevent cloudiness, make sure you heat the sugar, water, and corn syrup until the liquid is completely clear — no visible sugar crystals should remain. Use a clean saucepan and don’t stir once the mixture starts simmering. When adding the bloomed gelatin, stir gently until just combined — over-stirring introduces air bubbles that make the glaze hazy. Also, make sure your gelatin is fully bloomed (a firm, jiggly mass) before adding it. If your glaze turns cloudy despite these precautions, you can reheat it gently and add a tablespoon of water to help clarify it.
Can I use a different nut paste instead of pistachio?
Yes, you can substitute pistachio paste with other nut pastes to create entirely different flavor profiles. Almond paste or marzipan works beautifully — it’s sweeter and milder, so reduce the sugar in the cheesecake mixture by 2 tablespoons. Hazelnut paste creates a rich, almost chocolatey flavor that pairs wonderfully with the honey core. Cashew paste gives a creamy, buttery taste that’s very neutral. For any nut paste substitution, keep the quantity the same (1/2 cup) and adjust the sugar to taste. The color of the cheesecake will change with different nuts — almond gives a pale ivory, hazelnut a warm beige, and cashew a soft cream. Adjust your geode glaze color to complement the new nut flavor.
How do I prevent the honey core from freezing solid?
The honey core won’t freeze completely solid because honey has a high sugar content and low water activity — it becomes very thick and syrupy in the freezer, but not rock-hard like ice. To ensure a liquid, runny center when served, mix the honey with lemon juice and vanilla before adding it to the molds. The acidity from the lemon juice helps keep the honey fluid at cold temperatures. Also, make sure you don’t overfill the molds — use just 1 teaspoon of honey mixture per dome so the surrounding cheesecake can insulate it. When you serve, let the glazed bombs sit at room temperature for 5-7 minutes — this warms the honey enough to become liquid without melting the cheesecake.
Share Your Version!
I absolutely love seeing how you bring these pistachio emerald geode cheesecake bombs with honey core to life in your own kitchen. Whether you stuck to the recipe exactly or added your own creative twist — like a different glaze color or a new core filling — your version is special and I want to celebrate it with you. Drop a star rating and a comment below to tell me how they turned out, what surprised you, or what you’d try differently next time. Your feedback helps me refine recipes and inspires other home cooks to dive in.
Snap a photo of your gorgeous geode bombs and share it on Instagram or Pinterest with the tag @cheerychop — I personally love scrolling through your creations and often share my favorites in my stories. Did you find the honey core trick as magical as I do? Or maybe you discovered a brilliant short-cut that made the process even smoother? Let’s keep this conversation going — your ideas spark my next creation. From my NYC kitchen to yours — I hope this recipe brings as much warmth to your table as it does to mine. — Sara 🧡
🍽️ Made this recipe? I’d love to hear from you!
⭐ Rate this recipe and share your experience in the comments below.
📸 Tag @cheerychop on Instagram or Pinterest for a chance to be featured in my stories!
Love This Recipe? Save It to Pinterest!
If you enjoyed this Pistachio Emerald Geode Cheesecake Bombs with Honey Core recipe, don’t let it get lost in your browser tabs! 😄 Pin it now so you can find it again anytime — and explore hundreds more tried-and-tested recipes waiting for you on my Pinterest boards.
👉 Follow Sara on Pinterest @chefrecipes2
📌 Pin this recipe · 🔁 Re-pin your favorites · 💬 Tag me when you make it — I love seeing your creations!
Pistachio Emerald Geode Cheesecake Bombs with Honey Core

Decadent pistachio cheesecake domes with a hidden honey core, finished with an emerald geode candy glaze and garnished with pistachios, gold dust, and white chocolate shards.
- Yield: 6 1x
Ingredients
- For the Pistachio Cheesecake Shells:
- 12 oz cream cheese, softened
- 1/2 cup mascarpone cheese
- 1/2 cup heavy cream
- 1/3 cup granulated sugar
- 1 tsp vanilla extract
- 1/2 cup pistachio paste
- 2 tsp gelatin powder
- 2 tbsp cold water
- Pinch of salt
- For the Honey Core:
- 1/2 cup thick honey
- 1 tbsp lemon juice
- 1/2 tsp vanilla extract
- For the Biscuit Base:
- 1 cup digestive biscuit crumbs
- 3 tbsp melted butter
- 1 tbsp sugar
- 1/2 tsp cinnamon
- For the Emerald Geode Candy Crystals:
- 1 cup granulated sugar
- 1/2 cup water
- 1/2 cup light corn syrup
- 1 tbsp gelatin powder
- 3 tbsp cold water
- Green food coloring (emerald shade)
- 1 tsp vanilla extract
- 1 tbsp coconut oil
- For Garnish (optional):
- 2 tbsp crushed pistachios
- 1 tbsp edible gold dust
- White chocolate shards
Instructions
- Bloom gelatin in cold water for 5 minutes.
- Mix biscuit crumbs, melted butter, sugar, and cinnamon until combined. Press into silicone dome molds to form the base layer.
- Whip cream cheese, mascarpone, heavy cream, sugar, vanilla extract, pistachio paste, and salt until smooth and fluffy.
- Warm a small portion of the mixture and dissolve the bloomed gelatin, then fold it back into the full cheesecake mixture.
- Fill molds halfway with cheesecake mixture.
- Spoon a small amount of honey mixed with lemon juice and vanilla into the center to create the hidden core. Cover with remaining cheesecake mixture and smooth tops.
- Freeze for at least 4 hours until fully set.
- For the geode glaze, bloom gelatin in cold water for 5 minutes.
- Heat sugar, water, and corn syrup until fully dissolved and clear. Remove from heat and stir in gelatin, vanilla extract, coconut oil, and green food coloring until glossy emerald.
- Allow glaze to cool until thick but pourable.
- Unmold frozen domes and place on a wire rack. Pour emerald glaze over each dome to create a crystal geode finish.
- Let excess drip off, then transfer to serving plates.
- Finish with crushed pistachios, edible gold dust, and white chocolate shards.
Nutrition
- Calories: 465
- Sugar: 33g
- Fat: 32g
- Carbohydrates: 40g
- Protein: 7g
Tried This Recipe? Leave a Comment!
Did you make this recipe? I’d love to hear how it turned out! Please leave a comment and a rating below. Your feedback helps other home cooks and supports cheerychop.com!
For more delicious inspiration, follow me on Pinterest!


