
Table of Contents
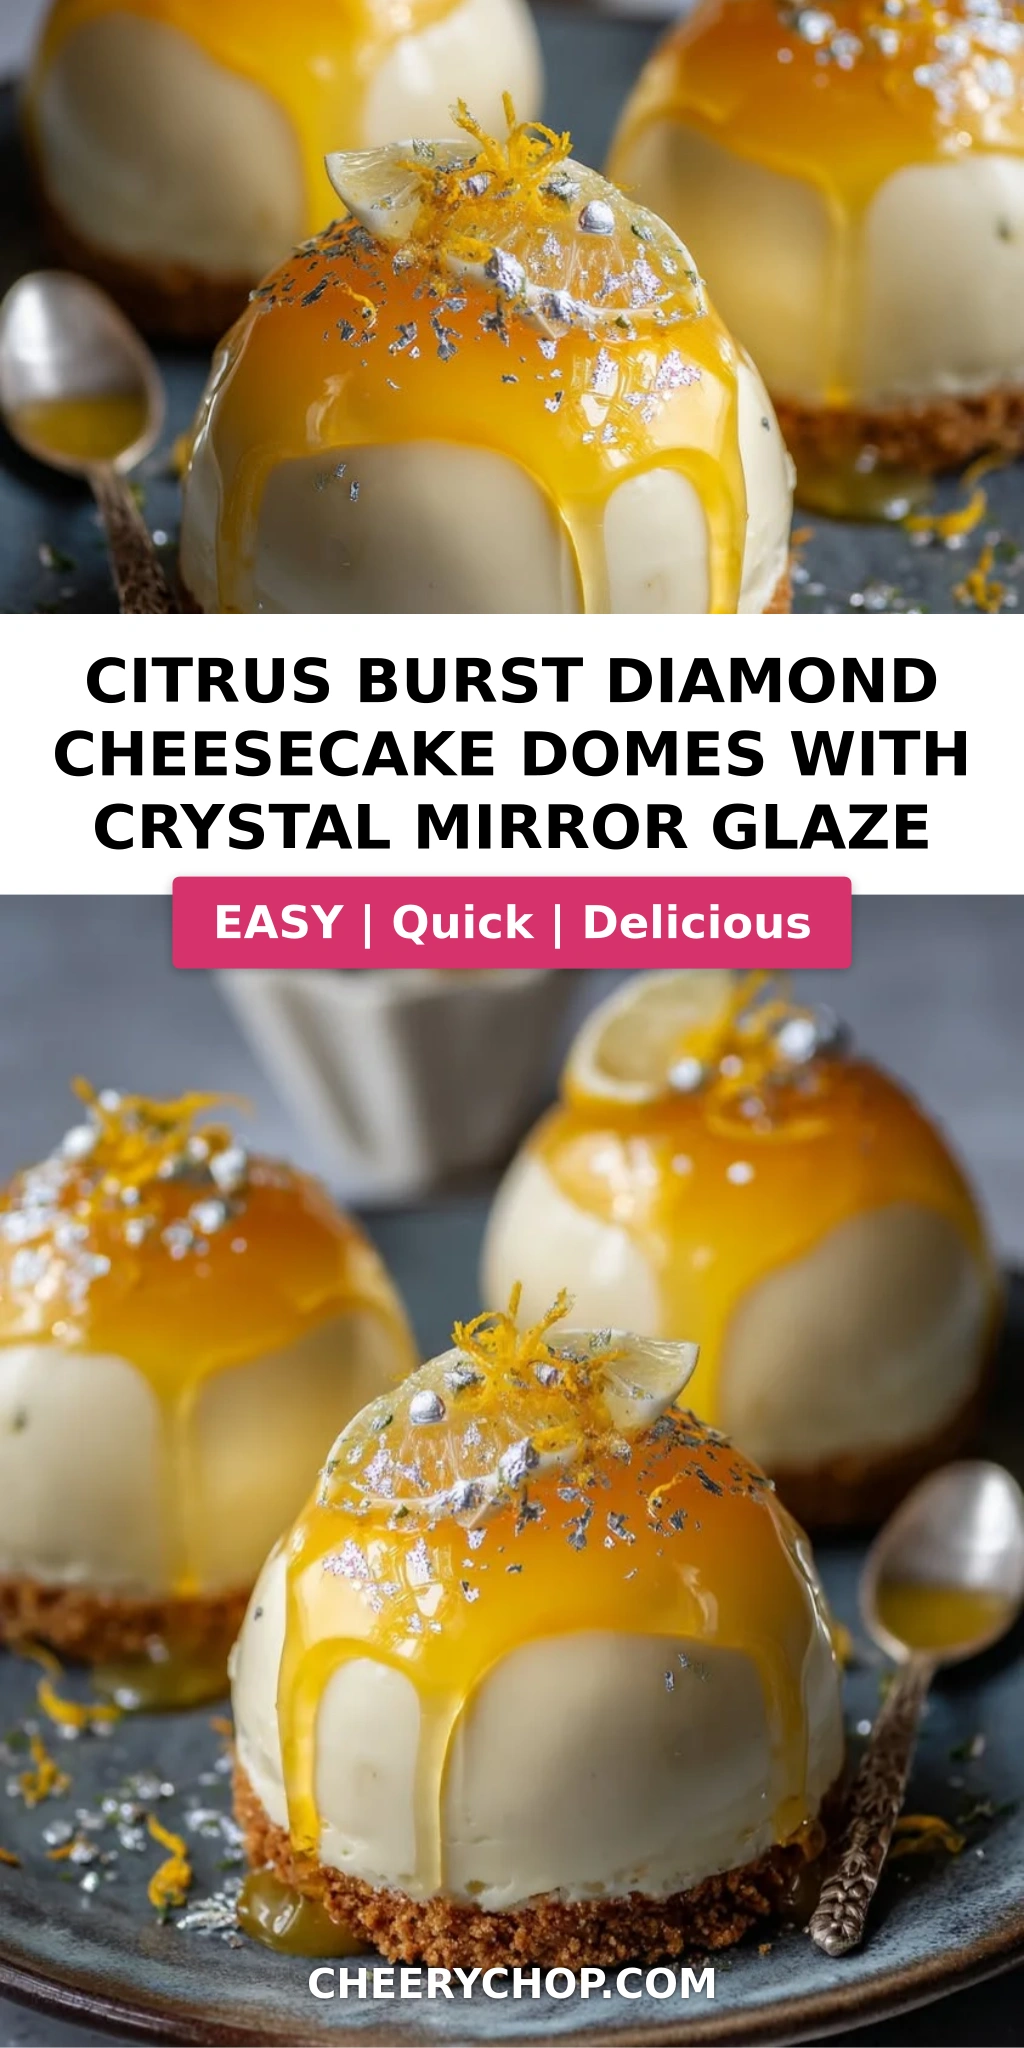
Citrus Burst Diamond Cheesecake Domes with Crystal Mirror Glaze – A Stunning Showstopper Dessert
I still remember the first time I saw a mirror glaze dome at a pastry shop in Paris. The glossy, jewel-like surface reflected the light like a polished gemstone, and I knew I had to learn that technique. Years later, after countless hours in the kitchen perfecting my French pastry skills and bringing them back to my New York City apartment, I created this mirror glaze cheesecake domes recipe that combines my love for bright citrus flavors with that stunning crystal finish. My mother’s Moroccan kitchen taught me the magic of citrus — the way orange and lemon can transform a simple dessert into something that sings. That’s the spirit behind these crystal mirror glaze cheesecake domes: a celebration of sunshine in every bite.
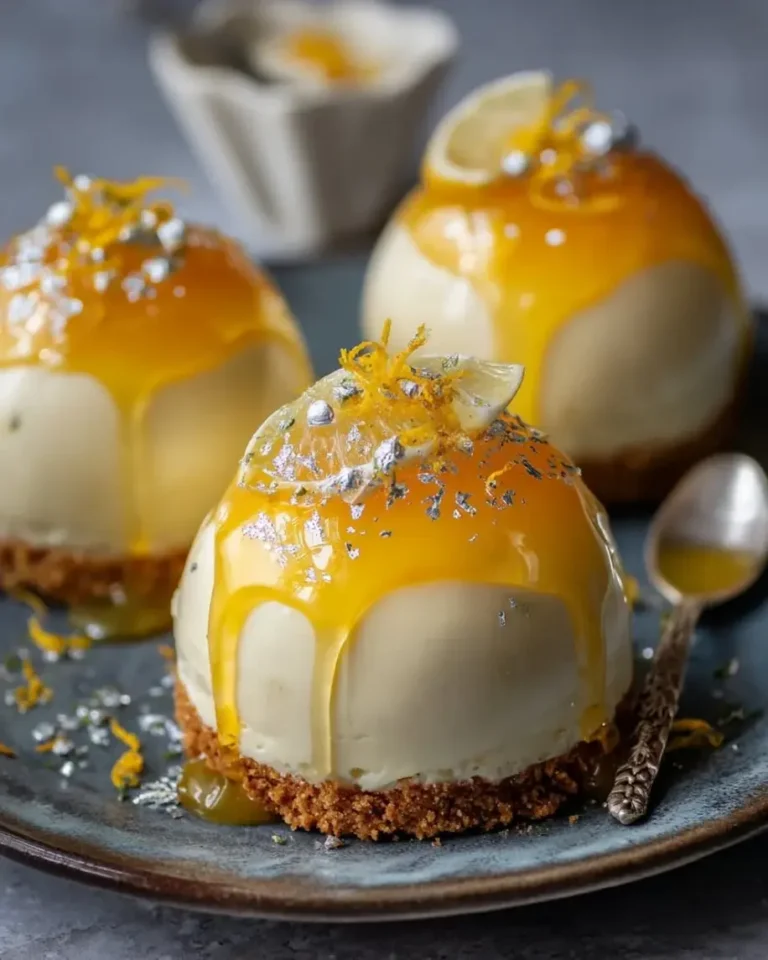
Imagine cutting into one of these diamond-shaped domes — the spoon glides through a silky, clear mirror glaze, then through a creamy citrus cheesecake filling that’s light yet indulgent. At the base, a buttery, zesty graham cracker crust adds a satisfying crunch. The glaze itself is a marvel: clear as a mountain stream, with a subtle citrus tang and a glossy finish that makes each dome look like a piece of art. A sprinkle of edible silver flakes and candied citrus peel adds a touch of elegance that turns a dinner party into a memorable event. The aroma – bright orange, zesty lime, and a whisper of vanilla – fills the room and promises something special.
This recipe is the result of years of testing and tweaking. I’ve combined the reliable structure of a classic French bavarois with the vibrant flavors of North African citrus to create a dessert that is both sophisticated and approachable. In this post, I’ll share my crystal mirror glaze cheesecake secrets — from getting a perfectly smooth, bubble-free glaze to avoiding the common mistake of overheating the gelatin. Whether you’re a seasoned baker or trying your first mirror glaze, I promise you’ll feel confident and inspired. Let’s dive into these citrus cheesecake diamond domes!
Why This Citrus Burst Diamond Cheesecake Domes Recipe Is the Best
The Flavor Secret: The key is balancing the citrus so it brightens rather than overwhelms. I use a blend of orange juice, lemon juice, and lime zest — a trick I learned from my mother, who always says “a little tartness makes the sweetness sing.” The mascarpone adds a velvety richness that tempers the acidity, while the graham cracker base gets a boost of orange zest that ties everything together. This isn’t just a cheesecake; it’s a layered experience of flavors that evolves with every bite.
Perfected Texture: The secret to the creamy yet firm consistency is in the gelatin technique. I bloom the gelatin in cold water, then dissolve it gently in a small portion of the cheesecake mixture before folding it back in. This ensures there are no lumps and the filling sets evenly. For the glaze, I use just enough gelatin to set without becoming rubbery — a common mistake is using too much. The result is a glaze that slicks perfectly and cracks beautifully when you break through it.
Foolproof & Fast: Despite the impressive appearance, this recipe is more forgiving than you might think. The free-zing step stabilizes the domes so they hold their shape during glazing, and the glaze can be made ahead and reheated gently. Even if you’re new to mirror glazes, my step-by-step instructions with visual cues will guide you to success. I’ve tested this on friends who thought they couldn’t bake — and they nailed it on the first try.
Mirror Glaze Cheesecake Domes Recipe Ingredients
When I shop for these ingredients at my local NYC farmers market or Whole Foods, I always look for the freshest citrus — heavy, fragrant, and vibrant. I love picking up a bag of juicy oranges and limes from the Union Square Greenmarket in winter; it reminds me of the citrus groves near my grandmother’s home in Marrakech. Here’s everything you’ll need:
Ingredients List
- For the Citrus Cheesecake Domes:
- 12 oz cream cheese, softened
- 1/2 cup mascarpone cheese
- 1/2 cup heavy cream
- 1/3 cup granulated sugar
- 2 tbsp orange juice
- 2 tbsp lemon juice
- 1 tsp lime zest
- 1 tsp vanilla extract
- 2 tsp gelatin powder
- 2 tbsp cold water
- Pinch of salt
- For the Citrus Biscuit Base:
- 1 cup graham cracker crumbs
- 3 tbsp melted butter
- 1 tbsp granulated sugar
- 1 tsp orange zest
- For the Crystal Mirror Glaze:
- 1 cup granulated sugar
- 1/2 cup water
- 1/2 cup light corn syrup
- 1 tbsp gelatin powder
- 3 tbsp cold water
- 2 tbsp clear citrus juice blend (orange, lemon, and lime)
- 1 tsp vanilla extract
- 1 tbsp coconut oil
- For Garnish (optional):
- 1 tbsp candied citrus peel, finely chopped
- 1 tsp lime zest
- Edible silver flakes
Ingredient Spotlight
Cream Cheese: Use full-fat, block-style cream cheese for the best texture and stability. Avoid spreadable tubs — they contain extra water and stabilizers that can make the filling weep. Let it soften completely to room temperature before mixing; cold cream cheese will leave lumps. If you need a dairy-free option, I’ve successfully used Kite Hill’s almond-based cream cheese substitute — it’s slightly less rich but still works beautifully.
Gelatin Powder: This is the backbone of both the dome filling and the mirror glaze. Use powdered gelatin (like Knox) — it’s reliable and easy to work with. Always bloom it in cold water (never warm) to ensure even hydration. For a vegetarian alternative, you can use agar agar (1 tsp agar powder to replace 2 tsp gelatin), but the texture will be slightly firmer and less creamy; it’s a good option if you’re serving a plant-based crowd.
Citrus Juice Blend: A clear citrus juice is key for the mirror glaze — it won’t cloud the clarity. I use a mix of fresh-squeezed orange, lemon, and lime, then strain it through a fine-mesh sieve to remove pulp. You can also use bottled clear citrus juice (like Santa Cruz Organic). Avoid anything with added color or pulp. If you want a different flavor, try a blend of grapefruit and Meyer lemon — it’s equally stunning.
Coconut Oil: This adds a subtle gloss and helps the glaze flow smoothly over the frozen domes. Use refined coconut oil (no coconut flavor) or substitute with a neutral oil like grapeseed. Don’t skip it — the oil is what gives the glaze that “mirror” shine.
| Original Ingredient | Best Substitution | Flavor / Texture Impact |
|---|---|---|
| Cream cheese | Neufchatel (lower fat) | Slightly less creamy, but still fine |
| Gelatin | Agar agar (1:2 ratio) | Firmer set, less creamy; good for vegans |
| Citrus juice blend | Grapefruit + Meyer lemon juice | Sweeter, less tart; lovely floral note |
| Coconut oil | Grapeseed oil | No coconut flavor, same glossy effect |
How to Make Citrus Burst Diamond Cheesecake Domes with Crystal Mirror Glaze — Step-by-Step
Don’t let the fancy name scare you — I’ll walk you through every step with clear instructions, pro tips, and common mistakes to avoid. You’ve got this!
Step 1: Bloom the Gelatin
In a small bowl, sprinkle 2 tsp gelatin powder over 2 tbsp cold water. Do not stir — let it sit undisturbed for 5 minutes. The gelatin will absorb the water and form a firm, jiggly mass. This is called “blooming” and it ensures the gelatin dissolves evenly later.
💡 Sara’s Pro Tip: Always use cold water (not warm) for blooming. Warm water will dissolve the gelatin too quickly and create lumps. If you’re in a hurry, you can speed up by blooming in ice-cold water.
Step 2: Make the Biscuit Base
In a bowl, combine 1 cup graham cracker crumbs, 3 tbsp melted butter, 1 tbsp granulated sugar, and 1 tsp orange zest. Mix with a fork until the crumbs are evenly moistened and clump together when pressed. Press a thin, even layer into each cavity of a diamond-shaped silicone mold (about 1/2-inch thick). Use a small measuring cup or your fingers to press firmly.
⚠️ Common Mistake to Avoid: Don’t press the base too thin — it should be sturdy enough to support the cheesecake. If it’s too loose, it will crumble when unmolded. Also, make sure the butter is well mixed; dry spots will cause cracks.
Step 3: Make the Cheesecake Filling
In a large mixing bowl, beat 12 oz softened cream cheese, 1/2 cup mascarpone, 1/2 cup heavy cream, 1/3 cup sugar, 2 tbsp orange juice, 2 tbsp lemon juice, 1 tsp lime zest, 1 tsp vanilla extract, and a pinch of salt. Use an electric mixer on medium speed until smooth and creamy — about 2 minutes. Scrape down the sides and beat for another 30 seconds. Do not overmix, or the filling can become too thin.
💡 Sara’s Pro Tip: Make sure all ingredients are at room temperature before mixing. Cold cream cheese will leave lumps, and cold heavy cream can cause the mixture to separate. I like to set everything out 30 minutes before starting.
Step 4: Dissolve and Incorporate Gelatin
Remove about 1/4 cup of the cheesecake mixture and place it in a small microwave-safe bowl. Heat in the microwave for 10-15 seconds until just warm (not hot). Add the bloomed gelatin and stir until it fully dissolves. Then fold this gelatin mixture back into the main cheesecake filling. Mix gently but thoroughly — you want the gelatin evenly distributed so the domes set evenly.
⚠️ Common Mistake to Avoid: Heating the gelatin too much can make it lose its setting power. Keep the portion small and warm it only until it’s lukewarm. If you don’t have a microwave, you can set the bowl in a warm water bath for a minute.
Step 5: Fill Molds and Freeze
Spoon or pipe the cheesecake filling into the diamond-shaped silicone molds over the biscuit base, filling to the top. Smooth the tops with an offset spatula. Tap the molds gently on the counter to release air bubbles. Freeze for at least 4 hours, or until completely firm (overnight is ideal).
💡 Sara’s Pro Tip: Lightly spray the molds with non-stick cooking spray before adding the base — this makes unmolding a breeze. For dome shapes, silicone molds are essential; they flex easily. If you use rigid metal molds, line with plastic wrap first.
Step 6: Bloom Gelatin for Glaze
In a small bowl, sprinkle 1 tbsp gelatin powder over 3 tbsp cold water. Let stand for 5 minutes to bloom. Meanwhile, set a wire rack over a baking sheet lined with parchment paper — you’ll glaze the domes on this rack.
⚠️ Common Mistake to Avoid: Forgetting to set up the rack and sheet before the glaze is ready can cause panic. The glaze needs to be poured immediately when it’s at the right temperature. Prep everything first!
Step 7: Heat the Glaze Base
In a small saucepan, combine 1 cup sugar, 1/2 cup water, and 1/2 cup light corn syrup. Heat over medium heat, stirring occasionally, until the sugar dissolves and the mixture becomes clear. Do not let it boil vigorously — just a gentle simmer. Remove from heat and stir in the bloomed gelatin, 2 tbsp citrus juice blend, 1 tsp vanilla, and 1 tbsp coconut oil. Stir until fully incorporated and glossy.
💡 Sara’s Pro Tip: Use a candy thermometer if you have one — the mixture should reach about 110°F (43°C) when you add the gelatin. If it’s too hot, the gelatin will weaken; if too cool, it will set too quickly. But don’t stress; even without a thermometer, you can test by dipping a spoon — the glaze should coat the back of the spoon and drip slowly.
Step 8: Cool the Glaze
Allow the glaze to cool at room temperature until it has thickened slightly but is still pourable — about 15 minutes. The ideal temperature is around 90°F (32°C). You can speed up cooling by placing the saucepan in a bowl of cold water and stirring gently. Do not chill it in the refrigerator; it may set too firm.
⚠️ Common Mistake to Avoid: Pouring the glaze when it’s too hot will melt the frozen cheesecake and create a thin, runny coating. When it’s too cool, it will set in thick blobs. Test the consistency: it should flow like warm honey.
Step 9: Unmold and Glaze
Remove the frozen domes from the molds by gently flexing the silicone. Place each dome immediately on the wire rack. Working quickly, pour the glaze over the center of each dome, letting it flow over the sides. Use a small offset spatula to nudge it down if needed. Tap the rack gently to release any air bubbles. Let the excess drip onto the parchment-lined sheet below.
💡 Sara’s Pro Tip: Work with one or two domes at a time, keeping the rest in the freezer until you’re ready. The glaze sets as it cools on the frozen surface, so don’t hesitate. If the glaze in the saucepan thickens too much, gently rewarm it over low heat and re-cool slightly.
Step 10: Refrigerate and Garnish
Carefully transfer the glazed domes to serving plates using a wide spatula. Refrigerate for at least 20 minutes to allow the glaze to fully set — this also lets the cheesecake soften slightly to a creamy texture. Just before serving, sprinkle with finely chopped candied citrus peel, a pinch of lime zest, and a few edible silver flakes.
⚠️ Common Mistake to Avoid: Adding garnishes too early — they can sink into the glaze or lose their sparkle. Wait until the glaze is set and you’re ready to serve. Also, don’t skip the refrigeration step; the domes need to thaw just a little to achieve that perfect creamy bite.
| Step | Action | Duration | Key Visual Cue |
|---|---|---|---|
| 1 | Bloom gelatin for filling | 5 mins | Gelatin turns into a firm, shiny block |
| 2 | Make biscuit base | 5 mins | Clumps hold together when pressed |
| 3 | Make cheesecake filling | 5 mins | Smooth, creamy, no lumps |
| 4 | Dissolve gelatin in filling | 2 mins | Gelatin fully dissolved, no streaks |
| 5 | Fill molds & freeze | 4+ hrs | Domes are rock solid, pop out easily |
| 6 | Bloom gelatin for glaze | 5 mins | Gelatin is firm and set |
| 7 | Heat glaze base | 5 mins | Sugar dissolved, mixture clear |
| 8 | Cool glaze | 15 mins | Thickened but flows like honey |
| 9 | Unmold and glaze | 2 mins per dome | Even, glossy coating, no bald spots |
| 10 | Refrigerate and garnish | 20 mins | Glaze is set, domes slightly soft to touch |
Serving & Presentation
These diamond-shaped domes are a showstopper on any dessert table. I love to arrange them on a large white platter, spaced evenly, with a few fresh mint leaves and edible flowers around the base. The crystal glaze catches the light beautifully, especially if you add a few silver flakes — it feels like serving edible jewelry.
For a side, consider a light citrus salad or a pile of fresh raspberries — the tartness cuts the richness of the cheesecake. A drizzle of honey-lime syrup on the plate adds an extra layer of flavor and elegance. If you’re pouring a drink, a chilled glass of Moscato d’Asti or a sparkling lemonade pairs perfectly. Growing up in Morocco, we often served similar desserts with a mint tea on the side — the contrast of hot tea and cold dessert is a sensation I still love.
When I serve these at my NYC dinner parties, I always garnish each dome just before the guests arrive: a pinch of candied citrus peel on top, a tiny pile of silver flakes, and a single fresh lime zest curl. The plates look like miniature works of art.
| Pairing Type | Suggestions | Why It Works |
|---|---|---|
| Side Dish | Fresh raspberries, citrus supremes, mint leaves | Adds bright acidity and color contrast |
| Sauce / Dip | Honey-lime syrup, passion fruit coulis, caramel sauce | Enhances the citrus notes; caramel adds warmth |
| Beverage | Moscato d’Asti, sparkling lemonade, Moroccan mint tea | Sparkling wine cuts richness; tea is a classic contrast |
| Garnish | Candied citrus peel, edible silver flakes, fresh lime zest | Adds texture and visual sparkle |
Make-Ahead, Storage & Reheating
This is the perfect dessert for hectic schedules — I often make the cheesecake domes a day or two in advance and glaze them the morning I plan to serve. Living in NYC, I’m always juggling work and family, so I rely on make-ahead recipes. The key is to keep the domes frozen until you glaze them, then refrigerate after glazing.
| Method | Container | Duration | Reheating Tip |
|---|---|---|---|
| Refrigerator | Airtight container, single layer | Up to 3 days | Serve cold; no reheating needed |
| Freezer | Freezer-safe bag or container, domes separated | Up to 1 month | Thaw in refrigerator 30 mins before serving |
| Make-Ahead | Freeze unglazed domes on a tray, then transfer to bag | Up to 2 weeks before glazing | Glaze from frozen; no thawing needed |
If you’ve already glazed the domes, store them in the refrigerator. The glaze will stay glossy for up to two days, but it may start to weep if left longer. I don’t recommend reheating these domes — the magic is in the cold, creamy texture. If you want to enjoy them slightly softer, just let them sit at room temperature for 5-10 minutes after refrigerating. One more tip from my Paris days: never store them near strong-smelling foods like onions or garlic — the glaze and the cheesecake can absorb odors.
Variations & Easy Swaps
I love playing with flavors in my kitchen, and this recipe is incredibly adaptable. Here are a few of my favorite variations, tested and approved by my dinner guests and my family back in Morocco.
| Variation | Key Change | Best For | Difficulty Impact |
|---|---|---|---|
| Berry Swirl Domes | Add 1/3 cup raspberry puree to the cheesecake filling | Valentine’s Day, romantic dinners | Easy (swirl gently) |
| Dairy-Free Version | Use vegan cream cheese, coconut cream, and dairy-free butter | Vegan guests, lactose intolerance | Moderate (texture adjustment) |
| Passion Fruit Mirror Glaze | Replace citrus juice with strained passion fruit pulp | Summer parties, tropical twist | Easy (same technique) |
Berry Swirl Domes
For a romantic twist, swirl in a raspberry puree (made by blending 1/2 cup fresh or frozen raspberries with 1 tbsp sugar, then straining). After filling the molds, drop small spoonfuls of the puree on top and use a toothpick to create a marbled pattern. The tartness of the berries plays beautifully with the citrus. I first tried this idea when I was training in Paris — the pastry chef there loved combining raspberry and lemon in elegant desserts. It’s a total crowd-pleaser.
Dairy-Free Version
To make this recipe dairy-free, swap the cream cheese with a high-quality vegan cream cheese (like Miyoko’s or Kite Hill), use full-fat coconut cream in place of heavy cream, and substitute the mascarpone with a vegan cream cheese or cashew cream. For the biscuit base, use a vegan butter or coconut oil. The texture will be slightly firmer and less rich, but still delicious. I’ve tested this several times for friends with dietary restrictions, and they always ask for seconds. One tip: be sure the vegan cream cheese is at room temperature to avoid lumps.
Passion Fruit Mirror Glaze
If you want a tropical vibe, substitute the 2 tbsp clear citrus juice blend in the glaze with 2 tbsp strained passion fruit pulp. The seeds and membranes should be removed — you want just the clear, tangy juice. The glaze will take on a beautiful golden hue and a punchy flavor that pairs wonderfully with the citrus cheesecake. I discovered this combination at a Brooklyn farmers market when I found a crate of perfectly ripe passion fruits. It’s become a summer favorite at my rooftop dinner parties.
What is the best way to achieve a smooth, bubble-free mirror glaze for the citrus cheesecake domes?
The key to a flawless mirror glaze is temperature control and air removal. First, make sure your gelatin is fully bloomed and dissolved without any lumps. When heating the sugar mixture, don’t let it boil vigorously – just a gentle simmer. After adding the gelatin and other ingredients, strain the glaze through a fine-mesh sieve into a clean bowl to catch any stray undissolved gelatin or particles. Then, let it cool to around 90°F (32°C) – if it’s too hot, it will melt the frozen dome and create bubbles; too cool, and it will set too fast. When pouring, hold the glaze about 6 inches above the dome and pour directly onto the center. Finally, gently tap the wire rack a few times to release any small air bubbles that may have formed. My Parisian pastry chef taught me this trick: if you see a bubble, pop it with a toothpick immediately.
Can I substitute the citrus fruit in the cheesecake filling for a different flavor without affecting the glaze?
Absolutely! The cheesecake filling is very forgiving and can be flavored with almost any fruit. If you switch the citrus (e.g., use only lime or grapefruit), make sure to adjust the sugar to balance tartness. For a berry version, swap the juices and zest for 1/4 cup berry puree and omit the lemon/orange. Note that the glaze is separate — you can keep the citrus mirror glaze or change it to match. For example, if you make a strawberry cheesecake dome, use a clear strawberry juice in the glaze (strained through a sieve to remove seeds). The technique stays the same. Just keep the acidity similar to ensure the gelatin sets properly. I’ve done a mango version with great success.
How far in advance can I prepare the diamond cheesecake domes before adding the crystal mirror glaze?
You can prepare the cheesecake domes (un-glazed) and freeze them up to 2 weeks in advance. Once they are fully frozen in the molds, pop them out and transfer them to a freezer-safe bag or container, separated by parchment paper. They will keep perfectly for at least two weeks. When you’re ready to glaze, simply take out the number you need, place them on a wire rack, and glaze directly from frozen – no thawing needed. The frozen dome helps the glaze set quickly and evenly. I typically make a double batch and keep a dozen in the freezer for unexpected guests. Just remember to add the final garnishes after glazing and a brief chill in the refrigerator.
What type of mold is needed to create the dome shape for this citrus cheesecake recipe?
For the diamond dome shape, you need silicone molds that are flexible and easy to unmold. I use a diamond-shaped silicone mold (similar to a large ice cube tray) that you can find at most baking supply stores or online. Silicone is essential because it allows the frozen dome to pop out without breaking the base or the cheesecake layer. If you don’t have diamond shapes, half-sphere silicone molds work beautifully too – just adjust the base layer to fit. Make sure the mold cavities are at least 1.5 inches deep to hold the biscuit base and a generous amount of cheesecake filling. Avoid metal or rigid plastic molds – they are very difficult to unmold without damaging the shape.
Can I use agar agar instead of gelatin for this mirror glaze cheesecake domes recipe?
Yes, you can substitute agar agar for gelatin to make the recipe vegetarian/vegan-friendly. Keep in mind that agar sets more firmly and at a higher temperature than gelatin. For the cheesecake filling, use 1 tsp agar powder (bloomed in 2 tbsp water) to replace 2 tsp gelatin. For the glaze, use 2 tsp agar powder (bloomed in 3 tbsp water) to replace 1 tbsp gelatin. The process is slightly different: you need to bring the agar mixture to a boil for 1-2 minutes to fully activate it, then cool slightly before incorporating. The texture will be a bit firmer and less creamy than the gelatin version, and the glaze may be less flexible (cracks rather than bends). I recommend doing a test run first if you’re new to agar.
How do I get the mirror glaze to be perfectly shiny and clear?
The shine and clarity of the mirror glaze depend on three things: the quality of your gelatin, the temperature, and the presence of oil. Use a high-quality unflavored gelatin (like Knox) and bloom it properly. Make sure your citrus juice is completely clear – strain it through a coffee filter if needed. The coconut oil (or any neutral oil) is crucial – it adds a brilliant gloss. Also, ensure the glaze is not too thick when poured; it should flow smoothly. If the glaze appears cloudy, it may be because the gelatin wasn’t fully dissolved or the mixture was overheated. I always check the consistency by dipping a spoon – the glaze should coat the back of the spoon and drip slowly. A final tip: refrigerate the glazed dome for at least 20 minutes to let the glaze set fully, which enhances the mirror-like finish.
Can I make this recipe without a thermometer?
Absolutely! You don’t necessarily need a thermometer for this recipe. For the glaze, instead of measuring temperature, you can rely on visual and tactile cues. After heating the sugar mixture, let it cool until it’s warm to the touch but not hot (like bathwater temperature). The best test is to dip the back of a spoon into the glaze – it should coat the spoon in an even, opaque layer and then slowly drip off. If it drips too quickly, it’s too warm; if it doesn’t drip at all, it’s too cool. For the cheesecake filling, just ensure the gelatin is dissolved in a warm (not hot) portion. In my early days in Paris, the chef taught me to trust my senses – you’ll develop a feel for it after a few tries.
What can I use instead of light corn syrup in the mirror glaze?
Light corn syrup is used to prevent sugar crystallization and add gloss. A good substitute is golden syrup, honey (use a mild variety like clover), or agave nectar. If using honey or agave, the glaze may be slightly thinner and less clear, but it will still work. For a sugar-free version, you can use a sugar-free syrup like Lakanto’s maple syrup, but the texture may be less stable. I’ve also used glucose syrup (available at specialty baking stores) with excellent results. When substituting, keep the quantity the same (1/2 cup). Note that honey will add a distinct flavor, so adjust your citrus juice accordingly.
Why do my cheesecake domes crack after freezing?
Cracking can happen for a few reasons. The most common cause is overmixing the cheesecake filling – too much air can create weak spots that crack as the water freezes and expands. Mix until just smooth, not fluffy. Another cause is rapid temperature changes. Freeze the domes slowly – place the molds in the freezer without covering them for the first hour, then cover. If you freeze them too quickly (like in a deep freeze), the gelatin can contract and cause cracks. Also, ensure the biscuit base is firmly pressed; an unstable base can shift and crack the filling. Finally, if you’re using a silicone mold with very thin walls, the filling might freeze too fast. A trick from my NYC kitchen: after pouring the filling, tap the mold a few times to release air bubbles, then freeze overnight – slow and steady.
Can I use a different flavor for the mirror glaze besides citrus?
Definitely! The recipe for the crystal mirror glaze is very adaptable. You can replace the 2 tbsp clear citrus juice blend with any clear fruit juice or syrup – try lychee, white grape, pear, or even a floral syrup like rose or elderflower. For a rich color, you can add a few drops of gel food coloring (avoid water-based coloring as it can make the glaze cloudy). If using a thicker syrup, you may need to adjust the water slightly (add an extra tablespoon of water to keep the right consistency). The key is to keep the liquid clear and not too acidic (high acid can weaken the gelatin). I’ve made a stunning rose-flavored glaze for Valentine’s Day – just a touch of rose water and pink coloring, and it was a hit.
Share Your Version!
I’d love to see how your Citrus Burst Diamond Cheesecake Domes turn out! Leave a star rating and comment below to let me know how it went. What citrus blend did you use? Did you try any of the variations? Tag me in your photos on Instagram or Pinterest – my handle is @cheerychop. I personally read every comment and love hearing your kitchen stories. Your feedback helps other home bakers who are considering this recipe.
If you have a question about a specific step or substitution, just ask below – I’m here to help. Happy baking, and remember: a beautiful dessert doesn’t have to be complicated. From my NYC kitchen to yours — I hope this recipe brings as much warmth to your table as it does to mine. — Sara 🧡
Love This Recipe? Save It to Pinterest!
If you enjoyed this Citrus Burst Diamond Cheesecake Domes with Crystal Mirror Glaze recipe, don’t let it get lost in your browser tabs! 😄 Pin it now so you can find it again anytime — and explore hundreds more tried-and-tested recipes waiting for you on my Pinterest boards.
👉 Follow Sara on Pinterest @chefrecipes2
📌 Pin this recipe · 🔁 Re-pin your favorites · 💬 Tag me when you make it — I love seeing your creations!
💬 I’d Love to Hear From You!
Did you make this recipe? Rate it ⭐⭐⭐⭐⭐ and tell me what you thought in the comments. Your star rating helps other readers find their next favorite dessert!
Question about a step? Drop it below — I answer every comment. — Sara 🧡
Citrus Burst Diamond Cheesecake Domes with Crystal Mirror Glaze
A stunning dessert featuring creamy citrus cheesecake domes with a crunchy biscuit base, covered in a dazzling crystal mirror glaze. Perfect for special occasions.
- Yield: 6 1x
Ingredients
- For the Citrus Cheesecake Domes:
- 12 oz cream cheese, softened
- 1/2 cup mascarpone cheese
- 1/2 cup heavy cream
- 1/3 cup granulated sugar
- 2 tbsp orange juice
- 2 tbsp lemon juice
- 1 tsp lime zest
- 1 tsp vanilla extract
- 2 tsp gelatin powder
- 2 tbsp cold water
- Pinch of salt
- For the Citrus Biscuit Base:
- 1 cup graham cracker crumbs
- 3 tbsp melted butter
- 1 tbsp granulated sugar
- 1 tsp orange zest
- For the Crystal Mirror Glaze:
- 1 cup granulated sugar
- 1/2 cup water
- 1/2 cup light corn syrup
- 1 tbsp gelatin powder
- 3 tbsp cold water
- 2 tbsp clear citrus juice blend (orange, lemon, and lime)
- 1 tsp vanilla extract
- 1 tbsp coconut oil
- For Garnish (optional):
- 1 tbsp candied citrus peel, finely chopped
- 1 tsp lime zest
- Edible silver flakes
Instructions
- Bloom 2 tsp gelatin in 2 tbsp cold water and let stand for 5 minutes.
- Mix graham cracker crumbs, melted butter, sugar, and orange zest until evenly combined. Press into diamond-shaped silicone molds to form the base layer.
- Beat cream cheese, mascarpone, heavy cream, sugar, orange juice, lemon juice, lime zest, vanilla extract, and salt until smooth and creamy.
- Warm a small portion of the cheesecake mixture and dissolve the bloomed gelatin. Fold it back into the remaining mixture until fully incorporated.
- Fill the molds over the biscuit base and smooth the tops. Freeze for at least 4 hours until completely firm.
- For the glaze, bloom 1 tbsp gelatin in 3 tbsp cold water for 5 minutes.
- Heat sugar, water, and corn syrup until fully dissolved and clear. Remove from heat and stir in the gelatin, citrus juice blend, vanilla extract, and coconut oil until glossy.
- Allow the glaze to cool until slightly thickened but still pourable.
- Unmold the frozen cheesecake domes and place them on a wire rack. Pour the crystal mirror glaze evenly over each dome, allowing excess glaze to drip away.
- Transfer to serving plates and refrigerate for 20 minutes before serving.
- Finish with candied citrus peel, lime zest, and edible silver flakes.
Nutrition
- Calories: 430
- Sugar: 33g
- Fat: 28g
- Carbohydrates: 40g
- Protein: 6g
Tried This Recipe? Leave a Comment!
Did you make this recipe? I’d love to hear how it turned out! Please leave a comment and a rating below. Your feedback helps other home cooks and supports cheerychop.com!
For more delicious inspiration, follow me on Pinterest!


