

“`html
Table of Contents
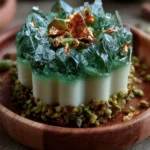
Pistachio Emerald Crown Gems – The Ultimate Gemstone Dessert
Every time I walk through the Union Square Greenmarket in fall, the jewel-toned squashes and the first tart apples always remind me of the gem-filled treasure boxes my grandmother kept in her spice cabinet in Tangier. But these Pistachio Emerald Crown Gems take the idea of a “gemstone dessert” into a whole new realm. I created this recipe after a trip to the Paris pâtisserie district, where a stunning emerald-glazed mousse cake caught my eye. Back in my NYC kitchen, I married the pistachio-rich flavors of my Moroccan childhood with the refined technique of French glacé work. The result? A crown-shaped pistachio dessert cup that shines like a green gemstone dessert — each one coated in a brilliant emerald crystal glaze recipe that looks like it was plucked from a vault of edible jewels.
The first bite is pure magic. The shell, made from pistachio paste and white chocolate, is firm yet melts on your tongue. Inside, a cloud-like vanilla cream center — made with mascarpone and vanilla bean paste — offers a cool, luxurious contrast. Then comes the glaze: a sweet, glossy, mirror-like emerald coating that shatters just slightly as you cut through, revealing the pistachio cream filled treats inside. The crushed green rock candy crystals add a subtle crunch that mimics real gem facets, while the chopped pistachios and edible gold flakes bring a toasty, earthy finish. It’s a dessert that begs to be photographed, but I promise it tastes even better than it looks.
I know that working with gelatin and glaze can feel intimidating — trust me, I’ve had my share of sticky disasters in the pastry kitchen. But I’ve refined every step so that even a home cook can achieve that flawless emerald mirror finish. My pistachio emerald crown gems are designed to be made over two days: the fill and freeze one day, glaze and garnish the next. This breaks the work into manageable chunks and ensures a stress-free, impressive result. One common mistake is over-heating the glaze, which can cause the gelatin to break and leave you with a dull, streaky finish. I’ll show you exactly how to avoid that. Ready to create your own edible crown jewels? Let’s dive in!
Why This Pistachio Emerald Crown Gems Recipe Is the Best
The Flavor Secret
The heart of this recipe is the pistachio paste — not the cheap, sweetened stuff, but a pure, high-quality paste that delivers true roasted pistachio flavor. I source mine from a small producer in Sicily that I discovered during a culinary tour, and the difference is night and day. The paste is the foundation of both the shell and the glaze, giving the entire dessert a cohesive, nutty richness. My French training taught me to balance that intensity with a touch of salt and a whisper of vanilla — a trick that makes the pistachio flavor sing without being cloying. This is the same technique I use for my Moroccan baklava-inspired desserts, and it never fails.
Perfected Texture
Texture is everything in a molded dessert. The crown shell needs to be firm enough to hold its shape after unmolding, yet tender enough to break with a spoon. My formula uses a precise ratio of gelatin to heavy cream to white chocolate, creating a shell that’s almost like a firm panna cotta. The vanilla cream center is light and airy from the whipped mascarpone cream, which I fold gently to keep it mousse-like. And the glaze — oh, the glaze! It sets with a slight chewiness from the sweetened condensed milk, but remains pourable and translucent thanks to the bloomed gelatin and luster dust. Every layer has been tested multiple times to ensure the perfect bite.
Foolproof & Fast
I know you’re busy — I live in NYC, and time is always of the essence. That’s why I designed this recipe with a make-ahead strategy. The crown gems are frozen for at least 4 hours (or overnight), which means you can prep them days ahead and glaze them the morning of your dinner party. The glaze itself comes together in under 10 minutes, and the entire glazing process takes less than 5 minutes per batch. No tempering, no complicated piping — just pour and let gravity work its magic. The silicone crown molds do the shaping for you. This is truly a dessert that looks impossible but is absolutely achievable.
Pistachio Emerald Crown Gems Ingredients
When I shop for these ingredients in NYC, I head straight to Kalustyan’s on Lexington for the pistachio paste and the pearl luster dust — they have the best selection of specialty baking items. That spice market reminds me of the souks in Marrakech, where every jar holds a promise of flavor. For regular grocery items like heavy cream and white chocolate, I trust my local Whole Foods. Quality matters here, especially the pistachio paste and the white chocolate, so don’t skimp.
Ingredients List
- For the Pistachio Emerald Crown Shells:
- 1 cup pistachio paste
- 3/4 cup heavy cream
- 1/2 cup white chocolate, finely chopped
- 1/3 cup granulated sugar
- 1 tsp vanilla extract
- 2 tsp gelatin powder
- 2 tbsp cold water
- Pinch of salt
- For the Vanilla Cream Center:
- 1 cup mascarpone cheese
- 1/2 cup heavy whipping cream
- 3 tbsp powdered sugar
- 1 tsp vanilla bean paste
- For the Emerald Crystal Glaze:
- 1 cup white chocolate, finely chopped
- 1/2 cup sweetened condensed milk
- 1/4 cup water
- 1 tbsp gelatin powder
- 3 tbsp cold water
- 1 tsp pistachio paste
- 1/2 tsp edible pearl luster dust
- Green food coloring, as needed
- For Garnish (optional):
- 2 tbsp finely chopped pistachios
- 1 tbsp crushed green rock candy crystals
- Edible gold flakes
Ingredient Spotlight
Pistachio Paste: This is the backbone of the dessert. Look for 100% pure pistachio paste, not pistachio butter or sweetened spread. I buy the Sicilian one from Rustichella d’Abruzzo — it’s worth the extra few dollars. If you can’t find it, you can make your own by grinding blanched pistachios with a little oil until smooth. The substitution will be slightly grainier, so sifting the final glaze is recommended.
White Chocolate: Use a high-quality couverture chocolate (around 30% cocoa butter) for the best melt and gloss. I love Valrhona Ivoire 35%. Cheap white chocolate can seize or result in a greasy texture. For a dairy-free version, you can use a good-quality dairy-free white chocolate, but the glaze may be less shiny.
Gelatin: Traditional powdered gelatin works perfectly. I always use Knox brand from the supermarket. For vegetarians, you can try agar-agar, but the texture will be firmer and less melt-in-the-mouth — the glaze will set like a jelly rather than a soft mirror. Not recommended for the glaze.
Edible Pearl Luster Dust: This gives the glaze that subtle shimmer that turns it from green to emerald. It’s available at specialty baking stores or online (Chef Rubber is my go-to). A tiny amount goes a long way; too much can make the glaze chalky. You can substitute with a pinch of edible white shimmer powder.
| Original Ingredient | Best Substitution | Flavor / Texture Impact |
|---|---|---|
| Pistachio paste | Homemade pistachio paste | Slightly grainier texture; sieve glaze. |
| Heavy cream | Canned coconut cream (chilled) | Lighter, coconut undertone; shell less firm. |
| Mascarpone | Full-fat cream cheese + 2 tbsp sour cream | Tangier, denser center. |
| White chocolate | Dairy-free white chocolate | Glaze less glossy; shell may be softer. |
| Edible pearl luster dust | White edible shimmer powder | Very similar shine. |
How to Make Pistachio Emerald Crown Gems — Step-by-Step
I promise this is easier than it looks. Break the work into two days: today we make and freeze the gems, tomorrow we glaze and garnish. Here’s exactly how to do it — I’ve added my pro tips and common mistakes to watch for.
Step 1: Bloom the Gelatin
Sprinkle 2 tsp gelatin powder over 2 tbsp cold water in a small bowl. Let it sit undisturbed for 5 minutes until it becomes a solid, jelly-like mass. This is called blooming. It ensures the gelatin dissolves smoothly later without clumps.
💡 Sara’s Pro Tip: Use cold water — never warm. Warm water will dissolve the gelatin prematurely and weaken its setting power. I keep a small measuring cup of ice water on the counter for this.
Step 2: Warm the Pistachio Base
In a small saucepan, combine 1 cup pistachio paste, 3/4 cup heavy cream, 1/3 cup sugar, 1 tsp vanilla, and a pinch of salt. Warm over medium heat, stirring constantly, until the mixture is smooth and steaming — about 3-4 minutes. Do not boil.
⚠️ Common Mistake to Avoid: Overheating can cause the pistachio paste to separate and become oily. If you see tiny oil droplets, remove from heat immediately and whisk vigorously to re-emulsify.
Step 3: Dissolve Gelatin and Add Chocolate
Remove the saucepan from the heat. Add the bloomed gelatin and whisk until fully dissolved — no streaks. Then add 1/2 cup finely chopped white chocolate and whisk until silky and completely melted. The mixture should look like thick, glossy caramel.
💡 Sara’s Pro Tip: If the chocolate doesn’t fully melt from the residual heat, place the saucepan over a very low flame for 10-15 seconds, whisking constantly. Better yet, use a double boiler for gentler heat.
Step 4: Fill the Molds
Pour a thin layer of the pistachio mixture into crown-shaped silicone molds — just enough to coat the bottom and sides about 1/8-inch thick. Use a small offset spatula or the back of a spoon to spread it evenly up the sides. Place the molds on a baking sheet and chill in the refrigerator for 15-20 minutes until partially set — the surface should feel tacky but not wet.
⚠️ Common Mistake to Avoid: If the mixture slides down the sides before it sets, you may have made it too thin. Chill for 5 more minutes, then add a second thin layer. Also, make sure the molds are completely dry — any moisture will prevent the shell from adhering.
Step 5: Make Vanilla Cream Center
While the shells chill, make the filling. In a large bowl, combine 1 cup mascarpone, 1/2 cup heavy whipping cream, 3 tbsp powdered sugar, and 1 tsp vanilla bean paste. Whip with a hand mixer on medium-high until light and fluffy — about 2 minutes. Don’t over-whip or it will become grainy.
💡 Sara’s Pro Tip: Chilling the mixing bowl and beaters for 10 minutes before whipping gives you a much better volume. This is a trick I picked up in a Paris pastry class — it makes the cream center extra airy.
Step 6: Fill and Cover
Spoon or pipe the vanilla cream into the partially set shells, filling each about 3/4 full, leaving a small border around the edges. Then cover the cream with the remaining pistachio mixture, spreading it smoothly to the edges. Tap the molds gently on the counter to remove any air bubbles.
⚠️ Common Mistake to Avoid: Don’t overfill! If the cream is too close to the top, the shell covering will be too thin and may crack during unmolding. Leave a 1/4-inch border.
Step 7: Freeze
Place the baking sheet with the molds in the freezer. Freeze for at least 4 hours, preferably overnight. The gems must be completely solid before unmolding and glazing.
💡 Sara’s Pro Tip: Once fully frozen, you can transfer the gems to a zip-top bag and keep them frozen for up to 2 weeks. This make-ahead step is a lifesaver for parties.
Step 8: Make Emerald Glaze
About 30 minutes before glazing, prepare the glaze. Bloom 1 tbsp gelatin in 3 tbsp cold water for 5 minutes. In a small saucepan, heat 1/2 cup sweetened condensed milk and 1/4 cup water until steaming. Remove from heat, add the bloomed gelatin, and stir until dissolved. Pour this hot mixture over 1 cup finely chopped white chocolate in a heatproof bowl. Let sit for 1 minute, then whisk until smooth and glossy.
💡 Sara’s Pro Tip: Use a rubber spatula to mix — whisking can incorporate too many air bubbles. You want a perfectly smooth, mirror-like finish.
Step 9: Color and Shimmer
Add 1 tsp pistachio paste (for extra flavor and a deeper green), 1/2 tsp edible pearl luster dust, and green food coloring drop by drop until you achieve a brilliant emerald hue. The glaze should be thick but pourable — like warm honey. If it thickens too much as it cools, gently reheat over a water bath.
⚠️ Common Mistake to Avoid: Don’t add too much luster dust — a little goes a long way. Also, use gel food coloring, not liquid, to avoid altering the glaze’s consistency.
Step 10: Unmold and Glaze
Remove the frozen gems from the molds by gently flexing the silicone. Place each gem on a wire rack set over a baking sheet (to catch drips). Working quickly, pour the emerald glaze evenly over each gem, covering the entire surface. Let the excess drip away for a few seconds.
💡 Sara’s Pro Tip: Make sure the gems are still frozen solid when you glaze. If they start to thaw, the glaze won’t set properly — it will slide off into a puddle. Work in batches if needed.
Step 11: Create the Gemstone Effect
While the glaze is still wet, sprinkle crushed green rock candy crystals onto selected areas of each gem — think of it like adding facets to a real emerald. Then immediately transfer to serving plates. The glaze will set in about 5-10 minutes.
⚠️ Common Mistake to Avoid: If you wait too long, the crystals won’t stick. Have your rock candy ready and sprinkle within 30 seconds of glazing.
Step 12: Garnish and Serve
Once the glaze is set (no longer tacky to the touch), finish with finely chopped pistachios and a few edible gold flakes. Serve immediately while still chilled. The contrast of cold, creamy center and crunchy garnish is divine.
💡 Sara’s Pro Tip: For a show-stopping presentation, serve each gem on a small mirror or a piece of black slate. The green will really pop.
| Step | Action | Duration | Key Visual Cue |
|---|---|---|---|
| 1 | Bloom gelatin | 5 mins | Gelatin becomes solid jelly |
| 2 | Warm pistachio base | 3-4 mins | Steaming, smooth |
| 3 | Dissolve gelatin + chocolate | 2 mins | Silky, glossy |
| 4 | Fill molds thin layer | 5 mins + 15-20 chill | Tacky surface |
| 5 | Make cream center | 3 mins | Light and fluffy |
| 6 | Fill and cover | 5 mins | Smooth top |
| 7 | Freeze | 4+ hours | Completely solid |
| 8 | Make glaze | 10 mins | Smooth, pourable |
| 9 | Color + shimmer | 2 mins | Brilliant emerald |
| 10 | Unmold + glaze | 5 mins | Even coverage |
| 11 | Add rock candy | 1 min | Crystals stick |
| 12 | Garnish + serve | 2 mins | Gold flakes shimmer |
Serving & Presentation
These Pistachio Emerald Crown Gems are meant to be the star of any special occasion. I love serving them as a grand finale to a dinner party — they never fail to elicit gasps. Place each gem on a small, chilled plate or a ridged dessert dish. A drizzle of extra glaze (thinned slightly with a drop of milk) around the plate adds a geode-like effect. For an extra touch, scatter a few extra crushed rock candy crystals and a pinch of gold flakes on the plate. In Morocco, we often serve sweets with mint tea — I find that a small glass of iced mint tea or a cold glass of Sauternes complements the pistachio and vanilla beautifully.
These gems also make incredible gifts. Arrange them in a beautiful box lined with green velvet or edible rice paper. I once made a dozen for a friend’s bridal shower, and they were the talk of the party. Just remember to keep them chilled until serving — they are at their best cold, when the center is still firm and the glaze is glossy. If you’re serving outdoors in summer, keep them on a tray of ice.
| Pairing Type | Suggestions | Why It Works |
|---|---|---|
| Side Dish | Light fruit salad (pomegranate seeds, oranges), fresh mint leaves | Bright acidity cuts the richness |
| Sauce / Dip | Rose syrup drizzle, extra pistachio cream | Adds floral notes, reinforces nuttiness |
| Beverage | Iced mint tea, Sauternes, espresso martini | Mint refreshes, Sauternes complements vanilla, martini for indulgence |
| Garnish | Additional crushed rock candy, edible flowers (violets), gold leaf | Enhances gemstone theme, adds elegance |
Make-Ahead, Storage & Reheating
New York life means I’m always planning ahead. These gems are perfect for make-ahead because the freezing step aligns with my weekend meal prep. I usually make the shells and fill them on Saturday, freeze overnight, then glaze on Sunday morning before guests arrive. The glaze holds its shine for about 2 hours after setting, so I glaze no more than 3 hours before serving.
| Method | Container | Duration | Reheating Tip |
|---|---|---|---|
| Refrigerator | Airtight container, single layer | 2 days | Not recommended to reheat; serve chilled |
| Freezer | Zip-top bag, between parchment layers | 2 weeks | Let thaw in fridge 2 hours before serving |
| Make-Ahead | Freeze unglazed gems up to 2 weeks; glaze day of serving | 2 weeks (unglazed) | Glaze directly from frozen; no need to thaw |
One important note: do not refreeze after glazing. The glaze will weep and lose its shine. If you have leftover glazed gems, store them in the refrigerator for up to 2 days, but the glaze may soften slightly. I still enjoy them straight from the fridge — the flavors actually deepen overnight.
Variations & Easy Swaps
| Variation | Key Change | Best For | Difficulty Impact |
|---|---|---|---|
| Almond & Rose | Substitute pistachio paste with almond paste; add 1 tsp rose water to cream center | A romantic, floral twist | Same difficulty |
| Dairy-Free Version | Use dairy-free white chocolate, coconut cream for cream center, and coconut condensed milk | Dairy-free guests | Advanced — texture changes |
| Chocolate-Orange | Replace pistachio paste with hazelnut paste; add 1 tsp orange zest to shell and glaze; use dark chocolate for glaze base | Chocolate lovers | Medium — simpler glaze |
Almond & Rose Variation
Inspired by the floral scents of Marrakech gardens, this swap uses almond paste in place of pistachio paste. I add a teaspoon of rose water to the cream center and a drop of pink food coloring to the glaze for a blush gemstone look. The result is softer, sweeter, and utterly romantic. My mother used to make a similar combination for special occasions, and it always reminds me of home.
Dairy-Free Version
Because I have friends in NYC who avoid dairy, I developed this version. Use a high-quality dairy-free white chocolate (like Pascha 55%), full-fat coconut cream (chilled and whipped for the center, plus the solid part for the shell mixture — reduce heavy cream accordingly). For the glaze, dairy-free sweetened condensed milk from Nature’s Charm works perfectly. The texture is slightly less firm, and the coconut flavor does come through a little, but it’s still delicious and beautiful.
Chocolate-Orange Variation
One cold winter evening in my Upper East Side apartment, I craved something bolder. I swapped the pistachio paste for hazelnut paste (available at Italian markets), added orange zest to the shell mixture, and replaced the white chocolate in the glaze with high-quality dark chocolate (70%). The emerald color shifts to a deep amber-green, like a citrine gemstone. The orange and hazelnut combo is a classic that never fails to impress. This variation is also slightly easier because the dark chocolate glaze is more forgiving with temperature.
What are the key ingredients needed to make Pistachio Emerald Crown Gems?
The essential ingredients are divided into three parts. For the shell: pistachio paste, heavy cream, white chocolate, sugar, vanilla, gelatin, and salt. For the vanilla cream center: mascarpone, heavy whipping cream, powdered sugar, and vanilla bean paste. For the emerald crystal glaze: white chocolate, sweetened condensed milk, water, gelatin, pistachio paste, edible pearl luster dust, and green food coloring. Optional garnishes include chopped pistachios, crushed green rock candy crystals, and edible gold flakes. The pistachio paste is the star — make sure it’s 100% pure nut paste without added sugar or fillers.
Can I substitute pistachios with another nut in this recipe?
Yes, you can substitute the pistachio paste with almond paste or hazelnut paste. Just keep in mind that the flavor profile will change significantly. Almond paste creates a sweeter, more floral dessert — perfect if you add a touch of rose water. Hazelnut paste works wonderfully with chocolate or orange accents. The texture of the shell may be slightly different because pistachio paste has less oil than almond paste; you may need to adjust the heavy cream by a tablespoon or two. For best results, use a nut paste with a similar consistency to the original.
How long do you need to bake Pistachio Emerald Crown Gems?
There is no baking involved in this recipe. The gems are made by preparing a pistachio cream mixture that sets in the freezer, and the glaze is poured over frozen gems. The active cooking time is about 30 minutes for the shell mixture and glaze, plus 5 minutes for the cream center. However, you do need to allow at least 4 hours for the gems to freeze solid after filling the molds. For best results, freeze them overnight. The glaze sets in about 5-10 minutes at room temperature. So total time from start to finish is at least 4 hours 45 minutes, but most of that is passive freezing.
What is the best way to serve or present Pistachio Emerald Crown Gems?
Serve each gem chilled on a small, elegant plate. I recommend using a dark-colored plate — black or deep green — to make the emerald glaze pop. Drizzle a little extra glaze (thinned with a drop of milk) around the plate for a geode effect. Garnish with extra chopped pistachios, a few crushed rock candy crystals, and a scattering of edible gold flakes. For special occasions, place each gem on a bed of crushed ice to keep it cold, or on a mirror tile. Pair with a glass of Sauternes, iced mint tea, or an espresso martini. They also make stunning gifts when arranged in a velvet-lined box.
Can I make these Pistachio Emerald Crown Gems ahead of time?
Absolutely! This recipe is designed for make-ahead preparation. You can prepare the unglazed gems up to 2 weeks in advance: fill the molds, freeze until solid, then transfer the frozen gems to a zip-top bag and keep frozen. On the day you want to serve, make the emerald glaze and pour it directly over the frozen gems. The glaze sets quickly, so you can glaze them up to 3 hours before serving. Once glazed, store the gems in the refrigerator for up to 2 days, but the glaze may soften slightly. Avoid freezing after glazing — the glaze will lose its shine.
How do I get the emerald glaze to be perfectly smooth and glossy?
The key to a flawless mirror glaze is temperature and technique. First, make sure your frozen gems are completely solid — if they start to thaw, the glaze will slide off. Second, use a good-quality white chocolate (around 30% cocoa butter) and finely chop it so it melts evenly. When you pour the hot condensed milk mixture over the chocolate, let it sit for 1 minute before whisking gently with a rubber spatula (not a whisk) to avoid air bubbles. Strain the glaze through a fine-mesh sieve if you see any lumps. The glaze should be around 90°F (32°C) when poured — warm but not hot. Work quickly and pour generously; let the excess drip away naturally.
What are some common mistakes when making this recipe?
The most common pitfalls are: (1) Overheating the pistachio mixture, which can cause the oils to separate and make the shell grainy. Always remove from heat before adding the gelatin and chocolate. (2) Not blooming the gelatin properly — always use cold water and let it sit for a full 5 minutes. (3) Over-whipping the mascarpone cream, which can turn it grainy or buttery. Whip just until soft peaks form. (4) Pouring the glaze over gems that are not fully frozen — if the gems are too warm, the glaze will slide off. (5) Adding too much food coloring or luster dust — start with a tiny amount and build. A little patience goes a long way!
Can I use a different shape of mold?
Yes, you can use any silicone mold you like, but crown-shaped molds are ideal because the pointed tips catch the glaze beautifully and create a gemstone illusion. If you use a round or dome mold, the result will look more like a classic entremet — still delicious, but less crown-like. Adjust the filling amount accordingly: smaller molds will yield more servings and require less freezing time. Just make sure the mold is flexible enough to unmold easily. I recommend using a mold with at least 2-inch depth to create a nice proportion between shell and filling.
Is this recipe suitable for beginners?
I would rate this recipe as advanced-intermediate because it involves several components and requires careful temperature control for the glaze and gelatin. That said, if you follow the step-by-step instructions and read through the recipe completely before starting, a determined beginner can succeed. I recommend making these over two days to reduce stress. The most critical part is the glaze — if you’ve ever made a mirror glaze before, you’ll find this straightforward. If not, watch a few online videos on pouring mirror glazes. The shell and cream center are quite forgiving. Start with my dairy-free or chocolate variation if you want a slightly easier version.
How many calories are in each Pistachio Emerald Crown Gem?
Each gem (based on 6 servings) contains approximately 470 calories, with 35g fat, 34g carbohydrates, 28g sugar, and 8g protein. This is a decadent dessert, so it’s best enjoyed as an occasional treat. The calories come mainly from the pistachio paste, heavy cream, white chocolate, and mascarpone — all rich, quality ingredients. If you’re looking to lighten the recipe, you could reduce the sugar in the shell by 2 tablespoons, or use a low-fat cream cheese substitute for the mascarpone (though the texture will change). The glaze is essential to the look, but you could use a thinner coating to save a few calories.
Share Your Version!
I can’t wait to see your Pistachio Emerald Crown Gems! Did you stick with the classic emerald glaze, or did you try one of the variations? Snap a photo and share it on Instagram or Pinterest, and tag me @cheerychop — I love seeing your creations come to life. If you have a question about a specific step or a substitution you’d like me to test, drop it in the comments below. I read every single comment and answer as many as I can. Your star rating means the world to me — it helps other home cooks find this recipe and feel confident trying it themselves.
From my NYC kitchen to yours — I hope this recipe brings as much warmth to your table as it does to mine. — Sara 🧡
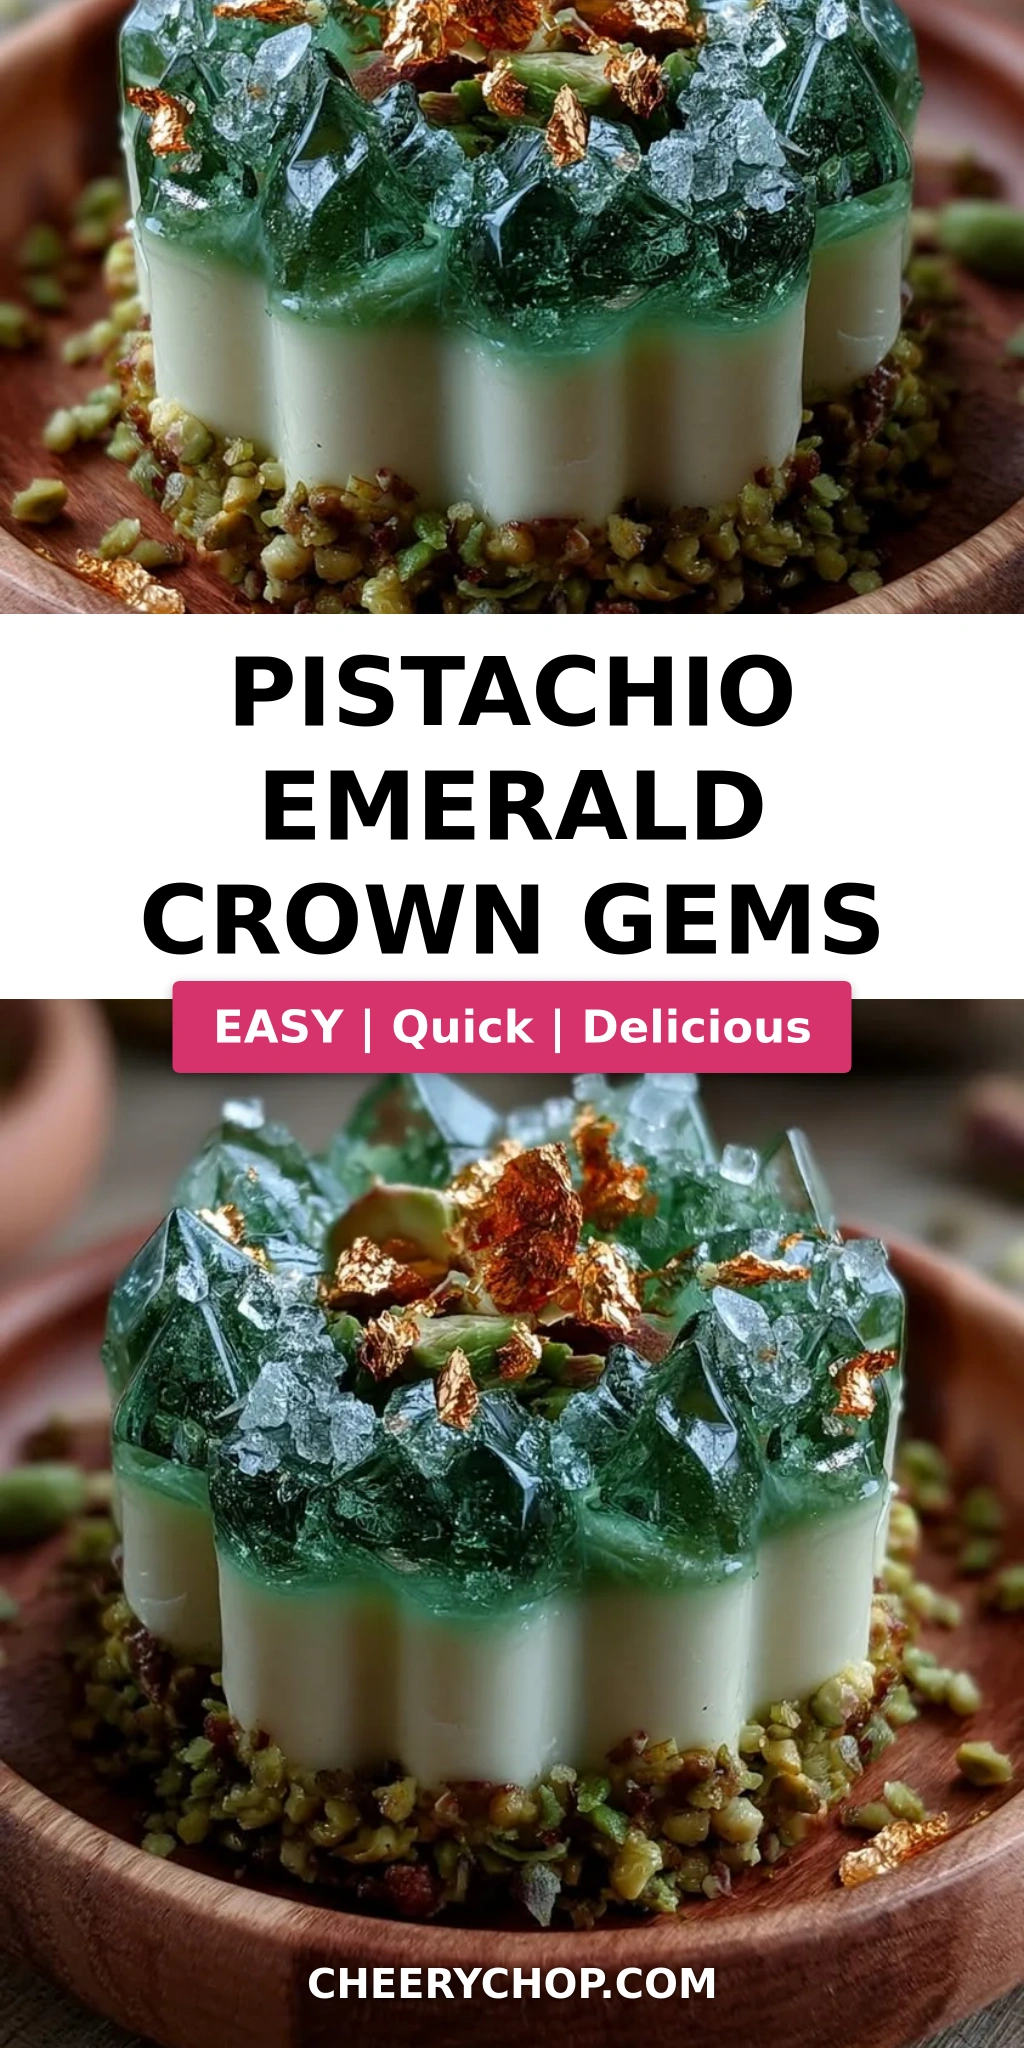
Love This Recipe? Save It to Pinterest!
If you enjoyed this Pistachio Emerald Crown Gems recipe, don’t let it get lost in your browser tabs! 😄 Pin it now so you can find it again anytime — and explore hundreds more tried-and-tested recipes waiting for you on my Pinterest boards.
👉 Follow Sara on Pinterest @chefrecipes2
📌 Pin this recipe · 🔁 Re-pin your favorites · 💬 Tag me when you make it — I love seeing your creations!
“`
Print
Pistachio Emerald Crown Gems
A luxurious dessert featuring pistachio crown shells filled with vanilla cream, enrobed in an emerald crystal glaze, and garnished with crushed rock candy crystals, chopped pistachios, and edible gold flakes.
- Yield: 6 1x
Ingredients
- For the Pistachio Emerald Crown Shells:
- 1 cup pistachio paste
- 3/4 cup heavy cream
- 1/2 cup white chocolate, finely chopped
- 1/3 cup granulated sugar
- 1 tsp vanilla extract
- 2 tsp gelatin powder
- 2 tbsp cold water
- Pinch of salt
- For the Vanilla Cream Center:
- 1 cup mascarpone cheese
- 1/2 cup heavy whipping cream
- 3 tbsp powdered sugar
- 1 tsp vanilla bean paste
- For the Emerald Crystal Glaze:
- 1 cup white chocolate, finely chopped
- 1/2 cup sweetened condensed milk
- 1/4 cup water
- 1 tbsp gelatin powder
- 3 tbsp cold water
- 1 tsp pistachio paste
- 1/2 tsp edible pearl luster dust
- Green food coloring, as needed
- For Garnish (optional):
- 2 tbsp finely chopped pistachios
- 1 tbsp crushed green rock candy crystals
- Edible gold flakes
Instructions
- Bloom gelatin in cold water for 5 minutes.
- Heat pistachio paste, heavy cream, sugar, vanilla extract, and salt until warm and smooth.
- Remove from heat and stir in the bloomed gelatin until fully dissolved.
- Add the white chocolate and whisk until silky and completely melted.
- Pour a thin layer of the pistachio mixture into crown-shaped silicone molds, coating the sides evenly.
- Chill until partially set.
- Whip mascarpone, heavy cream, powdered sugar, and vanilla bean paste until light and fluffy.
- Fill each mold with the vanilla cream center, leaving a small border around the edges.
- Cover with the remaining pistachio mixture and smooth the tops.
- Freeze for at least 4 hours until completely firm.
- For the emerald crystal glaze, bloom gelatin in cold water for 5 minutes.
- Heat sweetened condensed milk and water until steaming. Remove from heat and stir in gelatin until dissolved.
- Pour over white chocolate and whisk until smooth and glossy.
- Add pistachio paste, pearl luster dust, and green food coloring until a brilliant emerald finish is achieved.
- Allow glaze to cool until slightly thickened but still pourable.
- Unmold the frozen crown gems and place on a wire rack.
- Pour the emerald glaze evenly over each gem, allowing excess glaze to drip away.
- Sprinkle crushed green rock candy crystals onto selected areas to create a gemstone effect.
- Allow the coating to set before transferring to serving plates.
- Finish with chopped pistachios and edible gold flakes.
- Serve chilled.
Nutrition
- Calories: 470
- Sugar: 28g
- Fat: 35g
- Carbohydrates: 34g
- Protein: 8g
Tried This Recipe? Leave a Comment!
Did you make this recipe? I’d love to hear how it turned out! Please leave a comment and a rating below. Your feedback helps other home cooks and supports cheerychop.com!
For more delicious inspiration, follow me on Pinterest!


