Table of Contents
Neon Berry Mirror Domes – A Stunning Dessert for Any Celebration
I still remember the first time I saw a mirror-glazed dome in a Parisian pâtisserie window — it was like looking at a jewel. The glossy, reflective surface seemed almost too perfect to eat. Now, years later, living in New York City and cooking from my own kitchen, I love recreating that magic with a bold, colorful twist. These neon berry mirror domes are my tribute to that Parisian moment, blended with the vibrant energy of NYC and a touch of my Moroccan roots. The creamy berry mousse, the fruity center, and that slick neon mirror glaze — it’s a showstopper dessert that tastes as incredible as it looks.
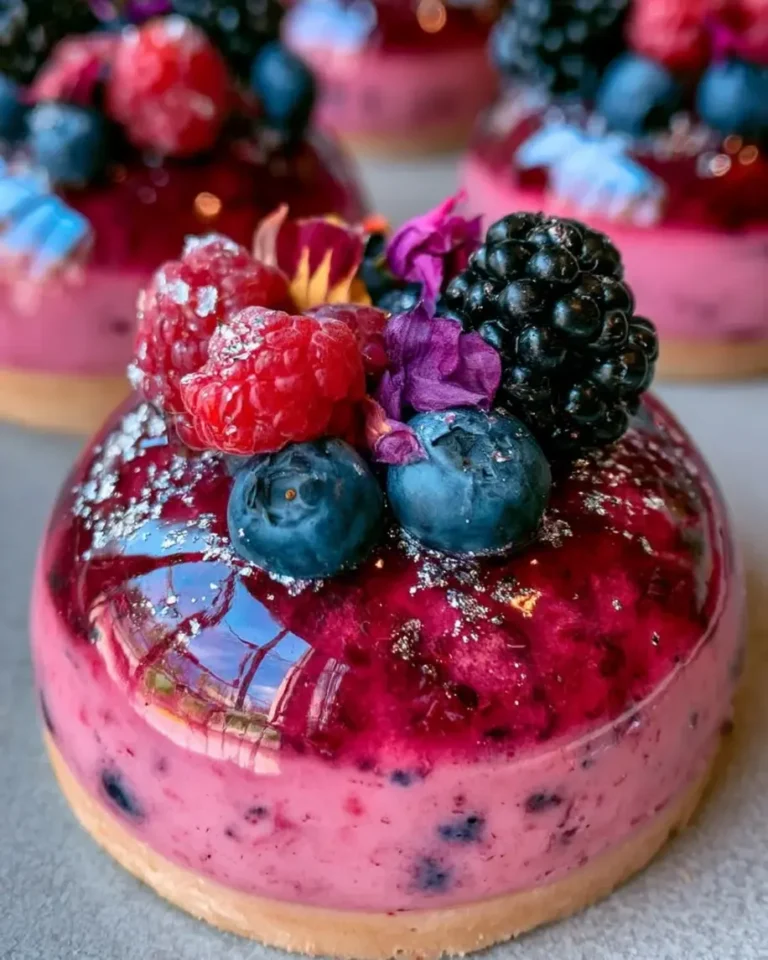
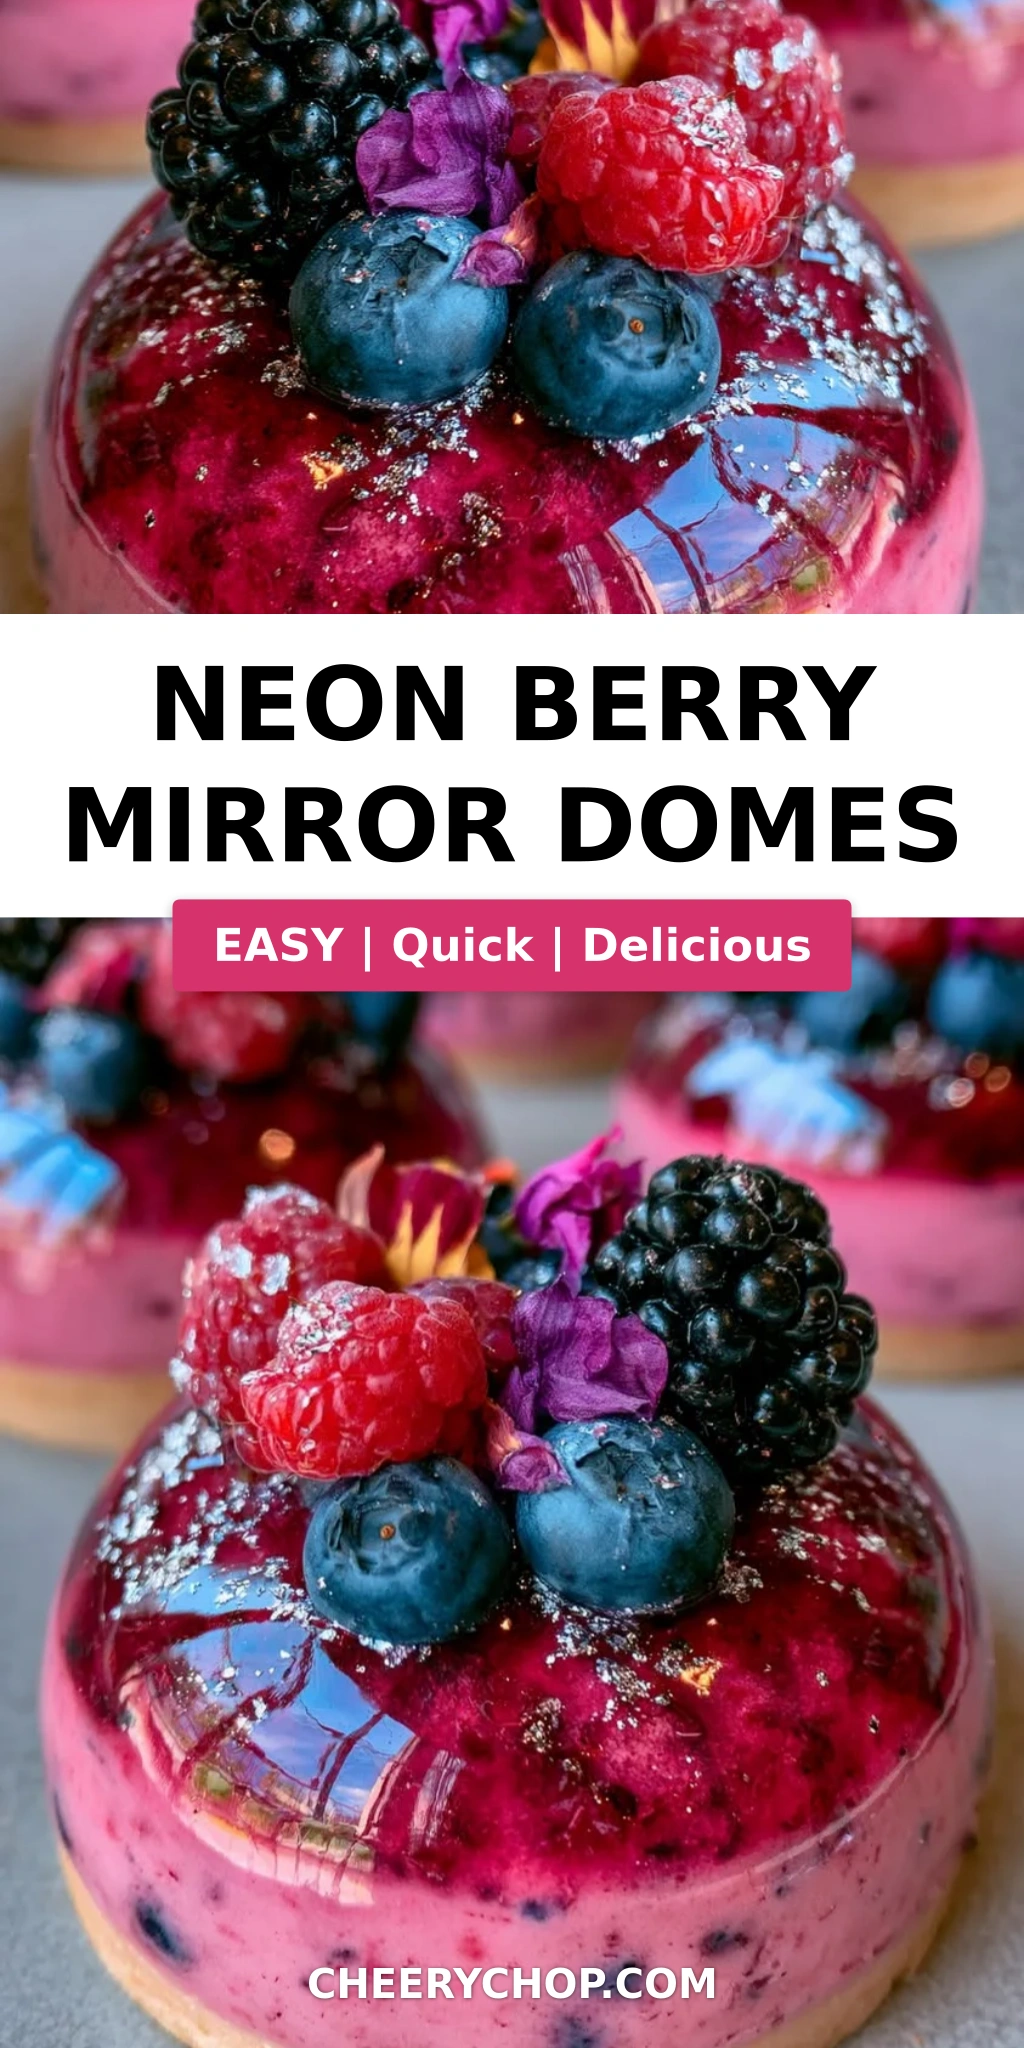
Imagine biting through a smooth, shiny shell of neon pink and purple glaze into a cloud of light, tangy berry mousse. Then you hit the center — a little pocket of raspberry preserves and fresh blueberries that bursts with bright, jammy flavor. The contrast of textures is pure magic: the firm, glossy glaze gives way to the airy mousse, and then that fruity surprise in the middle. It’s a dessert that excites all your senses before you even take a bite. The colors alone — electric pink, deep violet, and hints of neon blue — are enough to light up any table.
I’ve tested this recipe more times than I can count, tweaking the gelatin ratio, the glaze temperature, and the mousse texture until everything came together perfectly. The key to that flawless mirror finish is getting the glaze to exactly 90°F — too warm and it runs right off, too cool and it sets before you can pour. One common mistake is not freezing the domes solid before glazing — the mousse needs to be fully frozen so the warm glaze sets instantly and doesn’t soak in. Trust me, a little patience goes a long way here. Let me show you exactly how to nail it.
What Are Neon Berry Mirror Domes?
These are individual dome-shaped desserts built in layers: a frozen berry mousse base with a berry preserve center, all coated in a glossy, neon-colored mirror glaze. The glaze is made with white chocolate, sweetened condensed milk, and gel food coloring, swirled together for a marbled, electric effect. The result is a dessert that looks like art and tastes like a cloud of berries — perfect for birthdays, holidays, or any time you want to impress without spending all day in the kitchen.
Why This Neon Berry Mirror Domes Recipe Is the Best
The Flavor Secret – I use a blend of three berries — blueberries, raspberries, and blackberries — for a deep, complex fruit flavor that isn’t too sweet. The cream cheese in the mousse adds a subtle tang that balances the sweetness of the glaze, just like I learned in French pastry school. It’s a trick I picked up from my grandmother’s kitchen in Morocco, where we always balanced sweet with something bright and acidic.
Perfected Texture – The mousse is light and airy because I fold whipped cream into the berry mixture by hand, keeping as much volume as possible. The gelatin gives it just enough structure to hold its shape after freezing, so the domes release cleanly from the molds. The glaze, when poured at the right temperature, sets into a thin, mirror-like shell that cracks gently when you cut into it — exactly the texture a professional pastry chef aims for.
Foolproof & Fast – Even if you’ve never worked with mirror glaze before, this recipe is designed to work. I give you the exact temperature, the exact timing, and the exact visual cues to look for. The prep is straightforward, and most of the time is hands-off freezing. It’s a project worth every minute, and the payoff is a dessert that looks like it came from a high-end patisserie.
Neon Berry Mirror Domes Ingredients
I pick up my berries at the Union Square Greenmarket here in NYC — they’re always at their peak in summer and fall. The white chocolate for the glaze I get from a little shop in Chelsea Market that imports French couverture. The gel food coloring is key; I use Chefmaster neon pink, purple, and sometimes blue for that electric vibe. Let’s talk through everything you’ll need.
Ingredients List
- For the Berry Mousse Domes:
- 1 1/2 cups mixed berry purée (blueberries, raspberries, and blackberries)
- 1 cup heavy whipping cream
- 4 oz (115 g) cream cheese, softened
- 1/4 cup granulated sugar
- 1 tsp vanilla extract
- 2 tsp powdered gelatin
- 3 tbsp cold water
- For the Berry Center:
- 1/2 cup raspberry preserves
- 1/2 cup fresh blueberries
- 1 tbsp lemon juice
- For the Neon Mirror Glaze:
- 1/2 cup water
- 1/2 cup granulated sugar
- 1/3 cup sweetened condensed milk
- 2 tsp powdered gelatin
- 3 tbsp cold water
- 6 oz (170 g) white chocolate, finely chopped
- Neon pink and purple gel food coloring
- Neon blue gel food coloring (optional)
- For Garnish (optional):
- Fresh blackberries
- Edible flower petals
- Silver edible glitter
Ingredient Spotlight
Mixed Berry Purée: This is the backbone of the mousse. I use equal parts blueberries, raspberries, and blackberries for a balanced, not-too-tart flavor. You can find high-quality frozen berry purée in the freezer aisle, or make your own by blending thawed frozen berries and straining out the seeds. If you use fresh, just simmer them with a tablespoon of water for a few minutes to soften before blending.
White Chocolate: For the mirror glaze, you want a good-quality white chocolate with at least 30% cocoa butter. Cheap white chocolate won’t melt as smoothly and can seize, ruining the glaze. I like Valrhona or Callebaut — they’re available at specialty baking stores or online. If you’re in a pinch, Ghirardelli white chips work well too.
Gel Food Coloring: Liquid food coloring won’t give you the intense neon colors you want. Gel or paste colors are concentrated and won’t thin out the glaze. I use AmeriColor or Chefmaster neon shades. A little goes a long way — start with a toothpick amount and add more until you reach the desired brightness.
| Original Ingredient | Best Substitution | Flavor / Texture Impact |
|---|---|---|
| Mixed berry purée | Strawberry or mango purée | Sweeter, less tart; adjust sugar |
| Cream cheese | Mascarpone or Greek yogurt (full-fat) | Richer (mascarpone) / tangier (yogurt) |
| Powdered gelatin | Agar-agar (for vegetarian version) | Firmer set; use 1 tsp agar-agar per 2 tsp gelatin |
| White chocolate | High-quality white candy melts | Slightly different mouthfeel; still glossy |
How to Make Neon Berry Mirror Domes — Step-by-Step
This process looks involved, but I’ve broken it into simple stages. Work through them one at a time, and you’ll be rewarded with gorgeous, glossy domes that taste as good as they look.
Step 1: Bloom the Gelatin for the Mousse
Sprinkle the 2 teaspoons of powdered gelatin over 3 tablespoons of cold water in a small bowl. Let it sit for 5 minutes until it becomes a firm, jiggly mass. This process, called blooming, hydrates the gelatin so it dissolves smoothly into the cream later. Don’t skip this step — adding dry gelatin directly to the cream will give you lumps.
💡 Sara’s Pro Tip: Use cold water, not warm, for blooming. Warm water will partially dissolve the gelatin and create an uneven texture in your mousse.
Step 2: Heat the Cream and Dissolve the Gelatin
Heat 1/4 cup of the heavy cream in a small saucepan until it’s steaming but not boiling — small bubbles around the edge are your cue. Remove from heat and stir in the bloomed gelatin until completely dissolved. The mixture should look clear and smooth. Set it aside to cool slightly while you prepare the berry base.
Step 3: Blend the Mousse Base
In a blender, combine the berry purée, softened cream cheese, sugar, vanilla extract, and the warm cream-gelatin mixture. Blend until completely smooth and creamy, scraping down the sides as needed. The color should be a deep, even magenta. Taste it — it should be sweet but with a bright berry tang.
⚠️ Common Mistake to Avoid: Over-blending can incorporate too much air and make the mousse foamy instead of creamy. Blend just until smooth, about 30 seconds.
Step 4: Whip and Fold the Cream
In a separate bowl, whip the remaining 3/4 cup of heavy cream to soft peaks — the cream should hold a gentle shape when you lift the whisk but still be soft and billowy. Gently fold the whipped cream into the berry mixture in three additions, using a spatula. Fold just until no white streaks remain. Over-folding will deflate the mousse and make it dense.
💡 Sara’s Pro Tip: Use a large, wide bowl for folding — gives you more room to move the spatula gently without deflating the cream.
Step 5: Make the Berry Center
In a small bowl, mix the raspberry preserves, fresh blueberries, and lemon juice. Stir until combined. The lemon juice brightens the preserves and adds a little acidity that cuts through the sweet mousse. This mixture will be spooned into the center of each dome for that fruity surprise.
Step 6: Assemble and Freeze the Domes
Fill silicone dome molds halfway with the berry mousse. Spoon about 1 teaspoon of the berry center mixture into the middle of each dome, then cover with more mousse until the mold is full. Smooth the tops with an offset spatula. Freeze for at least 6 hours, or overnight. The domes must be completely solid before glazing — this is non-negotiable for a perfect finish.
⚠️ Common Mistake to Avoid: Don’t overfill the molds. Leave a tiny gap at the top so the mousse doesn’t bulge out during freezing. Bulging domes won’t sit flat on the rack for glazing.
Step 7: Prepare the Neon Mirror Glaze
Bloom the 2 teaspoons of gelatin in 3 tablespoons of cold water for 5 minutes. In a small saucepan, combine 1/2 cup water, 1/2 cup sugar, and 1/3 cup sweetened condensed milk. Heat over medium, stirring, until the sugar dissolves — about 3 minutes. Remove from heat and stir in the bloomed gelatin until smooth. Pour this hot mixture over 6 oz of finely chopped white chocolate in a bowl. Let it sit for 2 minutes, then stir gently until the chocolate is fully melted and the glaze is smooth.
💡 Sara’s Pro Tip: Chop your white chocolate very finely — the finer it is, the faster and more evenly it melts. Large chunks can leave lumps in your glaze.
Step 8: Color and Swirl
Divide the warm glaze into separate bowls. Add neon pink gel coloring to one, neon purple to another, and neon blue (if using) to a third. Stir each gently until the color is uniform. Then, pour the colors together into one bowl, and use a skewer or toothpick to swirl them gently — just a few passes. Don’t overmix; you want distinct ribbons of color, not a muddy blend.
⚠️ Common Mistake to Avoid: Over-swirling creates a muddy brown-purple mess. Two or three figure-eight motions with a skewer is enough.
Step 9: Cool the Glaze to the Perfect Temperature
Let the glaze cool to 90°F (32°C), checking with an instant-read thermometer. This is the sweet spot — fluid enough to flow smoothly over the domes, but cool enough to set quickly on contact with the frozen mousse. If the glaze is too warm, it will run right off and leave a thin, uneven coating. If too cool, it will set in thick, gloppy streaks.
💡 Sara’s Pro Tip: Stir the glaze gently as it cools to prevent a skin from forming on the surface. If a skin does form, strain the glaze through a fine-mesh sieve before using.
Step 10: Unmold and Glaze
Remove the frozen domes from the molds. They should pop out easily — if they stick, dip the bottom of the mold in warm water for a few seconds. Place each dome on a wire rack set over a baking sheet. Pour the cooled glaze evenly over each dome, starting from the center and letting it flow down the sides. The excess will drip through the rack into the pan below.
Step 11: Garnish and Set
Transfer the glazed domes to serving plates immediately. Garnish with fresh blackberries, edible flower petals, and a pinch of silver edible glitter while the glaze is still slightly tacky — this helps the garnishes stick. Refrigerate for 20 minutes to let the glaze fully set before serving. The domes are best served within a few hours of glazing for the most dramatic mirror shine.
⚠️ Common Mistake to Avoid: Don’t skip the 20-minute chill in the fridge. It sets the glaze to a clean, firm shell that won’t smudge when you handle the domes.
| Step | Action | Duration | Key Visual Cue |
|---|---|---|---|
| 1 | Bloom gelatin for mousse | 5 min | Firm, jiggly mass |
| 2 | Heat cream & dissolve gelatin | 2 min | Steaming, no bubbles |
| 3 | Blend mousse base | 30 sec | Smooth, uniform magenta |
| 4 | Whip cream & fold | 3 min | Soft peaks, no white streaks |
| 5 | Make berry center | 2 min | Combined, slightly chunky |
| 6 | Fill molds & freeze | 6+ hours | Fully solid, no give |
| 7 | Prepare mirror glaze | 8 min | Smooth, glossy, no lumps |
| 8 | Color & swirl | 3 min | Ribbons of color |
| 9 | Cool glaze | 10–15 min | 90°F on thermometer |
| 10 | Unmold & glaze | 5 min | Evens coating, drips set |
| 11 | Garnish & refrigerate | 20 min | Glaze is firm to the touch |
Serving & Presentation
These domes are meant to be the centerpiece of your dessert table. I serve them on simple white plates so the neon colors really pop. A small dollop of whipped cream or a drizzle of extra raspberry sauce underneath adds a nice contrast. For a truly stunning presentation, arrange a few fresh blackberries and a tiny edible flower on top of each dome — it adds a natural, organic touch against the slick, artificial-looking glaze.
In my NYC dinner parties, I often pair these domes with a light Prosecco or a berry-infused sparkling water for the kids. The bubbles cut through the richness of the mousse and cleanse the palate between bites. If you’re serving these after a heavy meal, keep the portions small and let the dessert shine. A dusting of silver glitter is optional but highly recommended — it catches the light and makes every dome look like a disco ball on your plate.
My Moroccan grandmother would have served a plate of these alongside a pot of mint tea, and honestly, that’s not a bad idea either. The sweetness of the domes against the herbaceous, slightly bitter tea is a beautiful pairing that honors my roots while still feeling totally modern.
| Pairing Type | Suggestions | Why It Works |
|---|---|---|
| Side Dish | Light shortbread cookies, fresh berries | Adds crunch and contrast |
| Sauce / Dip | Raspberry coulis, white chocolate drizzle | Enhances berry flavor |
| Beverage | Prosecco, mint tea, berry spritzer | Cuts richness, refreshes palate |
| Garnish | Blackberries, edible flowers, silver glitter | Adds elegance and visual pop |
Make-Ahead, Storage & Reheating
One of the best things about this recipe is how make-ahead friendly it is. In my busy NYC schedule, I often prep the mousse and freeze the domes a week in advance, then glaze them the morning of a party. The glaze itself can be made a day ahead and gently rewarmed to 90°F before using. Here’s exactly how to store everything.
| Method | Container | Duration | Reheating Tip |
|---|---|---|---|
| Refrigerator | Airtight container, single layer | Up to 2 days | Serve cold, straight from fridge |
| Freezer | Freezer-safe bag or container, layered with parchment | Up to 2 months | Thaw in fridge 1 hour before serving; glaze after thawing |
| Make-Ahead | Frozen domes in molds, then bagged | Up to 1 week | Glaze directly from frozen — no need to thaw |
If you’re storing glazed domes in the fridge, place them in a single layer in an airtight container. The mirror glaze may lose some of its high shine after a day, but the flavor will still be excellent. Do not freeze glazed domes — the glaze can crack and become tacky when thawed. Always glaze fresh on the day you plan to serve for that factory-fresh mirror finish.
To reheat leftover glaze (if you made it ahead), warm it gently in a double boiler or microwave at 50% power in 10-second bursts, stirring between each, until it reaches 90°F again. Strain through a sieve if any lumps formed during storage. You can reuse the glaze for up to 3 days if stored in the fridge in an airtight container.
Variations & Easy Swaps
| Variation | Key Change | Best For | Difficulty Impact |
|---|---|---|---|
| Tropical Neon Domes | Mango & passion fruit purée instead of berries | Summer parties, tropical themes | Same difficulty |
| Dairy-Free Version | Coconut cream & dairy-free cream cheese | Lactose-intolerant guests | Slightly harder — coconut cream is less stable |
| Chocolate-Berry Domes | Add 2 oz melted dark chocolate to mousse | Chocolate lovers, richer dessert | Same difficulty |
Tropical Neon Domes
Swap the mixed berry purée for equal parts mango and passion fruit purée. The acidity of passion fruit pairs beautifully with the sweet cream cheese mousse. For the center, use chopped fresh mango and a spoonful of passion fruit curd instead of raspberry preserves. The glaze works the same — just use neon yellow and orange food coloring for a sunset vibe. It’s like a vacation on a plate, and it always gets rave reviews at my poolside parties.
Dairy-Free Version
Use full-fat coconut cream (chilled, solid part only) instead of heavy whipping cream, and dairy-free cream cheese for the mousse. The coconut cream whips up similarly, though it’s a bit less stable, so fold gently and freeze thoroughly. For the glaze, use a dairy-free white chocolate — it’s harder to find, but brands like Pascha or Enjoy Life make good ones. The texture will be slightly less creamy but still delicious. I’ve tested this for a friend’s birthday and it held up beautifully.
Chocolate-Berry Domes
Melt 2 oz of high-quality dark chocolate (70% cocoa) and fold it into the mousse base along with the whipped cream. The chocolate adds depth and a slight bitterness that balances the sweet berry purée. Keep the berry center the same — the contrast between dark chocolate mousse and bright raspberry preserves is incredible. Use a dark chocolate mirror glaze instead of white if you want an all-chocolate vibe, but I love the pink-and-chocolate combo.
What is the best way to achieve a shiny mirror glaze for neon berry mirror domes?
The most important factor is temperature. The glaze must be cooled to exactly 90°F (32°C) before pouring. Use an instant-read thermometer to check. If it’s too warm, it will run off the frozen dome and leave a thin, uneven coating. If too cool, it will set in thick streaks instead of a smooth mirror. Also, make sure your domes are fully frozen — at least 6 hours, or overnight. The temperature shock between the frozen dome and the warm glaze is what creates that glassy, mirror-like finish. Finally, stir the glaze gently as it cools to prevent a skin from forming, and strain it through a fine-mesh sieve if you see any lumps.
Can I use frozen berries instead of fresh for the filling in neon berry mirror domes?
Absolutely, and in many ways frozen berries are actually better for this recipe. Frozen berries are picked at peak ripeness and flash-frozen, so they often have more consistent flavor than fresh berries that have traveled long distances. For the berry purée, use thawed frozen berries — just drain off any excess liquid before blending. For the berry center, you can use frozen blueberries, but thaw them first and pat them dry with a paper towel so they don’t release too much water into the mousse. I always keep a bag of frozen mixed berries in my freezer for exactly this recipe, especially in winter when fresh berries are less flavorful.
How far in advance can I make neon berry mirror domes for a party?
You can make the mousse domes and freeze them up to 2 weeks in advance. I do this all the time for my NYC dinner parties. Keep them in the silicone molds, wrapped tightly in plastic wrap, then transfer to a freezer-safe bag after they’re solid. The mirror glaze can be made up to 3 days ahead and stored in the fridge in an airtight container. On the day of your party, reheat the glaze to 90°F, unmold the domes, glaze them, and refrigerate for 20 minutes before serving. This gives you a gorgeous, fresh mirror finish with almost no day-of work. Just don’t glaze them more than a few hours ahead, as the shine can dull over time.
What can I substitute for gelatin in the mirror glaze to make it vegetarian-friendly?
You can substitute agar-agar, a plant-based gelling agent derived from seaweed, for the gelatin. Use 1 teaspoon of agar-agar powder for every 2 teaspoons of powdered gelatin. The process is slightly different: agar-agar needs to be brought to a full boil (212°F / 100°C) for 2 minutes to activate, rather than just dissolved in hot liquid. This can be tricky with a white chocolate glaze because overheating can separate the chocolate. I recommend dissolving the agar-agar in the water-sugar-condensed milk mixture first, bringing it to a boil, then removing from heat and adding the white chocolate afterward. The texture will be a bit firmer than with gelatin, and the glaze may be slightly less glossy, but it’s a reliable vegetarian-friendly option.
Why did my mirror glaze crack after I poured it on the domes?
Cracking usually happens when the glaze temperature is too cold when poured, or when the frozen domes have been sitting out too long and have started to thaw slightly. The glaze needs to be at 90°F and the domes must be fully frozen — think of it like ice cubes meeting warm water. If the dome surface is even slightly soft, the glaze will contract as it sets and pull apart, causing cracks. Another cause is pouring the glaze too thickly; a thin, even layer is more flexible. If your glaze cracks, you can sometimes save it by gently reheating the dome with a hair dryer on low heat to remelt the surface, then letting it reset in the fridge. But honestly, prevention is easier: check your temperatures and work quickly.
Can I use liquid food coloring instead of gel for the neon mirror glaze?
I don’t recommend it. Liquid food coloring is water-based and will thin out the glaze, making it less likely to set properly and potentially causing streaks or uneven color. It also takes a lot of liquid coloring to achieve neon shades, which can throw off the sugar-to-liquid ratio in the glaze. Gel or paste food colors are concentrated, oil-based, and designed to blend into white chocolate without changing the texture. A tiny dab of neon pink or purple gel goes a long way — start with a toothpick amount and add more until the color looks electric. I use Chefmaster or AmeriColor brands for the most vibrant results.
How do I get perfectly smooth, round domes without air bubbles?
Air bubbles in the mousse usually come from over-whipping the cream or over-folding. Whip the cream to soft peaks only — not stiff peaks — and fold it into the berry mixture gently with a rubber spatula, using a cut-and-fold motion. Tap the silicone mold gently on the counter after filling to bring any trapped bubbles to the surface, then pop them with a toothpick. For the smoothest surface, fill the molds slightly overfull and scrape across the top with an offset spatula. Freeze the domes flat — not tilted — so the tops set evenly. When you unmold, the side that was against the silicone will be naturally smooth and glossy-ready.
Can I make these neon berry mirror domes without a silicone dome mold?
You can, but the shape will be different. Without a dome mold, you can use a standard muffin tin lined with plastic wrap or large paper liners to create a similar rounded shape. Fill the liners with mousse and freeze them solid, then peel off the liner before glazing. They won’t be perfect half-spheres, but they’ll still look beautiful. Another option is to use small glass bowls or ramekins lined with plastic wrap — freeze the mousse in the bowl, then lift it out using the plastic wrap. The texture and flavor will be exactly the same, and the glaze will still give you that mirror finish. I’ve done this when my dome molds were in the dishwasher, and it worked great.
What is the best way to store leftover mirror glaze for reuse?
Store leftover mirror glaze in an airtight container in the refrigerator for up to 3 days. When you’re ready to use it again, warm it gently in a double boiler or in the microwave at 50% power in 10-second bursts, stirring between each, until it reaches 90°F. If the glaze has formed any lumps or a skin, strain it through a fine-mesh sieve before using. You can also add a teaspoon of warm water if the glaze seems too thick after reheating, but be careful not to thin it too much. The glaze can be reheated and cooled multiple times, but each cycle may slightly reduce the gloss.
Why is my berry mousse dome not coming out of the mold cleanly?
If your dome is stuck, it’s either not frozen long enough or the mold wasn’t filled correctly. The mousse needs at least 6 hours in the freezer — overnight is even better. If you try to unmold too early, the mousse will be soft and will tear. Another reason is that the mousse mixture was too thick and didn’t fill all the crevices of the mold, creating suction. Make sure to spread the mousse into the mold with a tiny spatula or the back of a spoon to eliminate any gaps. If the dome still won’t come out, try dipping the bottom of the silicone mold in warm water for 10–15 seconds — no longer, or the mousse will start to melt. The warm water creates a thin layer of melt that helps release the dome without damaging the shape.
Share Your Version!
I’d love to see how your neon berry mirror domes turn out! Did you go with neon pink and purple, or did you try a different color combination? Maybe you added a little sparkle with extra glitter or went bold with a dark chocolate twist. Drop a comment below and let me know what worked for you — I read every single one and I always respond. And if you’re feeling proud of your creation (you should be!), snap a photo and share it on Instagram or Pinterest. Tag me @cheerychop so I can cheer you on and maybe even feature your remake on my stories.
Your star rating helps other home cooks find this recipe and build the confidence to try it themselves. So if these domes made you feel like a pastry chef for the day, leave a ⭐⭐⭐⭐⭐ rating and tell me about your glazing moment. I want to hear about the first time you poured that glaze and watched it turn into a mirror — it’s a thrill that never gets old, even for me. From my NYC kitchen to yours — I hope this recipe brings as much warmth to your table as it does to mine. — Sara 🧡
Love This Recipe? Save It to Pinterest!
If you enjoyed this Neon Berry Mirror Domes recipe, don’t let it get lost in your browser tabs! 😄 Pin it now so you can find it again anytime — and explore hundreds more tried-and-tested recipes waiting for you on my Pinterest boards.
👉 Follow Sara on Pinterest @chefrecipes2
📌 Pin this recipe · 🔁 Re-pin your favorites · 💬 Tag me when you make it — I love seeing your creations!
💬 What’s your favorite berry combination? Drop a comment below and tell me how you’ll make these neon berry mirror domes your own!
Neon Berry Mirror Domes
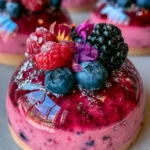
These vibrant neon berry mirror domes feature a creamy berry mousse with a fruity center, all enrobed in a glossy neon mirror glaze. A stunning and delicious dessert for special occasions.
- Prep Time: 30 minutes
- Cook Time: 15 minutes
- Total Time: 7 hours (includes freezing)
- Yield: 8 1x
- Method: Dessert
- Cuisine: American
Ingredients
- For the Berry Mousse Domes:
- 1 1/2 cups mixed berry purée (blueberries, raspberries, and blackberries)
- 1 cup heavy whipping cream
- 4 oz (115 g) cream cheese, softened
- 1/4 cup granulated sugar
- 1 tsp vanilla extract
- 2 tsp powdered gelatin
- 3 tbsp cold water
- For the Berry Center:
- 1/2 cup raspberry preserves
- 1/2 cup fresh blueberries
- 1 tbsp lemon juice
- For the Neon Mirror Glaze:
- 1/2 cup water
- 1/2 cup granulated sugar
- 1/3 cup sweetened condensed milk
- 2 tsp powdered gelatin
- 3 tbsp cold water
- 6 oz (170 g) white chocolate, finely chopped
- Neon pink and purple gel food coloring
- Neon blue food coloring (optional)
- For Garnish (optional):
- Fresh blackberries
- Edible flower petals
- Silver edible glitter
Instructions
- 1. Bloom the gelatin for the mousse in the cold water for 5 minutes.
- 2. Heat 1/4 cup of the heavy cream until steaming, then stir in the bloomed gelatin until dissolved.
- 3. Blend the berry purée, cream cheese, sugar, vanilla, and warm cream mixture until smooth.
- 4. Whip the remaining heavy cream to soft peaks and gently fold it into the berry mixture.
- 5. Combine the raspberry preserves, blueberries, and lemon juice for the berry center.
- 6. Fill silicone dome molds halfway with the mousse, add a spoonful of the berry center, then cover with more mousse. Freeze for at least 6 hours or until completely firm.
- 7. Bloom the gelatin for the glaze in the cold water for 5 minutes.
- 8. Heat the water, sugar, and condensed milk until the sugar dissolves. Remove from the heat and stir in the bloomed gelatin.
- 9. Pour the hot mixture over the white chocolate and stir until smooth. Divide the glaze and tint with neon food coloring, then swirl the colors together without fully mixing.
- 10. Cool the glaze to about 90°F (32°C).
- 11. Unmold the frozen domes and place them on a wire rack.
- 12. Pour the mirror glaze evenly over each dome, allowing the excess to drip away.
- 13. Transfer to serving plates and garnish with fresh berries, edible flower petals, and silver edible glitter. Refrigerate for 20 minutes before serving.
Notes
Serves 8. For best results, ensure the domes are fully frozen before glazing. The glaze should be cooled to around 90°F (32°C) for a perfect mirror finish. Garnishes are optional but add a beautiful presentation.
Nutrition
- Calories: 345
- Sugar: 30 g
- Fat: 22 g
- Carbohydrates: 35 g
- Protein: 4 g
Tried This Recipe? Leave a Comment!
Did you make this recipe? I’d love to hear how it turned out! Please leave a comment and a rating below. Your feedback helps other home cooks and supports cheerychop.com!
For more delicious inspiration, follow me on Pinterest!