
Table of Contents
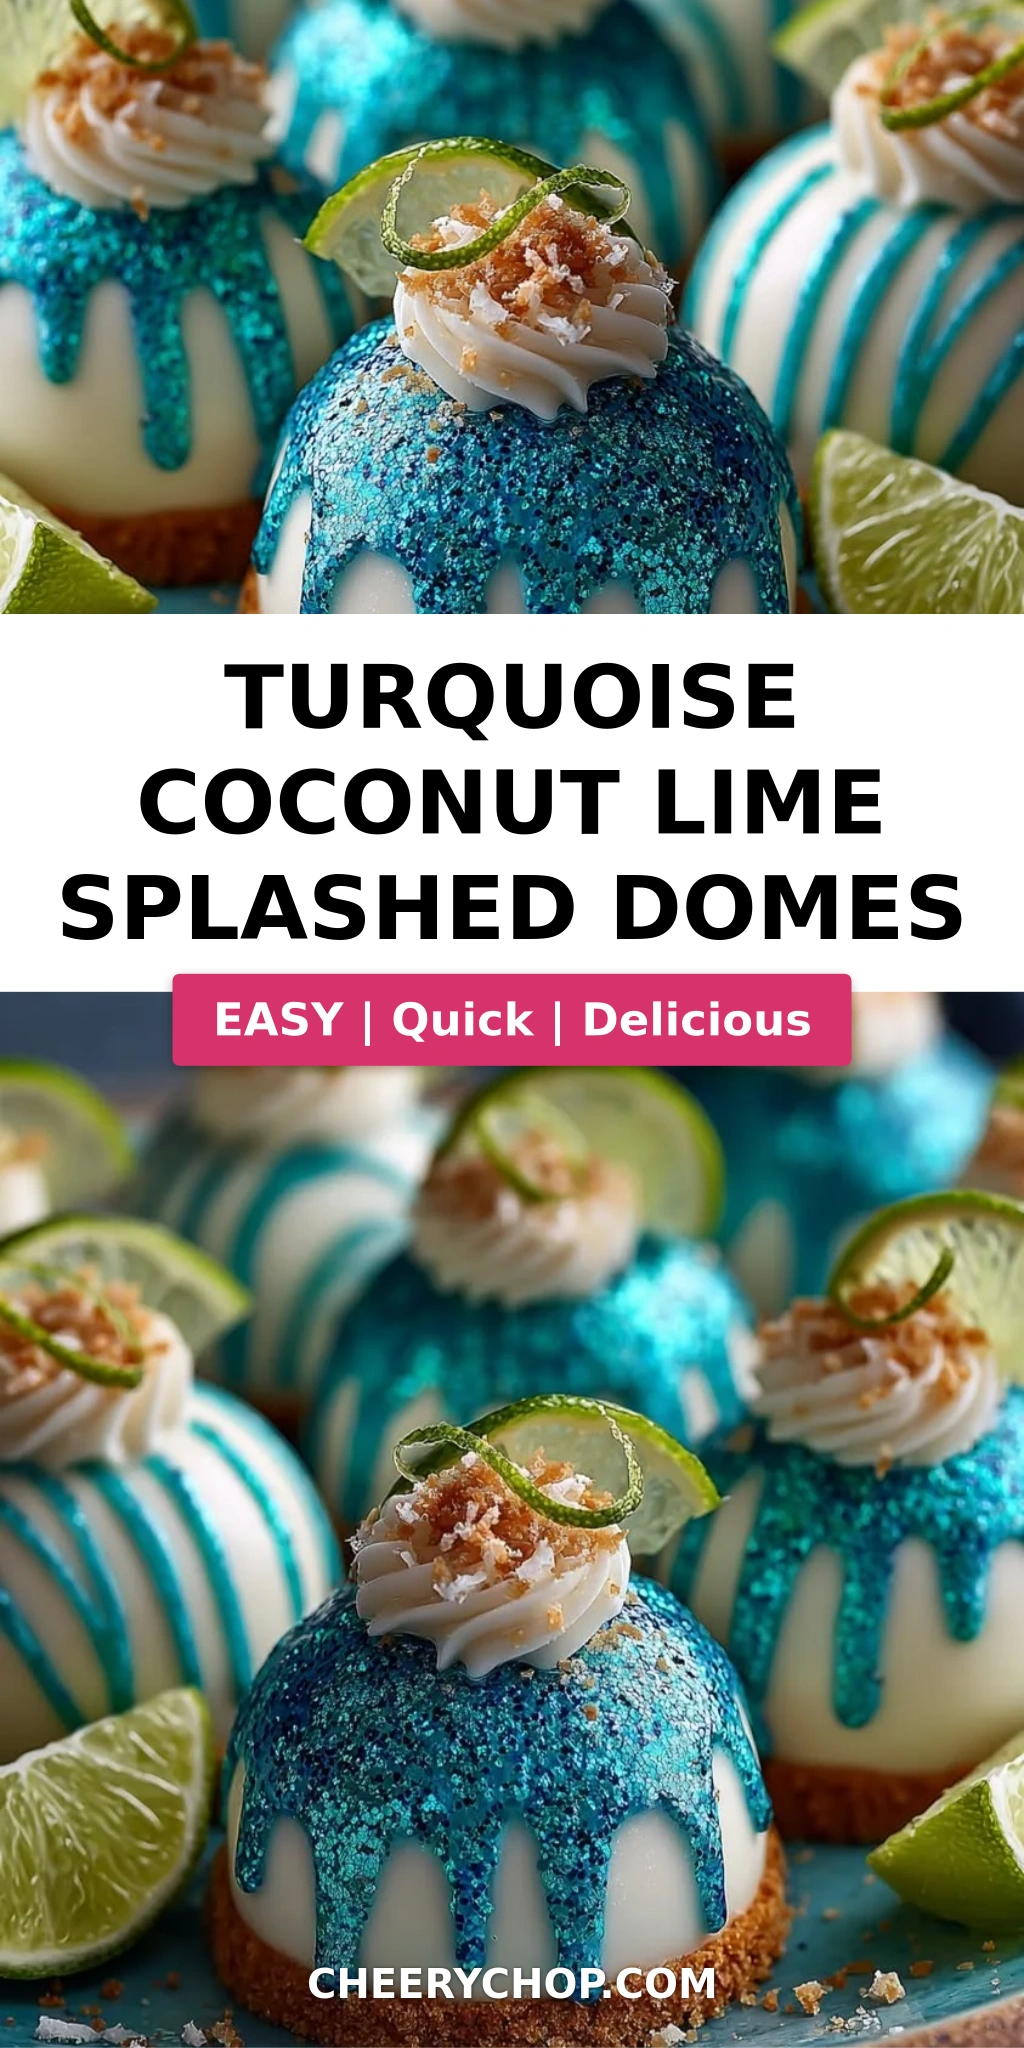
Turquoise Coconut Lime Splashed Domes – A Frozen Treasure
Every time I make these Turquoise Coconut Lime Splashed Domes, I’m transported back to my mother’s kitchen in Morocco, where she would press fragrant citrus into chilled desserts on hot afternoons. That memory is the heartbeat of this recipe — a creamy coconut-lime filling cradled in a toasted coconut cookie crust, all crowned with a shimmering turquoise glaze that catches the light like sea glass. The first time I served these at a dinner party in my NYC apartment, my guests actually gasped when I brought the platter to the table. That moment — the quiet awe before the first bite — is exactly why I love creating desserts that feel like edible art.
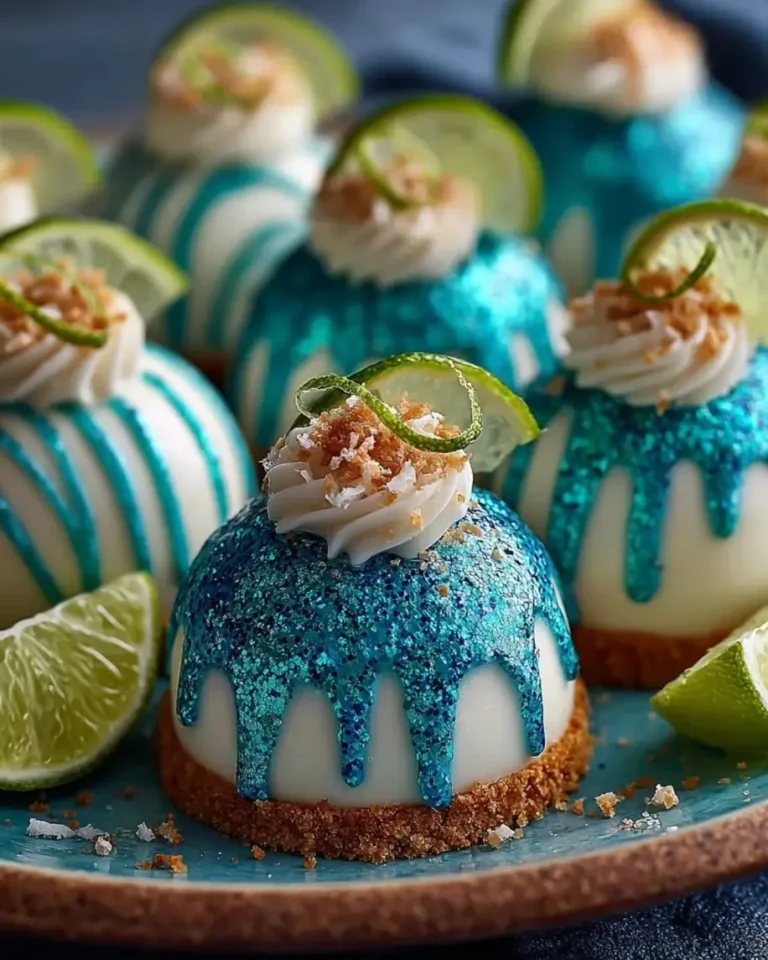
Let me paint you a picture: the filling is luxuriously smooth, thanks to cream cheese whipped with coconut cream and fresh lime juice, then lightened with softly peaked heavy cream. The crust whispers with toasted coconut and vanilla cookie crumbs, offering a buttery crunch that contrasts beautifully with the silky center. And that glaze — oh, that glorious turquoise splash — it’s a glossy, white-chocolate-based mirror that sets into a jewel-like shell. Each dome is finished with lime zest curls, toasted coconut flakes, and tiny white sugar pearls that catch the light like morning dew. One bite delivers layers of tart lime, sweet coconut, and a delicate vanilla warmth that lingers just long enough.
What makes my version special is the technique I learned during my pastry training in Paris: blooming gelatin for a velvety, stable mousse that holds its shape without feeling heavy, and a poured glaze that sets to a flawless, spoon-tapping shine. I’ve tested this recipe a dozen times in my tiny NYC kitchen to make sure it’s foolproof for home cooks. The trick is all in the timing — letting the domes freeze fully before glazing, and cooling the glaze to the perfect ribbon stage. One common mistake I see is rushing the glaze while it’s still warm, which makes it slide right off. Trust me, patience pays off in the most spectacular way.
Why This Turquoise Coconut Lime Domes Recipe Is the Best
The Flavor Secret: This isn’t just another coconut-lime dessert. By using coconut cream instead of milk, I get a rich, velvety base that stands up to the bright acidity of fresh lime juice. A touch of vanilla extract rounds out the citrus, while the toasted coconut in the crust adds a nutty depth that ties everything together. Growing up in Morocco, I learned that the best desserts balance sweet and tart in a way that leaves you wanting one more bite — and this recipe does exactly that.
Perfected Texture: The French technique I use here — blooming unflavored gelatin and folding it into a cream cheese and whipped cream base — creates a mousse that is luxuriously creamy yet sturdy enough to unmold cleanly. The glaze, made with white chocolate and a hint more gelatin, sets to a glossy, non-sticky finish that doesn’t crack when you cut into it. I’ve spent years perfecting this balance so you get a dessert that looks like it came from a patisserie but comes together in your home kitchen.
Foolproof & Fast: Despite the elegant presentation, this is a no-bake dessert that requires zero oven time (beyond toasting the coconut, which takes three minutes). The active prep is about 30 minutes, then the freezer does the heavy lifting. I’ve made these for busy weeknight dinner parties and holiday gatherings alike, and they never fail to impress. Plus, you can make them entirely ahead — more on that below — which makes them a hostess’s best friend.
Turquoise Coconut Lime Domes Recipe Ingredients
I source my ingredients from the Union Square Greenmarket here in NYC — the limes are always bright and fragrant, and the cream cheese from a local dairy farm has a richness I can’t resist. For the coconut cream, I reach for a good-quality canned brand (Chaokoh or Savoy are my go-tos). The white chocolate for the glaze should be a real deal — use a bar, not chips, for the smoothest melt. And the turquoise gel food coloring? A tiny bottle lasts forever and gives you that stunning ocean-blue hue.
Ingredients List
- For the Coconut Lime Domes:
- 12 oz cream cheese, softened
- 1/2 cup powdered sugar
- 1 tsp vanilla extract
- 1/4 cup coconut cream
- 2 tbsp fresh lime juice
- 1 tsp lime zest
- 1/2 cup heavy cream
- 1 tsp unflavored gelatin
- 2 tbsp cold water
- For the Coconut Biscuit Base:
- 1 cup vanilla cookie crumbs
- 1/4 cup toasted coconut flakes
- 3 tbsp unsalted butter, melted
- For the Turquoise Splash Glaze:
- 1 1/2 cups white chocolate, chopped
- 1/2 cup sweetened condensed milk
- 2 tsp gelatin powder
- 3 tbsp water (for gelatin)
- 3/4 cup granulated sugar
- 1/3 cup water (for sugar syrup)
- 2 drops turquoise gel food coloring
- 1 tsp edible shimmer dust
- For Garnish:
- Lime zest curls
- Toasted coconut flakes
- White sugar pearls
Ingredient Spotlight
Coconut Cream: This is the thick, rich layer that rises to the top of a can of full-fat coconut milk. It provides the lush mouthfeel without watering down the mousse. If you can’t find it, scoop the solid cream off the top of a refrigerated can of full-fat coconut milk — just avoid the watery liquid below. Substituting coconut milk (the thinner kind) will result in a less stable mousse that may weep as it thaws.
White Chocolate: The foundation of the turquoise glaze. Use a high-quality white chocolate bar (like Ghirardelli or Valrhona) rather than chips, which often contain stabilizers that prevent smooth melting. The chocolate gives the glaze its creamy opacity and sweetness, balancing the tart lime. If you need a dairy-free version, look for a good-quality vegan white chocolate — but note that the texture may be slightly less glossy.
Unflavored Gelatin: This is the secret to the mousse’s stable, sliceable texture and the glaze’s mirror-like finish. I use Knox brand, available at any US grocery store. Bloom it in cold water for exactly 5 minutes, then warm it gently — never boil it, or it will lose its setting power. For a vegetarian option, agar agar can work, but the proportions are different; use 1 tsp agar agar powder per 1 cup liquid and boil for 2 minutes to activate.
Fresh Limes: Nothing compares to fresh lime juice and zest. Bottled juice lacks the bright, volatile oils that make this dessert sing. I recommend buying organic limes if possible, since you’ll be using the zest. Roll the limes on the counter before juicing to release the most juice, and zest them before cutting — trust me, it’s much easier.
| Original Ingredient | Best Substitution | Flavor / Texture Impact |
|---|---|---|
| Coconut cream | Full-fat coconut milk (cream layer only) | Slightly thinner mousse, still good |
| White chocolate | High-quality white chocolate bar (not chips) | Smoother, glossier glaze |
| Unflavored gelatin | Agar agar powder (1 tsp per 1 cup liquid) | Firmer set, slightly different mouthfeel |
| Fresh lime juice | Bottled lime juice (not recommended) | Less bright, may need extra zest |
| Vanilla cookie crumbs | Graham cracker crumbs | Slightly more rustic, still delicious |
How to Make Turquoise Coconut Lime Splashed Domes — Step-by-Step
Trust me — if you can make a cheesecake mousse and press a cookie crust, you can make these stunning domes. I’ll walk you through every step with the exact timing and visual cues I use in my own kitchen.
Step 1: Prepare the Coconut Biscuit Base
In a medium bowl, combine 1 cup vanilla cookie crumbs, 1/4 cup toasted coconut flakes, and 3 tbsp melted unsalted butter. Stir with a fork until every crumb is evenly moistened — the mixture should clump together when pressed between your fingers. Divide the mixture evenly among 6 silicone dome molds (about 1 1/2 tbsp each) and press firmly into an even layer. Pop the molds into the fridge to chill while you prepare the filling.
💡 Sara’s Pro Tip: Use a flat-bottomed shot glass or a small measuring cup to press the crust firmly and evenly. If you don’t have silicone dome molds, you can use a muffin tin lined with plastic wrap — just press the crust into the bottom and up the sides slightly.
Step 2: Bloom the Gelatin
Sprinkle 1 tsp unflavored gelatin over 2 tbsp cold water in a small bowl. Let it sit undisturbed for exactly 5 minutes — the gelatin will absorb the water and become a firm, jiggly mass. This process, called blooming, ensures the gelatin dissolves smoothly and sets the mousse evenly without lumps.
⚠️ Common Mistake to Avoid: Don’t skip the blooming step! Adding dry gelatin directly to the cream cheese mixture will result in a grainy texture and uneven setting. Always bloom in cold water first.
Step 3: Make the Coconut Lime Filling
In a large bowl, beat 12 oz softened cream cheese, 1/2 cup powdered sugar, 1 tsp vanilla extract, 1/4 cup coconut cream, 2 tbsp fresh lime juice, and 1 tsp lime zest until smooth and fluffy — about 2 minutes with a hand mixer. In a separate small bowl, warm the bloomed gelatin in the microwave for 8–10 seconds until it melts into a liquid, then stir it into the coconut lime mixture until fully incorporated. In another bowl, whip 1/2 cup heavy cream to soft peaks — when you lift the whisk, the cream should hold a gentle, drooping peak. Fold the whipped cream into the cream cheese mixture gently with a rubber spatula, using a J-fold motion to keep the mousse light and airy.
💡 Sara’s Pro Tip: For the smoothest filling, make sure your cream cheese is truly at room temperature — let it sit on the counter for 45 minutes before starting. Cold cream cheese will create lumps that are nearly impossible to beat out.
Step 4: Fill the Molds and Freeze
Spoon the mousse into the dome molds over the chilled crust, filling each cavity to the top. Use an offset spatula or the back of a spoon to smooth the tops so they’re level. Tap the molds gently on the counter to release any air bubbles. Freeze for at least 4 hours — until the domes are rock-solid to the touch. If you’re making them ahead, you can freeze them overnight at this stage.
⚠️ Common Mistake to Avoid: Don’t rush this step. If the domes aren’t fully frozen, the glaze will absorb into the mousse instead of forming a shell, leaving you with a sticky, matte finish instead of that gorgeous glossy mirror.
Step 5: Make the Turquoise Splash Glaze
Bloom 2 tsp gelatin powder with 3 tbsp water in a small bowl. In a saucepan, combine 3/4 cup sugar and 1/3 cup water. Heat over medium, stirring gently, until the sugar dissolves completely — about 2 minutes. Add 1/2 cup sweetened condensed milk and the bloomed gelatin, stirring until smooth. Pour this hot mixture over 1 1/2 cups chopped white chocolate in a heatproof bowl. Let sit for 1 minute, then stir slowly until the chocolate is completely melted and the mixture is silky. Add 2 drops turquoise gel food coloring and 1 tsp edible shimmer dust, stirring until evenly distributed and glittery.
💡 Sara’s Pro Tip: Let the glaze cool to about 90°F — it should feel warm to the touch but not hot. Test it on the back of a spoon: if it coats the spoon in an even layer and drips in a steady ribbon, it’s ready. If it’s too thick, add a teaspoon of warm water; if too thin, let it cool a minute longer.
Step 6: Glaze and Garnish
Remove the frozen domes from the molds. Place each dome on a wire rack set over a baking sheet. Pour the cooled glaze over each dome, starting at the top and letting it flow down the sides to cover completely. The excess will drip onto the baking sheet. Let the glaze set for 2–3 minutes, then transfer each dome to a serving plate. While the glaze is still tacky, decorate with lime zest curls, toasted coconut flakes, and white sugar pearls.
⚠️ Common Mistake to Avoid: Don’t use too-warm glaze! If the glaze is hot, it will melt the frozen dome and create a messy, uneven coating. Wait until it reaches that ribbon stage — your patience will be rewarded with a flawless, glossy finish.
| Step | Action | Duration | Key Visual Cue |
|---|---|---|---|
| 1 | Prepare crust | 5 min | Crumbs clump when pressed |
| 2 | Bloom gelatin | 5 min | Gelatin becomes firm, jiggly mass |
| 3 | Make filling | 10 min | Smooth, fluffy, no lumps |
| 4 | Fill and freeze | 4+ hrs | Rock-solid to the touch |
| 5 | Make glaze | 15 min | Ribbon stage, glossy, warm to touch |
| 6 | Glaze and garnish | 5 min | Fully coated, glossy, garnishes stick |
Serving & Presentation
These domes are showstoppers, so let them shine. Serve each dome on a small white plate — the contrast against the turquoise glaze is stunning. I like to add a tiny quenelle of coconut whipped cream on the side and a thin slice of fresh lime for color. For texture, scatter a few extra toasted coconut flakes and white sugar pearls around the plate like edible confetti. The domes should still be slightly frozen when served — they thaw as you eat, creating a luscious, mousse-like consistency.
In my NYC kitchen, I often plate these with a small dollop of passion fruit curd for a tropical tang, or a drizzle of honey-lime syrup for extra sweetness. For a Moroccan-inspired touch, I sometimes sprinkle a tiny pinch of ground cardamom over the plate — it echoes the warm spice notes in the crust. These pair beautifully with a crisp Sauvignon Blanc or a coconut milk latte for a non-alcoholic option.
| Pairing Type | Suggestions | Why It Works |
|---|---|---|
| Side Dish | Coconut whipped cream, fresh berries, sliced mango | Adds freshness and contrasts the richness of the dome |
| Sauce / Dip | Passion fruit curd, honey-lime syrup, dark chocolate drizzle | Enhances the tropical citrus notes with sweet-tart layers |
| Beverage | Sauvignon Blanc, coconut milk latte, jasmine iced tea | Crisp, clean flavors that won’t overpower the delicate dessert |
| Garnish | Lime zest curls, toasted coconut, white sugar pearls, edible flowers | Visual pop and textural contrast — crunchy and bright |
Make-Ahead, Storage & Reheating
These domes are a meal-prepper’s dream. I often make a double batch on a Sunday for dinner parties later in the week. The key is to store them properly so the glaze stays glossy and the crust stays crunchy. Here’s my exact system for keeping them perfect.
| Method | Container | Duration | Reheating Tip |
|---|---|---|---|
| Refrigerator | Airtight container, single layer | 2 days | Not recommended — mousse softens too much |
| Freezer | Freezer-safe container, parchment between layers | 1 month | Serve directly from freezer, no reheating needed |
| Make-Ahead | Freeze unglazed domes, glaze and garnish on serving day | 3 days in advance | Let domes freeze solid, then glaze just before serving |
The best way to serve these is straight from the freezer — let them sit at room temperature for 5 minutes before serving so the mousse softens slightly to a creamy, mousse-like consistency. If you’ve stored them in the freezer for more than a day, check that the glaze hasn’t dulled. Sometimes condensation can form a thin film; a quick pass with a warm, dry finger restores the shine. Avoid microwaving — the gelatin will break down and the whole dome will collapse.
Variations & Easy Swaps
Once you master the base recipe, the possibilities are endless. Here are my three favorite variations — each one changes the flavor profile in a delicious way while keeping the same foolproof technique.
| Variation | Key Change | Best For | Difficulty Impact |
|---|---|---|---|
| Mango Passion Twist | Replace lime with mango puree + passion fruit juice | Summer parties, tropical theme | Easy — same technique, different fruit |
| Vegan Coconut Domes | Use vegan cream cheese, coconut cream, and agar agar | Dairy-free diets, plant-based guests | Medium — requires careful agar handling |
| Chocolate-Coconut Domes | Add 2 tbsp cocoa powder to filling, use dark chocolate glaze | Chocolate lovers, winter holidays | Easy — just swap the flavor base |
Mango Passion Twist
For a tropical spin, swap the lime juice and zest for 1/4 cup mango puree and 2 tbsp passion fruit juice. The filling takes on a golden-orange hue and a sweet-tart flavor that screams summer. I like to top these with a tiny slice of fresh mango and a sprinkle of freeze-dried passion fruit powder. The French technique of folding fruit puree into a mousse base works beautifully here — just make sure the puree is thick and not watery, or the mousse may weep.
Vegan Coconut Domes
A plant-based version that doesn’t skimp on luxury. Use vegan cream cheese (Miyoko’s or Violife work well), full-fat coconut cream, and replace the gelatin with 1 tsp agar agar powder per cup of liquid in both the filling and glaze. For the glaze, use vegan white chocolate. The texture will be slightly firmer and less creamy than the original, but still delicious. I tested this for a friend’s vegan wedding and it was a hit — the key is to boil the agar agar for 2 minutes to activate its setting power fully.
Chocolate-Coconut Domes
For chocolate lovers, add 2 tbsp unsweetened cocoa powder to the cream cheese mixture along with the coconut cream. Use a dark chocolate glaze instead of white — melt 1 1/2 cups dark chocolate with 1/2 cup coconut cream for a rich, glossy finish. Top with toasted coconut and cacao nibs instead of sugar pearls. The bitter chocolate balances the sweet coconut beautifully, and the turquoise color is replaced by a deep, glossy brown. My Paris-trained pastry chef instincts say this is the most luxurious variation of the three.
Can I use a different type of coconut milk or cream for the Turquoise Coconut Lime Splashed Domes?
Yes, but the texture will vary depending on what you choose. For the filling, coconut cream is ideal because it’s thick and rich, giving the mousse a stable, velvety base. If you only have full-fat coconut milk, refrigerate the can overnight, then scoop off the solid cream layer that rises to the top — that’s your substitute. Avoid using light coconut milk or the watery liquid from the bottom of the can, as they will make the mousse too loose and prone to weeping. For the glaze, coconut cream isn’t used, so stick with the recipe as written. If you’re dairy-free, you can replace the heavy cream with chilled coconut cream whipped to soft peaks — just make sure it’s very cold and free from any liquid.
What can I substitute for the butterfly pea powder or blue food coloring to achieve the turquoise color?
This recipe calls for turquoise gel food coloring rather than butterfly pea powder, since the glaze is white-chocolate-based and needs a concentrated color to achieve that vibrant ocean hue. If you prefer natural alternatives, you can mix a small amount of spirulina powder (for blue-green) with a tiny pinch of turmeric (for yellow-green) to create a custom turquoise. Start with 1/4 tsp spirulina and 1/8 tsp turmeric, then adjust. For a blue-only base, butterfly pea powder works — steep 1 tsp in 2 tbsp hot water for 5 minutes, then strain and use the liquid in place of 2 tbsp of the water in the glaze. Note that natural colors are more muted than gel colors, so the result will be a softer, pastel turquoise rather than a vivid jewel tone.
How long do these coconut lime domes need to chill or set in the freezer before serving?
The domes need at least 4 hours in the freezer to set firmly before glazing, but overnight is even better. The key is that they must be rock-solid to the touch — if you press one gently and it gives at all, it’s not ready. After glazing, they need only 2–3 minutes for the glaze to set, since the frozen dome instantly chills the glaze into a glossy shell. You can serve them immediately after glazing, or return them to the freezer for up to 30 minutes to firm up the glaze further. Total time from start to finish is about 4 hours 40 minutes, but I recommend making them a day ahead for the most reliable results — that way the freeze is deep and the glaze sets flawlessly.
Can I make these Turquoise Coconut Lime Splashed Domes ahead of time for a party?
Absolutely — in fact, they’re designed for advance preparation! You can make the domes through Step 4 (freezing them unglazed) up to 3 days ahead. Keep them covered tightly in the freezer. On the day of your party, make the glaze, let it cool to the ribbon stage, pour over the frozen domes, and garnish. This approach ensures the glaze is fresh, glossy, and perfectly set. If you need to make them even further ahead, freeze the unglazed domes for up to 1 month — just wrap each dome individually in plastic wrap and store in a freezer-safe container with parchment between layers. Glaze and garnish on serving day for the best presentation. Never assemble and glaze more than 24 hours before serving, as the glaze can absorb moisture and lose its shine.
Can I use a different mold shape if I don’t have dome molds?
Yes, absolutely! Silicone dome molds give you the classic half-sphere shape, but you can use any small silicone mold — heart shapes, fluted tartlet molds, or even a mini muffin tin lined with plastic wrap. If using a muffin tin, line each cup with two strips of plastic wrap crisscrossed for easy removal. The key is to use a flexible mold so the frozen domes release cleanly. If your mold has intricate details, spray it lightly with non-stick spray before adding the crust. The serving size will change slightly depending on the volume of your mold — aim for about 1/3 cup total volume per dome (crust + filling). Mini muffin tins will give you bite-sized domes that are perfect for parties.
How do I know when the turquoise glaze is the right temperature to pour?
The perfect pouring temperature for this glaze is around 90°F — it should feel warm to the touch but not hot. The best test is the spoon test: dip a metal spoon into the glaze and lift it out. The glaze should coat the spoon in an even, smooth layer and drip off in a steady, continuous ribbon. If the glaze runs off the spoon like water, it’s too warm — let it cool for 2–3 minutes and test again. If it’s so thick that it clumps on the spoon, it’s too cool — warm it gently in 5-second bursts in the microwave, stirring between each. A too-warm glaze will melt the frozen dome and create a messy, uneven coating. A too-cold glaze will set into blobs instead of flowing smoothly. Take your time and test frequently — this is the one step where patience makes all the difference.
Can I reduce the sugar in the turquoise glaze without ruining it?
I don’t recommend reducing the sugar in the glaze, as it plays a structural role beyond sweetness. The sugar syrup (3/4 cup sugar + 1/3 cup water) creates a stable base that helps the gelatin and white chocolate form a smooth, glossy, and flexible glaze. Reducing the sugar can lead to a grainy texture, a dull finish, or a glaze that cracks as it sets. If you’re concerned about sweetness overall, I suggest reducing the powdered sugar in the mousse filling to 1/3 cup instead of 1/2 cup — the tangy lime and coconut will still shine through. You can also use a sugar-free sweetener in the mousse, but the gelatin and white chocolate in the glaze need real sugar for proper texture. For a lower-sugar option, serve smaller domes with extra fresh fruit to balance the sweetness.
Share Your Version!
I absolutely love hearing how my recipes come to life in your kitchen — especially when you make them your own. Have you tried these Turquoise Coconut Lime Splashed Domes? Did you experiment with one of the variations, or invent your own twist? Drop a star rating and a comment below — I read every single one and I’ll personally answer any questions you have. Your feedback helps me create better recipes for this community, and it inspires other home cooks to give it a try.
Don’t forget to snap a photo of your gorgeous domes and share it on Instagram or Pinterest — tag me @cheerychop so I can see your creation and feature it in my stories! And if you’re feeling extra creative, try the Mango Passion Twist and let me know how it turned out. I’m always testing new variations in my NYC kitchen, and your ideas might just inspire my next recipe.
From my NYC kitchen to yours — I hope this recipe brings as much warmth to your table as it does to mine. — Sara 🧡
Love This Recipe? Save It to Pinterest!
If you enjoyed this Turquoise Coconut Lime Splashed Domes recipe, don’t let it get lost in your browser tabs! 😄 Pin it now so you can find it again anytime — and explore hundreds more tried-and-tested recipes waiting for you on my Pinterest boards.
👉 Follow Sara on Pinterest @chefrecipes2
📌 Pin this recipe · 🔁 Re-pin your favorites · 💬 Tag me when you make it — I love seeing your creations!
Turquoise Coconut Lime Splashed Domes

Turquoise Coconut Lime Splashed Domes are elegant frozen desserts with a creamy coconut-lime filling on a vanilla cookie crust, topped with a shimmering turquoise glaze and garnished with lime zest, toasted coconut, and sugar pearls.
- Yield: 6 1x
Ingredients
- For the Coconut Lime Domes:
- 12 oz cream cheese, softened
- 1/2 cup powdered sugar
- 1 tsp vanilla extract
- 1/4 cup coconut cream
- 2 tbsp fresh lime juice
- 1 tsp lime zest
- 1/2 cup heavy cream
- 1 tsp unflavored gelatin
- 2 tbsp cold water
- For the Coconut Biscuit Base:
- 1 cup vanilla cookie crumbs
- 1/4 cup toasted coconut flakes
- 3 tbsp unsalted butter, melted
- For the Turquoise Splash Glaze:
- 1 1/2 cups white chocolate, chopped
- 1/2 cup sweetened condensed milk
- 2 tsp gelatin powder
- 3 tbsp water
- 3/4 cup granulated sugar
- 1/3 cup water
- 2 drops turquoise gel food coloring
- 1 tsp edible shimmer dust
- For Garnish:
- Lime zest curls
- Toasted coconut flakes
- White sugar pearls
Instructions
- 1. Mix vanilla cookie crumbs, toasted coconut flakes, and melted butter until evenly combined.
- 2. Press the mixture into silicone dome molds and chill for 10 minutes.
- 3. Bloom gelatin with cold water and let sit for 5 minutes.
- 4. Beat cream cheese, powdered sugar, vanilla extract, coconut cream, lime juice, and lime zest until smooth.
- 5. Warm bloomed gelatin for a few seconds until melted, then stir into the coconut lime mixture.
- 6. Whip heavy cream until soft peaks form and fold gently into the filling.
- 7. Fill dome molds over the biscuit base and smooth the tops.
- 8. Freeze for at least 4 hours until completely firm.
- 9. Bloom gelatin powder with 3 tbsp water for the glaze.
- 10. Heat sugar and water in a saucepan until dissolved. Stir in condensed milk and bloomed gelatin.
- 11. Pour hot mixture over white chocolate and blend until smooth. Add turquoise coloring and shimmer dust.
- 12. Let glaze cool slightly, then pour over frozen domes until fully coated.
- 13. Finish with lime zest curls, toasted coconut flakes, and white sugar pearls before serving.
Notes
Serves 6. Nutritional info per serving: Calories: 490, Protein: 6g, Carbohydrates: 47g, Fat: 32g, Fiber: 1g, Sugar: 39g, Sodium: 225mg.
Nutrition
- Calories: 490
- Sugar: 39g
- Fat: 32g
- Carbohydrates: 47g
- Protein: 6g
Tried This Recipe? Leave a Comment!
Did you make this recipe? I’d love to hear how it turned out! Please leave a comment and a rating below. Your feedback helps other home cooks and supports cheerychop.com!
For more delicious inspiration, follow me on Pinterest!


