
Table of Contents
Caramelized Pear and Blue Cheese Salad – The Perfect Fall Salad with Caramelized Pears
I still remember the first time I made a caramelized pear and blue cheese salad. It was a crisp October afternoon in my tiny NYC kitchen, and I had just come back from the Union Square Greenmarket with a bag of perfectly ripe Bosc pears. My mother in Morocco used to simmer pears with honey and cinnamon for a simple dessert, and my French culinary training taught me how to build layers of flavor with just a little patience. That day, standing between two worlds — my Moroccan roots and my Parisian technique — I decided to let the pears caramelize slowly in butter and honey until they turned golden and yielding. The result was nothing short of magic. This pear blue cheese salad has been a staple in my home ever since, and it always steals the show at dinner parties.
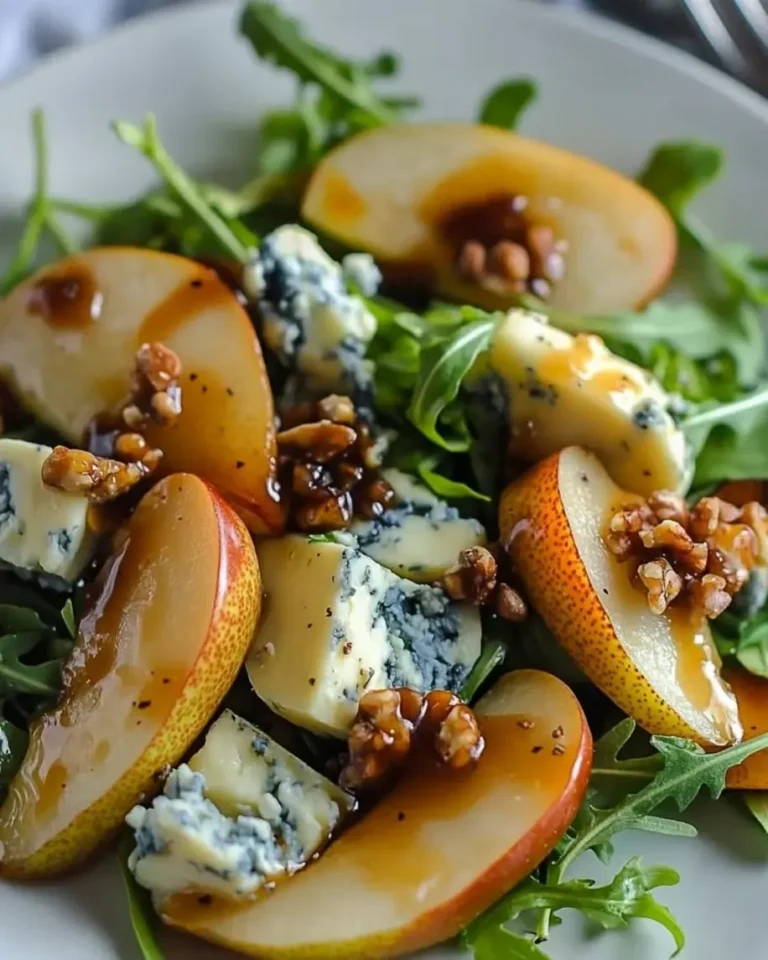
Imagine biting into a warm, buttery slice of caramelized pear, its edges sticky and sweet, paired with the sharp, creamy bite of crumbled blue cheese. Add the crunch of candied walnuts, the peppery freshness of arugula, and a drizzle of tangy balsamic glaze that ties everything together. This fall salad with pears is a celebration of textures and contrasts — warm and cool, sweet and savory, creamy and crunchy. The aroma alone — browned butter, honey, and pear — will make your kitchen smell like autumn in a bowl. It’s the kind of salad that even convinced my husband, a self-proclaimed “salad skeptic,” to ask for seconds.
What sets this blue cheese walnut salad apart from others is the caramelization technique I learned in Paris: using a combination of butter and honey over medium heat, letting the pears cook undisturbed so they develop a deep golden crust without turning mushy. I also add a pinch of sea salt at the end to balance the sweetness — a trick I picked up from my mother’s North African kitchen. This balsamic pear salad comes together in just 16 minutes, making it perfect for busy weeknights yet elegant enough for holiday entertaining. Trust me — once you master these caramelized pears, you’ll want to put them on everything.
Why This Caramelized Pear and Blue Cheese Salad Recipe Is the Best
The Flavor Secret: The magic of this salad lies in the caramelized pears. By cooking them in butter and honey over medium heat, you coax out their natural sugars while adding a subtle nuttiness from the browned butter. I finish them with a tiny pinch of flaky sea salt — a tip from my time in Paris — which elevates the entire dish. The creamy blue cheese provides a bold, tangy counterpoint, while the balsamic glaze adds acidity that cuts through the richness. Every forkful is perfectly balanced.
Perfected Texture: One of the biggest challenges with pear blue cheese salad is keeping the pears from turning mushy. My technique — slicing the pears about ¼-inch thick and cooking them briefly until just tender — ensures they hold their shape while becoming lusciously soft. The candied walnuts add a satisfying crunch, and the fresh greens stay crisp. My mother always taught me that food should feel as good as it tastes, and this salad delivers on both fronts.
Foolproof & Fast: This fall salad with pears comes together in 16 minutes flat, but it tastes like something you’d get at a fancy bistro. There’s no complicated vinaigrette to whisk — just a drizzle of high-quality balsamic glaze. I’ve tested this recipe for everyone from busy NYC friends to holiday guests, and it never fails. Whether you’re a beginner or a seasoned cook, the steps are simple and forgiving. Plus, you can prep the components ahead and assemble when ready.
Caramelized Pear and Blue Cheese Salad Ingredients
I love sourcing ingredients for this pear blue cheese salad at my local farmers market in Manhattan, but everything here is easy to find at any well-stocked US grocery store. The quality of your pears and blue cheese will make the biggest difference, so I always pick the best I can find. Let’s talk through what you’ll need.
Ingredients List
- 2 ripe pears, sliced (Bosc or Bartlett work beautifully)
- 1 tablespoon butter
- 1 tablespoon honey or maple syrup
- 6 cups mixed greens (arugula, spinach, or spring mix)
- ½ cup crumbled blue cheese
- ¼ cup candied walnuts or pecans
- ¼ red onion, thinly sliced
- ¼ cup dried cranberries
- 2 tablespoons balsamic glaze (or balsamic vinaigrette)
Ingredient Spotlight
Pears: Bosc pears are my go-to for this caramelized pear and blue cheese salad because they hold their shape beautifully during cooking and have a lovely honeyed flavor. When selecting pears at the store, look for ones that yield slightly to gentle pressure near the stem — they should be ripe but still firm. If your pears are too soft, they’ll turn mushy in the pan. Bartlett pears work too, but check they’re not overripe. In a pinch, firm Anjou pears are a solid backup.
Blue Cheese: I recommend a creamy, crumbly blue cheese like Gorgonzola dolce, Roquefort, or Point Reyes Blue. The creaminess balances the sweet pears and adds that signature tang. You want a cheese that crumbles easily but still has some spreadable richness. Avoid pre-crumbled cheese if possible — it tends to be drier. A small wedge you crumble yourself makes all the difference in a fall salad with pears.
Balsamic Glaze: This is the finishing touch that ties the entire dish together. You can buy it pre-made at most grocery stores (look for aged balsamic glaze), or make your own by simmering ½ cup balsamic vinegar with 1 tablespoon brown sugar until syrupy. The acidity cuts through the richness of the blue cheese and the sweetness of the pears. For a twist, I sometimes use a fig balsamic glaze I find at the Chelsea Market.
Candied Walnuts: These add the crucial crunch factor in a blue cheese walnut salad. You can use store-bought candied pecans or walnuts, or make your own by tossing nuts with a bit of maple syrup and salt, then toasting them in a pan. The sweetness of the nuts echoes the caramelized pears beautifully.
| Original Ingredient | Best Substitution | Flavor / Texture Impact |
|---|---|---|
| Blue cheese | Feta or goat cheese | Milder, less pungent — still creamy |
| Honey | Maple syrup | Slightly earthier, vegan-friendly |
| Candied walnuts | Toasted pecans or almonds | Similar crunch, different nutty notes |
| Mixed greens | Baby kale or watercress | More peppery or robust flavor |
| Dried cranberries | Dried cherries or chopped dates | Sweeter, chewier texture |
How to Make Caramelized Pear and Blue Cheese Salad — Step-by-Step
This balsamic pear salad is incredibly straightforward, but a few small details make all the difference. Follow these steps, and you’ll have a stunning salad that tastes like it took twice the effort.
Step 1: Caramelize the Pears
Heat a large skillet over medium heat. Add 1 tablespoon butter and 1 tablespoon honey, swirling to combine. Once the butter begins to foam, arrange the pear slices in a single layer (work in batches if needed). Cook for 2–3 minutes per side, until the pears are golden brown with caramelized edges. You’ll see the edges turning a beautiful amber color — that’s your cue to flip. Transfer to a plate and set aside. The key is not to crowd the pan; if the pears are too close together, they’ll steam instead of caramelize.
💡 Sara’s Pro Tip: Pat the pear slices dry with a paper towel before adding them to the pan. Excess moisture is the enemy of caramelization! Also, use a stainless steel or cast-iron skillet rather than nonstick for a better golden crust.
Step 2: Prep the Greens
While the pears are caramelizing, arrange your mixed greens on a large serving platter or divide them among individual bowls. I love using a peppery arugula and tender spinach mix from the farmers market — the slight bitterness of arugula stands up beautifully to the sweet pears and tangy blue cheese. If you’re using larger greens like spring mix, give them a quick rinse and spin dry so they’re crisp.
⚠️ Common Mistake to Avoid: Don’t dress the greens before adding the toppings! The warmth from the caramelized pears will wilt the greens slightly if placed on top — that’s a good thing — but pre-dressing makes them soggy. Drizzle the balsamic glaze at the very end.
Step 3: Assemble and Top
Layer the caramelized pears over the greens. Sprinkle evenly with crumbled blue cheese, candied walnuts, thinly sliced red onion, and dried cranberries. With this pear blue cheese salad, you want each bite to have a bit of everything — so distribute your toppings generously. The warm pears will slightly soften the cheese and wilt the greens just a touch, which is exactly what you want.
💡 Sara’s Pro Tip: For the prettiest presentation, fan out the pear slices in a circular pattern on top of the salad. It takes just a few extra seconds and makes the dish look restaurant-worthy.
Step 4: Drizzle and Serve
Drizzle the balsamic glaze over the entire salad in a zigzag pattern. Taste and adjust — if you’d like a little more acidity, add a light splash of balsamic vinegar. Serve immediately while the pears are still warm. This caramelized pear and blue cheese salad is best enjoyed right away, but if you need to hold it, keep the warm pears separate and assemble just before serving.
⚠️ Common Mistake to Avoid: Adding too much balsamic glaze can overwhelm the delicate flavors. Start with 2 tablespoons and add more if needed. You want it to enhance, not drench.
| Step | Action | Duration | Key Visual Cue |
|---|---|---|---|
| 1 | Caramelize pears in butter and honey | 4–6 mins total | Golden amber edges, pears are tender but hold shape |
| 2 | Arrange greens on platter | 2 mins | Fresh, dry, crisp greens |
| 3 | Top with pears, cheese, nuts, onion, cranberries | 3 mins | Evenly distributed toppings, warm pears |
| 4 | Drizzle with balsamic glaze and serve | 1 min | Glaze coats ingredients lightly |
Serving & Presentation
This pear blue cheese salad is a showstopper, and how you serve it matters. I like to arrange the salad on a large wooden board or a wide, low platter — this way the ingredients stay in beautiful clusters rather than getting tossed together. The warm pears go on top so they gently wilt the greens underneath, creating a lovely contrast of temperatures. For individual servings, compose each plate with a small handful of greens, a few pear slices, and a scattering of toppings so every bite is balanced.
In my NYC apartment, I often serve this fall salad with pears alongside a bowl of roasted butternut squash soup for a cozy autumn dinner. It also pairs beautifully with a crisp Sauvignon Blanc or a dry Riesling — the acidity in the wine echoes the balsamic glaze. For a heartier meal, I’ll add grilled chicken or seared salmon on top. And if you’re entertaining, this salad travels beautifully: just keep the greens undressed, the pears warm, and assemble right at the table for a dramatic reveal.
A final touch from my French training: sprinkle a small pinch of flaky sea salt and a crack of black pepper over the finished salad just before serving. It might seem minor, but it wakes up every single flavor and makes the blue cheese walnut salad taste even more professional.
| Pairing Type | Suggestions | Why It Works |
|---|---|---|
| Side Dish | Roasted butternut squash soup, crusty bread, grilled chicken | The sweetness of squash echoes the pears; bread soaks up extra glaze |
| Sauce / Dip | Extra balsamic glaze, honey mustard, lemon tahini | Adds brightness and another layer of flavor |
| Beverage | Sauvignon Blanc, dry Riesling, sparkling water with lemon | Acidity cuts through creamy cheese and sweet pears |
| Garnish | Flaky sea salt, fresh thyme leaves, pomegranate arils | Adds color, freshness, and a pop of flavor |
Make-Ahead, Storage & Reheating
I know life gets busy — some weeks I’m testing three recipes at once in my kitchen! This balsamic pear salad is perfect for meal prep because you can prepare nearly everything in advance. Here’s how I do it for my NYC schedule: I caramelize the pears, toast the nuts, slice the onion, and wash the greens all the night before. Then I store each component separately and assemble right before eating. It takes just 2 minutes to put together at dinner time.
| Method | Container | Duration | Reheating Tip |
|---|---|---|---|
| Refrigerator | Airtight container (components separate) | 2–3 days | Warm pears in a dry skillet for 1 min per side |
| Freezer | Not recommended for assembled salad | — | — |
| Make-Ahead | Store pears, nuts, and dressing separately | 1 day in advance | Assemble just before serving for best texture |
The most important thing to remember: never store this fall salad with pears fully assembled. The greens will turn soggy, and the pears will lose their texture. Keep everything in separate containers in the fridge. When you’re ready to eat, quickly warm the pears in a dry skillet — just 1 minute per side — and assemble fresh. The blue cheese can go straight from the fridge onto the greens; it softens beautifully against the warm pears.
Variations & Easy Swaps
This caramelized pear and blue cheese salad is wonderfully versatile. Over the years, I’ve adapted it for friends with dietary needs and cravings for something different. Here are my favorite variations — each one tested in my own kitchen and given the Sara seal of approval.
| Variation | Key Change | Best For | Difficulty Impact |
|---|---|---|---|
| Vegan | Use maple syrup, omit cheese or use vegan cheese | Plant-based diets | Same difficulty |
| Warm Grain Bowl | Add cooked quinoa or farro, reduce greens | Heartier meal | Same difficulty |
| Moroccan Twist | Add cinnamon to pears, swap cranberries for dates, add toasted almonds | Bold flavor lovers | Same difficulty |
Vegan Version
For a fully plant-based pear blue cheese salad, simply replace the butter with coconut oil or a vegan butter, and use maple syrup instead of honey. The caramelization works beautifully with coconut oil — it adds a subtle tropical note that complements the pears. Omit the blue cheese or use a high-quality vegan blue cheese alternative. I like the brand Violife for its tangy, crumbly texture. Everything else stays the same, and you won’t miss a thing.
Warm Grain Bowl Version
When I want a heartier meal, I turn this fall salad with pears into a warm grain bowl. I cook 1 cup of farro or quinoa and spread it on the bottom of the bowl before layering the greens, pears, and toppings. The warm grains soak up the balsamic glaze beautifully and add a chewy, nutty base. This version especially reminds me of the hearty one-bowl meals my mother would make back in Morocco — simple, satisfying, and full of flavor.
Moroccan Twist
This version is a nod to my roots. I add a pinch of cinnamon to the butter and honey mixture while caramelizing the pears — the warm spice makes the kitchen smell incredible. I swap the dried cranberries for chopped Medjool dates, and use toasted almonds instead of walnuts. The combination of cinnamon, dates, and almonds is quintessentially Moroccan, and it pairs gorgeously with the tangy blue cheese. I serve this version when I’m feeling homesick for my mother’s table.
What is the best way to caramelize pears for a salad without them becoming mushy?
The key to perfectly caramelized pears that hold their shape is threefold. First, choose pears that are ripe but still firm — Bosc or Bartlett varieties are ideal. Second, slice them about ¼-inch thick; too thin and they’ll fall apart, too thick and they won’t cook evenly. Third, cook them over medium heat in a skillet with butter and honey, and resist the urge to move them around too much. Let them cook undisturbed for 2–3 minutes per side until a golden crust forms. Pat the pear slices dry before cooking to remove excess moisture, and never crowd the pan — cook in a single layer with space between each slice. This method gives you tender, caramelized pears with structure, not mush.
Can I use a different type of cheese instead of blue cheese in this salad?
Absolutely! While blue cheese is the classic choice for this caramelized pear and blue cheese salad, there are plenty of delicious alternatives. Goat cheese (chèvre) adds a tangy, creamy element that pairs beautifully with the sweet pears. Feta cheese brings a salty, crumbly texture that works well too. If you want something milder, try shaved Parmesan or a soft brie cut into small pieces. Each cheese will change the flavor profile slightly — goat cheese is earthier, feta is saltier, and Parmesan adds nuttiness — so pick based on your preference. For a dairy-free option, a vegan blue cheese or cashew-based chevre are available at most well-stocked grocery stores.
How do you prevent the caramelized pears from sticking to the pan?
Sticking is usually a sign that the pan isn’t hot enough or there isn’t enough fat. Start by heating your skillet over medium heat before adding the butter and honey — this ensures the butter melts evenly and coats the pan. Use a stainless steel or cast-iron skillet rather than nonstick for better caramelization. Once the butter is foaming, add the pear slices in a single layer. If you’re making a large batch, work in batches so you don’t crowd the pan. Let the pears cook undisturbed for 2–3 minutes before trying to flip them — they’ll release naturally when a golden crust forms. If they still feel stuck, give them another 30 seconds. A well-seasoned cast-iron pan is my personal favorite for this recipe.
What kind of dressing pairs best with a caramelized pear and blue cheese salad?
This balsamic pear salad shines with a simple balsamic glaze — it’s thick, tangy, and slightly sweet, which complements the caramelized pears and creamy blue cheese without overpowering them. You can buy balsamic glaze at most grocery stores or make your own by simmering ½ cup balsamic vinegar with 1 tablespoon brown sugar until it reduces to a syrupy consistency. For a lighter option, a balsamic vinaigrette works beautifully: whisk together 3 tablespoons balsamic vinegar, 1 tablespoon honey, 1 teaspoon Dijon mustard, and ¼ cup olive oil. A honey mustard dressing or even a simple lemon vinaigrette would also pair nicely. Whatever you choose, go easy — you want the dressing to enhance, not mask, the other flavors.
Is this pear blue cheese salad suitable for meal prep?
Yes, this fall salad with pears is excellent for meal prep with one important rule: keep all components separate until you’re ready to eat. I recommend storing the caramelized pears in one container, the mixed greens in another, and the toppings (cheese, nuts, cranberries, onion) in separate bags or small containers. The pears will keep in the refrigerator for 2–3 days. When you’re ready to serve, simply reheat the pears in a dry skillet for about 1 minute per side, then assemble the salad. This approach keeps the greens crisp and the pears perfectly tender. The balsamic glaze can be stored at room temperature or in the fridge and drizzled right before serving.
Can I make this caramelized pear salad ahead for a dinner party?
Absolutely! This salad is one of my favorite dishes to serve when entertaining because almost everything can be prepped in advance. Up to 24 hours ahead, you can caramelize the pears, toast the nuts, slice the red onion, rinse and dry the greens, and make the dressing — store everything separately in the fridge. I recommend assembling the salad just 10 minutes before your guests sit down. Reheat the pears briefly in a skillet or even in the microwave for 20 seconds, then arrange everything on a platter. The warm pears on top will gently wilt the greens and soften the blue cheese, creating a gorgeous effect. It’s an elegant dish that takes very little last-minute effort.
What type of pear is best for a blue cheese walnut salad?
For a blue cheese walnut salad, I always recommend Bosc pears as my top choice. They have a firm, dense texture that holds up beautifully during caramelization, and their honeyed sweetness pairs perfectly with blue cheese and walnuts. Bartlett pears are my second choice — they’re softer and juicier, so you need to be careful not to overcook them. Anjou pears also work well; they’re mild and slightly sweet, with a firm texture that withstands cooking. Whichever variety you choose, make sure the pears are ripe but still firm — they should yield slightly to gentle pressure near the stem but not feel mushy. This ensures they’ll caramelize beautifully without falling apart.
Can I add protein to this fall salad with pears to make it a full meal?
Yes, this caramelized pear and blue cheese salad is fantastic with added protein. Grilled chicken breast seasoned with salt, pepper, and a touch of thyme is a classic choice — the savory meat balances the sweet pears beautifully. For seafood lovers, pan-seared salmon or seared shrimp work wonderfully; the richness of the fish complements the creamy blue cheese. If you prefer a vegetarian option, add chickpeas roasted with smoked paprika and a drizzle of olive oil, or a handful of toasted pepitas for extra plant-based protein. I often serve this salad with a side of crusty bread for busy weeknights, or with warm farro or quinoa for a heartier bowl. Any of these additions turn this salad into a satisfying main course.
How do you thinly slice red onion for salad without it being too sharp?
For a milder, more pleasant onion flavor in this pear blue cheese salad, I use a simple trick I learned in Paris. Cut the red onion in half through the root end, then slice it into very thin half-moons — about ⅛-inch thick. Place the slices in a small bowl and cover them with cold water. Let them sit for 5–10 minutes, then drain and pat dry. The water draws out some of the harsh sulfur compounds that make raw onion pungent, leaving you with a mild, sweet, and crunchy onion that doesn’t overwhelm the salad. If you’re short on time, you can also toss the sliced onion with a squeeze of lemon juice — the acidity helps tame the sharpness while adding a bright note.
Can I use frozen pears for caramelizing in this salad?
I don’t recommend using frozen pears for this caramelized pear and blue cheese salad. Frozen fruit contains a lot of excess water, which releases during cooking and prevents proper caramelization. Instead of getting golden, buttery pears, you’ll end up with steamed, mushy slices. Fresh pears are always the best choice for this recipe. If fresh pears aren’t in season, look for firm, slightly underripe pears at the store — they’ll ripen beautifully in a few days at room temperature. You can also try using firm apples like Honeycrisp or Fuji as a substitute; they caramelize well and offer a similar sweet-tart profile that works with blue cheese and walnuts.
Share Your Version!
I truly hope this caramelized pear and blue cheese salad becomes a favorite in your kitchen — it’s one of those recipes that feels both simple and special, exactly the way I think food should be. If you give it a try, I’d love to hear how it turned out! Leave a star rating and a comment below — tell me what type of pear you used, whether you added a protein, or if you tried one of the variations. Your feedback helps other readers too, and I read every single comment.
And if you share a photo on Instagram or Pinterest, please tag @cheerychop and use #SaraKitchen — I love seeing your beautiful creations and often feature them in my stories! Do you prefer Bosc or Bartlett for your salads? I’m curious which pear you reach for — drop your answer in the comments, and I’ll share my best tips for whatever variety you pick.
From my NYC kitchen to yours — I hope this recipe brings as much warmth to your table as it does to mine. — Sara 🧡
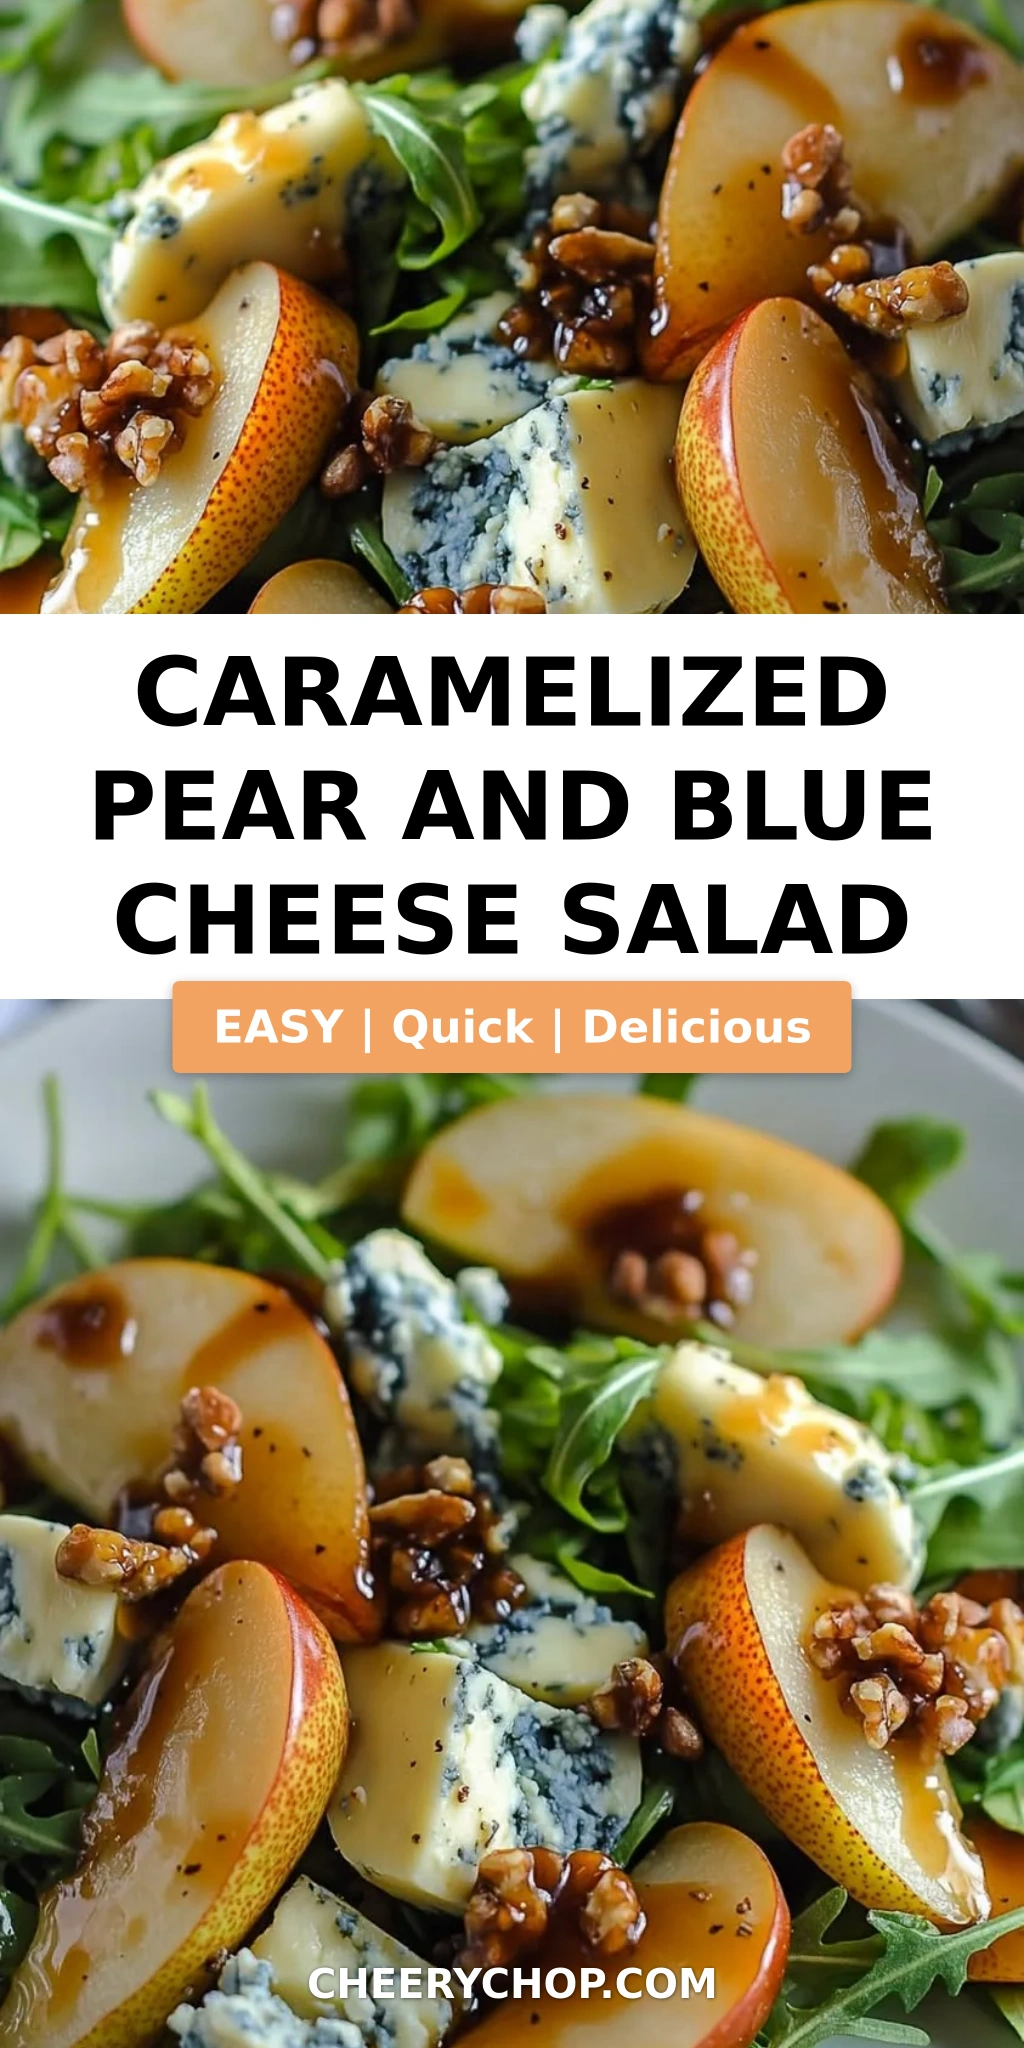
Love This Recipe? Save It to Pinterest!
If you enjoyed this Caramelized Pear and Blue Cheese Salad recipe, don’t let it get lost in your browser tabs! 😄 Pin it now so you can find it again anytime — and explore hundreds more tried-and-tested recipes waiting for you on my Pinterest boards.
👉 Follow Sara on Pinterest @chefrecipes2
📌 Pin this recipe · 🔁 Re-pin your favorites · 💬 Tag me when you make it — I love seeing your creations!
💬 What’s your go-to fall salad?
Drop a comment below — I’d love to hear how you make this caramelized pear and blue cheese salad your own! 🍂🧀🍐
Caramelized Pear and Blue Cheese Salad
A delicious fall salad with caramelized pears, creamy blue cheese, candied nuts, and a tangy balsamic glaze.
- Prep Time: 10 minutes
- Cook Time: 6 minutes
- Total Time: 16 minutes
- Yield: 4 1x
- Method: Salad
- Cuisine: American
Ingredients
- 2 ripe pears, sliced
- 1 tablespoon butter
- 1 tablespoon honey or maple syrup
- 6 cups mixed greens (arugula, spinach, or spring mix)
- ½ cup crumbled blue cheese
- ¼ cup candied walnuts or pecans
- ¼ red onion, thinly sliced
- ¼ cup dried cranberries
- 2 tablespoons balsamic glaze (or balsamic vinaigrette)
Instructions
- In a skillet over medium heat, melt butter and honey. Add pear slices and cook for 2-3 minutes per side until caramelized.
- Arrange mixed greens on a serving platter or in a bowl.
- Top with caramelized pears, crumbled blue cheese, candied nuts, red onion slices, and dried cranberries.
- Drizzle with balsamic glaze and serve immediately.
Notes
For a vegan version, use maple syrup and omit blue cheese or substitute with vegan cheese.
Nutrition
- Calories: 320
- Sugar: 18g
- Fat: 22g
- Carbohydrates: 28g
- Protein: 8g
Tried This Recipe? Leave a Comment!
Did you make this recipe? I’d love to hear how it turned out! Please leave a comment and a rating below. Your feedback helps other home cooks and supports cheerychop.com!
For more delicious inspiration, follow me on Pinterest!


