Table of Contents
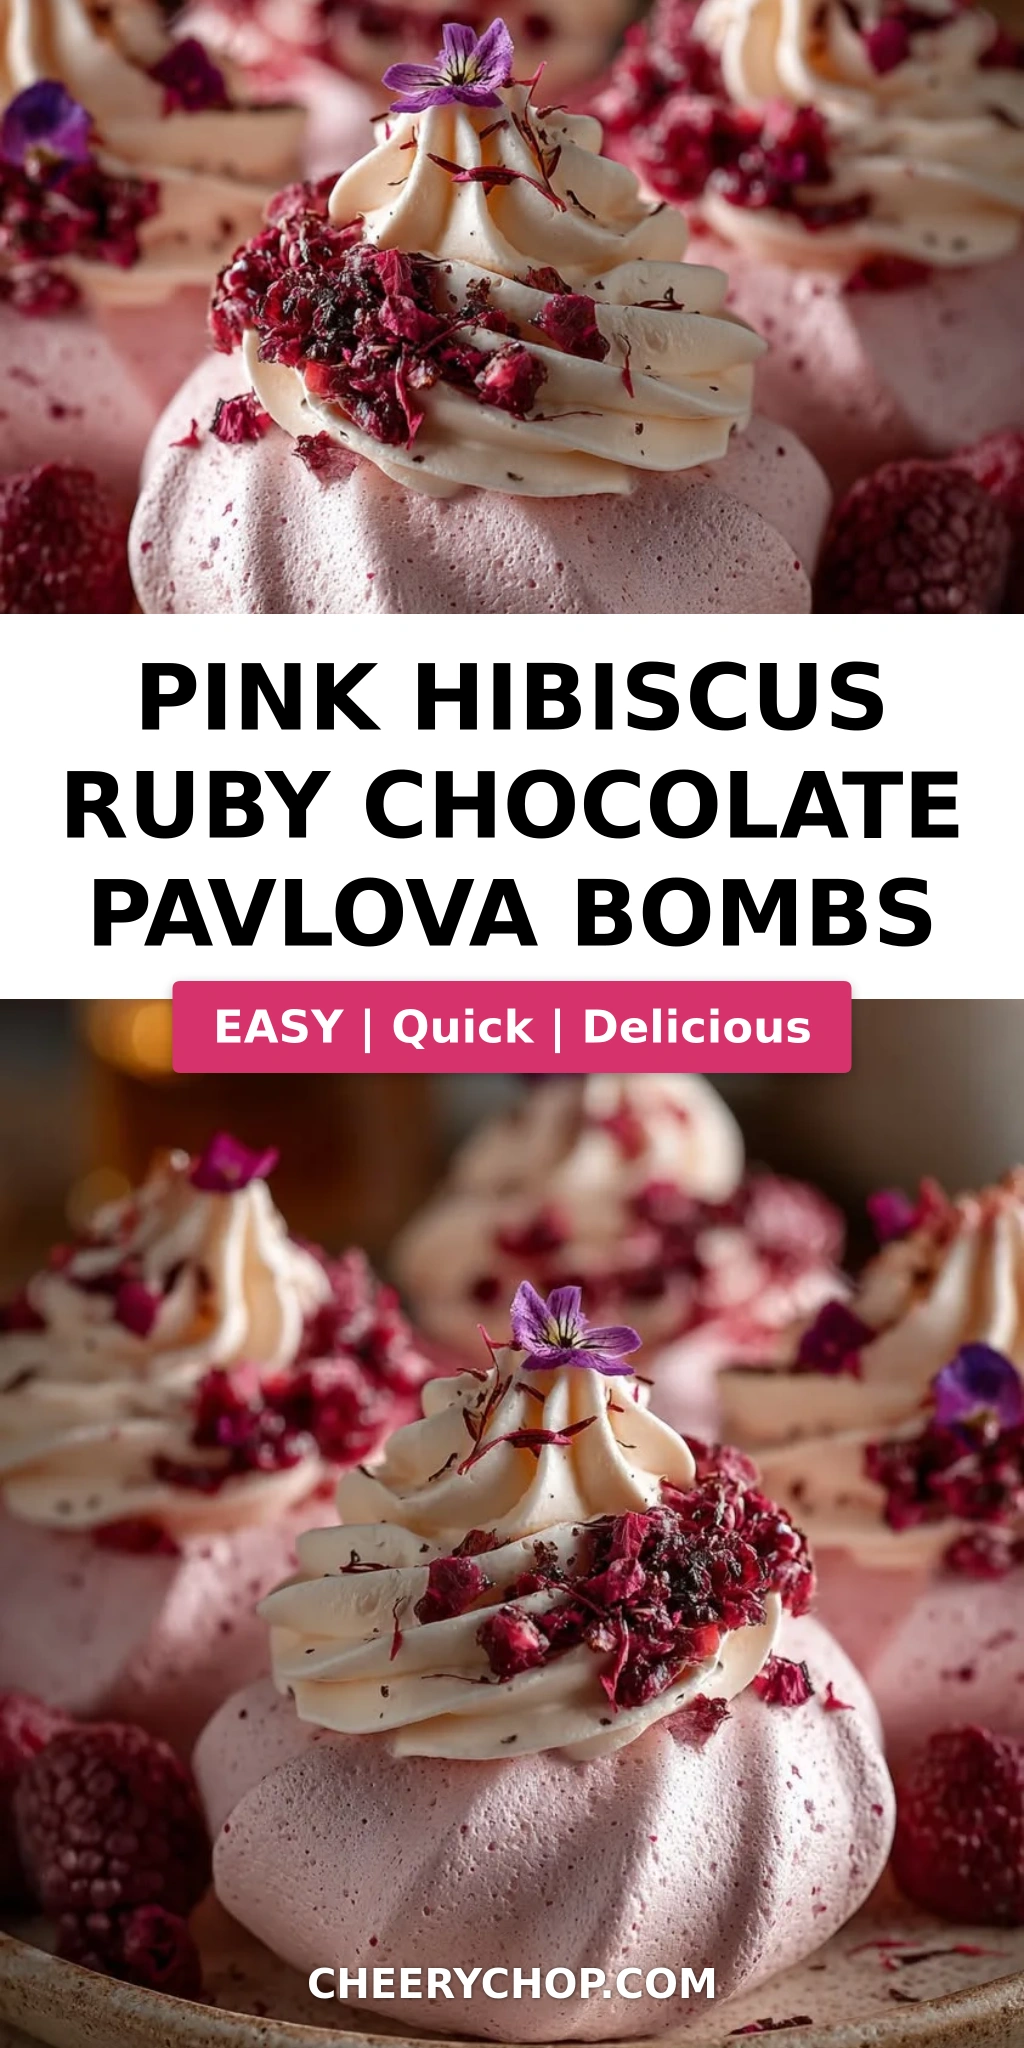
Pink Hibiscus Ruby Chocolate Pavlova Bombs – A Stunning Dessert with a Hibiscus-Infused Cream and Ruby Chocolate Glaze
I still remember the first time I tasted ruby chocolate — it was in a tiny chocolatier in Paris during my pastry training. The natural pink hue and berry-like tang felt like magic. Growing up in Morocco, my mother often infused teas and sweets with dried hibiscus flowers, that deep crimson color and tart floral note that I’ve always loved. So when I moved to New York and started creating desserts that blend those worlds, this ruby chocolate pavlova recipe was born. The crisp meringue, the hibiscus cream, the ruby chocolate glaze — every bite tells a story.
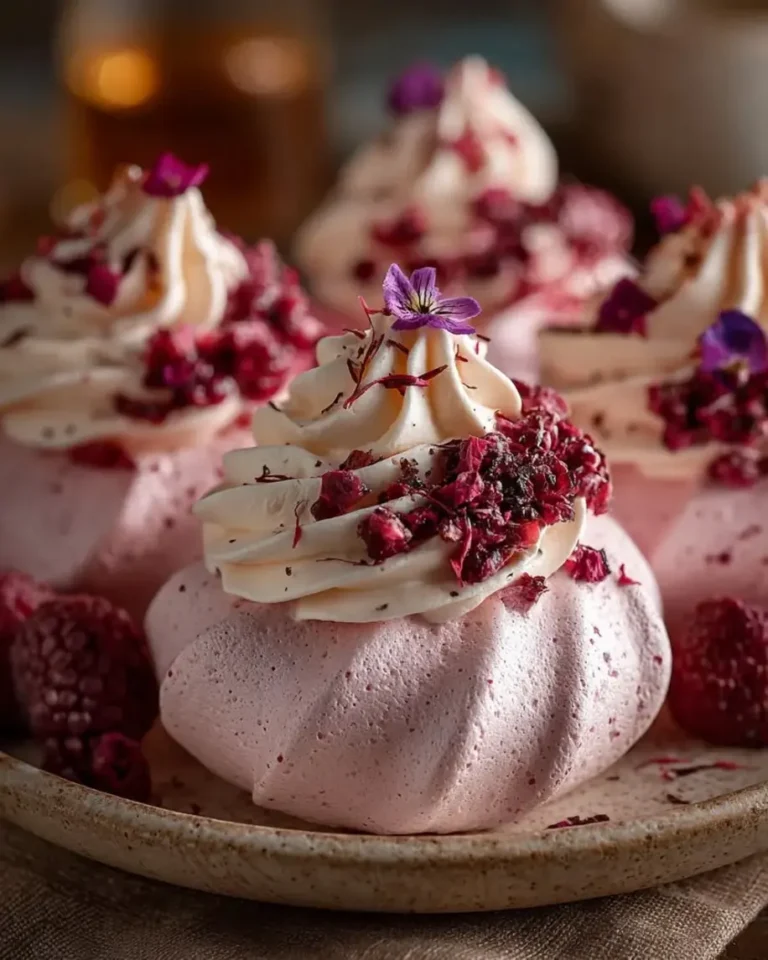
Imagine breaking through a delicate, cloud-like shell into a creamy, floral center studded with sweet berries, all finished with a glossy pink chocolate drizzle. The aroma of hibiscus mingles with vanilla and dark berries. The texture is pure contrast: crunchy meringue, silky cream, gooey preserves. This is a hibiscus pavlova dessert that feels both elegant and deeply personal. I use a simple technique from Le Cordon Bleu — cooling meringues in the oven to prevent cracking — and a secret step: steeping the cream with hibiscus tea bags to get that vibrant flavor without adding liquid that would ruin the pavlova.
This recipe is my signature because it’s approachable yet impressive. I’ll walk you through each step, from whipping meringue to tempering ruby chocolate. My pink pavlova bombs are perfect for Valentine’s Day, Mother’s Day, or any special occasion. And because I’ve tested it a dozen times, I know exactly where problems can occur — I’ll share my pro tips so you can avoid a soggy bottom or a cracked shell. Trust me, you can make these ruby chocolate dessert stars even if you’ve never made pavlova before.
Why This Pink Hibiscus Ruby Chocolate Pavlova Bombs Recipe Is the Best
The flavor secret lies in pairing two ingredients that complement each other beautifully: tart hibiscus and naturally fruity ruby chocolate. Ruby chocolate — with its pink color and notes of red berries — doesn’t need artificial coloring, and when you combine it with a hibiscus-infused cream, you get a dessert that tastes like berries kissed by flowers. I drew inspiration from the Moroccan tradition of making jasmine and orange blossom creams, but swapped in hibiscus for a more vibrant, modern twist. The creamy, floral filling cuts right through the sweetness of the meringue.
Perfected texture comes from my French pastry training. The key is to ensure the meringue is completely dry before you fill it. I bake the shells low and slow, then leave them in the oven to cool overnight — that gradual temperature drop prevents cracking and keeps the inside marshmallow-soft. The cornstarch and vinegar in the meringue give it stability. Then, the hibiscus cream pavlova filling is whipped just to soft peaks so it holds its shape but stays luscious.
Foolproof and fast for home cooks: you can make the meringue shells days ahead and store them in an airtight container. The assembled pavlova bombs come together in minutes. No complicated piping required — just spoon and drizzle. I’ve simplified the steps without sacrificing the wow factor. Even beginners get crack-free shells when they follow my cooling trick. This is the kind of dessert that makes you look like a pastry chef, and I promise it’s simpler than it looks.
Ruby Chocolate Pavlova Recipe Ingredients
I pick up fresh berries at the Union Square Greenmarket, and I always keep a stash of ruby chocolate from Callebaut or my local baking supply shop. The hibiscus tea bags are from a Middle Eastern grocery near me, but any strong hibiscus tea blend works. This recipe uses simple ingredients — the magic comes from how they’re combined.
Ingredients List
- For the Pavlova Shells:
- 4 large egg whites
- 1 cup granulated sugar
- 1 tsp cornstarch
- 1 tsp white vinegar
- 1/2 tsp vanilla extract
- Pinch of salt
- For the Hibiscus Cream Filling:
- 1 cup heavy cream
- 2 tbsp powdered sugar
- 2 hibiscus tea bags
- 1/4 cup mascarpone cheese
- 1 tsp vanilla extract
- For the Ruby Chocolate Glaze:
- 6 oz ruby chocolate, chopped
- 1/3 cup heavy cream
- 1 tbsp honey
- Pink food coloring, optional
- For the Berry Center:
- 1/2 cup raspberry preserves
- 1/4 cup diced strawberries
- For Garnish (optional):
- Dried hibiscus petals
- Fresh raspberries
- Ruby chocolate shavings
Ingredient Spotlight
Ruby chocolate is the star — look for it in specialty baking stores or online; it’s naturally pink and fruity. Egg whites should be at room temperature for the meringue to whip up properly. Hibiscus tea bags are widely available; make sure they are pure hibiscus, not blends with other teas, for the strongest flavor. Mascarpone adds richness to the cream without making it too heavy. Use high-quality raspberry preserves — no seeds, please — for a smooth center.
| Original Ingredient | Best Substitution | Flavor / Texture Impact |
|---|---|---|
| Ruby chocolate | White chocolate + pink food coloring + freeze-dried raspberry powder | Less tangy, but still pink and sweet; add a drop of raspberry extract |
| Hibiscus tea bags | Dried hibiscus flowers (1 tbsp steeped in cream) | More floral, slightly earthier; strain well |
| Mascarpone | Cream cheese, softened | Slightly tangier, but still creamy; beat until smooth |
How to Make Pink Hibiscus Ruby Chocolate Pavlova Bombs — Step-by-Step
Let me walk you through each step. I’ve broken it down so you can follow along easily. The key is to be gentle with the meringue and patient with the cooling.
Step 1: Prepare the Oven and Pans
Preheat your oven to 250°F (120°C). Line a large baking sheet with parchment paper. If you want perfectly round nests, trace six 3-inch circles onto the parchment and flip it over — you’ll see the marks but they won’t touch the meringue.
💡 Sara’s Pro Tip: Use a dab of meringue under the parchment corners to stick it to the pan. This keeps it from sliding when you pipe.
Step 2: Make the Meringue
In a clean, dry bowl, beat the egg whites with a pinch of salt on medium speed until soft peaks form (when you lift the whisk, the peaks flop over). Gradually add the sugar, a tablespoon at a time, while beating on high speed. Continue until the mixture is stiff, glossy, and holds a peak when you lift the whisk. Then add cornstarch, vinegar, and vanilla, and fold in gently with a spatula.
⚠️ Common Mistake to Avoid: Over-whipping after adding sugar can make the meringue grainy. Stop as soon as it’s stiff and shiny — about 5-7 minutes total.
Step 3: Shape the Shells
Spoon or pipe the meringue onto the prepared sheet, forming dome shapes with a slight well in the center. Use the back of a spoon to create a shallow indent for the filling. Aim for even thickness — about 1 inch thick on the edges and ½ inch in the center.
💡 Sara’s Pro Tip: For consistent nests, use a piping bag with a large star tip. Pipe from the center in a spiral outward, then build up the sides. The ridges also look pretty!
Step 4: Bake and Cool
Bake for 60 minutes. Do not open the oven door during baking. After 60 minutes, turn the oven off but leave the meringues inside to cool completely — at least 2 hours, or overnight. This gradual cooling prevents cracking.
⚠️ Common Mistake to Avoid: Don’t rush the cooling. If you take them out while still warm, they’ll crack from the sudden temperature change.
Step 5: Infuse the Hibiscus Cream
While the meringues cool, heat 1 cup heavy cream in a small saucepan until just simmering (do not boil). Remove from heat, add the hibiscus tea bags, and let steep for 10 minutes. Remove the bags, pressing out as much cream as possible. Chill the cream completely in the fridge — at least 30 minutes.
💡 Sara’s Pro Tip: For a stronger hibiscus flavor, steep two bags, but never more than 10 minutes or the cream can become slightly bitter. You can also add a drop of rose water for extra floral notes.
Step 6: Whip the Cream
Once chilled, transfer the hibiscus-infused cream to a bowl. Add powdered sugar, mascarpone, and vanilla. Whip on medium-high speed until soft peaks form — about 2-3 minutes. Do not over-whip; you want it to be light and spoonable.
⚠️ Common Mistake to Avoid: Over-whipping the cream will make it grainy and separate. Stop as soon as you see soft curls that hold their shape for a moment.
Step 7: Prepare the Berry Center
In a small bowl, stir together raspberry preserves and diced strawberries. Set aside.
Step 8: Assemble the Pavlova
Place each cooled meringue shell on a serving plate. Spoon a small amount of the berry mixture into the center well — about 1 tablespoon per shell. Then pipe or spoon the hibiscus cream over the berries, creating a tall swirl. The cream should cover the berries completely.
💡 Sara’s Pro Tip: Assemble just before serving to keep the meringue crisp. You can prepare all components separately and assemble in minutes.
Step 9: Make the Ruby Chocolate Glaze
Chop the ruby chocolate into small pieces and place in a heatproof bowl. Heat 1/3 cup heavy cream until just warm (not boiling). Pour over the chocolate and let stand for 1 minute, then stir gently until smooth and glossy. Stir in honey and optional pink food coloring if you want an even brighter hue.
⚠️ Common Mistake to Avoid: If the cream is too hot, it can seize the chocolate. Heat just until you see small bubbles around the edges — about 150°F.
Step 10: Glaze and Garnish
Spoon or drizzle the ruby chocolate glaze over the cream-topped pavlovas. The glaze should drip down the sides. While still wet, sprinkle with dried hibiscus petals, fresh raspberries, and chocolate shavings. Serve immediately for the best texture.
| Step | Action | Duration | Key Visual Cue |
|---|---|---|---|
| 2 | Whip meringue | 5-7 minutes | Stiff, glossy peaks |
| 4 | Bake shells | 60 minutes + cooling | Pale, crisp, dry to touch |
| 5 | Infuse cream | 10 minutes steep + chill | Pink-tinted cream |
| 6 | Whip cream | 2-3 minutes | Soft peaks, spreadable |
| 9 | Make glaze | 1-2 minutes | Smooth, glossy, pink |
Serving & Presentation
These pavlova bombs are best served immediately after glazing, while the shells are still crisp and the cream is cold. Place each one on a small plate or a dessert pedestal. The contrast of the white meringue, pink cream, and glossy ruby chocolate is stunning. I love to add a final sprinkle of dried hibiscus petals and a few fresh raspberries on the side.
In Morocco, we often serve delicate pastries with mint tea. Here in NYC, I pair these pavlovas with a sparkling rosé or a fruity iced tea. For a fun twist, you can serve them as individual “bombs” on a tray — guests can pick them up and take a bite, just like a handheld dessert. The children love them for birthday parties because of the color and the sweet, crunchy shell.
| Pairing Type | Suggestions | Why It Works |
|---|---|---|
| Side Dish | Fresh fruit salad, passion fruit coulis | Adds brightness and acidity to balance sweetness |
| Sauce / Dip | Extra ruby chocolate sauce, berry compote | Enhances the chocolate and fruit notes |
| Beverage | Sparkling rosé, hibiscus iced tea, espresso | Cleanses palate, echoes hibiscus flavor |
| Garnish | Dried hibiscus petals, fresh mint, edible flowers | Color contrast, floral aroma, visual appeal |
Make-Ahead, Storage & Reheating
I love prepping these pavlovas for parties. The meringue shells can be baked up to a week in advance and kept in an airtight container at room temperature. The hibiscus cream can be whipped a day ahead and stored in the fridge — just re-whip briefly before using. Assemble only when ready to serve for the best texture.
| Method | Container | Duration | Reheating Tip |
|---|---|---|---|
| Refrigerator | Airtight container (separate components) | Unfilled shells: 1 week Cream: 2 days |
No reheating; assemble cold |
| Freezer | Freezer-safe bag (meringue only) | Up to 1 month | Thaw at room temp, then re-crisp in 250°F oven for 5 minutes |
| Make-Ahead | Bake shells, whip cream, prepare berry mix | 1 day in advance | Assemble 15 minutes before serving |
If your pavlova shells become soft after storage, you can re-crisp them in a 250°F oven for 5 minutes and then cool again. I don’t recommend freezing assembled pavlovas because the cream will weep and make the meringue soggy. For a busy weekend, I often bake the shells on Friday, prepare the cream Saturday morning, and assemble just before guests arrive. It’s a total timesaver.
Variations & Easy Swaps
| Variation | Key Change | Best For | Difficulty Impact |
|---|---|---|---|
| Moroccan Rose & Pistachio | Use rose water instead of vanilla in cream; top with crushed pistachios | Elegant, Middle Eastern twist | Same |
| Dairy-Free | Full-fat coconut cream for heavy cream; omit mascarpone or use vegan cream cheese | Lactose-intolerant guests | Medium (chilling cream longer needed) |
| Berry-Mango Medley | Replace raspberry preserves with mango puree; add diced mango and blueberries | Summer fruit celebration | Same |
Moroccan Rose & Pistachio
My mother’s kitchen often smelled of rose water and honey. For this variation, replace the vanilla in the cream with 1 teaspoon of rose water. Top the assembled pavlova with crushed pistachios and a drizzle of honey. The floral note of rose pairs beautifully with the ruby chocolate, and the pistachio adds a lovely crunch. This version is especially popular for bridal showers.
Dairy-Free Version
I’ve tested this with full-fat coconut cream — refrigerate a can of coconut cream overnight, scoop the solid part, and whip it just like heavy cream. Omit the mascarpone or use a dairy-free cream cheese. The coconut flavor subtly complements the hibiscus. One tip: chill the bowl and beaters for better volume. The texture is slightly lighter but still luscious.
Berry-Mango Medley
When I find peak-season mangoes at the NYC farmers market, I swap the berry center for a mango purée (just blitz fresh mango with a little lime juice). Use diced mango and blueberries inside. The sweet-tart mango is a fantastic partner for the hibiscus cream. This variation brightens up the dessert for summer parties and is a hit with kids.
What type of ruby chocolate works best for making pink hibiscus pavlova bombs?
Ruby chocolate is a naturally pink variety of chocolate from Callebaut. It has a distinct fruity, slightly tangy flavor that works perfectly with the hibiscus. For this recipe, use good-quality ruby chocolate couverture (bars or chips). Avoid “pink chocolate” products that are just white chocolate dyed pink — they won’t give you the same flavor or shine. Callebaut Ruby is widely available online or at specialty baking stores. You can also find ruby chocolate from brands like Cacao Barry. Chop it finely for smooth melting.
How do you infuse hibiscus flavor into a pavlova without making the meringue soggy?
The trick is to infuse the cream, not the meringue. Steep hibiscus tea bags in warm cream, then chill it completely before whipping. This gives you a beautifully flavored cream without adding any liquid to the meringue. Another option is to use powdered dried hibiscus — but you must sift it in very carefully to avoid clumps. Never add hibiscus liquid directly to the meringue, as it will cause the shells to collapse or become soft. For an even stronger flavor, use two tea bags and steep for 10 minutes; any longer may develop bitterness.
Can I prepare pink hibiscus ruby chocolate pavlova bombs ahead of time and store them?
Yes, but with important caveats. Bake the meringue shells up to a week ahead and store them in an airtight container at room temperature. The hibiscus cream can be whipped a day ahead and refrigerated in a sealed container; give it a quick whisk to restore fluffiness just before using. The ruby chocolate glaze is best made fresh within a few hours of serving. Assemble the pavlovas just before serving — the cream will soften the meringue if left too long. For a dinner party, I recommend assembling no more than 30 minutes ahead.
What is the best way to pipe or shape pavlova bombs to prevent them from cracking?
To minimize cracking, first ensure the meringue is beaten to stiff, glossy peaks — undermixed meringue is unstable. Pipe or spoon the meringue into even domes using a large star tip or the back of a spoon. Create a shallow well in the center for filling. The most important tip is to cool the pavlovas slowly in the turned-off oven with the door closed for at least 2 hours. This gentle temperature transition prevents sudden contraction that causes cracks. Also, avoid drafts in the kitchen and never open the oven door during baking.
Can I use white chocolate instead of ruby chocolate?
Yes, you can substitute white chocolate, but the flavor and color will be different. Ruby chocolate has a natural berry-tang that complements the hibiscus, while white chocolate is sweeter and creamier. To mimic the pink color, add a few drops of pink or red food coloring. For a closer flavor match, stir in a teaspoon of freeze-dried raspberry powder or a drop of raspberry extract. The texture will be similar, but the glaze may be slightly less shiny. I recommend using ruby chocolate if you can find it for the best result.
How do I get my meringue to be crispy on the outside and chewy on the inside?
The secret lies in the baking temperature and time. Bake the meringue at a low temperature (250°F/120°C) for a full hour. This slowly dries the outside while keeping the inside soft. Adding cornstarch and vinegar to the meringue helps stabilize it and creates a marshmallowy interior. After baking, let the shells cool completely in the turned-off oven — the residual heat finishes drying the outer layer. If your meringue is sticky or soft inside, it may not have baked long enough. Next time, extend the baking time by 10 minutes.
Can I use frozen berries for the center instead of fresh?
Absolutely, but you need to thaw and drain them well first. Frozen strawberries release a lot of liquid when thawed, which can make the meringue soggy. Thaw the berries in a colander set over a bowl, then gently pat them dry with paper towels. Dice them and toss with a little sugar and maybe a teaspoon of cornstarch to absorb excess moisture. The preserves already provide sweetness and structure, so you can use frozen berries as long as you remove the extra liquid. I prefer fresh when they’re in season, but frozen work great in winter.
Why did my pavlova collapse after I added the cream?
This usually happens if the meringue hasn’t been baked dry enough inside. A properly baked pavlova shell should feel firm and dry to the touch, even though it may still be slightly soft inside. If you add cream too soon, the moisture can cause the meringue to weep and collapse. Always ensure the shells are completely cooled (overnight is best) before filling. Also, don’t overfill with cream — keep a ½-inch border around the edge. If your kitchen is humid, consider baking the shells an extra 5-10 minutes to help them dry out further.
What is the best way to drizzle the ruby chocolate glaze?
For a beautiful drizzle, let the glaze cool slightly until it thickens to a ribbon consistency — it should coat the back of a spoon but still flow slowly. Use a small spoon to drizzle over the cream-covered pavlova in a circular motion. You can also transfer the glaze to a piping bag with a small tip and pipe zigzags. For a more dramatic look, dip a fork into the glaze and wave it over the pavlova to create thin threads. Work quickly, as the glaze sets fast. If it becomes too thick, gently reheat with a teaspoon of warm cream.
Can I make mini pavlova bombs for a party?
Yes, mini versions are perfect for parties! Use a piping bag to create smaller nests — about 2 inches wide — and reduce the baking time to 40-45 minutes. Check doneness by gently tapping the top; it should feel dry and firm. You’ll need less filling per shell: about a teaspoon of berry mixture, a tablespoon of cream, and a small drizzle of glaze. These bite-sized bombs are easy to pick up and eat. Just remember to cool them slowly in the oven as usual, and store them dry before assembling. They look adorable on a platter!
Share Your Version!
I’d love to see how your pink hibiscus ruby chocolate pavlova bombs turn out! Leave a star rating and a comment below — tell me which variation you tried or what special occasion you’re making them for. Snap a photo and tag @cheerychop on Instagram or Pinterest. Did you try the rose and pistachio version? Or did you go dairy-free? Let me know — I read every comment.
From my NYC kitchen to yours — I hope this recipe brings as much warmth to your table as it does to mine. — Sara 🧡
Love This Recipe? Save It to Pinterest!
If you enjoyed this Pink Hibiscus Ruby Chocolate Pavlova Bombs recipe, don’t let it get lost in your browser tabs! 😄 Pin it now so you can find it again anytime — and explore hundreds more tried-and-tested recipes waiting for you on my Pinterest boards.
👉 Follow Sara on Pinterest @chefrecipes2
📌 Pin this recipe · 🔁 Re-pin your favorites · 💬 Tag me when you make it — I love seeing your creations!
Have you tried this recipe? Let me know in the comments! What’s your favorite hibiscus or ruby chocolate pairing?
Pink Hibiscus Ruby Chocolate Pavlova Bombs
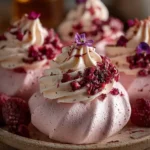
A stunning dessert combining light pavlova shells with a hibiscus-infused cream, a berry center, and a ruby chocolate glaze.
- Yield: 6 1x
Ingredients
- For the Pavlova Shells:
- 4 large egg whites
- 1 cup granulated sugar
- 1 tsp cornstarch
- 1 tsp white vinegar
- 1/2 tsp vanilla extract
- Pinch of salt
- For the Hibiscus Cream Filling:
- 1 cup heavy cream
- 2 tbsp powdered sugar
- 2 hibiscus tea bags
- 1/4 cup mascarpone cheese
- 1 tsp vanilla extract
- For the Ruby Chocolate Glaze:
- 6 oz ruby chocolate, chopped
- 1/3 cup heavy cream
- 1 tbsp honey
- Pink food coloring, optional
- For the Berry Center:
- 1/2 cup raspberry preserves
- 1/4 cup diced strawberries
- For Garnish (optional):
- Dried hibiscus petals
- Fresh raspberries
- Ruby chocolate shavings
Instructions
- 1. Preheat the oven to 250°F (120°C). Line a baking tray with parchment paper.
- 2. Beat egg whites with salt until soft peaks form. Gradually add sugar and continue beating until stiff and glossy.
- 3. Fold in cornstarch, vinegar, and vanilla extract gently.
- 4. Spoon the meringue into dome-shaped nests on the baking tray, creating shallow centers.
- 5. Bake for 1 hour, then turn off the oven and allow the pavlovas to cool completely inside the oven.
- 6. Heat heavy cream gently and steep hibiscus tea bags for 10 minutes. Chill completely.
- 7. Whip the hibiscus cream with powdered sugar, mascarpone cheese, and vanilla extract until soft peaks form.
- 8. Fill each pavlova shell with a spoonful of raspberry preserves and diced strawberries.
- 9. Pipe or spoon the hibiscus cream over the berry center.
- 10. Heat heavy cream for the glaze until warm and pour over chopped ruby chocolate. Stir until smooth and glossy.
- 11. Add honey and optional pink food coloring if desired.
- 12. Spoon or drizzle the ruby chocolate glaze over each pavlova bomb.
- 13. Garnish with dried hibiscus petals, fresh raspberries, and ruby chocolate shavings before serving.
Nutrition
- Calories: 340
- Sugar: 31g
- Fat: 20g
- Carbohydrates: 36g
- Protein: 4g
Tried This Recipe? Leave a Comment!
Did you make this recipe? I’d love to hear how it turned out! Please leave a comment and a rating below. Your feedback helps other home cooks and supports cheerychop.com!
For more delicious inspiration, follow me on Pinterest!