

Table of Contents
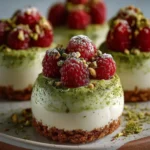
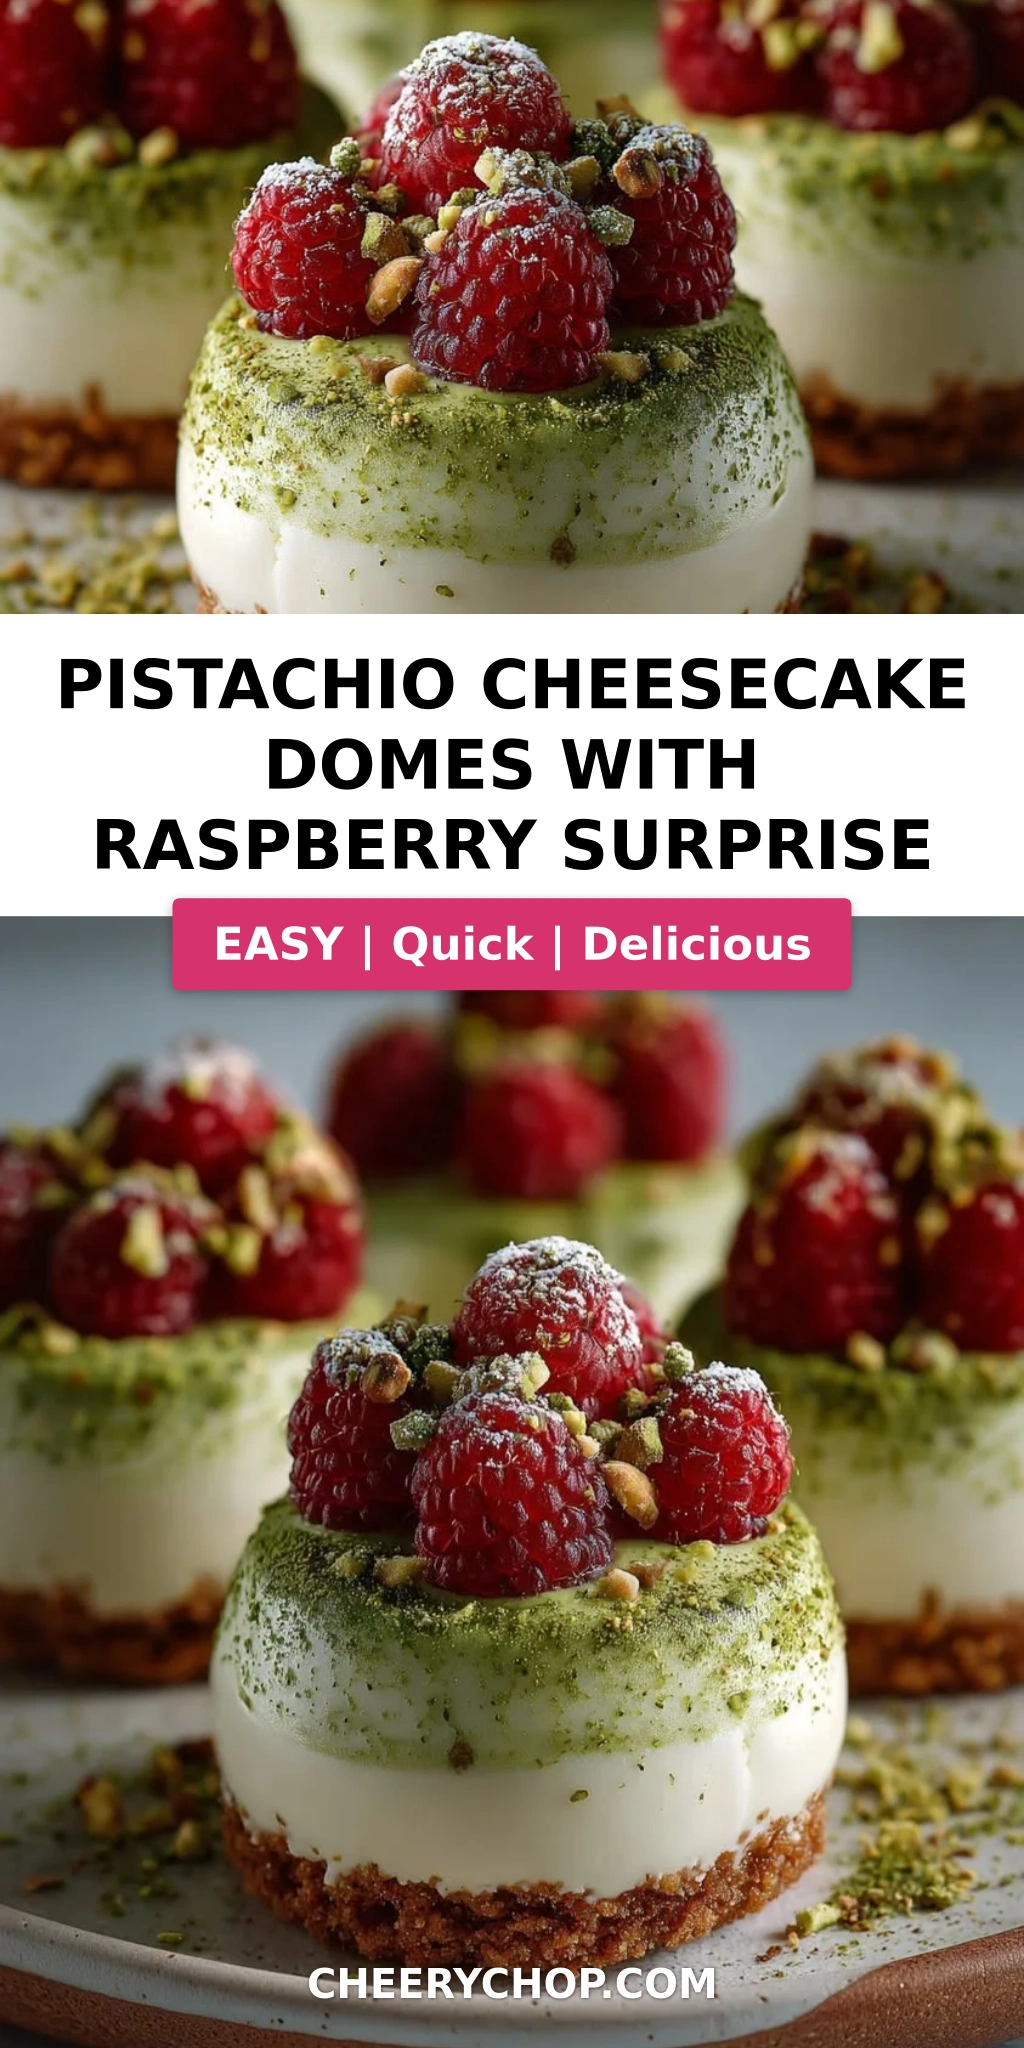
Pistachio Cheesecake Domes with Raspberry Surprise – A Bite-Sized Indulgence
I still remember the first time I made these pistachio cheesecake domes — it was a chilly November afternoon in my tiny NYC apartment, and I was craving something that tasted like the holidays wrapped in a silky, nutty hug. Growing up in Morocco, my mother would always have a bowl of pistachios on the counter, and in Paris, I learned to turn that simple nut into velvety French pâtisserie. These pistachio cheesecake domes are my love letter to both worlds: a creamy, nutty cheesecake filling with a hidden raspberry surprise that bursts when you take a bite, all encased in a crisp white chocolate shell. This is not just a pistachio cheesecake recipe — it’s a showstopping, make-ahead dessert that looks like you spent hours, but comes together with smart shortcuts I picked up in professional kitchens.
The moment you crack the white chocolate shell with your spoon, you’re greeted with a luscious layer of pistachio cheesecake that’s light as air, and then — surprise! — a bright, jammy raspberry center cuts through the richness with a pop of acidity. The crushed pistachio and biscuit base adds a buttery crunch that anchors each bite. I love the contrast of textures and temperatures here: the cold, creamy dome, the slightly firm white chocolate, and that soft, fruit-forward raspberry heart. It’s a dessert that feels elegant — like something from a Parisian patisserie — but is totally achievable in a home kitchen, even if you’ve never worked with silicone molds before.
What sets my version apart is the technique: I brush the white chocolate into the molds in thin layers to get a shell that’s sturdy enough to unmold but thin enough to crack satisfyingly. Plus, I’ve perfected a no-cook pistachio cheesecake filling that uses pistachio paste for maximum flavor without the fuss of soaking and grinding nuts. One common mistake I see home cooks make is rushing the freezing step — these domes need a solid 2 hours in the freezer to set properly, so plan ahead. Trust me, the payoff is worth it. Let me walk you through every step so you can nail these raspberry cheesecake domes on your first try.
Why This Pistachio Cheesecake Domes Recipe Is the Best
The Flavor Secret — I use high-quality pistachio paste (not just ground nuts) to get that deep, toasty, almost floral pistachio flavor into the cheesecake base. It’s the same ingredient I used in a pastry kitchen in Paris, and it makes all the difference. The raspberry surprise center is cooked down with a touch of lemon juice to concentrate its flavor, creating a sweet-tart counterpoint that keeps you coming back for another bite. This pistachio cheesecake recipe is all about balance: creamy, nutty, fruity, and crunchy in perfect harmony.
Perfected Texture — The filling uses whipped cream folded into the cream cheese mixture, which gives it a mousse-like lightness rather than a dense, heavy cheesecake texture. After training at Le Cordon Bleu in Paris, I learned that the secret to a silky cheesecake dome is folding the cream in gently and freezing it slowly — this prevents ice crystals and keeps it velvety. The biscuit base is pre-chilled so it stays firm against the moist filling, and the white chocolate shell is reinforced with a touch of coconut oil for a glossy, snappy finish that doesn’t bloom or crack prematurely.
Foolproof & Fast — Even if you’ve never made mini cheesecake domes before, this recipe is designed to work. I’ve streamlined the steps: no water bath, no oven, no complicated tempering of chocolate. The molds do the shaping work for you, and the freezing step sets everything perfectly. The recipe is also forgiving — you can use store-bought digestive biscuit crumbs, swap the raspberry center for another fruit, or even skip the white chocolate shell for a simpler version. Whether you’re a beginner or a seasoned baker, these domes deliver impressive results with minimal fuss.
Pistachio Cheesecake Domes Ingredients
I source my pistachio paste from a specialty shop near Union Square Market here in NYC — it’s worth seeking out a good one because it’s the backbone of the flavor. For the raspberries, I love grabbing a pint from the farmers market in summer, but frozen work beautifully too (more on that in the FAQ). Let’s break down everything you’ll need for these raspberry cheesecake domes.
Ingredients List
- For the Pistachio Cheesecake Filling:
- 8 oz (225 g) cream cheese, softened
- 1/3 cup powdered sugar
- 1/2 cup pistachio paste
- 1 tsp vanilla extract
- 1 cup heavy whipping cream, chilled
- For the Raspberry Surprise Center:
- 1 cup fresh raspberries
- 2 tbsp granulated sugar
- 1 tsp lemon juice
- For the Biscuit Base:
- 1 cup digestive biscuit crumbs
- 3 tbsp unsalted butter, melted
- For the White Chocolate Shell:
- 10 oz (280 g) white chocolate, melted
- 1 tsp coconut oil
- For Garnish (optional):
- Crushed pistachios
- Fresh raspberries
- Freeze-dried raspberry powder
Ingredient Spotlight
Pistachio Paste: This is your flavor powerhouse. Look for a paste that lists pistachios as the first ingredient with minimal added sugar or oils. I recommend using a brand like Love’n Bake or making your own by blending shelled pistachios with a bit of oil until smooth. If you can’t find pistachio paste, you can substitute with finely ground pistachio flour mixed with a touch of almond oil, but the flavor will be less intense.
Cream Cheese: Use full-fat block cream cheese (not the spreadable kind in a tub) for the richest, creamiest texture. Let it come to room temperature before beating — cold cream cheese will leave lumps that no amount of mixing can fix. Philadelphia is my go-to brand.
White Chocolate: Quality matters here since it’s the star of the shell. Choose a white chocolate with at least 30% cocoa butter for a smooth melt and glossy finish. Ghirardelli or Callebaut are both excellent choices. Avoid white chocolate chips that contain stabilizers — they don’t melt as smoothly.
Raspberries: Fresh raspberries are ideal for the surprise center because they hold their shape and provide a bright pop of color. Frozen raspberries work too — just thaw them first and drain any excess liquid before cooking to avoid a watery filling. I tested this with both, and the flavor is equally delicious.
Digestive Biscuits: These British-style cookies are the perfect base — they’re not too sweet and have a nice wheaty flavor. If you can’t find them, graham crackers or shortbread cookies make excellent substitutes. Pulse them into fine crumbs using a food processor or a rolling pin and zip-top bag.
| Original Ingredient | Best Substitution | Flavor / Texture Impact |
|---|---|---|
| Pistachio paste | Finely ground pistachios + 1 tbsp almond oil | Slightly grainier texture, less intense green color, still delicious |
| Heavy whipping cream | Canned coconut cream (chilled, whipped) | Lighter, coconut undertone, dairy-free option |
| Digestive biscuits | Graham cracker crumbs | Sweeter, slightly more honey flavor, same crunch |
| White chocolate | Dark chocolate (60-70%) | Bittersweet shell, less sweet overall, striking color contrast |
How to Make Pistachio Cheesecake Domes with Raspberry Surprise — Step-by-Step
I’ve broken this down into manageable steps — each one builds on the last, and I promise the process is more fun than fussy. Take your time with the chocolate shell, and don’t skip the freezing step. Let’s go!
Step 1: Prepare the Biscuit Base
In a small bowl, combine 1 cup digestive biscuit crumbs with 3 tablespoons melted unsalted butter. Stir with a fork until the mixture resembles wet sand and holds together when pressed. Divide the mixture evenly among 8 silicone dome molds (about 1 heaping tablespoon each) and press firmly into an even layer to form the base. Place the molds on a small baking sheet and chill in the refrigerator for 15 minutes to firm up.
💡 Sara’s Pro Tip: Use the back of a small measuring spoon to press the crumbs firmly into the mold — this creates a compact base that won’t crumble when you unmold the domes later.
Step 2: Make the Raspberry Surprise Center
In a small saucepan, combine 1 cup fresh raspberries, 2 tablespoons granulated sugar, and 1 teaspoon lemon juice. Cook over medium heat for 3–4 minutes, stirring occasionally, until the raspberries break down and the mixture thickens slightly to a jammy consistency. Remove from heat and let cool completely to room temperature. The mixture will continue to thicken as it cools.
⚠️ Common Mistake to Avoid: Don’t overcook the raspberries! They should still have some texture — not be completely broken down into syrup. You want a few small berry pieces left for that lovely surprise pop.
Step 3: Make the Pistachio Cheesecake Filling
In a large mixing bowl, beat 8 oz softened cream cheese, 1/3 cup powdered sugar, 1/2 cup pistachio paste, and 1 teaspoon vanilla extract together with an electric mixer on medium speed until smooth and creamy — about 2 minutes. In a separate bowl, whip 1 cup chilled heavy whipping cream on high speed until soft peaks form (when you lift the whisk, the cream holds a soft, droopy peak). Gently fold the whipped cream into the pistachio mixture using a rubber spatula, being careful not to deflate the air. The filling should be light, fluffy, and uniformly pale green.
💡 Sara’s Pro Tip: Fold the whipped cream in three additions — gently cut through the center, scrape the bottom, and turn the bowl. This retains the air and gives you that silky mousse-like texture.
Step 4: Form the White Chocolate Shells
Melt 10 oz white chocolate with 1 teaspoon coconut oil in a heatproof bowl set over a pan of simmering water (or in the microwave in 20-second bursts, stirring each time). Stir until smooth and glossy. Using a small pastry brush or the back of a spoon, coat the inside of each silicone mold evenly with a thin layer of melted white chocolate. Make sure to get all the way up to the edges. Place the molds in the refrigerator for 10 minutes to set the chocolate. Repeat with a second thin layer to reinforce the shells, then chill again until firm.
⚠️ Common Mistake to Avoid: Don’t make the chocolate layer too thick — two thin layers are better than one thick one. A thick shell will be hard to crack and may overwhelm the delicate filling inside.
Step 5: Assemble the Domes
Once the white chocolate shells are set, spoon or pipe the pistachio cheesecake filling into each shell, filling them about halfway. Add a small spoonful (about 1 teaspoon) of the cooled raspberry mixture into the center of each — don’t let it touch the sides of the shell. Cover the raspberry center with more pistachio filling, filling the mold completely to the top. Use a small offset spatula or the back of a spoon to smooth the surface flat. The biscuit base will sit on top of this flat surface.
Gently press one of the chilled biscuit bases onto the top of each filled dome, pressing lightly so it adheres. Make sure the base is level with the rim of the mold. Place the assembled molds in the freezer for at least 2 hours, or until fully frozen and firm to the touch.
💡 Sara’s Pro Tip: Freeze the domes uncovered for the first 30 minutes, then cover loosely with plastic wrap. This prevents condensation from forming on the surface and keeps the chocolate shell glossy.
Step 6: Unmold and Garnish
When the domes are fully frozen, remove them from the freezer. Gently flex the silicone molds to loosen the edges, then carefully pop each dome out onto a serving tray or parchment-lined baking sheet. If any edges look uneven, you can smooth them with your fingertip (the warmth will soften the chocolate slightly). Garnish each dome with crushed pistachios, a fresh raspberry, and a dusting of freeze-dried raspberry powder for a beautiful finish.
⚠️ Common Mistake to Avoid: Don’t let the domes sit at room temperature for more than 5 minutes before serving — they should be served very cold so the filling is firm and the chocolate shell snaps cleanly.
Serve immediately, or return to the freezer until ready to serve. These domes are best enjoyed straight from the freezer — let them sit for 2–3 minutes to soften slightly, then dig in!
| Step | Action | Duration | Key Visual Cue |
|---|---|---|---|
| 1 | Press biscuit base into molds | 15 mins chill | Firm, compact crumb layer |
| 2 | Cook raspberry center | 3–4 mins | Jammy, slightly thickened |
| 3 | Make cheesecake filling | 5 mins | Smooth, fluffy, pale green |
| 4 | Brush white chocolate shells | 10 mins + 20 mins chill | Glossy, firm, no thin spots |
| 5 | Fill and freeze domes | 2 hrs freeze | Firm to touch, no give |
| 6 | Unmold and garnish | 5 mins | Clean dome shape, shiny shell |
Serving & Presentation
These pistachio cheesecake domes are showstoppers on any dessert table. I love serving them on a chilled marble slab or a mirrored cake stand for extra elegance. Place each dome with the biscuit base facing down and the smooth chocolate dome facing up. A light dusting of freeze-dried raspberry powder adds a pop of vibrant pink that contrasts beautifully with the pale green filling inside. For a touch of NYC flair, I sometimes add a tiny edible gold leaf on top — it catches the light and makes them feel extra special for dinner parties or holidays.
Pair these mini cheesecake domes with a dollop of lightly sweetened crème fraîche on the side if you want to cut through the richness even more. In my Paris days, we’d serve them alongside a small glass of chilled Muscat or a strong espresso — the slight bitterness of the coffee balances the sweetness of the white chocolate beautifully. For a non-alcoholic option, a sparkling raspberry lemonade or a Moroccan mint tea (my mother’s recipe) makes a lovely accompaniment that echoes the fresh raspberry notes.
I also love setting up a small garnish station when I’m entertaining — let guests top their own domes with crushed pistachios, fresh raspberries, a drizzle of warm white chocolate, or even a sprinkle of flaky sea salt. It makes the dessert interactive and ensures everyone gets exactly what they like. These white chocolate cheesecake domes are also perfect for plating individually on small dessert plates with a raspberry coulis swirl and a few fresh mint leaves for a restaurant-quality finish.
| Pairing Type | Suggestions | Why It Works |
|---|---|---|
| Side Dish | Crème fraîche, vanilla bean ice cream | Adds coolness and tang to balance sweetness |
| Sauce / Dip | Raspberry coulis, warm dark chocolate ganache | Enhances the raspberry surprise and adds richness |
| Beverage | Espresso, Muscat wine, Moroccan mint tea | Bitterness or acidity cuts through creamy sweetness |
| Garnish | Crushed pistachios, fresh raspberries, mint, edible gold | Adds crunch, color contrast, and visual appeal |
Make-Ahead, Storage & Reheating
One of my favorite things about these pistachio cheesecake domes is how well they work for make-ahead desserts — essential for my busy NYC lifestyle. I often prepare a double batch on a Sunday afternoon and keep them in the freezer for impromptu dinner parties or when I need a last-minute showstopper. The key is proper storage to maintain the texture and flavor.
| Method | Container | Duration | Reheating Tip |
|---|---|---|---|
| Refrigerator | Airtight container, layered with parchment | Up to 3 days | Serve straight from fridge, no reheating needed |
| Freezer | Freezer-safe container, separated by parchment | Up to 3 months | Thaw in fridge 2 hours before serving, or serve frozen |
| Make-Ahead | Assembled in molds, covered with plastic wrap | Up to 1 week before serving | Freeze in molds, then unmold and garnish at serving time |
If you’re storing these raspberry cheesecake domes in the refrigerator, place them in a single layer in an airtight container with a piece of parchment paper between layers if stacking. The white chocolate shell may soften slightly in the fridge, so for the best crackly texture, serve them within 24 hours or transfer to the freezer for longer storage. When freezing, make sure the domes are fully frozen before wrapping — wrap each individually in plastic wrap, then place in a freezer bag. This prevents freezer burn and keeps the flavors fresh for up to 3 months.
To serve from frozen, let the domes sit at room temperature for just 5 minutes before plating — this allows the filling to soften slightly while keeping the shell crisp. Never microwave these domes (the chocolate will seize and the filling will deflate). If you prefer a softer texture, thaw them in the refrigerator for 2 hours before serving. I actually love eating them straight from the freezer — the filling has a creamy, ice-cream-like texture that’s incredibly satisfying.
Variations & Easy Swaps
One of the best things about this pistachio cheesecake recipe is how adaptable it is. Over the years, I’ve tested dozens of variations in my kitchen, and I’m sharing my three favorites with you. Each one keeps the dome structure but changes the flavor profile in exciting ways. Whether you’re avoiding dairy, looking for a seasonal twist, or just want to experiment, these mini cheesecake domes are a perfect canvas.
| Variation | Key Change | Best For | Difficulty Impact |
|---|---|---|---|
| Dark Chocolate & Cherry | Replace white chocolate with dark chocolate, cherry center instead of raspberry | Chocolate lovers, Valentine’s Day | Same difficulty |
| Dairy-Free / Vegan | Use coconut cream in filling, vegan cream cheese, dark chocolate shell | Dairy-free or vegan guests | Slightly harder (needs careful chilling) |
| Saffron & Rose | Add saffron to pistachio paste, rose water to raspberry center, pistachio-rose garnish | Special occasions, Persian-inspired dessert | Same difficulty |
Dark Chocolate & Cherry Domes
This variation swaps the white chocolate shell and raspberry center for dark chocolate and cherry — a classic pairing that feels even more indulgent. Use a good-quality dark chocolate (70% cocoa is my sweet spot) and replace the raspberries with pitted cherries cooked down with sugar and a splash of kirsch or vanilla. The dark chocolate shell is less sweet and provides a beautiful contrast to the creamy pistachio filling. This version reminds me of the black forest desserts I used to make in Paris, but with my Moroccan pistachio twist. It’s a showstopper for Valentine’s Day or any celebration where you want to impress with these white chocolate cheesecake domes — but make them dark!
Dairy-Free / Vegan Cheesecake Domes
For a dairy-free version that still delivers on flavor and texture, use full-fat canned coconut cream (chilled overnight, then whipped) in place of the heavy cream, and a high-quality vegan cream cheese alternative like Miyoko’s or Violife. Replace the white chocolate with a dairy-free dark chocolate bar (most dark chocolate is naturally dairy-free) and use coconut oil in the biscuit base instead of butter. The coconut flavor pairs surprisingly well with pistachio, and the texture stays creamy and rich. This variation requires a bit more attention to chilling times — the vegan cream cheese can be softer, so freeze the domes for at least 3 hours. I’ve served these at dinner parties where no one guessed they were dairy-free!
Saffron & Rose Cheesecake Domes
This variation is inspired by my North African heritage. Add a pinch of saffron threads (steeped in 1 tablespoon warm water for 10 minutes) to the pistachio cheesecake filling for a golden hue and floral aroma. In the raspberry center, stir in 1/2 teaspoon rose water after cooking — it adds a perfumed note that transports you to a Moroccan garden. Garnish with crushed pistachios, a few dried rose petals, and a drizzle of honey. The saffron-rose combination is elegant and unexpected, perfect for Eid, Persian New Year, or any celebration where you want something truly unique. These pistachio cheesecake domes become a conversation piece — and they taste even better than they look.
Can I use frozen raspberries for the surprise center in pistachio cheesecake domes?
Absolutely! Frozen raspberries work wonderfully for the raspberry surprise center. Simply thaw them first at room temperature or in the refrigerator, then drain any excess liquid before cooking. Frozen raspberries can release more water than fresh ones, so you may need to cook them for an extra minute or two to achieve that jammy consistency. The flavor will still be bright and delicious, and the color will be just as vibrant. I’ve tested this many times, and the results are consistently excellent — a great option when fresh raspberries aren’t in season or if you want to save money. Just make sure to let the cooked mixture cool completely before assembling the domes so it doesn’t melt the white chocolate shell or the cheesecake filling.
How do I get the perfect dome shape for pistachio cheesecake domes without a special mold?
If you don’t have silicone dome molds, you can still achieve a lovely dome shape using a few clever tricks. The easiest method is to use a regular muffin tin — line each cup with a strip of parchment paper that hangs over the edges for easy removal, then press the biscuit base into the bottom and shape the filling into a dome on top. Another option is to use small glass or stainless steel bowls (like individual dessert bowls) lined with plastic wrap — press the chocolate shell into the bowl, add the fillings, and freeze. When you unmold them, they’ll hold a beautiful dome shape. Finally, you can use a silicone ice cube tray with round cavities (the kind for making large ice spheres) — these are available at most kitchen supply stores and work perfectly for mini cheesecake domes. The key is to make sure whatever mold you use is flexible enough to release the frozen domes without cracking the chocolate shell. I’ve used all three methods in my NYC kitchen, and they all work beautifully!
What is the best substitute for pistachios in this cheesecake dome recipe?
If you need a substitute for pistachios in these cheesecake domes, I recommend using toasted almond or hazelnut paste as a 1:1 replacement for the pistachio paste. Almond paste will give you a similar creamy texture and a mild, nutty flavor that pairs beautifully with raspberries. Hazelnut paste is richer and more robust — it will add a lovely depth that complements the white chocolate shell. For the garnish, you can substitute crushed toasted almonds, hazelnuts, or even macadamia nuts for the crushed pistachios. If you’re avoiding nuts entirely, you can use sunflower seed butter as a base (though the flavor will be quite different) and skip the nut garnish. Keep in mind that the color of your cheesecake domes will change — almond-based filling will be off-white, while hazelnut will be slightly brown. The texture will be similar, and the desserts will still be absolutely delicious. I’ve tried all these variations at home, and each one brings its own unique charm to these mini cheesecake domes.
How far in advance can I make pistachio cheesecake domes with a raspberry surprise?
You can make these pistachio cheesecake domes up to 1 week in advance if stored properly in the freezer, or up to 3 days in advance if kept in the refrigerator. For the best texture and flavor, I recommend freezing them for up to 1 month — they’ll taste freshly made when you serve them. Here’s my make-ahead strategy: assemble the domes completely in their molds, freeze them for at least 2 hours until solid, then wrap each dome individually in plastic wrap and store them in a freezer-safe container or zip-top bag. When you’re ready to serve, simply unmold them (the plastic wrap will help them release easily if you’ve wrapped them tightly), add the garnishes, and let them sit at room temperature for 5 minutes before serving. For refrigerator storage, place the unmolded domes in an airtight container with parchment between layers. The white chocolate shell may soften slightly in the fridge, so for the best crackly texture, serve within 24 hours or stick with freezer storage. This make-ahead flexibility makes these raspberry cheesecake domes my go-to for dinner parties and holidays — I can prepare them well in advance and focus on other dishes on the day of serving.
Can I make these cheesecake domes without white chocolate?
Yes, you can absolutely make these cheesecake domes without white chocolate! The white chocolate shell is optional, and the domes will still be stunning and delicious without it. Simply skip the chocolate shell step and fill the silicone molds directly with the biscuit base and pistachio cheesecake filling with the raspberry surprise center. The domes will have a softer, mousse-like exterior that’s still firm enough to unmold after freezing. For a different coating, you can roll the frozen cheesecake domes in crushed pistachios, shredded coconut, or even a dusting of cocoa powder for a beautiful finish. If you want to keep the glossy shell but avoid white chocolate, you can use a dark chocolate or milk chocolate shell instead — the process is exactly the same. I’ve made these mini cheesecake domes without the chocolate shell for a lighter dessert, and they’re always a hit. The texture is creamier and more like a frozen mousse, which some people actually prefer!
Why did my white chocolate shell crack when I unmolded the cheesecake domes?
Cracked white chocolate shells are usually caused by one of three issues. First, the chocolate layer may have been too thick — thin layers dry and set more evenly. Second, the molds may have been flexed too aggressively during unmolding. Silicone molds need a gentle, even flex to release the domes without stress cracks. Third, the temperature difference between the frozen filling and the shell can cause cracking if the domes are unmolded too quickly after coming out of the freezer. Let them sit for 30 seconds at room temperature before unmolding to reduce thermal shock. To fix a cracked shell, you can patch it with a small amount of melted white chocolate applied with a fingertip or small brush, then return the dome to the freezer for 10 minutes to set. In my Paris kitchen training, I learned that temperature control is everything with chocolate — make sure your white chocolate is properly tempered (cooled to about 82°F before using) for the most stable shell. Adding coconut oil (as in this recipe) also helps flexibility and reduces cracking. Don’t worry — even cracked domes taste amazing, and you can always hide imperfections with crushed pistachio garnish!
Can I use a different fruit for the surprise center instead of raspberries?
Absolutely! The raspberry surprise center is versatile, and you can swap in almost any fruit that cooks down into a jammy consistency. My favorite alternatives include diced strawberries (cook with a bit of vanilla), blueberries (they become wonderfully jammy), finely chopped cherries (fresh or frozen), or even diced mango for a tropical twist. For each substitution, use the same amount (1 cup of fruit) with 2 tablespoons sugar and 1 teaspoon lemon juice, adjusting the sugar to taste based on the fruit’s natural sweetness. If you’re using a very tart fruit like blackberries or sour cherries, you might want to add an extra tablespoon of sugar. The lemon juice is important — it helps thicken the fruit and brightens the flavors. I’ve also made a fig version using fresh figs cooked down with a touch of balsamic vinegar and honey, which pairs beautifully with the pistachio. The key is to cook the fruit just until it thickens but still has some texture — you want that lovely surprise pop when someone bites into these white chocolate cheesecake domes. Let your seasonal farmer’s market be your guide!
How do I store leftover pistachio cheesecake domes after serving?
If you have leftover pistachio cheesecake domes (which rarely happens in my house, but just in case!), store them in an airtight container in the refrigerator for up to 3 days or in the freezer for up to 3 months. For refrigerator storage, place the domes in a single layer in a container with a tight-fitting lid — the white chocolate shell will soften slightly, but the flavor will still be delicious. For freezer storage, wrap each dome individually in plastic wrap, then place them in a freezer-safe bag or container. This prevents freezer burn and keeps the flavors fresh. To serve leftover frozen domes, let them sit at room temperature for 5 minutes or in the refrigerator for 1 hour before serving. If you’ve stored them in the fridge, they’re ready to eat straight away. I don’t recommend refreezing domes that have already been thawed — the texture of the cheesecake filling can become grainy and the white chocolate shell may develop condensation streaks. Just portion out what you’ll eat and store the rest immediately. These raspberry cheesecake domes actually taste even better the next day as the flavors meld together — one of the many reasons I love making them ahead!
Share Your Version!
I truly hope you enjoy making these pistachio cheesecake domes with raspberry surprise as much as I do. There’s something so satisfying about creating a dessert that looks this elegant and tastes this incredible — especially when you know the hidden raspberry surprise is waiting inside each bite. I’d love to hear how your version turns out! Did you try one of the variations? Use a different fruit? Or maybe you added a sprinkle of something special on top? Drop a comment below and let me know — I read every single one and I love hearing about your kitchen adventures.
If you’re sharing photos on social media, tag @cheerychop on Instagram or Pinterest so I can see your beautiful creations. And if you found this recipe helpful, please give it a 5-star rating — it helps other home cooks find it too. I’m always here to answer questions, so don’t hesitate to ask if something wasn’t clear or if you want more tips. From my NYC kitchen to yours — I hope this recipe brings as much warmth to your table as it does to mine. — Sara 🧡
Love This Recipe? Save It to Pinterest!
If you enjoyed this Pistachio Cheesecake Domes with Raspberry Surprise recipe, don’t let it get lost in your browser tabs! 😄 Pin it now so you can find it again anytime — and explore hundreds more tried-and-tested recipes waiting for you on my Pinterest boards.
👉 Follow Sara on Pinterest @chefrecipes2
📌 Pin this recipe · 🔁 Re-pin your favorites · 💬 Tag me when you make it — I love seeing your creations!
Made these Pistachio Cheesecake Domes? 🌟 Rate the recipe below — your feedback helps me create more recipes you’ll love! I read every comment and reply to every question. Let’s bake together! 🧡
Pistachio Cheesecake Domes with Raspberry Surprise
Pistachio Cheesecake Domes with Raspberry Surprise
- Yield: 8 1x
Ingredients
- For the Pistachio Cheesecake Filling:
- 8 oz (225 g) cream cheese, softened
- 1/3 cup powdered sugar
- 1/2 cup pistachio paste
- 1 tsp vanilla extract
- 1 cup heavy whipping cream, chilled
- For the Raspberry Surprise Center:
- 1 cup fresh raspberries
- 2 tbsp granulated sugar
- 1 tsp lemon juice
- For the Biscuit Base:
- 1 cup digestive biscuit crumbs
- 3 tbsp unsalted butter, melted
- For the White Chocolate Shell:
- 10 oz (280 g) white chocolate, melted
- 1 tsp coconut oil
- For Garnish (optional):
- Crushed pistachios
- Fresh raspberries
- Freeze-dried raspberry powder
Instructions
- 1. Mix digestive biscuit crumbs with melted butter and press into silicone dome molds to form the base. Chill for 15 minutes.
- 2. In a saucepan, cook raspberries with sugar and lemon juice for 3–4 minutes until slightly jammy. Cool completely.
- 3. In a bowl, beat cream cheese, powdered sugar, pistachio paste, and vanilla until smooth.
- 4. Whip heavy cream separately until soft peaks form, then fold into the pistachio mixture.
- 5. Brush or spoon melted white chocolate mixed with coconut oil into silicone molds and chill until set to form shells.
- 6. Fill each shell halfway with pistachio cheesecake filling.
- 7. Add a small spoon of raspberry filling in the center.
- 8. Cover with more pistachio filling and smooth the top.
- 9. Freeze for at least 2 hours until fully set.
- 10. Carefully unmold and place on a tray.
- 11. Garnish with crushed pistachios, fresh raspberries, and freeze-dried raspberry powder if desired.
- 12. Serve chilled.
Nutrition
- Calories: 340
- Sugar: 19 g
- Fat: 24 g
- Carbohydrates: 26 g
- Protein: 5 g
Tried This Recipe? Leave a Comment!
Did you make this recipe? I’d love to hear how it turned out! Please leave a comment and a rating below. Your feedback helps other home cooks and supports cheerychop.com!
For more delicious inspiration, follow me on Pinterest!


