
Table of Contents
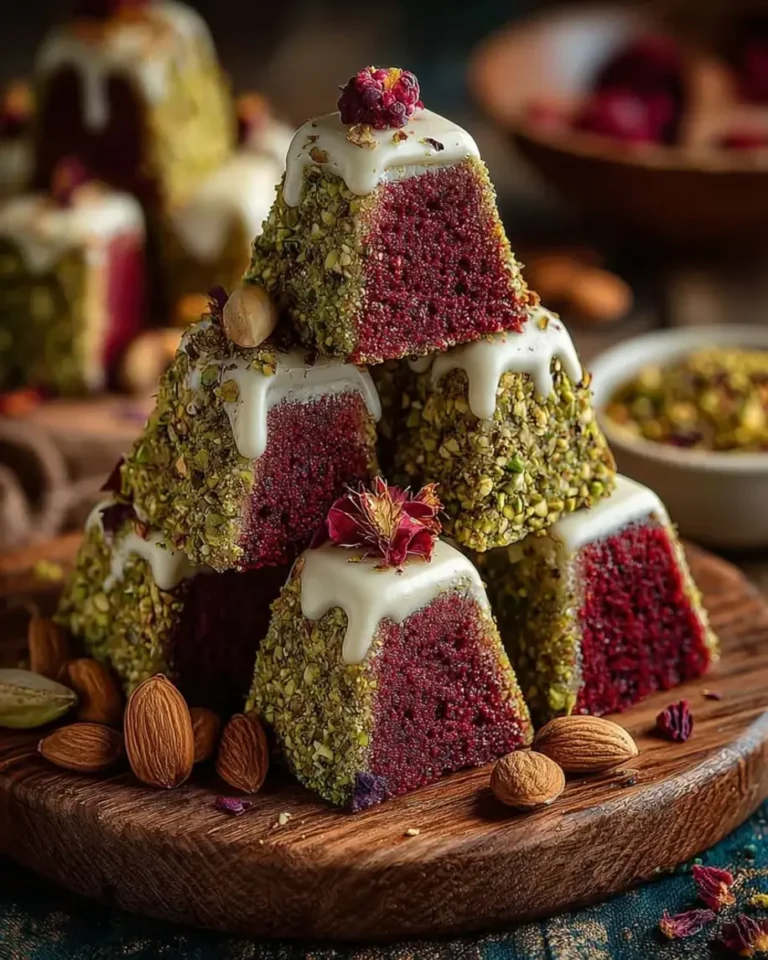
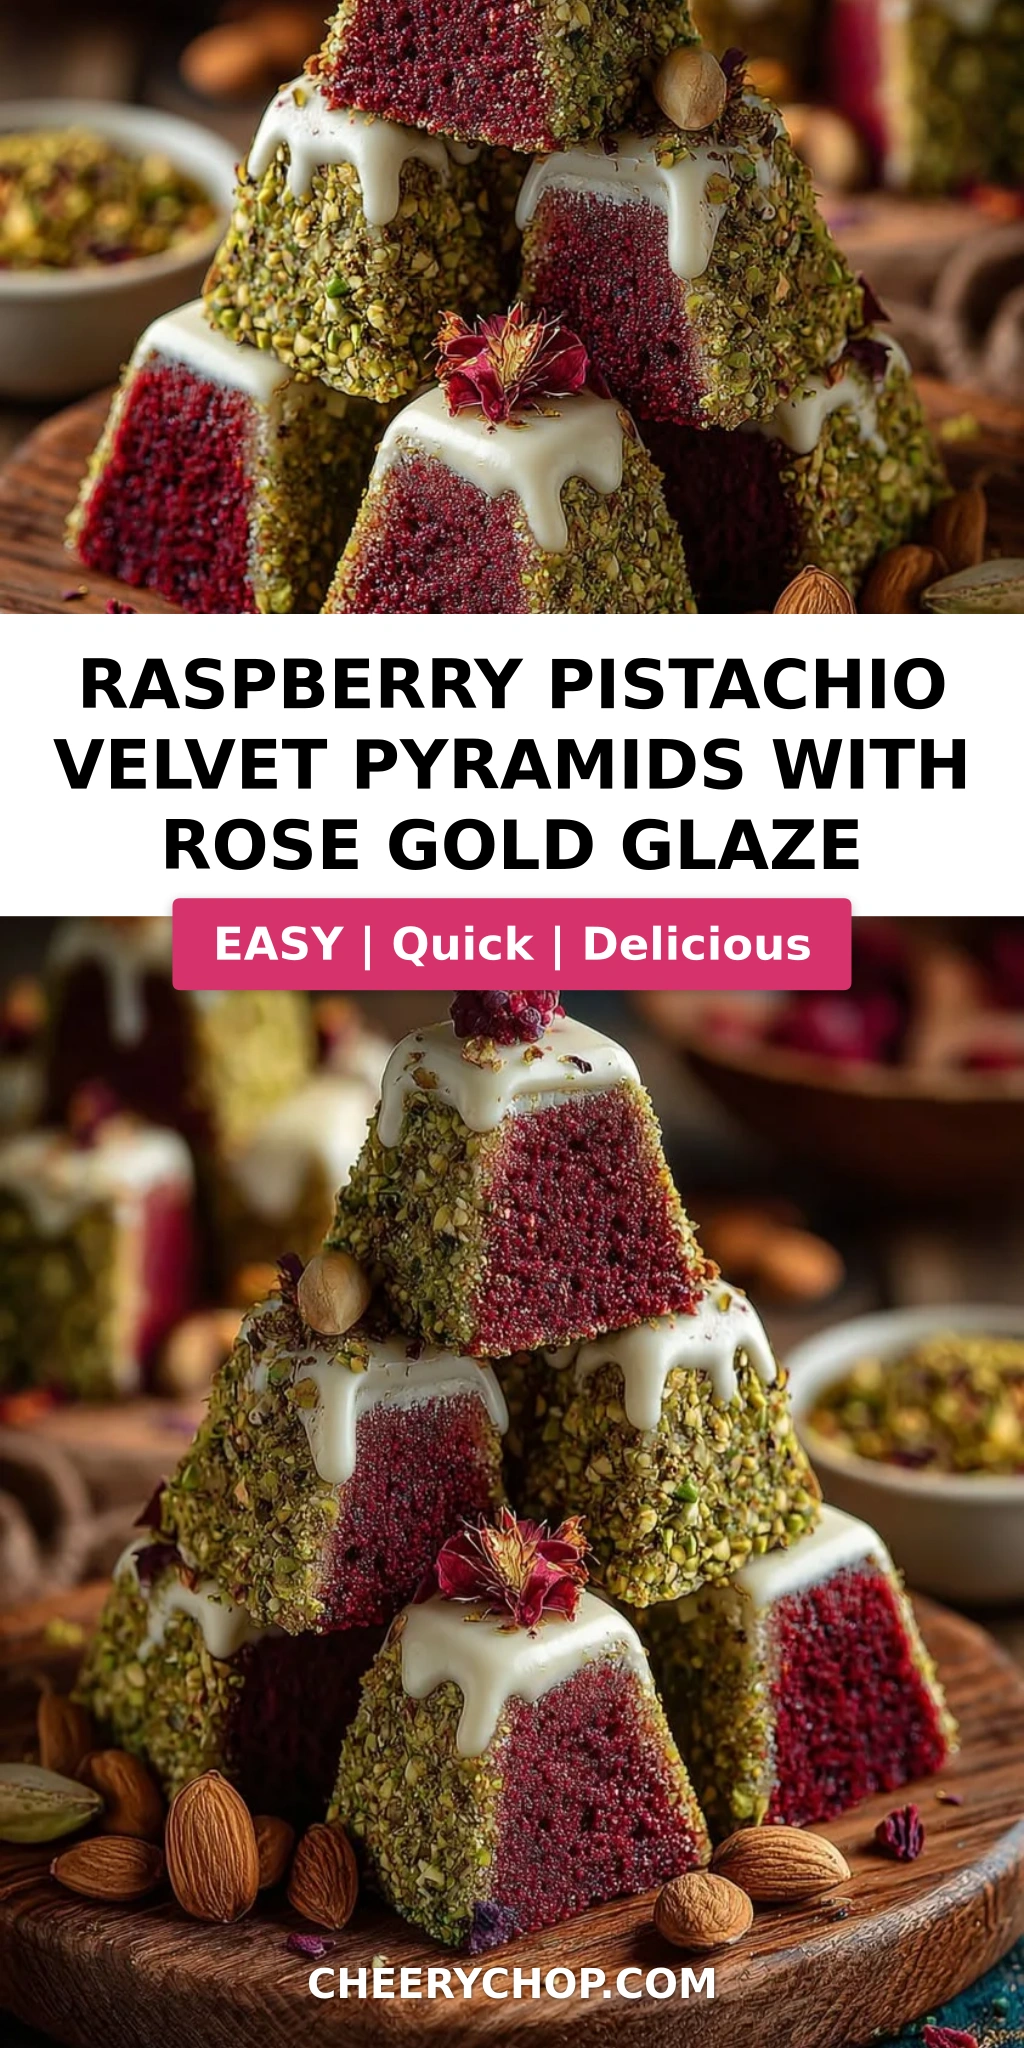
Raspberry Pistachio Velvet Pyramids with Rose Gold Glaze – A Showstopping Easy Elegant Party Dessert
I still remember the first time I tasted a raspberry pistachio combination — it was at a tiny patisserie in the 16th arrondissement of Paris, where the pastry chef had layered a delicate pistachio sponge with a sharp raspberry compote and finished it with a mirror glaze that caught the light like a jewel. That moment shaped my entire approach to dessert. These Raspberry Pistachio Velvet Pyramids with Rose Gold Glaze are my love letter to that Parisian memory, rewritten with the warmth of my Moroccan roots and the confidence of my New York City kitchen. The pistachio raspberry cake recipe is built around a tender, finely ground nut sponge that stays moist for days, while the rose gold glaze dessert topping — shimmering with edible luster — turns each pyramid into a miniature work of art. This is an easy elegant party dessert that looks like it took hours, but comes together with thoughtful, doable steps.
Imagine cutting into a perfectly chilled pyramid: the first thing you see is that glossy, rose-scented glaze in pale pink with golden flecks. Then the knife slides through a layer of silky pistachio cream, meeting a tender crumb studded with jammy pockets of raspberry. The aroma hits you next — fragrant rose water, toasted pistachios, and the bright acidity of raspberries. It’s a dessert that engages every sense. The texture is a study in contrasts: the creamy filling soft against the toothsome cake, the glaze cracking slightly as you break through. I learned that balance of textures during my pastry training in Paris, where every element of a plated dessert is designed to complement the next. The ground pistachios in the cake aren’t just for flavor — they absorb moisture and keep the crumb impossibly tender, a trick I picked up from a pastry chef in Montmartre who insisted on grinding his own nuts daily.
What makes my version stand out is the pyramid geometry — it’s unexpected, elegant, and surprisingly simple to achieve with a sharp knife and a chilled cake. The rose gold glaze dessert element is where the magic happens: white chocolate, cream, a hint of rose water, and a pinch of edible luster dust create a finish that looks like liquid metal. I’ll show you exactly how to temper the glaze so it stays glossy without streaks. And because I know how stressful party planning can be, I’ve tested this pistachio velvet cake to work perfectly as a make-ahead dessert — the flavors actually deepen overnight. One common mistake home bakers make is overmixing the batter once the raspberries are added, which can turn the whole thing gray. I’ll share my gentle folding technique that keeps those berries intact and your cake beautiful.
Why This Raspberry Pistachio Velvet Pyramids Recipe Is the Best
The flavor secret here is the three-way harmony between sweet pistachio, tart raspberry, and floral rose. Growing up in Morocco, my mother taught me that the best desserts have a thread of acidity or bitterness to cut through richness — that’s why I use fresh raspberries folded into the batter rather than just a jam swirl. The pistachio cream filling gets its intensity from real pistachio paste (not just extract), which I source from a specialty shop near Union Square. This isn’t a dessert that relies on sugar alone; it builds flavor in layers, the way a French chef builds a sauce.
The perfected texture comes from a technique I learned during my time at Le Cordon Bleu: grinding the pistachios to the texture of almond flour and then toasting them lightly before incorporating them into the dry ingredients. This releases the natural oils and deepens the nutty flavor without making the cake greasy. The cake itself uses the reverse-creaming method — beating the butter into the dry ingredients first — which gives a finer, more uniform crumb that holds up beautifully to being cut into geometric shapes. The pistachio cream is whipped to medium peaks, not stiff, so it stays luscious and spreadable without becoming heavy.
This recipe is foolproof and fast for a reason: the components are simple and forgiving. The cake batter comes together in one bowl, the cream needs only four ingredients and five minutes of whipping, and the glaze sets in under twenty minutes. Even the pyramid cutting — which looks intimidating — is just a matter of letting the cake chill fully and using a long, sharp knife. I’ve taught this dessert in my NYC cooking workshops, and first-time bakers consistently nail it because each step is designed to build confidence. The rose gold glaze dessert component is especially beginner-friendly because it’s a simple ganache, not a complicated mirror glaze — no gelatin, no thermometers, just stirring and pouring.
Raspberry Pistachio Velvet Pyramids Ingredients
Every time I buy pistachios for this recipe, I think of the spice souk in Marrakech where my mother would buy them by the kilo — still in their shells, dusty with salt, and so fragrant you could smell them from three stalls away. Now I get my pistachio paste from a little Italian grocer in Brooklyn’s Carroll Gardens, and my raspberries from the Union Square Greenmarket in summer. Here’s everything you’ll need to make these showstopping pyramids.
Ingredients List
- For the Raspberry Pistachio Cake:
- 1 1/2 cups all-purpose flour
- 1/2 cup finely ground pistachios
- 1 tsp baking powder
- 1/4 tsp salt
- 1/2 cup unsalted butter, softened
- 3/4 cup granulated sugar
- 2 large eggs
- 1 tsp vanilla extract
- 1/2 cup whole milk
- 3/4 cup fresh raspberries
- For the Pistachio Cream Filling:
- 1 cup heavy cream
- 1/4 cup pistachio paste
- 2 tbsp powdered sugar
- 1/2 tsp vanilla extract
- For the Rose Gold Glaze:
- 1 cup white chocolate, finely chopped
- 1/3 cup heavy cream
- 1 tsp rose water
- Edible rose gold luster dust, as needed
- For Garnish (optional):
- 2 tbsp chopped pistachios
- Fresh raspberries
- Dried rose petals
Ingredient Spotlight
Pistachio paste is the backbone of this dessert’s flavor. Look for one that lists only pistachios and a little oil — no added sugar or flavorings. I love the brand from Sicilia, but you can also make your own by blending shelled pistachios with a touch of neutral oil until smooth. The paste gives the cream filling its intense, toasty flavor and pale green color.
Fresh raspberries are non-negotiable for the batter. Frozen berries release too much moisture as they thaw, which can make the cake soggy and turn the batter gray. If you’re making this out of season, look for the freshest possible raspberries in the refrigerated section — they should feel dry and plump, not wet or mushy. For the garnish, any firm, bright berry will do.
Rose water is a delicate ingredient that can easily overwhelm a dessert if you use too much. The grade matters: look for food-grade rose water from a Middle Eastern grocery or a well-stocked spice section — it should smell floral but not like perfume. One teaspoon is the sweet spot for this glaze, adding a whisper of aroma that complements rather than dominates.
White chocolate for the glaze should be high quality — I use one with at least 30% cocoa butter. Cheap white chocolate can seize when melted or taste waxy. The cocoa butter is what gives the glaze that smooth, glossy finish, so don’t skimp here. Finely chop it so it melts evenly and quickly.
| Original Ingredient | Best Substitution | Flavor / Texture Impact |
|---|---|---|
| Pistachio paste | Homemade pistachio butter (blend shelled pistachios + oil) | Slightly less smooth, but deeper nutty flavor |
| Fresh raspberries | Frozen raspberries (do not thaw, toss in flour before folding) | Slightly more moisture in batter; reduce milk by 1 tbsp |
| Whole milk | Almond milk or oat milk (unsweetened) | Subtle nutty note from almond milk; oat milk adds slight sweetness |
| White chocolate | High-quality white chocolate chips (must contain cocoa butter) | Slightly less smooth melt, still glossy if stirred gently |
| Rose water | Orange blossom water or 1/2 tsp vanilla extract | More floral (orange blossom) or simpler, less aromatic (vanilla) |
How to Make Raspberry Pistachio Velvet Pyramids — Step-by-Step
Trust me when I say this: if you can make a simple layer cake, you can absolutely make these pyramids. The key is patience with the chilling steps — they’re not extra work, they’re the secret to clean cuts and a perfect glaze. Let’s walk through each stage together.
Step 1: Prepare the Oven and Pan
Preheat your oven to 350°F (175°C). Grease a 9×13-inch baking pan with butter or nonstick spray, then line it with parchment paper, leaving an overhang on two sides — this makes lifting the cake out a breeze. I use a metal pan for even heat distribution, but glass works fine too; just add 5 minutes to the bake time if using glass.
💡 Sara’s Pro Tip: For the cleanest pyramid cuts later, line the pan with parchment in both directions so the cake lifts out as a perfect rectangle. No stuck edges, no broken corners.
Step 2: Mix the Dry Ingredients
In a medium bowl, whisk together 1 1/2 cups all-purpose flour, 1/2 cup finely ground pistachios, 1 teaspoon baking powder, and 1/4 teaspoon salt. Make sure the pistachios are ground fine enough that there are no large pieces — they should look like a coarse flour. If you grind your own, pulse them in a food processor with a tablespoon of the flour to prevent them from turning into butter.
Step 3: Cream Butter and Sugar
In a large bowl, beat 1/2 cup softened unsalted butter and 3/4 cup granulated sugar together on medium speed until light, pale, and fluffy — about 3 minutes. Add the 2 eggs one at a time, beating well after each addition, then mix in 1 teaspoon vanilla extract. The mixture should look smooth and slightly aerated.
⚠️ Common Mistake to Avoid: Don’t rush the creaming step. If the butter and sugar aren’t properly creamed, the cake will be dense and flat. You want the mixture to increase in volume and turn a pale yellow — that’s the air you need for a light crumb.
Step 4: Alternate Dry Ingredients and Milk
With the mixer on low, add the dry ingredients in three additions, alternating with the 1/2 cup whole milk in two additions — start and end with the dry mixture. Mix just until combined after each addition; stop as soon as the flour disappears. Overmixing at this stage develops gluten and makes the cake tough.
💡 Sara’s Pro Tip: Scrape the sides and bottom of the bowl with a spatula after each addition to ensure even mixing without overworking the batter.
Step 5: Fold in the Raspberries
Gently fold 3/4 cup fresh raspberries into the batter using a silicone spatula. Use a light hand — you want the berries to stay intact. If they break, they’ll release juice and streak the batter pink. It’s okay if a few berries break, but try to keep most whole.
⚠️ Common Mistake to Avoid: Adding frozen raspberries straight from the freezer without coating them in flour. Frozen berries bleed immediately into the batter and create soggy patches. If you must use frozen, toss them in 1 tablespoon of flour first and fold them in while still frozen.
Step 6: Bake and Cool
Pour the batter into the prepared pan and spread it evenly. Bake for 25–30 minutes, until a toothpick inserted in the center comes out clean or with just a few moist crumbs. Let the cake cool in the pan for 10 minutes, then lift it out using the parchment overhang and transfer to a wire rack to cool completely. Do not skip this — cutting a warm cake is impossible.
Step 7: Make the Pistachio Cream
In a chilled bowl, combine 1 cup heavy cream, 1/4 cup pistachio paste, 2 tablespoons powdered sugar, and 1/2 teaspoon vanilla extract. Whip on medium-high speed until medium peaks form — the cream should hold its shape but still be soft and pillowy, not stiff. Overwhipping will make it grainy, so stop as soon as you see firm ribbons.
💡 Sara’s Pro Tip: Chill your bowl and beaters in the freezer for 10 minutes before whipping the cream. The pistachio paste has a high fat content, so keeping everything cold helps it whip up faster and stay stable longer.
Step 8: Cut and Assemble the Pyramids
Once the cake is completely cool, place it on a cutting board. Using a long, sharp knife, trim the edges to create a clean rectangle. Cut the cake into 8 equal rectangles, then cut each rectangle diagonally to form two triangles per piece — you’ll have 16 triangles. Pair them into 8 pyramids by sandwiching a generous layer of pistachio cream between two triangles, matching up the long edges. Gently press to adhere.
⚠️ Common Mistake to Avoid: Using a dull knife to cut the cake. A dull blade will crush the tender crumb and create ragged edges. Use a long, sharp chef’s knife and wipe it clean between cuts for smooth, clean triangles.
Step 9: Make the Rose Gold Glaze
Place 1 cup finely chopped white chocolate in a heatproof bowl. Heat 1/3 cup heavy cream in a small saucepan until it begins to steam — do not let it boil. Pour the hot cream over the white chocolate and let it sit for 2 minutes, then stir gently until smooth. Stir in 1 teaspoon rose water and edible rose gold luster dust, starting with a pinch and adding more until you achieve a pale pink-gold shimmer.
💡 Sara’s Pro Tip: If the glaze looks streaky or thick, warm it gently over a double boiler for 10 seconds while stirring. If it’s too thin, let it cool for 2–3 minutes — it will thicken as it cools. The perfect consistency is like honey: it should flow slowly off a spoon.
Step 10: Glaze the Pyramids
Place the assembled pyramids on a wire rack set over a baking sheet. Pour the rose gold glaze evenly over each pyramid, starting at the top and letting it cascade down the sides. Use a small offset spatula to gently guide the glaze if needed, but let gravity do most of the work. Tap the rack gently to encourage any excess to drip off.
Step 11: Set the Glaze
Allow the glaze to set for 15–20 minutes at room temperature. It should firm up to a shiny, lightly tacky finish. Don’t refrigerate the glaze before it sets, or it will lose its shine and develop condensation spots.
Step 12: Garnish and Serve
Before the glaze fully hardens, garnish each pyramid with a sprinkle of chopped pistachios, a fresh raspberry, and a few dried rose petals. The garnish should be pressed in gently so it stays put. Serve immediately or refrigerate until ready to serve — the pyramids look most dramatic on a white platter with a dusting of extra luster dust.
| Step | Action | Duration | Key Visual Cue |
|---|---|---|---|
| 1 | Preheat & prepare pan | 5 mins | Parchment overhang on all sides |
| 2–5 | Mix batter & fold raspberries | 15 mins | Raspberries distributed, not broken |
| 6 | Bake cake | 25–30 mins | Toothpick clean, edges golden |
| 7 | Whip pistachio cream | 5 mins | Medium peaks, pale green ribbons |
| 8 | Cut triangles & assemble | 10 mins | Clean diagonal cuts, cream evenly spread |
| 9 | Make rose gold glaze | 8 mins | Smooth, glossy, pale pink-gold |
| 10–11 | Glaze & set | 20–25 mins | Glaze flows evenly, sets to shiny finish |
| 12 | Garnish & serve | 5 mins | Garnish pressed in before glaze hardens |
Serving & Presentation
These Raspberry Pistachio Velvet Pyramids are designed to be the centerpiece of any dessert table. I love serving them on a long, narrow white platter — the pale pink-gold glaze pops against the white, and the geometric shapes create a striking repeating pattern. For a dinner party, arrange the pyramids in a row down the center of the table with fresh raspberries and rose petals scattered around the base. Each guest gets their own pyramid, which makes serving effortless and feels incredibly special.
In terms of pairings, the floral notes of the rose gold glaze dessert call for something equally aromatic. A cup of mint tea (my Moroccan grandmother’s influence) is a natural companion — the cool mint cuts through the richness and complements the rose. For a more indulgent pairing, a small glass of dessert wine like a Moscato d’Asti or a late-harvest Riesling echoes the fruity and floral notes beautifully. If you’re serving these at a brunch or afternoon tea, a pot of jasmine or rose green tea works wonders.
For garnishing, I keep it simple but intentional: a single fresh raspberry perched on top of each pyramid, a tiny sprinkle of chopped pistachios along the ridge, and a few dried rose petals scattered like confetti. The dried petals add a delicate crunch and a pop of deep pink that contrasts with the pale glaze. One tip I learned from a plating class in Paris: use tweezers to place each garnish element so it looks intentional, not haphazard. The beauty of this dessert is in the details.
| Pairing Type | Suggestions | Why It Works |
|---|---|---|
| Side Dish | Fresh raspberry coulis, vanilla bean ice cream | Adds brightness and creamy contrast |
| Sauce / Dip | Warm dark chocolate sauce, salted caramel | Richness balances floral and tart notes |
| Beverage | Mint tea, Moscato d’Asti, jasmine green tea | Aromatic complements to rose and pistachio |
| Garnish | Dried rose petals, chopped pistachios, fresh raspberries | Textures and colors that echo the dessert |
Make-Ahead, Storage & Reheating
As a busy New York City food blogger, I rely on make-ahead desserts for dinner parties and holiday gatherings. The great news is that these pyramids actually improve after a day in the fridge — the pistachio cream sets firmly, the cake absorbs a touch of moisture from the cream, and the flavors meld together beautifully. Here’s my tested system for prepping ahead without losing that WOW factor.
| Method | Container | Duration | Reheating Tip |
|---|---|---|---|
| Refrigerator | Airtight container, single layer | Up to 3 days | Serve cold or let sit 15 mins at room temp |
| Freezer | Wrap each pyramid in plastic wrap, then foil | Up to 1 month | Thaw overnight in fridge; glaze may soften slightly |
| Make-Ahead | Assemble without glaze, store in fridge | Up to 2 days in advance | Glaze on day of serving for best shine |
If you’re making these fully in advance for a party, I recommend assembling the pyramids with the pistachio cream and storing them uncovered in the fridge for an hour to let the cream firm up, then wrapping each one individually in plastic wrap. On the day of serving, make the glaze fresh, pour it over the cold pyramids, and let it set at room temperature for 20 minutes before garnishing. The cold cake helps the glaze set quickly and evenly. For the shiniest results, never refrigerate the pyramids after glazing — condensation will dull the finish. If you must refrigerate, bring them back to room temperature for 30 minutes before serving and the shine will return.
I don’t recommend microwaving these to reheat — the glaze will melt and the cream will separate. If you want a warm dessert, serve the cake component (without glaze) warm from the oven with a dollop of pistachio cream on the side. But honestly, these pyramids are at their absolute best served cold or at room temperature, with the glaze firm and glossy.
Variations & Easy Swaps
One of the things I love most about this Raspberry Pistachio Velvet Pyramids recipe is how versatile it is. Over the years, I’ve developed several variations that keep the dessert exciting while adapting to different dietary needs and flavor preferences. Whether you’re baking for someone with food allergies or just want to switch up the flavor profile, these swaps have all been tested in my NYC kitchen.
| Variation | Key Change | Best For | Difficulty Impact |
|---|---|---|---|
| Chocolate Pistachio Pyramids | Replace raspberries with mini dark chocolate chips | Chocolate lovers, holiday tables | Easy — same technique, fewer berry worries |
| Orange Blossom & Honey | Replace rose water with orange blossom water; add 1 tbsp honey to glaze | North African flavor profile, brunch | Easy — simple flavor swap |
| Vegan Pistachio Pyramids | Use flax eggs, coconut cream, and vegan white chocolate | Vegan guests, dairy-free diets | Medium — requires careful substitution |
| Saffron Rose Pyramids | Add a pinch of saffron to the cake batter and glaze | Special occasions, Persian-inspired menus | Easy — saffron steeped in warm milk first |
Chocolate Pistachio Pyramids
This variation is a crowd-pleaser for serious chocolate fans. Simply replace the raspberries with 3/4 cup of mini dark chocolate chips (60-70% cacao) folded into the batter. The chocolate chips stay intact during baking, creating little pockets of melted chocolate throughout the pistachio cake. For the glaze, you can keep the rose gold or swap it for a dark chocolate ganache — just replace the white chocolate with dark chocolate and omit the rose water. The combination of pistachio and dark chocolate is a classic French pairing that never disappoints.
Vegan Pistachio Pyramids
To make this dessert fully vegan, I’ve tested a version that uses flax eggs (1 tablespoon ground flaxseed mixed with 3 tablespoons water per egg, let sit for 5 minutes) in place of the eggs, and full-fat coconut cream (the solid part from a chilled can of coconut milk) in place of the heavy cream for the pistachio cream and glaze. For the cake, use a good-quality vegan butter stick and unsweetened oat milk. The glaze needs a vegan white chocolate — I’ve had great results with brands like Pascha or iChoc. The texture is slightly denser than the original but still tender and delicious. The coconut cream adds a subtle tropical note that pairs surprisingly well with raspberry.
Saffron Rose Pyramids
This variation is inspired by my Moroccan heritage — saffron and rose are a classic combination in North African sweets. To make it, steep a generous pinch of saffron threads in 2 tablespoons of warm milk for 10 minutes, then add that infused milk to the batter along with the other wet ingredients. For the glaze, steep the saffron in the heavy cream before pouring it over the white chocolate. The saffron gives the cake a beautiful golden hue and a subtle, earthy floral note that complements the rose water. It’s a stunning variation for Eid, Nowruz, or any celebration where you want to honor ancient flavor traditions.
How do you make rose gold glaze for a raspberry pistachio velvet cake?
To make the rose gold glaze for this raspberry pistachio velvet cake, start by finely chopping 1 cup of high-quality white chocolate and placing it in a heatproof bowl. Heat 1/3 cup of heavy cream in a small saucepan until it just begins to steam — do not let it boil. Pour the hot cream over the white chocolate and let it sit undisturbed for 2 minutes, then stir gently with a spatula until completely smooth. Stir in 1 teaspoon of rose water and add edible rose gold luster dust, starting with a pinch and increasing until you reach a pale pink-gold shimmer. The glaze should be smooth and fluid, like warm honey. If it’s too thick, warm it over a double boiler for 10 seconds while stirring. Pour the glaze over your assembled pyramids on a wire rack and let it set at room temperature for 15–20 minutes. The result is a glossy, shimmering finish that looks like liquid metal and tastes delicately floral.
Can I use frozen raspberries instead of fresh for raspberry pistachio velvet pyramids?
Yes, you can use frozen raspberries in this raspberry pistachio velvet pyramids recipe, but you need to adjust your technique to avoid a soggy cake. First, do not thaw the berries — work with them straight from the freezer. Toss the frozen raspberries in 1 tablespoon of all-purpose flour before folding them into the batter; this helps absorb excess moisture and prevents the berries from sinking to the bottom. Fold them in very gently, as frozen berries are more fragile and can break apart easily. Reduce the milk in the batter by 1 tablespoon to compensate for the extra moisture the frozen berries will release during baking. Expect a slightly longer bake time — about 3–5 extra minutes — since the frozen berries lower the overall temperature of the batter. If you notice the batter turning pink or gray from berry juice, you’ve mixed too vigorously. All that said, fresh raspberries are always the best choice for texture and flavor, but frozen can work in a pinch.
What is the best way to shape cake into pyramids without it falling apart?
The key to clean pyramid shapes is to start with a fully cooled cake — do not attempt to cut a warm cake, as it will crumble and stick to your knife. Place the cooled cake on a cutting board and trim the edges to create a clean rectangle. Use a long, sharp chef’s knife to cut the cake into 8 equal rectangles. Then cut each rectangle diagonally from one corner to the opposite corner to form two triangles. You will have 16 triangles. To assemble each pyramid, spread a generous layer of pistachio cream on one triangle, then place a second triangle on top, matching up the long edges to form a pyramid shape. Gently press together. The key to preventing crumbling is using a sharp, non-serrated knife and wiping it clean between cuts. If the cake still feels too tender, pop it in the freezer for 15 minutes before cutting — the chilled cake firms up and cuts much more cleanly. This technique works beautifully for any geometric cake project.
How do you store raspberry pistachio velvet pyramids to keep the glaze shiny?
To keep the rose gold glaze on your raspberry pistachio velvet pyramids looking glossy and beautiful, storage is all about managing condensation. The glaze is a white chocolate ganache, which is sensitive to moisture. For short-term storage (up to 24 hours), place the glazed pyramids in an airtight container in the refrigerator — but let them come to room temperature for 15–20 minutes before serving so any condensation evaporates and the shine returns. For longer storage (up to 3 days), I recommend glazing the pyramids no more than a few hours before serving. If you must make them fully in advance, assemble the pyramids with the pistachio cream and store them uncovered in the fridge for an hour, then wrap each one individually in plastic wrap. On serving day, make the glaze fresh, pour it over the cold pyramids, and let it set at room temperature. Never wrap glazed pyramids directly in plastic, as the wrap will stick to and ruin the glaze. The most important rule: once glazed, do not refrigerate again — the moisture in the fridge will create condensation that dulls the finish. If you do refrigerate, place the pyramids in a sealed container with a paper towel to absorb moisture, and bring to room temperature before serving.
Can I make the pistachio cream filling ahead of time?
Yes, you can absolutely make the pistachio cream filling up to 2 days in advance, which is a great time-saver when planning for a party. Whip the cream, pistachio paste, powdered sugar, and vanilla together until medium peaks form, then transfer the cream to an airtight container and refrigerate. The cream will firm up slightly in the fridge, so before using it, let it sit at room temperature for about 15 minutes and then give it a few gentle folds with a spatula to restore its spreadable consistency. One thing to keep in mind: if you whip the cream too stiff initially, it can become grainy after refrigeration as the fat separates. That’s why I always stop at medium peaks — they hold their shape but remain soft enough to survive a day or two in the fridge. If you notice any separation after refrigeration, simply whisk it by hand for a few seconds to bring it back together. This make-ahead approach is exactly what I use when teaching my NYC cooking classes — it makes the final assembly a breeze.
What can I use instead of pistachio paste in this recipe?
If you can’t find pistachio paste, there are several good alternatives that will still give you a delicious result. The best substitute is homemade pistachio butter: simply blitz 1 cup of shelled, unsalted pistachios in a food processor with 1 tablespoon of neutral oil (like grapeseed or avocado) until smooth and creamy. This takes about 5 minutes and gives you a fresh, intensely nutty paste. Another option is to use 1/4 cup of store-bought almond paste or marzipan in place of the pistachio paste, but this will change the flavor profile to almond and add more sweetness. If you’re in a pinch, you can use 3 tablespoons of melted white chocolate mixed with 1 tablespoon of finely ground pistachios — it won’t have the same intensity, but it will add nutty flavor and richness. The most important thing is to avoid using pistachio-flavored syrups or extracts, as they taste artificial and don’t provide the creaminess needed for the filling. Whichever substitute you choose, the texture and color of the cream will differ slightly, but the flavor will still be delightful.
Why did my rose gold glaze turn out streaky or lumpy?
A streaky or lumpy rose gold glaze is almost always the result of one of two issues: the cream was too hot when poured over the white chocolate, or the luster dust was added too quickly without proper mixing. If the cream is too hot (boiling rather than steaming), it can cause the white chocolate to seize — the cocoa butter separates and the mixture becomes thick, grainy, and streaky. Always heat the cream until it just begins to steam with small bubbles around the edges, but never reaches a full boil. If your glaze does seize, try stirring in a tablespoon of warm cream at a time while whisking vigorously to bring it back together. Another common cause is adding too much luster dust at once without stirring thoroughly. The luster dust needs to be fully dissolved into the warm glaze — sprinkle it in gradually while stirring, and continue stirring for a full minute after the last addition. If the glaze is already cold and streaky, gently reheat it over a double boiler while stirring constantly until smooth. Remember, patience with temperature is everything when working with white chocolate ganache.
Can I use a different nut instead of pistachios in this velvet cake recipe?
Absolutely — this pistachio velvet cake recipe is wonderfully adaptable to other nuts. The best alternatives are almonds and hazelnuts, as both have a similar fat content and grind to a fine flour-like texture. For almond version, replace the ground pistachios with an equal amount of almond flour or finely ground blanched almonds. Almond pairs beautifully with raspberry and rose, giving the cake a slightly sweeter, more delicate flavor. For hazelnut version, use finely ground hazelnuts, but note that hazelnuts have a stronger, earthier flavor that pairs best with dark chocolate rather than raspberry — consider switching to the chocolate variation if you go this route. Walnuts are another option, though they are oilier and can make the cake denser; reduce the butter by 1 tablespoon if using walnuts. For any nut substitution, the key is to grind the nuts to the same fine consistency as the original pistachios — no large pieces. The color of the cake will change depending on the nut (pale yellow for almonds, golden for hazelnuts, brown for walnuts), which is part of the fun of experimenting.
How do I transport raspberry pistachio velvet pyramids to a party without damaging them?
Transporting these delicate pyramids requires a little planning, but it’s absolutely doable. The best method is to assemble and glaze the pyramids directly on the serving platter you’ll use at the party — that way you don’t have to transfer them afterward. Choose a platter with a slight lip to prevent sliding. If you need to transport them on a separate tray, first chill the glazed pyramids in the refrigerator for 30 minutes until the glaze is fully set but not rock hard. Then, place each pyramid in a individual paper cupcake liner — the fluted sides grip the pyramid and keep it stable. Arrange the lined pyramids snugly in a sturdy box or on a rimmed baking sheet with a non-slip mat underneath. Cover loosely with plastic wrap, making sure the wrap doesn’t touch the tops of the pyramids. Drive carefully and keep the box level — avoid sudden stops. For longer trips, place the box on the floor of the car where it won’t slide. Once you arrive, gently remove the plastic wrap and let the pyramids sit at room temperature for 15 minutes to restore their glossy shine. The cupcake liner trick is a game-changer for transport.
Is this recipe suitable for beginners or is it only for experienced bakers?
This Raspberry Pistachio Velvet Pyramids recipe is designed to be accessible for confident beginners while still impressing experienced bakers. The cake itself is a simple butter cake — if you can make a basic layer cake, you can make this. The most challenging parts are the pyramid cutting and the glaze, but I’ve included tips that make both easy. For beginners, I recommend reading through the entire recipe first, prepping all your ingredients before starting, and giving yourself plenty of time — especially for the chilling steps. The pyramid cutting is much easier if you chill the cake in the freezer for 15 minutes first, and the glaze is forgiving if you keep the cream at the right temperature. I’ve taught this recipe to beginner bakers in my NYC workshops and they’ve all succeeded on their first try. If you’re nervous, you can simplify the recipe by skipping the pyramid shape and serving the cake as rectangles or squares, or even as a single layered cake. The flavors are stunning no matter how you shape it. Trust the process, and don’t rush the cooling steps — that’s truly the secret.
Share Your Version!
I absolutely love seeing how my readers make these Raspberry Pistachio Velvet Pyramids their own. Whether you stick to the original recipe or try one of the variations — the Chocolate Pistachio version with mini dark chocolate chips, or the Saffron Rose twist with its golden hue — I want to hear about it. Leave a star rating and a comment below telling me how it went. Did you make it for a special occasion? Did someone at your table ask for seconds? Those are the stories that make recipe-sharing so meaningful.
If you share your creation on Instagram or Pinterest, tag @cheerychop so I can see your beautiful pyramids in all their glazed glory. I always re-share my favorites in my stories! And here’s a question for you: what’s the one dessert you’ve always wanted to make but felt too intimidated to try? Let me know in the comments — I might just develop a recipe for it next. From my NYC kitchen to yours — I hope this recipe brings as much warmth to your table as it does to mine. — Sara 🧡
Love This Recipe? Save It to Pinterest!
If you enjoyed this Raspberry Pistachio Velvet Pyramids with Rose Gold Glaze recipe, don’t let it get lost in your browser tabs! 😄 Pin it now so you can find it again anytime — and explore hundreds more tried-and-tested recipes waiting for you on my Pinterest boards.
👉 Follow Sara on Pinterest @chefrecipes2
📌 Pin this recipe · 🔁 Re-pin your favorites · 💬 Tag me when you make it — I love seeing your creations!
💬 Did you make these Raspberry Pistachio Velvet Pyramids?
I’d love to hear how they turned out! Drop a comment below, rate the recipe, and tag @cheerychop in your photos. Your feedback helps me create more recipes you’ll love.
⭐ Rate · 💬 Comment · 📌 Pin · 📸 Tag @cheerychop
Raspberry Pistachio Velvet Pyramids with Rose Gold Glaze
A decadent dessert featuring layers of raspberry pistachio cake, pistachio cream, and a rose gold glaze.
- Yield: 8 1x
Ingredients
- For the Raspberry Pistachio Cake:
- 1 1/2 cups all-purpose flour
- 1/2 cup finely ground pistachios
- 1 tsp baking powder
- 1/4 tsp salt
- 1/2 cup unsalted butter, softened
- 3/4 cup granulated sugar
- 2 large eggs
- 1 tsp vanilla extract
- 1/2 cup whole milk
- 3/4 cup fresh raspberries
- For the Pistachio Cream Filling:
- 1 cup heavy cream
- 1/4 cup pistachio paste
- 2 tbsp powdered sugar
- 1/2 tsp vanilla extract
- For the Rose Gold Glaze:
- 1 cup white chocolate, finely chopped
- 1/3 cup heavy cream
- 1 tsp rose water
- Edible rose gold luster dust, as needed
- For Garnish (optional):
- 2 tbsp chopped pistachios
- Fresh raspberries
- Dried rose petals
Instructions
- 1. Preheat the oven to 350°F (175°C). Grease and line a baking pan.
- 2. Whisk together flour, ground pistachios, baking powder, and salt.
- 3. Beat butter and sugar until light and fluffy. Mix in eggs one at a time, then add vanilla.
- 4. Alternate adding the dry ingredients and milk until a smooth batter forms.
- 5. Fold in the raspberries gently.
- 6. Bake for 25–30 minutes or until a toothpick comes out clean. Cool completely.
- 7. Whip the heavy cream, powdered sugar, vanilla, and pistachio paste until medium peaks form.
- 8. Cut the cooled cake into pyramid-shaped portions or trim into geometric layers and fill with pistachio cream.
- 9. Heat the cream for the glaze until steaming. Pour over the white chocolate and stir until smooth.
- 10. Mix in the rose water and edible rose gold luster dust until glossy.
- 11. Place the pyramids on a rack and pour the glaze evenly over each piece.
- 12. Allow the glaze to set for 15–20 minutes.
- 13. Garnish with chopped pistachios, raspberries, and dried rose petals before serving.
Nutrition
- Calories: 410
- Sugar: 24 g
- Fat: 27 g
- Carbohydrates: 37 g
- Protein: 6 g
Tried This Recipe? Leave a Comment!
Did you make this recipe? I’d love to hear how it turned out! Please leave a comment and a rating below. Your feedback helps other home cooks and supports cheerychop.com!
For more delicious inspiration, follow me on Pinterest!


