

Table of Contents
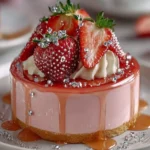
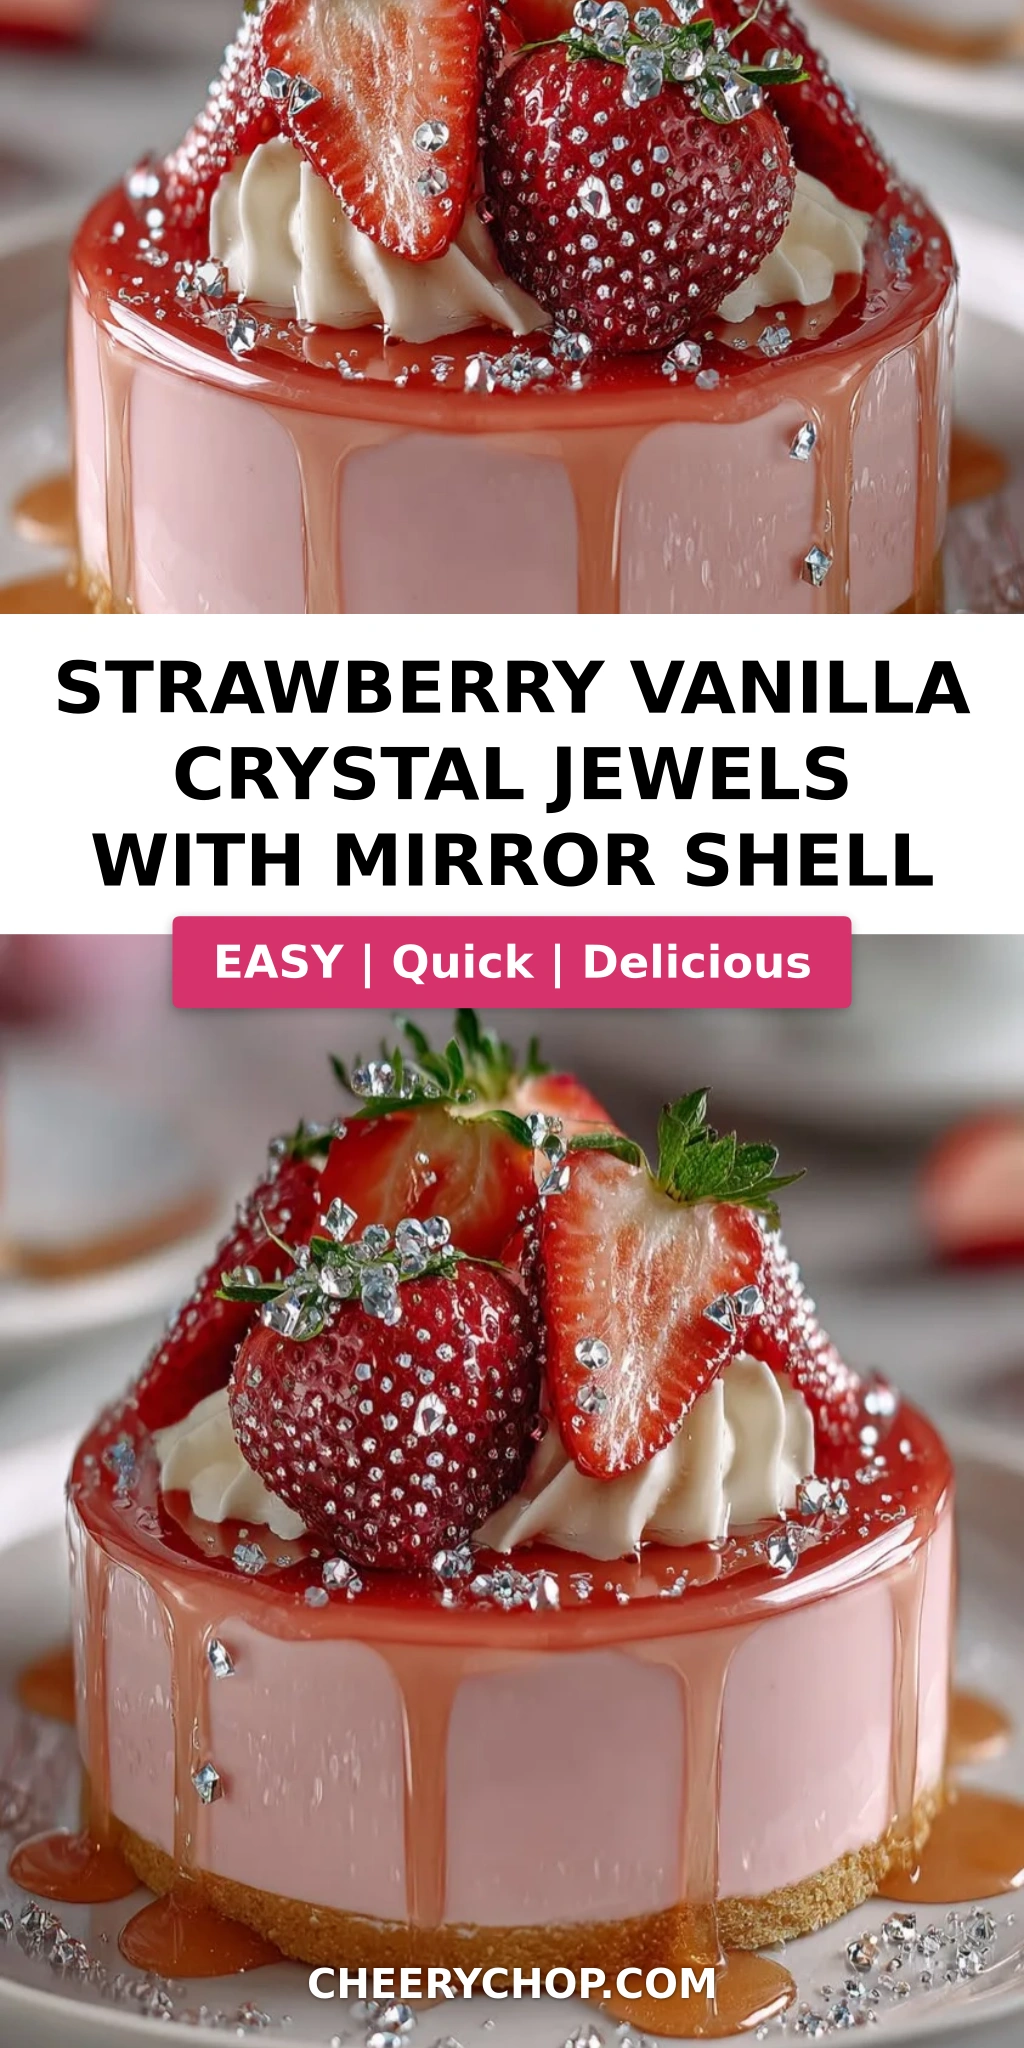
Strawberry Vanilla Crystal Jewels with Mirror Shell – A Glossy, Gem-Inspired Showstopper
I still remember the first time I saw a mirror-glazed dessert in a patisserie window in Paris—it glowed like a polished gem, and I knew I had to learn how to make it at home. That moment led to years of testing and perfecting, and now I’m thrilled to share my Strawberry Vanilla Mirror Glaze Jewels Recipe with you. These little crystals combine a luscious strawberry vanilla mousse with a tender vanilla sponge, all encased in a glossy pink mirror shell that shimmers like a jewel. The unique angle here is the edible pearl shimmer dust—it takes the glaze from shiny to truly magical, reflecting light in the most beautiful way.
When you bite into one of these jewels, you get first the crack of the thin, sweet mirror shell, then the airy, fruity mousse, and finally the soft sponge base. The strawberry puree, brightened with lemon juice and real vanilla, tastes like summer captured in a spoon. My mother back in Morocco would make a simple strawberry compote with orange blossom water, and that memory inspired the fragrant note in this mousse—though I swapped the orange blossom for extra vanilla to keep it more familiar for my NYC friends. The texture is thanks to a French technique called “bain-marie” for the glaze, ensuring it stays silky and pourable.
After years in restaurant kitchens and my own blog, I’ve streamlined this recipe so home cooks can achieve professional results. The trick is to work with frozen mousse—it gives you a perfect surface for the glaze. I’ll walk you through each step, including my 💡 Sara’s Pro Tip for getting that glass-like finish. One common mistake is rushing the glaze temperature—if it’s too warm, it runs right off; too cool, it thickens too fast. We’ll avoid that together. Trust me, when you see your friends’ faces light up as you present these crystal jewels, you’ll know it was worth every minute.
Why This Strawberry Vanilla Crystal Jewels Recipe Is the Best
The Flavor Secret – I use a high-quality vanilla extract (I buy mine from a small batch producer at the Union Square Greenmarket) and fresh strawberry puree, not syrup. The lemon juice wakes up the berries, and the condensed milk in the mirror shell adds a subtle caramel sweetness that pairs beautifully with the tart fruit. It’s a balanced, sophisticated dessert that tastes as good as it looks.
Perfected Texture – The mousse is light and velvety because I fold whipped cream into the cooled strawberry gelatin mixture rather than using a heavy custard base. This French-style mousse keeps the jewels airy. The sponge is a simple genoise that I bake thin and cut into small squares—firm enough to hold the mousse but soft enough to melt on the tongue.
Foolproof & Fast – Even though this is an advanced recipe, I’ve broken it into manageable parts. You can prepare the sponge and mousse a day ahead, freeze overnight, and glaze just before serving. The mirror shell comes together in 15 minutes and sets in 10. This makes it perfect for a dinner party where you want to wow without being stuck in the kitchen all day.
Strawberry Vanilla Mirror Glaze Jewels Recipe Ingredients
Whenever I make these jewels, I head to my local farmers market in Brooklyn for the most fragrant strawberries. But I also keep frozen puree on hand for the off-season—both work beautifully, as I’ll explain below. The ingredients are straightforward, but each plays a crucial role.
Ingredients List
- For the Strawberry Vanilla Mousse: 2 cups strawberry puree (fresh or frozen, thawed), 1/2 cup granulated sugar, 1 tsp vanilla extract, 1 tbsp lemon juice, 1 cup heavy cream, 2 tsp powdered gelatin, 2 tbsp cold water
- For the Vanilla Sponge Base: 1 cup all-purpose flour, 1/2 tsp baking powder, 1/4 tsp salt, 1/4 cup unsalted butter, softened, 1/3 cup granulated sugar, 1 large egg, 1/2 tsp vanilla extract, 1/4 cup milk
- For the Mirror Shell: 1 cup white chocolate, finely chopped, 1/3 cup sweetened condensed milk, 1/4 cup water, 1/2 cup granulated sugar, 2 tsp powdered gelatin, 2 tbsp cold water, Pink food coloring (gel or powder best), Edible pearl shimmer dust (1–2 tsp)
- For Garnish (optional): Fresh strawberry slices, White chocolate curls, Edible silver pearls
Ingredient Spotlight
Strawberry Puree – Use unsweetened puree for best control. If making your own, hull ripe strawberries and blend until smooth. Frozen strawberries work fine—just thaw, drain excess liquid, and puree. One tested substitution is raspberry puree for a tangier jewel.
Powdered Gelatin – This is the key to the mousse and glaze structure. I prefer Knox brand, but any unflavored powdered gelatin works. Bloom it in cold water for 5–10 minutes before heating; never skip that step. For a vegetarian version, you can try agar agar, but the texture will be firmer and less silky.
White Chocolate – Use a high-quality white chocolate with cocoa butter (like Callebaut or Ghirardelli) for the best shine. White chips often have additives that can make the glaze grainy. Chop it finely so it melts evenly in the hot liquid.
Edible Pearl Shimmer Dust – This is what gives the jewels their crystal-like sparkle. Find it at baking supply stores or online (I love the brand “Chefmaster”). A little goes a long way; stir it into the glaze after coloring.
| Original Ingredient | Best Substitution | Flavor / Texture Impact |
|---|---|---|
| Strawberry puree | Raspberry or mixed berry puree | Tartier, darker color; still works great |
| Powdered gelatin | Agar agar (use 1 tsp, different setting method) | Firmer set, less silky; not recommended for mirror glaze |
| White chocolate (cocoa butter based) | White candy melts (colored) | Less shine, more waxy; add extra shimmer dust |
| Heavy cream (for mousse) | Full-fat coconut cream (chilled) | Coconut flavor; lighter, different mouthfeel |
| All-purpose flour | Gluten-free 1-to-1 flour blend | Slightly denser sponge; add 1 tbsp milk if needed |
How to Make Strawberry Vanilla Crystal Jewels — Step-by-Step
Don’t be intimidated by the steps—I promise you can do this. The secrets are good timing and a few chef’s tricks. Let’s get started!
Step 1: Prepare the Vanilla Sponge Base
Preheat your oven to 350°F (175°C). Grease an 8×8 inch baking pan and line with parchment paper. In a small bowl, whisk together 1 cup all-purpose flour, 1/2 tsp baking powder, and 1/4 tsp salt. In a medium bowl, beat 1/4 cup softened unsalted butter with 1/3 cup sugar until light and fluffy—about 3 minutes. Add 1 large egg and 1/2 tsp vanilla extract, mixing until combined. Alternate adding the flour mixture and 1/4 cup milk, starting and ending with flour. Mix just until a smooth batter forms. Spread evenly in the pan and bake for 18–20 minutes, until golden and a toothpick comes out clean. Cool completely, then use a small cutter or knife to cut 8 jewel-sized pieces (about 1.5 inches square or round, depending on your mold).
⚠️ Common Mistake to Avoid: Don’t overmix the batter or your sponge will be tough. Stir just until no flour streaks remain.
Step 2: Make the Strawberry Vanilla Mousse
In a small bowl, sprinkle 2 tsp powdered gelatin over 2 tbsp cold water. Let it sit for 5–10 minutes to bloom. In a saucepan, combine 2 cups strawberry puree, 1/2 cup sugar, 1 tsp vanilla, and 1 tbsp lemon juice. Heat over medium until warm (not boiling), stirring to dissolve sugar. Remove from heat, add the bloomed gelatin, and stir until completely dissolved. Let cool to room temperature, stirring occasionally. In a separate chilled bowl, whip 1 cup heavy cream to soft peaks. Gently fold the cooled strawberry mixture into the whipped cream in three additions, until no white streaks remain.
💡 Sara’s Pro Tip: For the smoothest mousse, strain the strawberry puree through a fine-mesh sieve before heating to remove seeds. It’s a little Parisian trick that makes the texture extra elegant.
Step 3: Assemble and Freeze
If using jewel-shaped silicone molds (I love the faceted diamond shapes from Amazon), place them on a baking sheet. Spoon the mousse into each mold, filling about 2/3 full. Press a sponge piece gently into the center of each mold, pushing until it’s flush with the top (the mousse will rise slightly). Freeze uncovered for at least 4 hours, or overnight, until completely firm. This is crucial for the mirror glaze to adhere properly.
⚠️ Common Mistake to Avoid: Don’t skip the freeze time. If the mousse is even slightly soft, the warm glaze will melt it and create a messy, uneven coating.
Step 4: Create the Mirror Shell Glaze
Bloom 2 tsp gelatin in 2 tbsp cold water. In a small saucepan, combine 1/2 cup sugar, 1/4 cup water, and 1/3 cup sweetened condensed milk. Heat over medium, stirring constantly, until smooth and just beginning to simmer. Remove from heat, add the bloomed gelatin, and stir until dissolved. Pour this hot liquid over 1 cup finely chopped white chocolate in a heatproof bowl. Let sit for 1 minute, then stir gently until the chocolate is fully melted and the mixture is silky. Add pink food coloring gel drop by drop until you reach your desired shade. Then stir in 1–2 tsp edible pearl shimmer dust until evenly distributed. Let the glaze cool to 90–95°F (32–35°C)—it should be thick but pourable, like warm honey.
💡 Sara’s Pro Tip: Test the glaze on the back of a spoon. If it runs off in a steady sheet, it’s ready. If it’s too runny, let it cool a bit more; if too thick, warm it gently over a water bath.
Step 5: Glaze and Garnish
Remove the frozen jewels from the molds. Place each on a wire rack set over a baking sheet to catch drips. Working one at a time, pour the glaze over the jewel, starting at the center and letting it flow evenly over the sides. Let the coating set for 10–15 minutes at room temperature—the glaze will become firm and shiny. Once set, use a small offset spatula to transfer to serving plates. Garnish with fresh strawberry slices, white chocolate curls, and edible silver pearls if desired.
⚠️ Common Mistake to Avoid: Don’t let the jewels sit too long before glazing—they need to be frozen solid. If they start to sweat, pat them dry with a paper towel before pouring the glaze.
| Step | Action | Duration | Key Visual Cue |
|---|---|---|---|
| 1 | Make sponge | 10 min prep + 20 min bake | Golden top, toothpick clean |
| 2 | Make mousse | 15 min | Gelatin fully dissolved, mixture thickens |
| 3 | Assemble & freeze | 10 min + 4 hrs freeze | Mousse firm to touch, sponge holds |
| 4 | Make mirror glaze | 15 min | Glaze drips off spoon in sheet |
| 5 | Glaze & garnish | 10 min + 10 min set | Smooth, glossy coating |
Serving & Presentation
These jewels are meant to be the star of any dessert table. I like to serve them on a mirrored cake stand (so the shine doubles!) or on individual white plates with a drizzle of extra mirror glaze and a few fresh berries on the side. The contrast of the glossy pink against the white chocolate curls and silver pearls is absolutely stunning.
For a Moroccan touch, I sometimes dust the plate with a little ground pistachio or add a tiny pinch of rose petal—it reminds me of the rosewater pastries my mother made during Ramadan. My NYC friends adore these with a dollop of lightly sweetened mascarpone cream or a scoop of vanilla bean ice cream. The jewels are best served within an hour of glazing, while the shell is firm but the mousse is still beautifully cold.
| Pairing Type | Suggestions | Why It Works |
|---|---|---|
| Side/Accompaniment | Fresh raspberries, mint leaves, edible flowers | Adds freshness and color contrast |
| Cream/Sauce | Vanilla bean crème anglaise, mascarpone cream | Enhances the vanilla notes, adds richness |
| Beverage | Prosecco, Earl Grey tea, cold-brew coffee | Bubbles cut through sweetness; tea complements berry |
| Garnish | White chocolate curls, silver pearls, gold leaf | Elevates the jewel effect, adds luxury |
Make-Ahead, Storage & Reheating
I love making these jewels for dinner parties because almost everything can be done ahead. In my bustling NYC schedule, I prep the sponge and mousse on Saturday, assemble and freeze overnight, then glaze and garnish just before guests arrive. The frozen jewels (unglazed) keep perfectly for up to two weeks in an airtight container—just wrap them individually in plastic wrap before freezing.
| Method | Container | Duration | Reheating Tip |
|---|---|---|---|
| Refrigerator | Airtight container, single layer | Up to 2 days (unglazed only) | N/A – serve cold after glazing |
| Freezer | Wrap individually in plastic, then foil | Up to 2 months (unglazed) | Thaw in fridge 1 hour before glazing |
| Make-Ahead | Freeze assembled, unglazed | Up to 2 weeks before glazing | Glaze directly from frozen |
Once the jewels are glazed, they should be served within 2–3 hours to maintain the best shine. If you need to hold them longer, place them on a tray in the refrigerator (not the freezer—condensation can dull the glaze) for up to 12 hours, but the glossy finish may soften slightly. I don’t recommend reheating, as it would ruin the mousse and melt the shell.
Variations & Easy Swaps
| Variation | Key Change | Best For | Difficulty Impact |
|---|---|---|---|
| Raspberry Rose Jewels | Replace strawberry puree with raspberry; add 1 tsp rose water | Elegant floral flavor, Valentine’s Day | Same |
| Gluten-Free Version | Use gluten-free 1-to-1 flour blend; add 1 tbsp extra milk | Guests with gluten intolerance | Slightly more delicate sponge |
| Lemon Vanilla Jewels | Use lemon curd instead of strawberry puree; add zest | Bright, citrusy twist for summer | Same – curd needs straining |
Raspberry Rose Jewels
This variation is inspired by the rosewater syrups I grew up with in Morocco. Replace the strawberry puree with an equal amount of raspberry puree (fresh or frozen). Add 1 teaspoon of rose water to the mousse along with the vanilla. For the mirror glaze, omit the pink food coloring if you like—the raspberry will give a deeper red hue. The floral notes pair beautifully with the white chocolate shell. A tiny dried rose petal on top makes it extra special.
Gluten-Free Version
For my friends with celiac disease, I’ve tested this with a quality gluten-free 1-to-1 baking flour (like Bob’s Red Mill). The sponge is a bit more tender, so handle it gently. Add an extra tablespoon of milk to the batter because gluten-free flours absorb more liquid. Bake time may be 2–3 minutes shorter. The mousse and glaze are naturally gluten-free, so just the base needs the swap.
Lemon Vanilla Jewels
A bright, citrusy version that reminds me of lemon tarts I learned to make in Paris. Use 1 cup of good-quality lemon curd (store-bought is fine, but I love Ina Garten’s recipe) mixed with 1/2 cup of heavy cream for the mousse. Omit the strawberry puree, sugar, and lemon juice from the mousse—the curd already has sugar and acid. Add the vanilla extract and bloomed gelatin to the warm curd before folding in cream. The mirror glaze can stay pink or go yellow with yellow food coloring. Serve with fresh blueberries on the side.
What is a mirror shell glaze and how do you make it for Strawberry Vanilla Crystal Jewels?
A mirror shell glaze is a shiny, reflective coating made from white chocolate, sweetened condensed milk, sugar, water, and gelatin. For this strawberry vanilla mirror glaze jewels recipe, you bloom gelatin in cold water, then heat sugar, water, and condensed milk until smooth. Pour that over finely chopped white chocolate, stir until melted, add pink food coloring and edible pearl shimmer dust, then cool to about 90°F. Pour the glaze over frozen mousse jewels for that glass-like finish. The key is using a good-quality white chocolate with cocoa butter and keeping the glaze at the right temperature—too hot and it runs, too cool and it thickens.
Can I use frozen strawberries instead of fresh for the crystal jewel recipe?
Absolutely! Frozen strawberries work perfectly for the strawberry vanilla mousse. Thaw them completely, then drain any excess liquid before pureeing—otherwise the mousse might be too watery. I often use frozen puree from the supermarket when fresh berries are out of season. The flavor is still bright, especially with a little extra lemon juice. Just make sure to stir the puree well after thawing to keep the consistency smooth.
How long do Strawberry Vanilla Crystal Jewels need to set before serving?
The jewels need two setting stages. First, the assembled mousse and sponge must freeze solid for at least 4 hours (overnight is better) before glazing. Second, after pouring the mirror shell glaze, let them set at room temperature for 10–15 minutes until the glaze is firm to the touch but still glossy. After that, they can be served immediately. If you refrigerate them after glazing, the shine may dull slightly, so I recommend serving within 2 hours of glazing for the best crystal effect.
What is the best way to store Strawberry Vanilla Crystal Jewels with mirror shell to keep them shiny?
To preserve the mirror shine, store the glazed jewels in an airtight container in the refrigerator for up to 12 hours. Place them on a tray in a single layer, not touching each other, and avoid covering them with plastic wrap directly—it will stick to the glaze and ruin the finish. For longer storage, freeze the unglazed jewels (the mousse and sponge) for up to 2 months, then glaze them from frozen the day of serving. Once glazed, they don’t freeze well because condensation will make them sticky.
Can I make the mirror glaze ahead of time?
Yes, you can make the mirror shell glaze a day ahead. Prepare it completely, let it cool, then cover it directly with plastic wrap (touching the surface to prevent a skin) and refrigerate. When you’re ready to use it, gently reheat it in the microwave in 10-second bursts or in a heatproof bowl over simmering water, stirring until it reaches a pourable consistency again. You may need to add a drop of water if it’s too thick. Just be careful not to overheat, or the chocolate might seize.
Why did my mirror glaze crack or not set properly?
Cracking usually happens if the jewels were not frozen solid enough when glazed. The warm glaze hits a semi-frozen surface and causes a thermal shock. Make sure the mousse is frozen for at least 4 hours. Also, if the glaze is too thick (cooled too much), it can set unevenly and crack. Aim for a temperature of about 90°F. Another cause is using white chocolate that doesn’t contain real cocoa butter—it can be grainy and won’t set smoothly. Stick with a good brand like Callebaut or Ghirardelli.
What can I use instead of gelatin in this recipe?
For a gelatin-free version, you can try agar agar powder, but the results will be different. For the mousse, use 1 teaspoon of agar agar (bloomed in 2 tablespoons water) and heat it with the strawberry puree until fully dissolved. Let it set before folding in cream. For the mirror glaze, agar agar can make the glaze firmer and less glossy, so it’s not ideal. I prefer to stick with gelatin for the best texture and shine. If you need vegetarian, look for a high-quality vegan gelatin substitute (like “Vitafit” brand) that behaves similarly.
Can I use a different shape mold for these jewels?
Absolutely! While I love faceted diamond or gem-shaped silicone molds, you can use any small silicone mold—round hemispheres, squares, hearts, or even mini bundt shapes. The key is that the molds are flexible so the frozen mousse pops out easily. If you use shapes with undercuts, make sure to grease them lightly with neutral oil before filling. And always place the sponge piece so it sits flat at the top—that becomes the base of your jewel after glazing.
How do I get the mirror glaze to be perfectly smooth without air bubbles?
A few tricks: First, when stirring the white chocolate into the hot liquid, do it gently—no vigorous whisking. Use a spatula and fold. Second, after the glaze is mixed, strain it through a fine-mesh sieve to catch any lumps or bubbles. Third, let it cool undisturbed for a few minutes before using. Fourth, when you pour the glaze over the frozen jewel, pour it from a height of about 6 inches—that helps the glaze flow over evenly and pop any surface bubbles. If you see bubbles, use a toothpick to pop them immediately.
Can I add other flavors to the mirror glaze?
Definitely! The base mirror glaze is very adaptable. For a chocolate version, replace the white chocolate with dark or milk chocolate and omit the pink coloring. You can add a teaspoon of vanilla bean paste or a drop of peppermint extract. For a citrus note, add a grating of orange zest to the hot liquid before pouring over the chocolate. Just keep in mind that any added liquid (like juice) can change the consistency—you may need a little extra gelatin to compensate. I’ve even made a lavender version by steeping dried lavender in the water before straining.
Share Your Version!
I can’t wait to see your Strawberry Vanilla Crystal Jewels! Drop a star rating and a comment below—tell me which variation you tried or how you decorated yours. Did you go with the classic fresh strawberry garnish, or did you add a Moroccan twist with rose petals? Every time you share a photo on Instagram or Pinterest and tag @cheerychop, it makes my day. And if you have any questions about the mirror shell or the freezing step, just ask—I read every comment.
From my NYC kitchen to yours — I hope this recipe brings as much warmth to your table as it does to mine. — Sara 🧡
Did you make this recipe? I’d love to see it! Share a photo on Pinterest or Instagram and tag me @cheerychop. Your creations inspire me every day. 🌟
Love This Recipe? Save It to Pinterest!
If you enjoyed this Strawberry Vanilla Crystal Jewels with Mirror Shell recipe, don’t let it get lost in your browser tabs! 😄 Pin it now so you can find it again anytime — and explore hundreds more tried-and-tested recipes waiting for you on my Pinterest boards.
👉 Follow Sara on Pinterest @chefrecipes2
📌 Pin this recipe · 🔁 Re-pin your favorites · 💬 Tag me when you make it — I love seeing your creations!
Strawberry Vanilla Crystal Jewels with Mirror Shell
Delicate jewel-shaped desserts with a strawberry vanilla mousse, vanilla sponge base, and a glossy pink mirror shell glaze.
- Yield: 8 1x
Ingredients
- For the Strawberry Vanilla Mousse:
- 2 cups strawberry puree
- 1/2 cup granulated sugar
- 1 tsp vanilla extract
- 1 tbsp lemon juice
- 1 cup heavy cream
- 2 tsp powdered gelatin
- 2 tbsp cold water
- For the Vanilla Sponge Base:
- 1 cup all-purpose flour
- 1/2 tsp baking powder
- 1/4 tsp salt
- 1/4 cup unsalted butter, softened
- 1/3 cup granulated sugar
- 1 large egg
- 1/2 tsp vanilla extract
- 1/4 cup milk
- For the Mirror Shell:
- 1 cup white chocolate, finely chopped
- 1/3 cup sweetened condensed milk
- 1/4 cup water
- 1/2 cup granulated sugar
- 2 tsp powdered gelatin
- 2 tbsp cold water
- Pink food coloring, as needed
- Edible pearl shimmer dust, as needed
- For Garnish (optional):
- Fresh strawberry slices
- White chocolate curls
- Edible silver pearls
Instructions
- 1. Preheat oven to 350°F (175°C). Grease and line a small baking pan.
- 2. Whisk together flour, baking powder, and salt.
- 3. Beat butter and sugar until light and fluffy. Add egg and vanilla extract.
- 4. Alternate adding dry ingredients and milk until a smooth batter forms.
- 5. Bake for 18–20 minutes. Cool completely and cut into jewel-sized base pieces.
- 6. Bloom gelatin in cold water for the mousse.
- 7. Heat strawberry puree, sugar, vanilla, and lemon juice until warm.
- 8. Stir in gelatin until fully dissolved and allow to cool.
- 9. Whip heavy cream to soft peaks and gently fold into the strawberry mixture.
- 10. Fill jewel-shaped silicone molds with mousse and place sponge pieces on top.
- 11. Freeze until completely firm, about 4 hours.
- 12. Bloom gelatin in cold water for the mirror shell.
- 13. Heat water, sugar, and condensed milk until smooth. Remove from heat.
- 14. Stir in gelatin, then pour over white chocolate and mix until glossy.
- 15. Add pink food coloring and edible pearl shimmer dust.
- 16. Cool glaze to a pourable consistency.
- 17. Unmold frozen jewels and place on a wire rack.
- 18. Pour the mirror shell glaze evenly over each jewel.
- 19. Allow the coating to set for 10–15 minutes.
- 20. Garnish with strawberry slices, white chocolate curls, and edible silver pearls before serving.
Nutrition
- Calories: 320
- Sugar: 32 g
- Fat: 16 g
- Carbohydrates: 41 g
- Protein: 4 g
Tried This Recipe? Leave a Comment!
Did you make this recipe? I’d love to hear how it turned out! Please leave a comment and a rating below. Your feedback helps other home cooks and supports cheerychop.com!
For more delicious inspiration, follow me on Pinterest!


