
Table of Contents
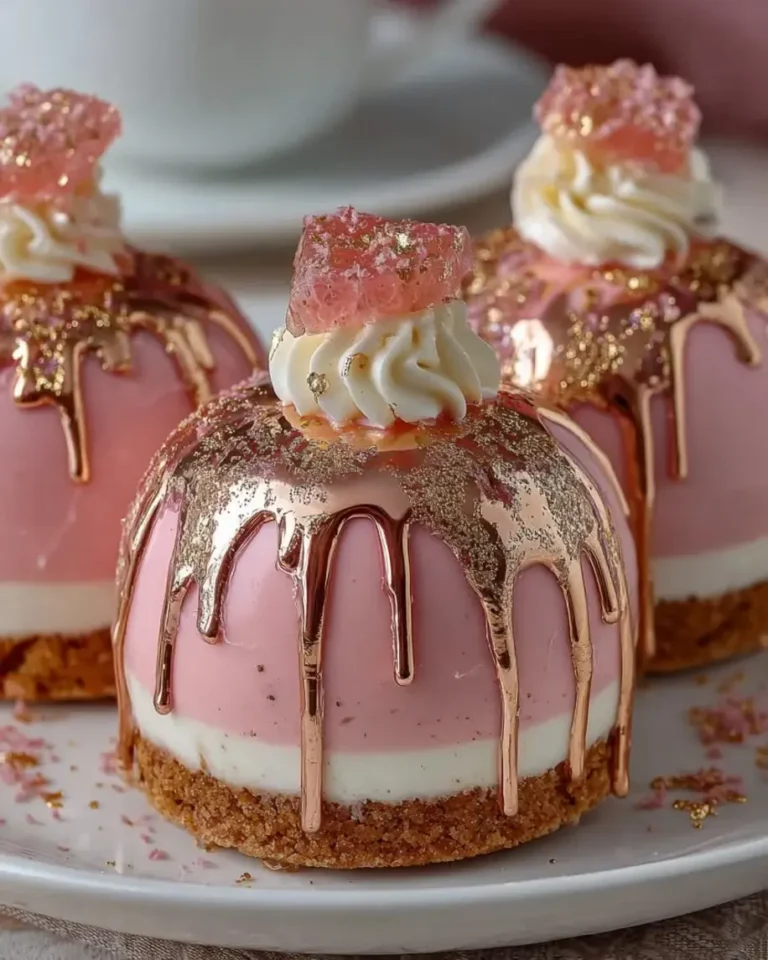
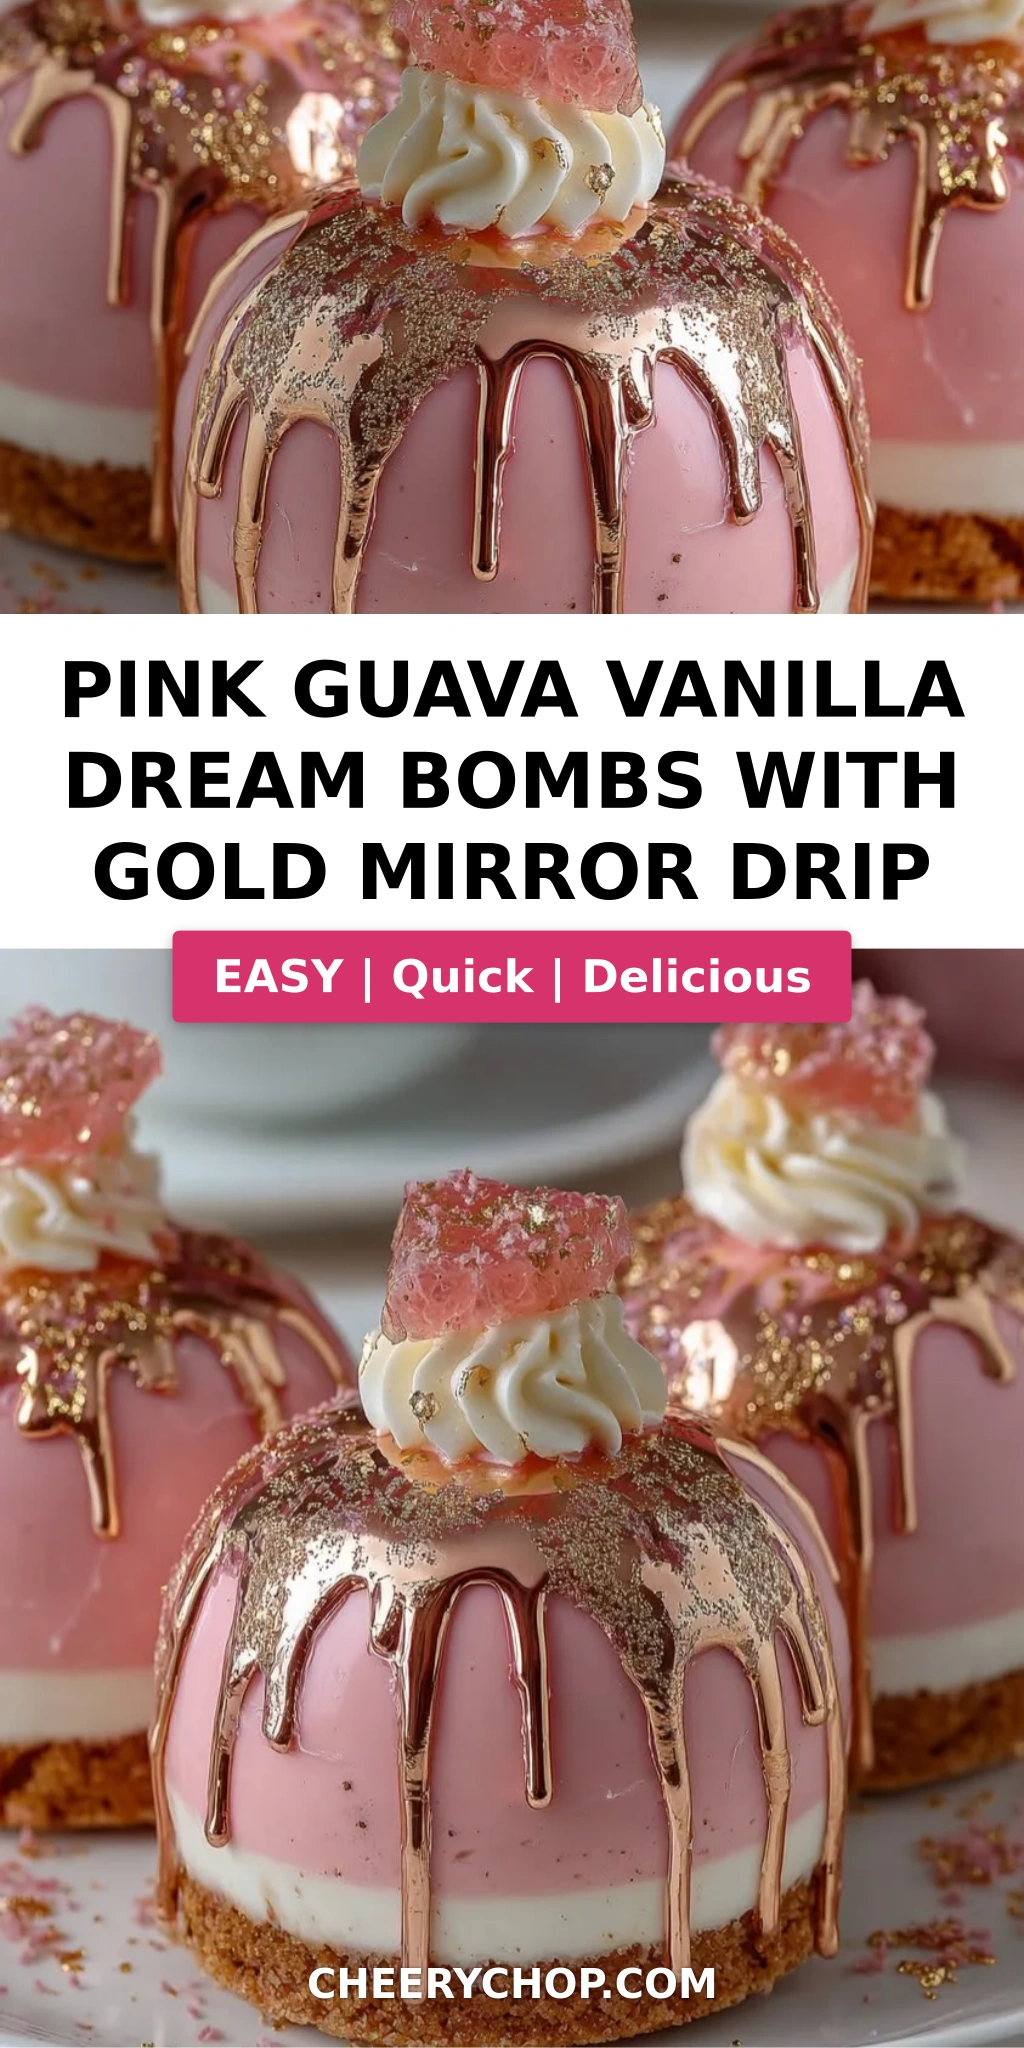
Pink Guava Vanilla Dream Bombs with Gold Mirror Drip – The Ultimate Luxury Dessert
* Includes freezing time.
I grew up in a bustling kitchen in Morocco, where my mother would simmer guava paste with cinnamon and rose water until the whole house smelled like a garden in Marrakech. Years later, after training at Le Cordon Bleu in Paris and settling in New York City, I found myself drawn back to that memory — but I wanted to turn it into something spectacular. That’s how these Pink Guava Vanilla Dream Bombs with Gold Mirror Drip were born. The star of the show is a pillowy pink guava mousse, wrapped around a velvety vanilla cream center, all draped in a glossy gold-mirrored glaze. It’s a dessert that feels like a trophy — but trust me, it’s 100% doable at home.
The first bite hits you with the bright, tropical tang of pink guava, quickly mellowed by the rich, vanilla-kissed cream cheese filling. The texture is airy and cloud-like, thanks to a French mousseline technique I learned in pastry school. Then comes the glaze — a luscious white chocolate mirror that shimmers like gold leaf. Each dream bomb sits on a buttery cookie crumb base for that little crunch. I love serving these after a dinner party with guests — they look like they belong in a pastry case on the Upper East Side, but they’re made with love right here in my tiny NYC kitchen.
To make this recipe foolproof, I’ve perfected every step: from blooming gelatin for the mousse to achieving that drip effect without streaks. I’ll also share my secret for getting the mirror glaze to set smooth and shiny — no heat gun needed. 💡 Sara’s Pro Tip: Always chill your glazed bombs at least 15 minutes before serving — it lets the colors deepen and the gold shine like a mirror. Avoid the common mistake of over-pouring the glaze; a gentle trickle over the top gives the cleanest drip. Ready to wow your friends? Let’s dive in.
Why This Pink Guava Vanilla Dream Bombs Recipe Is the Best
The Flavor Secret: Growing up, my mother taught me to balance sweet and tart with a pinch of salt — a Moroccan trick I use here. Pink guava puree brings natural acidity that cuts through the creamy richness, while the vanilla center adds a comforting warmth. I’ve layered the flavors so each spoonful unfolds like a story: bright guava first, then vanilla, then the buttery cookie crunch. It’s a symphony of taste that you won’t find in any bakery.
Perfected Texture: In Paris, I spent an entire semester mastering mousse textures — too dense, too runny, too lumpy. For these dream bombs, the mousse is stabilized with just the right amount of gelatin and folded with whipped cream to achieve a silky, cloud-like consistency. The vanilla cream center is frozen firm so it stays intact inside the mousse, then slowly melts as you eat — like a surprise in every bite. The mirror glaze is thinned with condensed milk so it sets with a mirror finish, not a cracked mess.
Foolproof & Fast: Even though these look like a project, I’ve broken it down into manageable stages. Make the glaze and freeze the centers a day ahead. On serving day, assemble and glaze in 20 minutes. No baking, no complicated equipment — just a little patience with the freezer. I’ve tested this recipe with home cooks in my NYC cooking classes, and they nail it every time. If you can whisk and pour, you can make these.
Pink Guava Vanilla Dream Bombs Recipe Ingredients
I like to pick up pink guava puree from a Latin grocery in my neighborhood in Astoria — it’s sold frozen or jarred. For the vanilla, I use a Mexican vanilla that I brought back from a trip to Veracruz, but any pure vanilla extract works beautifully. Here’s what you’ll need to create these gorgeous little domes.
Ingredients List
- For the Pink Guava Mousse:
- 1 cup pink guava puree
- 8 oz cream cheese, softened
- 1/2 cup powdered sugar
- 1 cup heavy cream
- 1 tsp vanilla extract
- 1 tbsp gelatin powder
- 3 tbsp warm water
- For the Vanilla Cream Center:
- 4 oz cream cheese, softened
- 1/4 cup powdered sugar
- 1/4 cup heavy cream
- 1 tsp vanilla extract
- For the Gold Mirror Drip:
- 1 cup white chocolate, finely chopped
- 1/2 cup sweetened condensed milk
- 1 tbsp gelatin powder
- 3 tbsp warm water
- Pink food coloring, as needed
- Gold food coloring or edible gold dust, as needed
- For the Cookie Base:
- 1 cup vanilla cookie crumbs
- 3 tbsp melted butter
- 1 tbsp granulated sugar
- Pinch of salt
- For Garnish (optional):
- Guava slices
- White chocolate curls
- Edible gold flakes
Ingredient Spotlight
Pink Guava Puree: This is the heart of the dessert. Look for it in the frozen aisle or near Latin American ingredients. One popular brand is Goya. If you can’t find it, you can make your own by blending fresh pink guava (peel and all) and straining out the seeds. The flavor is floral and slightly tart — worth the effort.
Gelatin Powder: The key to a smooth, stable mousse and mirror glaze. Always bloom it in cold water first (1 tablespoon powder to 3 tablespoons water) for 5 minutes, then dissolve gently. Overheating can weaken the set. I use Knox brand — it’s reliable and easily found in any US grocery store.
White Chocolate: Use a good-quality couverture like Lindt or Guittard for the mirror glaze. Cheap white chocolate can seize or turn grainy. The glaze should be glossy and smooth. If you need a dairy-free substitute, try a high-quality dairy-free white chocolate (like Enjoy Life) — but note that the texture may be slightly less shiny.
| Original Ingredient | Best Substitution | Flavor / Texture Impact |
|---|---|---|
| Pink guava puree | Fresh pink guava blended and strained | More vibrant flavor; strain extra seeds |
| Cream cheese | Mascarpone or dairy-free cream cheese | Mascarpone: richer, less tang; dairy-free: slightly less firm |
| White chocolate | Dairy-free white chocolate (cacao butter based) | Gloss may reduce slightly; flavor still good |
| Sweetened condensed milk | Coconut condensed milk (for dairy-free) | Slight coconut note; glaze may be less thick |
How to Make Pink Guava Vanilla Dream Bombs — Step-by-Step
Let’s walk through each stage together — take it step by step and you’ll have a stunning tray of gold-drenched dream bombs. I recommend reading through all the steps first, then gather your tools: a silicone dome mold (half-sphere, about 2.5 inches wide), a piping bag, and a wire rack with a rimmed baking sheet underneath.
Step 1: Bloom the Gelatin
Sprinkle the gelatin powder over the warm water (don’t boil — 110°F is fine) and let it sit for 5 minutes. It will become a firm, wobbly mass. That’s perfect. Then gently warm it in the microwave for 5-second bursts, stirring, until it liquifies again. Set aside.
⚠️ Common Mistake to Avoid: Don’t let the gelatin boil — it will lose its setting power and your mousse won’t hold shape.
Step 2: Make the Guava Mousse
In a large bowl, beat the softened cream cheese and powdered sugar until light and fluffy. Add the pink guava puree and vanilla extract, mixing until smooth. In another bowl, whip the heavy cream to soft peaks — they should just hold their shape. Fold the whipped cream into the guava-cream cheese mixture gently, then stir in the dissolved gelatin until fully incorporated. The mousse will be thick but pourable.
💡 Sara’s Pro Tip: Use a rubber spatula and a gentle folding motion — you want to keep the air bubbles for that light texture.
Step 3: Make the Vanilla Cream Center
In a small bowl, beat together the remaining cream cheese, powdered sugar, heavy cream, and vanilla extract until smooth. It should be thick like a cheesecake filling. Transfer to a piping bag with a small round tip (or a zip-top bag with a corner snipped). Pipe small blobs (about 1 tablespoon each) into a mini silicone mold or onto a parchment-lined tray. Freeze for at least 2 hours until rock-solid.
Step 4: Assemble the Dream Bombs
Spoon or pipe the pink guava mousse into your dome molds, filling each cavity halfway. Push a frozen vanilla cream center into the middle, then cover with more mousse, leveling the top with a spatula. Freeze for at least 4 hours (overnight is best) until completely firm.
⚠️ Common Mistake to Avoid: If the cream centers aren’t frozen solid, they’ll sink into the mousse and you won’t get that distinct center.
Step 5: Make the Mirror Glaze
Bloom a second batch of gelatin in warm water (1 tbsp gelatin + 3 tbsp water) and set aside. In a heatproof bowl, combine the chopped white chocolate and sweetened condensed milk. Microwave in 20-second bursts, stirring each time, until melted and smooth. Add the dissolved gelatin and mix well. Then add pink food coloring — I use a gel color for vibrancy. Stir until you get a soft rose hue. Finally, take a small portion of the glaze and tint it with gold coloring — you’ll use this for the drip effect.
💡 Sara’s Pro Tip: Test the glaze consistency: it should be thick enough to coat the back of a spoon but still drip slowly. If it’s too thick, add a teaspoon of water.
Step 6: Glaze the Bombs
Unmold the frozen mousse domes — they should pop out easily. Place them on a wire rack over a baking sheet. Pour the pink mirror glaze over each dome, letting the excess drip off. Immediately drizzle the gold-tinted glaze over the tops — you can use a squeeze bottle or a spoon to create thin streams. Let them set at room temperature for about 5 minutes, then transfer to the fridge for at least 15 minutes to set completely.
Step 7: Make the Cookie Bases
Mix the vanilla cookie crumbs, melted butter, sugar, and salt until it feels like wet sand. Press a heaping tablespoon into small round molds (or use a measuring spoon) to form compact discs. Freeze for 15 minutes to firm up. Attach one base to the bottom of each glazed bomb — you can use a dab of leftover glaze as glue.
Step 8: Garnish and Serve
Top each dream bomb with a thin slice of fresh guava, a curl of white chocolate, and a sprinkle of edible gold flakes. Chill for 15 minutes before serving to let the glaze fully set and the flavors meld. The contrast of the cold, creamy center against the buttery base is pure magic.
| Step | Action | Duration | Key Visual Cue |
|---|---|---|---|
| 1 | Bloom gelatin | 5 min | Gelatin becomes firm, then liquid |
| 2 | Make guava mousse | 10 min | Smooth, thick, pale pink |
| 3 | Make cream center | 5 min | Thick, pipeable |
| 4 | Assemble bombs | 10 min + 4 hr freeze | Firm to the touch, no give |
| 5 | Make glaze | 10 min | Glossy, smooth, no lumps |
| 6 | Glaze bombs | 5 min + set | Shiny, gold streaks visible |
| 7 | Make cookie base | 5 min + freeze | Firm discs |
| 8 | Garnish & chill | 15 min before serve | Glaze set, garnish bright |
Serving & Presentation
When I serve these at dinner parties, I love to plate each dream bomb on a small white saucer — the contrast of the pink and gold against the clean white makes the colors pop. For a more dramatic display, arrange them on a mirrored tray (very NYC fashion!) and scatter a few edible gold flakes around. The cookie base ensures they stand upright, so they look like little gem-studded domes.
These dream bombs pair beautifully with a glass of chilled Moscato d’Asti or a floral iced tea. For a Moroccan twist, serve with a tiny cup of mint tea on the side — the fresh mint cuts through the richness. If you’re feeling extra indulgent, add a dollop of whipped cream and a sprinkle of crushed pink peppercorns for a subtle heat. The key is to let the bombs sit at room temperature for 2–3 minutes after coming out of the fridge — the mousse softens just enough to become perfectly creamy.
| Pairing Type | Suggestions | Why It Works |
|---|---|---|
| Side Dish | Fresh berries (strawberries, raspberries), light fruit salad | Adds fresh tartness and color |
| Sauce / Dip | Passion fruit coulis, raspberry sauce | Bright acidity balances sweetness |
| Beverage | Moscato d’Asti, sparkling water with lime, jasmine tea | Light and refreshing, doesn’t overpower |
| Garnish | Fresh guava slices, white chocolate curls, edible gold flakes, mint leaves | Adds elegance and texture contrast |
Make-Ahead, Storage & Reheating
Since these dream bombs require significant freezing time, they are perfect for make-ahead entertaining. I often prepare the mousse and centers on a Friday evening, freeze them overnight, then glaze and serve on Saturday. Just keep the glazed bombs in the fridge until guests arrive. Here’s how to store them properly so the gold mirror stays intact.
| Method | Container | Duration | Reheating Tip |
|---|---|---|---|
| Refrigerator | Airtight container, layered with parchment | Up to 3 days | Serve straight from fridge; no reheating needed |
| Freezer | Freeze on a baking sheet, then wrap individually in plastic wrap | Up to 2 months | Thaw in fridge overnight before glazing (if unglazed) or serve frozen (glazed) |
| Make-Ahead | Assemble bombs (unglazed) on a tray, freeze solid, then store in a zipper bag | Up to 1 week before glazing | Glaze directly from frozen — the cold helps the glaze set quickly |
If you’re storing glazed bombs, the mirror may become slightly less shiny after a day or two — condensation from the fridge can dull it. To restore the shine, pat the glaze gently with a paper towel and let them sit uncovered for 5 minutes before serving. Never microwave these — the mousse will deflate. They are meant to be enjoyed cold, like a fancy ice cream cake.
Variations & Easy Swaps
| Variation | Key Change | Best For | Difficulty Impact |
|---|---|---|---|
| Moroccan Spice Twist | Add 1 tsp cinnamon and a pinch of cardamom to the mousse | Fall entertaining, holiday table | No extra difficulty |
| Dairy-Free / Vegan | Use dairy-free cream cheese, coconut cream for mousse, vegan white chocolate | Plant-based diet, lactose intolerance | Slightly more delicate; use agar instead of gelatin |
| Mango-Coconut Twist | Replace guava with mango puree, add 1/2 cup toasted coconut to cookie base | Summer parties, tropical theme | No extra difficulty |
Moroccan Spice Twist
This variation brings back memories of my mother’s kitchen. Simply stir a teaspoon of cinnamon and a pinch of cardamom into the guava mousse before folding in the whipped cream. The warm spices complement the guava’s floral notes and make the dessert feel cozy — perfect for a winter party. You can also add a dusting of cinnamon on top instead of gold flakes for a more rustic look.
Dairy-Free / Vegan Version
To make these dream bombs plant-based, replace the cream cheese with a high-quality vegan cream cheese (like Kite Hill). For the mousse, use full-fat coconut cream (chilled and whipped) instead of heavy cream. The mirror glaze can be made with vegan white chocolate (many brands use cacao butter) and coconut condensed milk. Important: Substitute gelatin with agar-agar — use 1.5 tsp agar powder dissolved in 3 tbsp water, then bring to a boil and cool slightly. The texture will be slightly firmer, but still delicious.
Mango-Coconut Twist
When pink guava isn’t in season, I swap in mango puree for an equally tropical flavor. Add 1/2 cup of toasted coconut flakes to the cookie base for extra texture. You can also tint the glaze with yellow-orange instead of pink, and skip the gold for a more natural look. This version screams summer — I’ve served it at rooftop BBQs in Brooklyn and it disappears in minutes.
What is a gold mirror drip glaze and how do I make it for these dream bombs?
A gold mirror drip glaze is a glossy, reflective icing that sets with a smooth, mirror-like finish. It’s made by combining white chocolate, sweetened condensed milk, and gelatin, then tinting it with gold food coloring. For these dream bombs, you’ll pour a pink-colored version over the frozen mousse domes, then drizzle a small amount of gold-tinted glaze over the top as a decorative drip. The key is to work quickly so the glaze flows evenly and the gold streaks stay distinct. Chill the glazed bombs for at least 15 minutes to set the shine.
Can I use fresh pink guava instead of guava puree in this recipe?
Absolutely! Fresh pink guava will give you an even more vibrant, floral flavor. To use it, peel the guavas (the skin is bitter), cut them in half, and scoop out the pink flesh. Blend the flesh in a food processor until smooth, then strain through a fine-mesh sieve to remove the seeds. Measure out 1 cup of the puree. Fresh puree is often thinner than commercial brands, so you may need to reduce it slightly by simmering for a few minutes, but it works beautifully in the mousse.
How do I store pink guava vanilla dream bombs to keep the gold mirror drip intact?
Store glazed dream bombs in an airtight container in the refrigerator for up to 3 days. To preserve the mirror shine, place them in a single layer lined with parchment — don’t stack them, as the glaze might stick. If condensation forms (common after opening the fridge), gently dab the tops with a clean paper towel to restore gloss. For longer storage, freeze the unglazed bombs (the mousse domes) for up to 2 months; glaze them directly from the freezer when ready to serve. The cold surface helps the glaze set instantly.
What can I substitute for vanilla in pink guava vanilla dream bombs to change the flavor profile?
If you want to switch up the flavor, try replacing the vanilla extract with an equal amount of rose water (a Moroccan favorite) or almond extract. Rose water adds a floral note that pairs gorgeously with guava — start with 1/2 teaspoon, as it’s potent. Almond extract gives a nutty, marzipan-like flavor that works well with the white chocolate glaze. For a citrusy twist, use orange blossom water or a teaspoon of lime zest. Just be aware that alcohol-free extracts may affect the consistency slightly, so add after the cream cheese is smooth.
How far in advance can I make these dream bombs?
You can prepare the unglazed mousse domes and freeze them up to 2 weeks in advance. Store them tightly wrapped in plastic wrap inside a freezer bag. On the day you plan to serve, make the glaze and pour it directly over the frozen domes — the cold surface will set the glaze quickly. The cookie bases can also be made ahead and stored in the fridge for up to a week. Assemble everything just before serving for the best presentation.
Can I make these without gelatin for a vegetarian version?
Yes, you can substitute gelatin with agar-agar powder, a plant-based alternative. Use 1.5 teaspoons of agar powder dissolved in 3 tablespoons of water. Bring the mixture to a boil, then let it cool slightly before adding to the mousse and glaze. Note that agar sets more firmly at room temperature and doesn’t melt as easily in the mouth, so the texture will be slightly different — more like a panna cotta consistency than a soft mousse. But it still works wonderfully if you avoid animal products.
What if I don’t have silicone dome molds? Can I use something else?
Absolutely! If you don’t have dome molds, you can use small glass bowls (like 4-ounce ramekins) or a muffin tin lined with plastic wrap. Line each cup with a piece of plastic wrap large enough to overhang, fill with mousse and center, then gather the wrap to form a dome shape. Freeze until firm. Alternatively, use a round cookie cutter to cut the mousse into discs once frozen — just be aware that the shape won’t be as perfect. The important thing is to have a smooth, round surface for the glaze to run over.
How do I get the mirror glaze to be perfectly smooth and shiny without streaks?
The secret to a flawless mirror glaze is temperature control. First, make sure your mousse domes are frozen solid — any slight melt will cause the glaze to slide off. Second, the glaze should be around 90–95°F when you pour it — warm enough to flow but not hot enough to melt the mousse. Use an instant-read thermometer. Pour the glaze in one steady stream over the center of the dome, letting it cascade naturally. Don’t touch it with a spatula. If you see any bubbles, pop them with a toothpick before the glaze sets.
Can I skip the gold coloring in the glaze and use another color?
Of course! The gold drip is purely decorative — you can use any color you like. Try a silver luster dust for a wintery look, or keep the glaze a solid pink and skip the drip entirely. If you want a marble effect, mix two colors (like pink and white) and swirl them together just before pouring. Edible glitter or metallic food sprays also work well for adding shimmer. The base glaze recipe is very forgiving — feel free to get creative with colors.
What can I serve instead of the cookie base?
The cookie base adds a nice crunch, but you can substitute it with a thin layer of crushed graham crackers mixed with butter, or even a round of shortbread cookie. For a gluten-free option, use crushed gluten-free vanilla cookies or almond flour mixed with melted butter. If you want a lighter dessert, serve the glazed dome on a pool of fruit coulis or a smear of passion fruit curd instead — no base needed. The bombs will still stand upright on their own if the glaze is set.
Share Your Version!
I’d love to see how your Pink Guava Vanilla Dream Bombs turn out! Drop a comment below with your star rating — did the gold mirror drip work perfectly? What variation did you try? Share a photo on Instagram or Pinterest and tag @cheerychop — I love scrolling through my feed and seeing your beautiful creations. If you have a question about a specific step, ask away! I read every comment and do my best to help. Your feedback helps me create better recipes for you.
From my NYC kitchen to yours — I hope this recipe brings as much warmth to your table as it does to mine. — Sara 🧡
Love This Recipe? Save It to Pinterest!
If you enjoyed this Pink Guava Vanilla Dream Bombs with Gold Mirror Drip recipe, don’t let it get lost in your browser tabs! 😄 Pin it now so you can find it again anytime — and explore hundreds more tried-and-tested recipes waiting for you on my Pinterest boards.
👉 Follow Sara on Pinterest @chefrecipes2
📌 Pin this recipe · 🔁 Re-pin your favorites · 💬 Tag me when you make it — I love seeing your creations!
💬 What’s your favorite tropical dessert flavor combination? I’d love to hear your ideas in the comments below! 💬
Pink Guava Vanilla Dream Bombs with Gold Mirror Drip

Pink Guava Vanilla Dream Bombs with Gold Mirror Drip
- Yield: 8 1x
Ingredients
- For the Pink Guava Mousse:
- 1 cup pink guava puree
- 8 oz cream cheese, softened
- 1/2 cup powdered sugar
- 1 cup heavy cream
- 1 tsp vanilla extract
- 1 tbsp gelatin powder
- 3 tbsp warm water
- For the Vanilla Cream Center:
- 4 oz cream cheese, softened
- 1/4 cup powdered sugar
- 1/4 cup heavy cream
- 1 tsp vanilla extract
- For the Gold Mirror Drip:
- 1 cup white chocolate, finely chopped
- 1/2 cup sweetened condensed milk
- 1 tbsp gelatin powder
- 3 tbsp warm water
- Pink food coloring, as needed
- Gold food coloring or edible gold dust, as needed
- For the Cookie Base:
- 1 cup vanilla cookie crumbs
- 3 tbsp melted butter
- 1 tbsp granulated sugar
- Pinch of salt
- For Garnish (optional):
- Guava slices
- White chocolate curls
- Edible gold flakes
Instructions
- 1. Bloom gelatin in warm water and let stand for 5 minutes.
- 2. Beat cream cheese and powdered sugar until smooth.
- 3. Mix in pink guava puree and vanilla extract.
- 4. Whip heavy cream to soft peaks and fold into the guava mixture.
- 5. Stir in dissolved gelatin until fully incorporated.
- 6. In a separate bowl, beat cream cheese, powdered sugar, heavy cream, and vanilla until smooth for the vanilla cream center.
- 7. Pipe the vanilla cream into small molds and freeze until firm.
- 8. Fill silicone dome molds halfway with the guava mousse.
- 9. Place a frozen vanilla cream center into each mold.
- 10. Cover with remaining mousse and freeze until completely firm.
- 11. Combine white chocolate, condensed milk, dissolved gelatin, and pink food coloring until smooth and glossy.
- 12. Unmold the frozen bombs and place on a wire rack.
- 13. Pour the pink mirror glaze evenly over each bomb.
- 14. Tint a small portion of glaze with gold coloring and drizzle over the domes to create a gold mirror drip effect.
- 15. Mix cookie crumbs, melted butter, sugar, and salt, then press into small round bases.
- 16. Place each glazed bomb onto a prepared base.
- 17. Garnish with guava slices, white chocolate curls, and edible gold flakes.
- 18. Chill for 15 minutes before serving.
Nutrition
- Calories: 425
- Sugar: 32 g
- Fat: 29 g
- Carbohydrates: 38 g
- Protein: 6 g
Tried This Recipe? Leave a Comment!
Did you make this recipe? I’d love to hear how it turned out! Please leave a comment and a rating below. Your feedback helps other home cooks and supports cheerychop.com!
For more delicious inspiration, follow me on Pinterest!


