
Table of Contents
Pistachio Cheesecake Domes with Cherry Surprise – A Showstopping No-Bake Dessert
I still remember the first time I made pistachio cheesecake domes with a cherry surprise for a dinner party here in New York City. It was one of those humid summer evenings when you want something elegant but absolutely refuse to turn on the oven. I drew on my pastry training in Paris, where we learned that the best desserts tell a story in every bite. These pistachio cheesecake domes are exactly that — a creamy, nutty cheesecake hiding a bright cherry center, all wrapped in an emerald mirror glaze that shimmers like a jewel. The pistachio cheesecake recipe is naturally no-bake, which makes it a lifesaver for warm-weather entertaining.
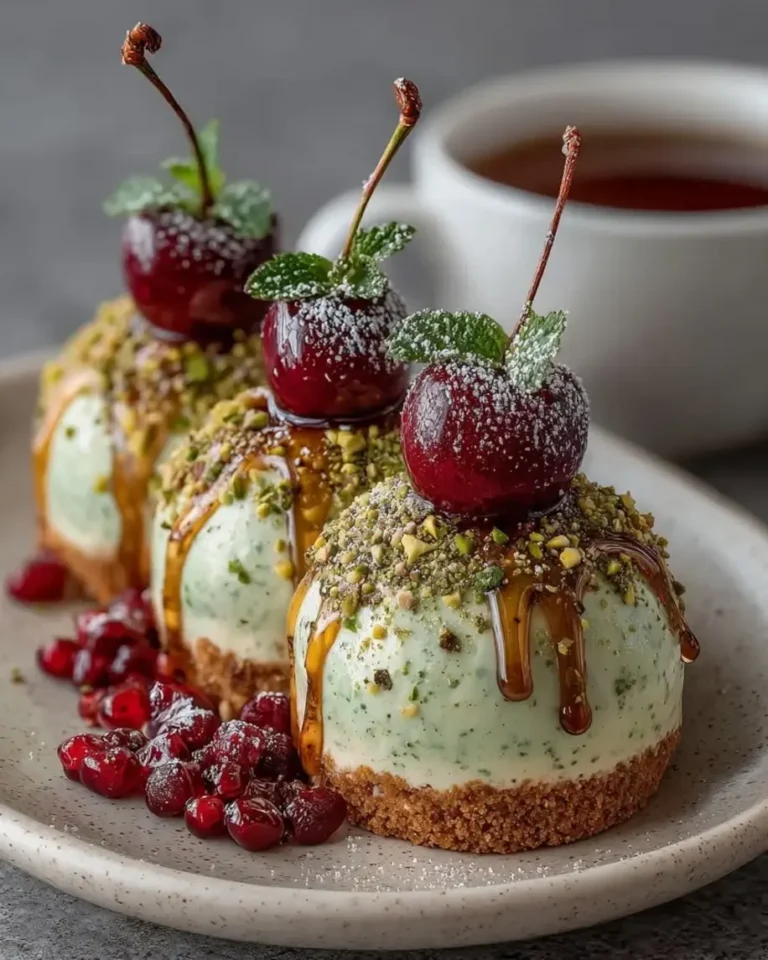
The first bite gives you that luscious, velvety pistachio cheesecake — rich from mascarpone and cream cheese, with a whisper of vanilla and a delicate nuttiness from real pistachio paste. Then comes the surprise: a burst of tangy-sweet cherry that cuts through the creaminess like a little firework. The pistachio biscuit base adds a buttery crunch, and the mirror glaze — oh, that glossy emerald finish — makes these domes look like they came from a high-end patisserie. It’s the kind of dessert that makes people gasp when you set it on the table. I love serving these after a Moroccan-inspired meal, with the cherries echoing the preserved lemons and dried fruit my mother used in her tagines back in Casablanca.
What sets my cherry cheesecake domes apart is the technique I learned in Paris for achieving that flawless mirror glaze without any special equipment. The secret is in the temperature — too warm and the glaze runs off completely; too cool and it sets before you can pour it. I’ll walk you through every step so you can nail it on your first try. One common mistake I see is rushing the freeze time — these domes need to be fully frozen (at least 6 hours) for the glaze to set properly and for the cherry surprise to stay perfectly centered. Trust me, the wait is worth it. These mirror glaze cheesecake domes are the showstopper you’ve been looking for.
Why This Pistachio Cheesecake Domes Recipe Is the Best
The flavor secret lies in using real pistachio paste rather than just ground nuts or extract. Pistachio paste gives these cheesecake domes that deep, toasty, almost buttery pistachio flavor that you simply can’t get from any other ingredient. I source mine from a specialty shop near my apartment in the West Village, but you can find good-quality pistachio paste online or at Middle Eastern markets. Growing up in Morocco, my mother always used almond paste in her pastries, and that memory inspired me to seek out the pistachio equivalent here in New York. The result is a pistachio cheesecake recipe that tastes genuinely luxurious, not artificial.
The texture is where my French training really comes into play. By combining cream cheese with mascarpone and whipping the mixture until it’s light and fluffy, you get a cheesecake filling that’s incredibly smooth and airy — almost like a mousse. It sets firmly in the freezer but softens to a perfect creamy consistency when you let it rest at room temperature for about 10 minutes before serving. The pistachio biscuit base is pressed thin and chilled until firm, so it stays crisp and doesn’t get soggy even after the glaze is poured. Every layer has its own distinct texture, which is what makes these cherry cheesecake domes so satisfying to eat.
This recipe is foolproof because it requires no baking, no eggs, and no complicated water baths. The most challenging part is the mirror glaze, and I’ve simplified that with a clear, step-by-step method that works every time. If you can whisk and pour, you can make these mirror glaze cheesecake domes. I’ve tested this recipe in my tiny NYC kitchen with a standard freezer and basic silicone dome molds — no professional equipment required. Whether you’re an experienced baker or a confident beginner, this pistachio cheesecake recipe will make you look like a pastry chef.
Pistachio Cheesecake Domes Ingredients
I love shopping for these ingredients at the Union Square Greenmarket in the summer when the cherries are at their peak, but they’re all available at any well-stocked grocery store. The pistachio paste is the one specialty item — I recommend buying it online or from a Middle Eastern grocer if you can’t find it locally. The quality of your pistachio paste will directly impact the flavor of your pistachio cheesecake domes, so it’s worth seeking out a good brand.
Ingredients List
- For the Pistachio Cheesecake Domes: 8 oz cream cheese, softened
- 1/2 cup mascarpone cheese
- 1/2 cup heavy whipping cream
- 1/4 cup powdered sugar
- 3 tbsp pistachio paste
- 1 tsp vanilla bean paste
- 2 drops natural green food coloring (optional)
- For the Cherry Surprise Center: 1 cup fresh sweet cherries, pitted and finely chopped
- 2 tbsp cherry preserves
- 1 tsp fresh lemon juice
- For the Pistachio Biscuit Base: 3/4 cup crushed vanilla cookies
- 2 tbsp finely ground pistachios
- 3 tbsp melted butter
- For the Emerald Mirror Glaze: 1/2 cup sweetened condensed milk
- 1/3 cup white chocolate, finely chopped
- 2 tbsp heavy cream
- 1 tbsp honey
- 1 tbsp pistachio paste
- 1 tsp vanilla extract
- A tiny drop green food coloring (optional)
- For Garnish (optional): Crushed pistachios, Fresh cherries, White chocolate curls, Edible gold leaf flakes, Edible pearl dust
Ingredient Spotlight
Pistachio Paste: This is the heart of the pistachio cheesecake recipe. Look for 100% pistachio paste with no added sugar or oils — the ingredient list should say “pistachios” and maybe a little oil. I use the brand from my local Middle Eastern market, but you can also use almond paste in a pinch (though the flavor will be different). Store it in the fridge after opening.
Fresh Sweet Cherries: For the cherry surprise center, you want sweet, ripe cherries — Bing or Rainier are perfect. If fresh cherries aren’t in season, you can use frozen sweet cherries (thawed and drained) or even dark sweet cherries from a jar. Just make sure they’re well-drained so they freeze firmly and don’t leak into the cheesecake filling.
Mascarpone Cheese: This Italian cream cheese adds a silky richness that American cream cheese alone can’t achieve. It’s what gives these cherry cheesecake domes their luxurious, melt-in-your-mouth texture. If you can’t find mascarpone, you can substitute with an equal amount of full-fat cream cheese, but the texture will be slightly denser.
White Chocolate for Glaze: Use high-quality white chocolate for the mirror glaze — I use Valrhona or Guittard. Chips can work but may contain stabilizers that affect the gloss. Chop a bar finely so it melts evenly. The white chocolate gives the glaze its shine and body, so don’t substitute it with compound coating or candy melts.
| Original Ingredient | Best Substitution | Flavor / Texture Impact |
|---|---|---|
| Pistachio Paste | Almond paste + 1/2 tsp pistachio extract | Less intense pistachio flavor, slightly sweeter |
| Mascarpone | Full-fat cream cheese | Denser texture, slightly tangier |
| Fresh Cherries | Frozen sweet cherries (thawed & drained) | Slightly softer texture, still good flavor |
| Vanilla Bean Paste | 1 tsp vanilla extract | Less intense vanilla flavor, no vanilla specks |
| Vanilla Cookies | Shortbread or graham crackers | Slightly different sweetness, still crunchy |
How to Make Pistachio Cheesecake Domes — Step-by-Step
Trust me, if you can follow these steps, you will have the most stunning pistachio cheesecake domes on the table. I’ve broken everything down so it feels manageable — even the mirror glaze.
Step 1: Prepare the Cherry Surprise Center
Combine the finely chopped fresh cherries, cherry preserves, and fresh lemon juice in a small bowl. Stir until well mixed. Spoon the mixture into small silicone molds (half-sphere or small dome shapes work perfectly) or drop teaspoon-sized portions onto a parchment-lined tray. Freeze for 1 hour, or until completely firm. This step is crucial — the cherry centers need to be solid so they stay embedded in the cheesecake filling without sinking or leaking. The lemon juice brightens the cherries and balances the sweetness of the preserves.
💡 Sara’s Pro Tip: For perfectly round cherry centers, use a small half-sphere silicone mold. If you don’t have one, drop the cherry mixture onto a parchment-lined tray in teaspoon-sized mounds and freeze until solid — they’ll still work beautifully inside the dome.
Step 2: Make the Pistachio Biscuit Base
Mix the crushed vanilla cookies, finely ground pistachios, and melted butter in a small bowl until the mixture resembles wet sand and holds together when pressed. Press the mixture into small round discs that match the diameter of your dome molds — use a teaspoon measure for consistent portions. Place the discs on a parchment-lined tray and chill in the refrigerator for at least 30 minutes until firm. The ground pistachios add a lovely nutty crunch and reinforce the pistachio flavor throughout the dessert.
⚠️ Common Mistake to Avoid: Don’t press the biscuit base too thick — aim for about 1/4 inch. If it’s too thick, it will be difficult to seal the dome and the base-to-filling ratio will be off. A thin, firm disc is what you want.
Step 3: Whip the Pistachio Cheesecake Filling
In a large bowl, beat the softened cream cheese, mascarpone, heavy whipping cream, powdered sugar, pistachio paste, vanilla bean paste, and optional green food coloring together. Use an electric mixer on medium speed and beat for 2–3 minutes until the mixture is smooth, thick, and fluffy — it should hold soft peaks when you lift the beater. Be careful not to over-whip, as the mixture can become grainy. Transfer the filling to a piping bag fitted with a large round tip (or just snip the corner off a zip-top bag). The pistachio paste should be well incorporated for an even green color and consistent flavor throughout the cheesecake domes.
💡 Sara’s Pro Tip: Make sure your cream cheese and mascarpone are at room temperature before whipping. Cold cream cheese will create lumps in your pistachio cheesecake filling. Let them sit on the counter for 30 minutes before you start — this makes the filling silky smooth every time.
Step 4: Assemble the Domes
Pipe the pistachio cheesecake filling into dome-shaped silicone molds, filling each cavity about halfway. Press a frozen cherry center into the middle of each dome, gently pushing it down so it’s centered in the filling. Pipe more cheesecake filling on top to cover the cherry completely, filling the mold to the brim. Press a chilled pistachio biscuit base onto the top of each filled mold, gently sealing it against the filling. Freeze the assembled domes for at least 6 hours, or overnight, until completely firm. This long freeze is essential — the domes need to be rock-solid for the mirror glaze to pour cleanly without melting the filling.
⚠️ Common Mistake to Avoid: The cherry center must be fully frozen before you embed it in the cheesecake filling. If it’s even slightly soft, it will sink to the bottom of the dome during freezing, and you’ll lose the beautiful surprise effect when you slice the dome open.
Step 5: Prepare the Emerald Mirror Glaze
In a small saucepan over very low heat, gently warm the sweetened condensed milk, finely chopped white chocolate, heavy cream, honey, pistachio paste, vanilla extract, and optional green food coloring. Stir constantly with a silicone spatula until the white chocolate is fully melted and the mixture is smooth and glossy. Do not let it boil — you just want it warm enough to melt everything. Remove from heat and let the glaze cool for 8–10 minutes until it thickens slightly but is still pourable. The ideal temperature for pouring is around 90°F — it should feel warm to the touch but not hot. If it gets too thick, reheat gently for a few seconds.
💡 Sara’s Pro Tip: The mirror glaze should have the consistency of warm honey — thick enough to coat the back of a spoon but fluid enough to pour smoothly. If it’s too thin, it will run off the domes completely; if too thick, it will set in clumps. Test it on a spoon first: it should form a smooth, glossy film.
Step 6: Glaze the Domes
Carefully unmold the frozen domes by gently peeling away the silicone mold. Place each dome on a wire rack set over a baking tray (to catch the drips). Pour the emerald mirror glaze evenly over each dome, starting from the top and letting it cascade down the sides for a flawless, smooth finish. Work quickly — the glaze sets fast on the frozen domes. If any spots are missed, spoon a little extra glaze over them immediately. Let the excess drip off for about 30 seconds, then transfer the glazed domes to serving plates using a thin spatula. The glaze should set into a shiny, mirror-like shell within 1–2 minutes.
⚠️ Common Mistake to Avoid: Don’t let the glaze cool too much before pouring — if it’s too thick, it won’t self-level and you’ll get streaks and clumps. Aim for a warm, fluid consistency. Also, make sure your domes are fully frozen before glazing; partially frozen domes will start to soften and create a messy, uneven surface.
Step 7: Garnish and Serve
Immediately garnish the glazed domes with crushed pistachios, fresh cherries, white chocolate curls, edible pearl dust, and delicate flakes of edible gold leaf — the glaze will still be slightly tacky, so the garnishes will stick beautifully. Allow the domes to soften at room temperature for 8–10 minutes before serving. This resting time is crucial: the cheesecake filling should be creamy and sliceable, not icy. When you cut into a dome with a sharp knife, you’ll reveal the vibrant cherry surprise hidden inside the creamy pistachio cheesecake center — a moment that never fails to impress.
💡 Sara’s Pro Tip: For the cleanest slices, use a warm, dry knife. Run it under hot water, wipe it dry, then slice — repeat between each cut. This gives you those picture-perfect cross-sections that show off the cherry surprise and the beautiful layers.
| Step | Action | Duration | Key Visual Cue |
|---|---|---|---|
| 1 | Prepare cherry center | 1 hr freeze | Cherry mixture is solid, holds its shape |
| 2 | Make biscuit base | 30 mins chill | Firm, holds together when pressed |
| 3 | Whip cheesecake filling | 2–3 mins | Smooth, thick, holds soft peaks |
| 4 | Assemble domes | 6 hrs freeze | Rock-hard, unmolds cleanly |
| 5 | Make mirror glaze | 8–10 mins cool | Smooth, glossy, coats a spoon |
| 6 | Glaze domes | 1–2 mins | Shiny, even coating, no streaks |
| 7 | Garnish and serve | 8–10 mins rest | Glaze is tacky, garnishes stick, dome is sliceable |
Serving & Presentation
These pistachio cheesecake domes are made for special occasions. I love serving them on a simple white plate with a dusting of crushed pistachios and a few fresh cherries on the side. The emerald mirror glaze is so striking that it doesn’t need much else — let the domes be the star. For a dinner party, I sometimes drizzle a little extra cherry sauce (made by simmering leftover cherries with a splash of cherry liqueur) around the plate for a beautiful color contrast against the green glaze. It reminds me of the way we’d plate desserts at the restaurant in Paris — clean, elegant, and intentional.
In the summer, I pair these with a chilled glass of Vin Santo or a light Moscato — the sweetness of the wine complements the pistachio and cherry beautifully. For a non-alcoholic option, a sparkling cherry-lime spritzer is fantastic. If you’re serving these after a heavy meal, the lightness of the no-bake cheesecake is a welcome relief. I often make these for holiday gatherings, especially around Christmas when the green and red colors feel so festive — they always disappear first on the dessert table.
For a truly spectacular presentation, arrange the glazed domes on a mirrored tray or a slate board and let guests slice into their own dome at the table. The moment the cherry surprise is revealed is pure theater — everyone at the table will want to see. It’s one of those desserts that creates a memory, and that’s exactly why I love making these cherry cheesecake domes for the people I care about.
| Pairing Type | Suggestions | Why It Works |
|---|---|---|
| Side Dish | Fresh berries, mint sprigs, thin almond cookies | Adds freshness and crunch without overpowering |
| Sauce / Dip | Cherry coulis, vanilla anglaise, white chocolate sauce | Enhances cherry and pistachio flavors, adds elegance |
| Beverage | Vin Santo, Moscato, sparkling cherry spritzer | Light sweetness complements the creamy pistachio and bright cherry |
| Garnish | Crushed pistachios, edible gold leaf, white chocolate curls | Adds texture, visual appeal, and a touch of luxury |
Make-Ahead, Storage & Reheating
These pistachio cheesecake domes are the ultimate make-ahead dessert for busy home cooks. I often prepare them a day or two before a party and keep them frozen until I’m ready to glaze and serve. The components can also be made separately and assembled later. Here’s how to store every element for the best results.
| Method | Container | Duration | Reheating Tip |
|---|---|---|---|
| Refrigerator | Airtight container | Up to 3 days | Not recommended — texture is best when frozen and softened just before serving |
| Freezer (unglazed) | Wrap each dome in plastic wrap, then foil | Up to 2 months | Glaze directly from frozen — no need to thaw first |
| Freezer (glazed) | Single layer on a tray, then wrap | Up to 1 week | Thaw at room temp for 10 mins before serving |
| Make-Ahead | Assemble domes, freeze unglazed | Up to 2 months | Glaze the day of serving for freshest shine |
For the best texture, I recommend freezing the assembled (unglazed) domes and then glazing them on the day you plan to serve. The mirror glaze is at its shiniest within the first 24 hours, so glazing fresh gives you that stunning high-gloss finish. If you have leftovers (which is rare!), keep them frozen and eat within a week — the glaze may lose some shine but the flavor will still be wonderful.
One thing I’ve learned from my busy NYC lifestyle: you can also freeze the cherry centers and biscuit bases separately for up to a month. Then, when you’re ready to assemble, just whip up the cheesecake filling and put everything together. This modular approach makes the pistachio cheesecake recipe even more manageable for holiday prep. Just remember to label everything with dates so you know what’s what.
Variations & Easy Swaps
I love how versatile this pistachio cheesecake recipe is. Over the years, I’ve played with different flavor combinations inspired by my travels and the seasons. Here are some of my favorite variations that keep the cherry surprise intact while changing up the flavors around it.
| Variation | Key Change | Best For | Difficulty Impact |
|---|---|---|---|
| Chocolate Pistachio Domes | Add 2 tbsp melted dark cocoa to cheesecake filling | Chocolate lovers, deeper flavor | Same |
| Vegan / Dairy-Free | Use vegan cream cheese, coconut cream, and nut-based milk | Dairy-free diets, plant-based | Slightly harder — texture is less creamy |
| Rose & Pistachio | Add 1/2 tsp rose water to cheesecake filling | Middle Eastern flavor, elegant twist | Same |
Chocolate Pistachio Domes
This variation is inspired by my love for chocolate and pistachio together — a combination I discovered in a Parisian patisserie near my school. Simply melt 2 tablespoons of high-quality dark cocoa (or 1 oz of melted dark chocolate) and fold it into the pistachio cheesecake filling after whipping. The chocolate deepens the color to a beautiful forest green-brown and adds a rich, bittersweet note that pairs beautifully with the cherry surprise. Use a chocolate biscuit base (substitute chocolate cookies for vanilla) and finish with a dark mirror glaze instead of emerald for a stunning contrast.
Vegan / Dairy-Free Pistachio Domes
I developed this version for a friend’s birthday party, and it was a huge hit. Use a high-quality vegan cream cheese (I like Miyoko’s or Kite Hill), replace the mascarpone with full-fat coconut cream (the solid part from a chilled can), and use a nut-based heavy cream alternative. The pistachio paste is naturally dairy-free, which helps. The texture will be slightly less rich and a bit more firm than the original, but the flavor is still wonderful. For the glaze, use a dairy-free white chocolate. The cherry surprise center and biscuit base can be made as-is (use vegan butter or coconut oil for the base).
Rose & Pistachio Domes
This is my nod to the flavors of my Moroccan childhood, where rose water and pistachios were used in everything from pastries to tagines. Add 1/2 teaspoon of culinary rose water to the pistachio cheesecake filling along with the vanilla. The rose pairs exquisitely with the cherry surprise and the pistachio base. Garnish the finished domes with dried rose petals alongside the crushed pistachios for a truly stunning presentation. This variation is especially lovely for spring celebrations like bridal showers or Easter. The rose water should be used sparingly — too much can taste like perfume, so start with 1/4 teaspoon and adjust to your taste.
How do you make the cherry surprise filling for pistachio cheesecake domes without it leaking out?
The key to a leak-free cherry surprise is twofold: first, make sure your cherry mixture is fully frozen before embedding it in the cheesecake filling. Freeze the cherry center for at least 1 hour, or until it’s solid. Second, pipe a layer of cheesecake filling into the dome mold first, then press the frozen cherry center into the middle, and cover it completely with more filling before sealing with the biscuit base. The frozen cherry acts as an ice cube within the filling — it stays put and doesn’t seep into the surrounding cheesecake. Using cherry preserves in the mixture also helps bind the chopped fruit together, reducing the risk of liquid seeping out. If you’re concerned, you can roll the frozen cherry centers in a little crushed pistachio before embedding them — this creates a barrier that absorbs any minimal moisture.
Can you substitute cream cheese with a dairy-free alternative for pistachio cheesecake domes?
Yes, you can absolutely make these pistachio cheesecake domes dairy-free. Substitute the cream cheese with a high-quality vegan cream cheese (Miyoko’s or Kite Hill work well), replace the mascarpone with the solid part of a can of full-fat coconut cream, and use a nut-based heavy cream alternative like cashew cream or a barista-style oat cream. The pistachio paste is naturally dairy-free, which is helpful. The texture will be slightly firmer and less rich than the original, so I recommend adding an extra tablespoon of nut-based milk if the mixture feels too thick. For the mirror glaze, use a dairy-free white chocolate. The biscuit base can be made with vegan butter or coconut oil. I’ve tested this version and it’s delicious — just be sure to whip the vegan cream cheese well to incorporate air for a lighter texture.
What is the best way to achieve a smooth, dome-shaped finish for pistachio cheesecake domes?
The secret to perfectly smooth pistachio cheesecake domes is all in the freezing and the glaze temperature. First, make sure your silicone dome molds are clean and dry before piping in the cheesecake filling. Freeze the assembled domes for at least 6 hours — they need to be completely solid. When you unmold them, do it gently by flexing the silicone mold from the bottom, not by pulling on the dome itself. For the mirror glaze, the temperature is critical: it should be around 90°F — warm to the touch but not hot. Pour the glaze over the frozen domes in one smooth motion, starting from the center and letting it flow naturally over the sides. The contrast between the warm glaze and the frozen dome creates that flawless, glass-like finish. If you get any air bubbles, pop them with a toothpick before the glaze sets.
How far in advance can you prepare pistachio cheesecake domes with cherry surprise for a party?
You can prepare these pistachio cheesecake domes well in advance — they’re actually one of the best make-ahead desserts for entertaining. The assembled, unglazed domes can be frozen for up to 2 months if wrapped tightly in plastic wrap and then foil. On the day of your party, simply unmold and glaze them fresh for the shiniest finish. The mirror glaze is at its best within the first 24 hours, so glazing the morning of your event is ideal. If you want to go even further ahead, you can prepare the cherry centers and biscuit bases up to a month in advance and freeze them separately. Then, up to 3 days before the party, whip the cheesecake filling, assemble the domes, and freeze them. This modular approach makes holiday entertaining so much less stressful — I do this every year for my Thanksgiving dessert table.
Can I use frozen cherries instead of fresh for the cherry surprise center?
Yes, you can use frozen sweet cherries for the cherry surprise center, and they work beautifully. Thaw the frozen cherries first, then drain them well — excess liquid is the enemy of a clean cherry center. Pat them dry with paper towels before chopping finely and mixing with the cherry preserves and lemon juice. Because frozen cherries are already soft from the thawing process, the mixture might be slightly more delicate, so freeze it for an extra 15–20 minutes to ensure it’s fully solid. The flavor will be just as vibrant as fresh cherries, especially if you use high-quality frozen cherries. I’ve done this in winter when fresh cherries aren’t in season, and the results are consistently wonderful. Just don’t skip the draining step — it makes all the difference in preventing leakage into the cheesecake filling.
What can I use instead of pistachio paste for these cheesecake domes?
If you can’t find pistachio paste, the best substitution is a combination of almond paste and a few drops of pistachio extract (or pistachio flavoring). Use the same amount of almond paste as the pistachio paste called for, and add 1/2 teaspoon of pistachio extract for that authentic nutty flavor. Another option is to make your own pistachio paste by blending 1 cup of shelled, unsalted pistachios in a food processor with 1 tablespoon of neutral oil (like grapeseed) until smooth and creamy — this can take 5–8 minutes of scraping down the sides. Homemade paste won’t be as silky as store-bought, but it will still give you a great pistachio flavor. Keep in mind that the color of your homemade paste will be more muted, so you may want to add a drop of natural green food coloring to achieve that vibrant emerald hue.
Why did my mirror glaze turn out streaky and not smooth?
Streaky mirror glaze is usually caused by one of three issues: temperature, consistency, or pouring technique. First, the glaze temperature should be around 90°F — if it’s too cool, it thickens and won’t self-level; if too hot, it runs off the dome too quickly and can create thin spots. Second, the consistency should be like warm honey — thick enough to coat a spoon but fluid enough to pour. If it’s too thick, add a splash of warm cream; if too thin, let it cool a bit more. Third, pour the glaze in one continuous motion from the center of the dome, letting it cascade naturally — don’t spread it with a spoon or spatula. Also, make sure your domes are fully frozen; a partially frozen dome will create steam and cause the glaze to set unevenly. If you get streaks, you can sometimes fix them by gently re-warming the dome with a hair dryer on low for a few seconds to encourage the glaze to flow.
Can I make these pistachio cheesecake domes without a silicone dome mold?
Absolutely — you don’t need special silicone dome molds to make these pistachio cheesecake domes. You can use a regular muffin tin lined with plastic wrap or parchment paper cups. Press the plastic wrap into the muffin cups, pipe in the cheesecake filling, add the frozen cherry center, and seal with the biscuit base. Freeze until firm, then lift out the domes by the edges of the plastic wrap. The shape will be more like a rounded muffin top than a perfect dome, but the flavor and texture will be identical. Another option is to use small glass bowls or ramekins — just line them with plastic wrap for easy removal. You can also use a half-sphere silicone mold that’s used for making chocolate candies; these are widely available online and are quite inexpensive. The key is to have a rounded shape that allows the glaze to flow evenly over the surface.
How do I store leftover pistachio cheesecake domes after glazing?
Leftover glazed pistachio cheesecake domes should be stored in the freezer, not the refrigerator. Place them in a single layer on a baking tray lined with parchment paper and freeze until the glaze is firm (about 1 hour). Then wrap each dome individually in plastic wrap and transfer to an airtight container or freezer bag. They’ll keep for up to 1 week — the glaze may lose some of its high-gloss shine after a few days, but the flavor will remain excellent. To serve from frozen, let the dome sit at room temperature for 10–12 minutes until the cheesecake is creamy and sliceable. I don’t recommend storing glazed domes in the refrigerator for more than a few hours, as the moisture can cause the glaze to become tacky and dull. If you have unglazed domes in the freezer, glaze only what you plan to serve and keep the rest unglazed for up to 2 months.
Can I use a different fruit instead of cherries for the surprise center?
Yes, you can absolutely swap the cherry surprise for another fruit center. Some of my favorite variations include raspberry (use fresh raspberries mashed with a little raspberry jam), mango (pureed fresh mango with a splash of lime juice), or strawberry (chopped strawberries with strawberry preserves). The same principles apply: the fruit mixture needs to be frozen solid before embedding, and you want a combination of fresh fruit and preserves to bind it. For berry centers, I recommend adding a little cornstarch (about 1/2 teaspoon per cup of fruit) to help thicken the mixture before freezing. Stone fruits like peach or apricot also work beautifully — just make sure they’re finely chopped and well-drained. Each fruit will bring its own color and flavor to the surprise, so you can match the mirror glaze accordingly: a raspberry center with a pink glaze, a mango center with a yellow glaze, and so on.
Share Your Version!
I absolutely love seeing how you make these pistachio cheesecake domes your own. Did you use a different fruit for the surprise center? Did you try the rose variation? Maybe you served them at a special occasion and everyone was amazed by the cherry surprise? Drop a comment below and let me know — your questions and stories inspire me and help other readers too. If you found this pistachio cheesecake recipe helpful, please give it a star rating — it means the world to me and helps more people discover these cherry cheesecake domes.
Don’t forget to snap a photo of your beautiful mirror glaze cheesecake domes and tag @cheerychop on Instagram or Pinterest — I feature my favorites in my stories! And if you have any questions about a step or an ingredient swap, just ask in the comments. I read every single one and I’m always here to help. From my NYC kitchen to yours — I hope this recipe brings as much warmth to your table as it does to mine. — Sara 🧡
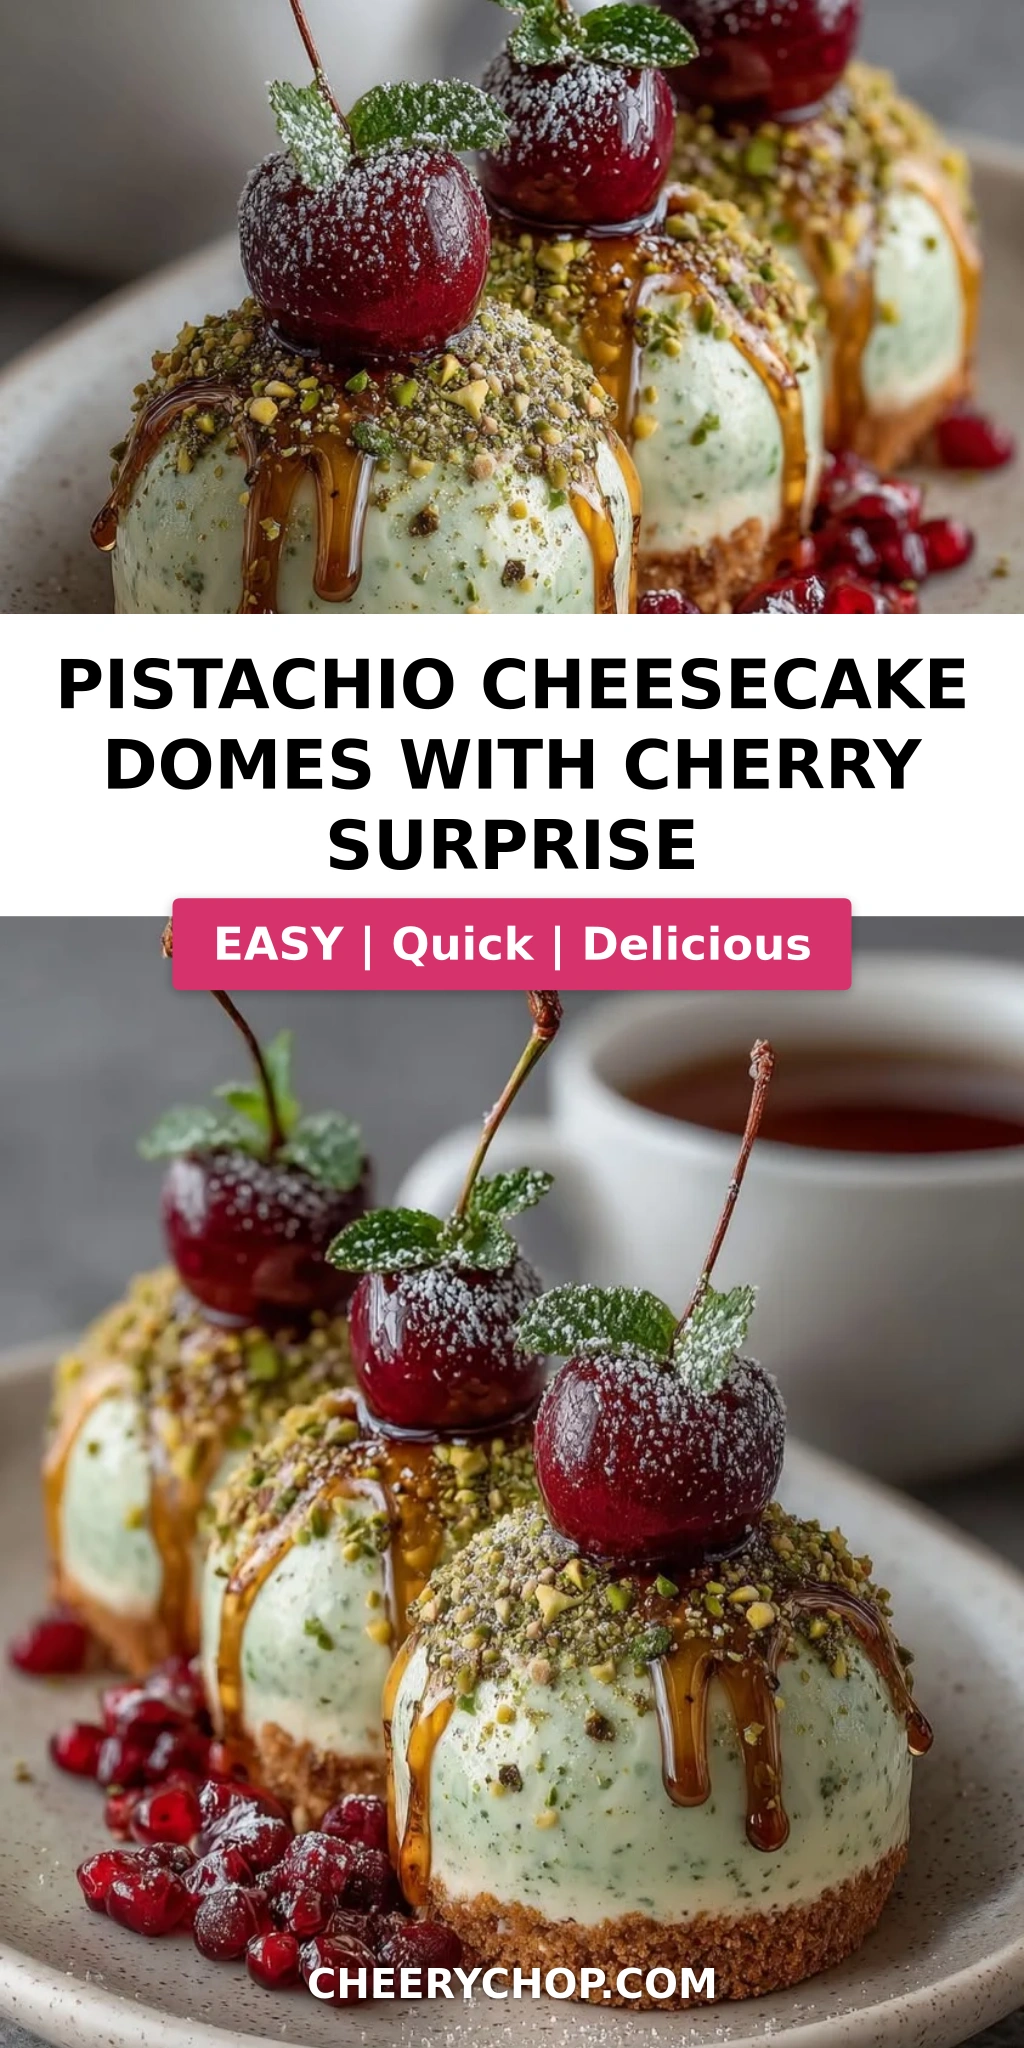
Love This Recipe? Save It to Pinterest!
If you enjoyed this Pistachio Cheesecake Domes with Cherry Surprise recipe, don’t let it get lost in your browser tabs! 😄 Pin it now so you can find it again anytime — and explore hundreds more tried-and-tested recipes waiting for you on my Pinterest boards.
👉 Follow Sara on Pinterest @chefrecipes2
📌 Pin this recipe · 🔁 Re-pin your favorites · 💬 Tag me when you make it — I love seeing your creations!
⭐ Made this recipe? I’d love to hear from you!
📸 Tag @cheerychop on Instagram or Pinterest — I feature my favorites in my stories!
💬 Drop a comment below with your star rating and any questions — I read every single one in my NYC kitchen. 🧡
Pistachio Cheesecake Domes with Cherry Surprise
Elegant pistachio cheesecake domes with a hidden cherry center, topped with an emerald mirror glaze.
- Yield: 6 1x
Ingredients
- For the Pistachio Cheesecake Domes:
- 8 oz cream cheese, softened
- 1/2 cup mascarpone cheese
- 1/2 cup heavy whipping cream
- 1/4 cup powdered sugar
- 3 tbsp pistachio paste
- 1 tsp vanilla bean paste
- 2 drops natural green food coloring (optional)
- For the Cherry Surprise Center:
- 1 cup fresh sweet cherries, pitted and finely chopped
- 2 tbsp cherry preserves
- 1 tsp fresh lemon juice
- For the Pistachio Biscuit Base:
- 3/4 cup crushed vanilla cookies
- 2 tbsp finely ground pistachios
- 3 tbsp melted butter
- For the Emerald Mirror Glaze:
- 1/2 cup sweetened condensed milk
- 1/3 cup white chocolate, finely chopped
- 2 tbsp heavy cream
- 1 tbsp honey
- 1 tbsp pistachio paste
- 1 tsp vanilla extract
- A tiny drop green food coloring (optional)
- For Garnish (optional):
- Crushed pistachios
- Fresh cherries
- White chocolate curls
- Edible gold leaf flakes
- Edible pearl dust
Instructions
- Combine chopped cherries, cherry preserves, and lemon juice in a small bowl. Spoon into small silicone molds or drop teaspoon-sized portions onto a parchment-lined tray. Freeze for 1 hour until firm.
- Mix crushed vanilla cookies, ground pistachios, and melted butter. Press into small rounds matching the size of the dome molds. Chill until firm.
- Whip cream cheese, mascarpone, heavy cream, powdered sugar, pistachio paste, vanilla bean paste, and optional coloring until smooth, thick, and fluffy. Transfer to a piping bag.
- Pipe cheesecake filling into dome-shaped silicone molds, filling each cavity about halfway. Press a frozen cherry center into the middle of each dome. Cover with more pistachio cheesecake filling and seal with a chilled pistachio biscuit base. Freeze for at least 6 hours or until completely firm.
- For the mirror glaze, gently warm sweetened condensed milk, white chocolate, heavy cream, honey, pistachio paste, vanilla extract, and optional coloring until smooth and glossy. Cool until slightly thickened but still pourable.
- Carefully unmold the frozen domes and place on a wire rack over a tray. Pour the emerald mirror glaze evenly over each dome, allowing it to cascade down the sides for a flawless finish.
- Transfer to serving plates and garnish with crushed pistachios, fresh cherries, white chocolate curls, edible pearl dust, and delicate flakes of edible gold leaf.
- Allow the domes to soften slightly before serving. Slice open to reveal the vibrant cherry surprise hidden inside the creamy pistachio cheesecake center.
Nutrition
- Calories: 395
- Sugar: 30g
- Fat: 25g
- Carbohydrates: 37g
- Protein: 6g
Tried This Recipe? Leave a Comment!
Did you make this recipe? I’d love to hear how it turned out! Please leave a comment and a rating below. Your feedback helps other home cooks and supports cheerychop.com!
For more delicious inspiration, follow me on Pinterest!


