
Table of Contents
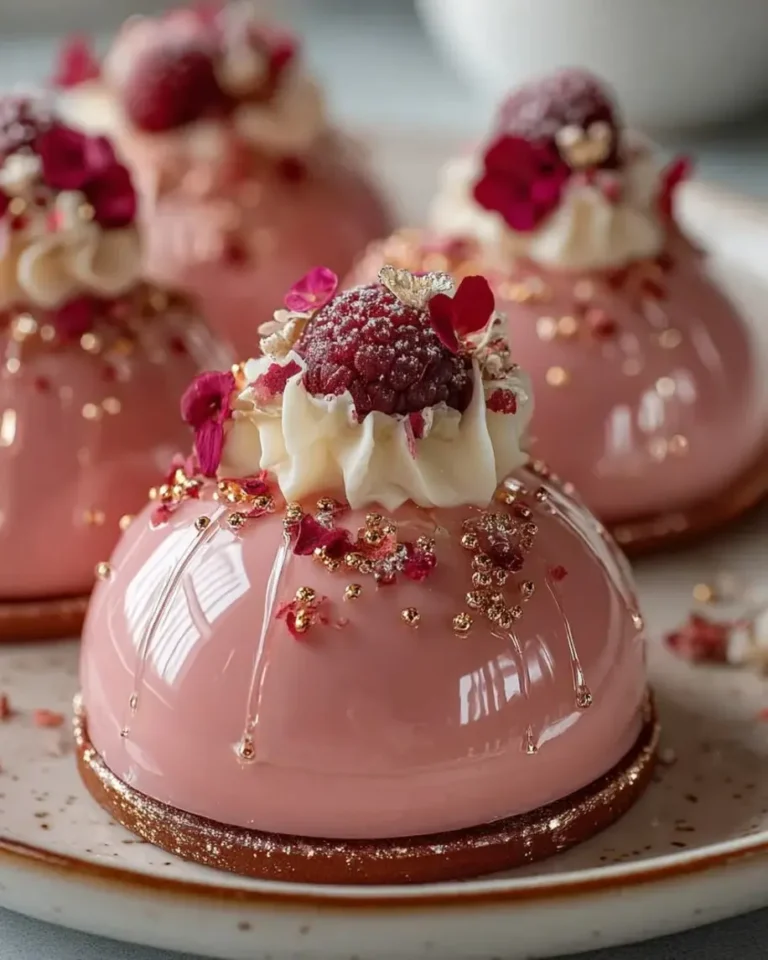
Rose Gold Lychee Raspberry Mirror Glaze Bombs with Cream Heart – A Showstopping Dessert with a Silky Surprise Inside
Introduction
I still remember the first time I saw a mirror glaze dome in a Parisian patisserie window — the flawless shine, the way light danced across the surface like liquid metal. It felt almost magical, like something you could only admire from behind glass. But after years of training in Paris and countless late-night tests back in my New York City kitchen, I realized that magic is actually technique — and it’s entirely achievable at home. These Rose Gold Lychee Raspberry Mirror Glaze Bombs with Cream Heart are the perfect example: they look impossibly elegant, but every step is built on clear, repeatable methods. The main keyword here is rose gold mirror glaze bombs, and the unique angle is the hidden cream heart that stays perfectly solid inside the frozen fruit shell.
Imagine cracking through a glossy, rose-gold shell to reveal a bright, tangy-sweet lychee-raspberry dome — and then discovering a silky mascarpone cream heart at the very center. The flavor is bright and floral from the lychee, tart from the raspberry, and luxuriously creamy from the heart. It’s like a jewel box of textures and temperatures: the frozen fruit shell gives way to a luscious, almost mousse-like cream center. The mirror glaze adds a final layer of decadence with a subtle vanilla sweetness and a shimmer that picks up every bit of light. This is a dessert that stops conversations and starts them.
I’ve spent years perfecting this recipe — from my early experiments in a tiny Paris kitchen to testing it on my friends at NYC dinner parties. What sets my version apart is the cream heart technique: instead of a uniform filling, the mascarpone center stays dense and creamy while the fruit shell freezes solid, creating a beautiful contrast. In this post, I’ll share my pro tip for getting the mirror glaze to that flawless rose gold sheen (hint: it starts with the temperature of your glaze) and the one common mistake that ruins the cream heart texture. Whether you’re a confident home baker or just starting your dessert journey, I’ll walk you through every step so your rose gold mirror glaze bombs turn out as stunning as the ones in my dreams.
Why This Recipe Is the Best
The Flavor Secret: I grew up in Morocco, where floral and fruit flavors are woven into everything from teas to tagines. Lychee and raspberry are a pairing I discovered at a NYC farmers market — the lychee brings a perfumed sweetness that softens raspberry’s sharpness, and the coconut milk in the shell adds a subtle creaminess that bridges the fruit and the heart. It’s a sophisticated flavor profile that feels both exotic and comforting.
Perfected Texture: The magic of these bombs is the contrast between the frozen fruit shell and the soft, whipped cream heart. I tested nine versions before landing on the right ratio of gelatin to puree — too much gelatin and the shell is rubbery; too little and it won’t unmold cleanly. The cream heart uses mascarpone for density and heavy cream for lightness, so it stays scoopable even after hours in the freezer.
Foolproof & Fast: Even though this looks like a high-end pastry shop dessert, the process is broken into simple, manageable steps. The active prep is about 45 minutes, and the freeze time does all the hard work for you. I’ve streamlined the mirror glaze to use ingredients you can find at any US grocery store — no special equipment needed. This is a recipe that makes you look like a professional pastry chef without the stress.
Rose Gold Mirror Glaze Bombs Ingredients
When I shop for these ingredients in New York City, I head to the Union Square farmers market for fresh raspberries in summer, or grab high-quality frozen purees from Kalustyan’s — a spice shop that reminds me of the souks in Morocco. For the lychee, I love the canned variety in syrup, drained and blended, or you can find lychee puree online. The white chocolate for the glaze needs to be good quality — I use Guittard or Valrhona — because cheap white chocolate can seize and ruin the shine.
Ingredients List
- For the Lychee Raspberry Shells: 1½ cups raspberry puree, ½ cup lychee puree, ½ cup coconut milk, ⅓ cup granulated sugar, 2 tsp gelatin powder, 2 tbsp cold water, 1 tsp lemon juice, pinch of salt
- For the Cream Heart: 1 cup mascarpone cheese, ½ cup heavy whipping cream, 3 tbsp powdered sugar, 1 tsp vanilla extract
- For the Rose Gold Mirror Glaze: 1 cup white chocolate (finely chopped), ½ cup sweetened condensed milk, ¼ cup water, 1 tbsp gelatin powder, 3 tbsp cold water, 1 tsp vanilla extract, a few drops pink food coloring, ½ tsp edible gold luster dust
- For Garnish (optional): 2 tbsp freeze-dried raspberries (crushed), 1 tbsp edible rose petals, edible gold flakes
Ingredient Spotlight
Raspberry Puree: This is the backbone of the shell’s flavor. Use unsweetened puree for the best control over sweetness — I like the Boiron brand, which you can find at specialty food stores or online. If you’re using fresh raspberries, blend and strain them through a fine-mesh sieve to remove seeds. Frozen raspberries work beautifully too; just thaw, blend, and strain.
Lychee Puree: Lychee adds a floral, almost rose-like note that pairs perfectly with raspberry. Canned lychees in syrup are a great substitute — drain them well, then blend until smooth. You can also find lychee puree in Asian grocery stores or online. I always taste my puree first; if it’s too sweet, I reduce the sugar slightly.
White Chocolate: The key to a glossy mirror glaze is high-quality white chocolate with cocoa butter. Cheap white chocolate (with palm oil) will seize and leave your glaze streaky. I recommend Valrhona or Guittard — they melt smoothly and create that signature shine. Chop it finely so it melts evenly.
Edible Gold Luster Dust: This is what gives the glaze its rose gold shimmer. Look for “edible gold luster dust” at baking supply stores or online — it’s different from pearlescent powder (which is silver-white). I use a tiny whisk to blend it into the glaze for even distribution.
| Original Ingredient | Best Substitution | Flavor / Texture Impact |
|---|---|---|
| Raspberry puree | Frozen raspberries, thawed and strained | Slightly more tart, needs a touch more sugar |
| Lychee puree | Canned lychees, drained and blended | Syrup may add sweetness; reduce sugar by 1 tbsp |
| Coconut milk | Full-fat oat milk | Less creamy, slightly oat-y flavor — still good |
| Mascarpone | Cream cheese (full-fat), softened | More tangy, slightly denser; add 1 tbsp cream |
| White chocolate | High-quality white cocoa butter melts | More stable shine, but harder to find |
How to Make Rose Gold Lychee Raspberry Mirror Glaze Bombs — Step-by-Step
Trust me when I say this: if you can make Jell-O and whip cream, you can make these bombs. The steps are straightforward, and I’ve included visual cues so you know exactly what to look for at every stage.
Step 1: Bloom the Gelatin
Sprinkle 2 teaspoons of gelatin powder over 2 tablespoons of cold water in a small bowl. Let it sit for 5 minutes until it becomes a firm, jiggly mass — this is called blooming, and it activates the gelatin so it dissolves smoothly into your fruit mixture.
💡 Sara’s Pro Tip: Use ice-cold water for blooming. Warm water will make the gelatin clump and won’t activate properly. Think of it like a sponge — it needs cold water to expand evenly.
Step 2: Make the Fruit Shell Base
In a small saucepan, combine 1½ cups raspberry puree, ½ cup lychee puree, ½ cup coconut milk, ⅓ cup sugar, a pinch of salt, and 1 teaspoon lemon juice. Warm over medium heat, stirring gently, until the sugar dissolves and the mixture is warm to the touch — about 2–3 minutes. Do not boil. Remove from heat and stir in the bloomed gelatin until completely dissolved.
⚠️ Common Mistake to Avoid: Boiling the fruit mixture will break down the gelatin and give you a cloudy, weak shell that won’t unmold cleanly. Keep it at a gentle simmer — just steaming, not bubbling.
Step 3: Pour and Chill the Shells
Pour a thin layer — about ¼ inch — of the fruit mixture into silicone half-sphere molds (2–3 inches in diameter). Use the back of a small spoon to coat the sides evenly, making sure there are no air bubbles. Place the molds in the refrigerator for 15–20 minutes until the mixture is partially set — it should feel tacky but not liquid.
💡 Sara’s Pro Tip: If you see air bubbles, tap the mold gently on the counter a few times. They’ll rise to the surface and pop, leaving you with a smooth shell.
Step 4: Whip the Cream Heart
In a mixing bowl, combine 1 cup mascarpone, ½ cup heavy whipping cream, 3 tablespoons powdered sugar, and 1 teaspoon vanilla extract. Whisk by hand or with an electric mixer on medium speed until the mixture is light, fluffy, and holds soft peaks — about 2–3 minutes. Be careful not to overwhip, or it will become grainy.
⚠️ Common Mistake to Avoid: Overwhipping the cream will turn it into butter. Stop as soon as you see soft, billowy peaks that hold their shape for a second before drooping. The mascarpone adds enough structure.
Step 5: Fill and Seal the Bombs
Spoon or pipe the cream filling into the center of each partially set shell, filling it about two-thirds full — leave a ¼-inch border around the edges. Gently press the cream down so it’s level. Spoon the remaining fruit mixture over the cream, covering it completely and sealing the edges. Smooth the top with a small spatula.
💡 Sara’s Pro Tip: Leave that border! If the cream touches the edges of the mold, it will freeze and stick, making unmolding difficult. The fruit mixture acts as a seal.
Step 6: Freeze Firm
Place the filled molds in the freezer and freeze for at least 4 hours, or overnight. The bombs need to be completely solid — if they’re even slightly soft, they’ll break when you unmold them. I usually make these the day before and let them freeze overnight.
⚠️ Common Mistake to Avoid: Rushing the freeze time. Four hours is the minimum — if your freezer is crowded or runs warm, give it 6 hours. A partially frozen bomb will collapse under the glaze.
Step 7: Make the Rose Gold Mirror Glaze
Bloom 1 tablespoon gelatin in 3 tablespoons cold water for 5 minutes. In a small saucepan, heat ½ cup sweetened condensed milk and ¼ cup water until steaming — do not boil. Remove from heat, stir in the bloomed gelatin until dissolved, then pour the hot liquid over 1 cup finely chopped white chocolate. Let it sit for 2 minutes, then stir gently until smooth. Add 1 teaspoon vanilla extract, a few drops of pink food coloring, and ½ teaspoon edible gold luster dust. Stir until the color is even and the glaze has a rose gold sheen. Let it cool to 90–95°F — it should be glossy and pourable, like warm honey.
💡 Sara’s Pro Tip: The temperature of the glaze is everything. If it’s too hot (above 100°F), it will melt the frozen bomb on contact. Too cold (below 85°F), it will thicken and lose its mirror shine. I use an instant-read thermometer to check.
Step 8: Glaze the Bombs
Unmold the frozen bombs by gently flexing the silicone molds. Place each bomb on a wire rack set over a baking sheet to catch drips. Working quickly, pour the rose gold mirror glaze evenly over each bomb, letting it flow naturally over the dome. Let the excess drip off for about 30 seconds before transferring to serving plates.
⚠️ Common Mistake to Avoid: Pouring too slowly. The glaze needs to coat the entire surface in one smooth motion. If you pour in stops and starts, you’ll get streaks. One bold pour per bomb is the way to go.
Step 9: Garnish and Serve
While the glaze is still tacky, sprinkle with crushed freeze-dried raspberries, edible rose petals, and gold flakes. Let the glaze set fully — about 2–3 minutes — before serving. Serve immediately while the shell is still frozen and the heart is creamy. These are best enjoyed right away, but they can sit at room temperature for up to 10 minutes without losing their structure.
💡 Sara’s Pro Tip: For the best texture contrast, serve directly from the freezer. Let the bomb sit at room temperature for 2–3 minutes before eating — the shell will soften just enough to crack with a spoon, while the heart stays cool and luscious.
| Step | Action | Duration | Key Visual Cue |
|---|---|---|---|
| 1 | Bloom gelatin | 5 min | Firm, jiggly mass |
| 2 | Heat fruit mixture | 2–3 min | Steaming, not boiling |
| 3 | Chill shells | 15–20 min | Tacky, not liquid |
| 4 | Whip cream heart | 2–3 min | Soft peaks, fluffy |
| 5 | Fill and seal bombs | 5 min | Cream covered, edges sealed |
| 6 | Freeze firm | 4+ hrs | Rock solid, no give |
| 7 | Make mirror glaze | 10 min | Glossy, rose gold sheen, 90–95°F |
| 8 | Glaze bombs | 2–3 min | Even coating, smooth drips |
| 9 | Garnish and serve | 5 min | Glaze set, garnishes adhered |
Serving & Presentation
These rose gold mirror glaze bombs are made for the spotlight. Serve them on a simple white plate or a mirrored serving tray to let the color pop. I like to add a small quenelle of whipped cream or a raspberry coulis swirl on the plate for contrast — it echoes the flavors inside and makes the plating feel intentional. In my NYC dinner parties, I often set up a little “bomb bar” with extra garnishes (gold flakes, rose petals, crushed pistachios) so guests can customize their own.
The texture is best when the bomb is still frozen on the outside but the heart has softened slightly — about 2–3 minutes at room temperature after glazing. That first crack of the spoon through the glossy shell is pure theater. I learned this presentation style from a pastry chef in Paris who would plate frozen domes with a single edible flower on top. It’s minimal, elegant, and lets the dessert speak for itself.
For a Moroccan-inspired twist, I sometimes dust the plate with a pinch of cinnamon and cardamom — it adds a warm aromatic note that complements the lychee. And if you’re serving these at a celebration, a few drops of rose water in the cream heart takes the floral notes to another level. Just go easy — rose water is potent!
| Pairing Type | Suggestions | Why It Works |
|---|---|---|
| Side Dish | Fresh berries, coconut sorbet, shortbread cookies | Adds freshness and crunch without overpowering |
| Sauce / Dip | Raspberry coulis, passion fruit sauce, coconut cream | Enhances the fruit layers and adds tropical notes |
| Beverage | Brut Champagne, lychee iced tea, Moroccan mint tea | Acidity and floral notes mirror the dessert’s profile |
| Garnish | Edible gold flakes, rose petals, crushed pistachios | Adds visual drama and textural contrast |
Make-Ahead, Storage & Reheating
Between my NYC schedule and hosting friends, I rely on make-ahead strategies constantly. These bombs are actually perfect for advance prep — the components can be made separately and assembled when you’re ready. I usually make the shells and cream heart a day ahead, then glaze them just before serving for that mirror-perfect shine.
| Method | Container | Duration | Reheating Tip |
|---|---|---|---|
| Refrigerator | Airtight container, glazed bombs on parchment | Up to 2 days | Not recommended for glazed bombs — serve frozen |
| Freezer | Silicone molds, then transfer to zip-top bag | Up to 1 month | Glaze directly from frozen — no thawing needed |
| Make-Ahead | Un-glazed frozen bombs in zip-top bag | Up to 1 week before glazing | Glaze day-of for best shine |
If you’re storing un-glazed frozen bombs, wrap each one individually in plastic wrap before placing them in a zip-top bag. This prevents freezer burn and keeps the fruit shell fresh. When you’re ready to serve, make the glaze fresh — it doesn’t store well once made, as the gelatin will set and the shine will dull. I’ve tried reheating the glaze, and while it works in a pinch, the mirror finish won’t be as perfect. For best results, glaze within 30 minutes of serving.
One more thing: if you’re transporting these to a party, freeze them solid, pack them in a cooler with dry ice or ice packs, and glaze them at the destination. The glaze takes less than 10 minutes to prepare and pour, so you can have fresh, showstopping desserts anywhere. I’ve done this for friends’ birthdays and holiday dinners — it always impresses.
Variations & Easy Swaps
| Variation | Key Change | Best For | Difficulty Impact |
|---|---|---|---|
| Passionfruit-Mango Twist | Replace raspberry with passionfruit puree, lychee with mango | Tropical-themed parties, summer celebrations | Same — easy swap |
| Dairy-Free Coconut Version | Use coconut cream in heart, dairy-free white chocolate | Vegan or lactose-intolerant guests | Moderate — coconut cream behaves differently |
| Berry Blush with White Chocolate | Add strawberry puree to shell, use ruby chocolate glaze | Valentine’s Day, romantic dinners | Same — ruby chocolate melts like white chocolate |
Variation: Passionfruit-Mango Twist
This is my go-to summer version, inspired by the tropical fruit markets near my mother’s home in Morocco. Replace the raspberry puree with passionfruit puree and the lychee with mango puree. The passionfruit adds a tangy, seedy crunch (strain if you prefer smooth), and the mango brings sweetness. The cream heart stays the same, but I add a pinch of cardamom to the mascarpone for a fragrant lift. The mirror glaze can stay rose gold, or you can switch to a yellow-orange hue with a drop of yellow food coloring.
Variation: Dairy-Free Coconut Version
For a dairy-free version that doesn’t sacrifice creaminess, replace the mascarpone with full-fat coconut cream (chilled and whipped) and use a dairy-free white chocolate for the glaze. The coconut milk in the shell already gives a subtle coconut note, so this variation feels cohesive. I tested this for a friend’s birthday and found that the coconut cream heart needs a little extra stability — add 1 teaspoon of cornstarch to the coconut cream before whipping to help it hold its shape. The mirror glaze works beautifully with dairy-free white chocolate, but make sure it’s a high-quality brand that melts smoothly.
Variation: Berry Blush with White Chocolate
For Valentine’s Day or any romantic occasion, try this blush-colored version. Use a mix of raspberry and strawberry puree (1 cup raspberry, ½ cup strawberry) for the shell, and swap the white chocolate in the glaze for ruby chocolate — it has a natural pink hue and a tangy berry flavor that doubles down on the fruitiness. The cream heart stays the same, but I fold in a tablespoon of freeze-dried strawberry powder for extra color and flavor. This variation is visually stunning and tastes like a berry cream dream.
What is the best way to achieve a rose gold color for the mirror glaze?
The best way to achieve a true rose gold color for your mirror glaze is to combine pink food coloring with edible gold luster dust. Start with a base of white chocolate and sweetened condensed milk, then add just a few drops of pink gel food coloring — I prefer Americolor Soft Pink or a tiny dab of deep pink. Stir until the glaze is a pale, warm pink. Then add ½ teaspoon of edible gold luster dust (make sure it’s labeled “edible” and not just “decorative”) and whisk gently until the color shifts to a shimmering rose gold. The luster dust is key — it catches the light and creates that metallic sheen. If the color is too pink, add a tiny drop of yellow to warm it up; if too gold, add more pink. Temperature also affects the color — a warmer glaze will appear more golden, while a cooler glaze looks pinker. Aim for 90–95°F and adjust with small pinches of luster dust until you’re happy. I always test a spoonful on a white plate before pouring over the bombs.
Can I use frozen raspberries for the mirror glaze bombs?
Yes, absolutely! Frozen raspberries work wonderfully for this recipe and often have a more consistent flavor than fresh, especially when raspberries are out of season in the US. The key is to thaw them completely first, then blend and strain through a fine-mesh sieve to remove the seeds. Frozen raspberries release more liquid when thawed, so you may end up with a slightly thinner puree — that’s fine, just cook it down for an extra minute on the stove to concentrate the flavor. If you’re using frozen raspberries, I recommend reducing the sugar by about 1 tablespoon because frozen berries are sometimes packed in light syrup. One tip from my NYC kitchen: buy IQF (individually quick frozen) raspberries for the best quality. They’re frozen at peak ripeness and have a bright, tart flavor that works perfectly in these bombs.
How do you make a cream heart that stays solid inside the frozen dome?
The secret to a cream heart that stays solid and scoopable inside the frozen dome is the ratio of mascarpone to heavy cream. Mascarpone has a much higher fat content and lower water content than regular cream cheese, so it freezes into a dense, creamy texture rather than an icy block. I use 1 cup mascarpone to ½ cup heavy cream, which gives enough structure to hold its shape while remaining soft. The cream heart should be whipped to soft peaks — not stiff — because overwhipped cream can separate when frozen. Another critical step is to leave a ¼-inch border of fruit mixture around the cream when sealing the bomb. This border acts as a barrier, preventing the cream from touching the frozen shell and creating a uniform texture. Finally, freeze the bombs for at least 4 hours (overnight is better) so the shell freezes completely solid while the cream heart stays in a creamy, semi-frozen state.
How far in advance can I prepare rose gold lychee raspberry mirror glaze bombs?
You can prepare these bombs several days in advance, with a few key timing tips for the best results. The filled, un-glazed bombs can be frozen solid in their silicone molds, then transferred to a zip-top bag and stored in the freezer for up to 1 month. I recommend glazing them no more than 2–3 hours before serving, because the mirror glaze loses its brilliant shine after about 4 hours in the refrigerator. If you need to prep the components separately: make the fruit shell base and freeze the shells in the molds up to 1 week ahead, and you can whip the cream heart filling up to 2 days ahead (store it covered in the refrigerator, then re-whip briefly before piping). The mirror glaze itself should be made fresh — it doesn’t store well because the gelatin sets and the shine dulls. For a dinner party, I usually freeze the filled bombs 2–3 days before, then glaze them just before my guests arrive.
Can I make these without a silicone mold?
Yes, you can make these without a silicone mold, though silicone is ideal because it flexes and releases the frozen bombs cleanly without sticking. If you don’t have silicone half-sphere molds, you have a couple of options. First, you can use a standard metal muffin tin — line each cup with a double layer of plastic wrap, pressing it into the shape of the cup, then pour in the fruit mixture and proceed as directed. The plastic wrap acts as a release liner. Second, you can use small glass or ceramic bowls (like ramekins) lined with plastic wrap. The key is to make sure the container is smooth and has a rounded shape. Metal tins without liners will stick, so the plastic wrap is essential. Another option is to use flexible plastic candy molds — just make sure they’re food-safe and freezer-safe. The bombs may not be perfectly spherical, but they’ll still taste and look amazing.
Why did my mirror glaze turn out streaky or dull?
Streaky or dull mirror glaze is usually caused by one of three issues: temperature, mixing, or ingredient quality. First, temperature: if your glaze is too hot (above 100°F), it will be too thin and run off the bomb quickly, creating streaks as it drips unevenly. If it’s too cold (below 85°F), it will thicken and not flow smoothly, leaving a dull, lumpy finish. Always use an instant-read thermometer and aim for 90–95°F. Second, mixing: whisk gently to avoid creating air bubbles — bubbles create a rough surface that scatters light instead of reflecting it. If you see bubbles, let the glaze sit for a minute or tap the bowl on the counter. Third, ingredient quality: cheap white chocolate that contains palm oil instead of cocoa butter will seize and leave a streaky, greasy finish. Use a high-quality white chocolate with cocoa butter (like Valrhona or Guittard). Also make sure your gelatin is fully dissolved — undissolved gelatin creates a bumpy texture.
What can I use instead of edible gold luster dust?
If you don’t have edible gold luster dust, you have several alternatives that will still give your mirror glaze a beautiful shimmer. First, you can use a high-quality pearlescent or iridescent dust (labeled “edible”) — it will give a silvery-pink sheen instead of gold, which is lovely with the pink food coloring. Second, you can skip the luster dust entirely and use a combination of pink and yellow food coloring to create a warm rose gold hue — the color will be flat (no shimmer) but still beautiful. Third, edible gold leaf or gold flakes can be applied to the surface after glazing for a different kind of gold effect. I’ve also used a tiny pinch of turmeric mixed with pink food coloring in a pinch — it creates a warm, earthy gold tone, though it adds a very subtle flavor. For the most authentic rose gold shimmer, I recommend ordering edible gold luster dust online or picking it up at a baking supply store — it lasts forever and a little goes a long way.
How do I unmold the frozen bombs without breaking them?
Unmolding frozen bombs is easier than you think if you follow a few simple techniques. First, make sure the bombs are fully frozen — at least 4 hours, ideally overnight. If they’re even slightly soft, they’ll be fragile. To unmold, gently flex the silicone mold from the edges, working your way around in a circle. You should hear a slight pop or feel the bomb release from the mold. If it’s stuck, let it sit at room temperature for 30–60 seconds — just enough to soften the very surface of the shell, which will release its grip on the mold. Never pull or twist the bomb — you’ll break the shell. If you’re using a plastic wrap-lined tin, simply lift the edges of the plastic wrap to remove the bomb. Once unmolded, place each bomb on a wire rack set over a baking sheet for glazing. Handle them gently — the shells are durable when frozen but can crack if dropped. I always keep a backup bomb in the freezer just in case!
Can I use store-bought raspberry puree instead of making my own?
Absolutely! Store-bought raspberry puree is a fantastic time-saver and works perfectly in this recipe. I often use Boiron brand raspberry puree, which you can find at specialty food stores or online. It’s made from strained raspberries with no added sugar, so you have full control over the sweetness. If you’re using store-bought puree, check the label for added sugar or other fruits — some brands add apple or grape juice as fillers, which can alter the flavor. Pure raspberry or pure lychee puree is what you want. The texture is usually perfectly smooth, so you can skip the straining step. One thing to note: store-bought purees are often thicker than homemade because they’re reduced or have natural pectin — this is actually a bonus for these bombs because it gives the shell a firmer set. If your puree seems very thick, add a tablespoon of water to thin it slightly before heating.
What is the best way to store leftover mirror glaze?
Honestly, mirror glaze is best used fresh, but if you have leftovers, you can store it and reheat it gently. Pour any leftover glaze into an airtight container and refrigerate for up to 3 days. The glaze will solidify into a firm, jelly-like mass because of the gelatin. To reuse it, cut it into small pieces and place them in a heatproof bowl set over a pan of simmering water (double-boiler method). Warm it gently, stirring occasionally, until it melts back into a liquid. Do not microwave it — the heat is too uneven and can break the emulsion. Once melted, you may need to add a teaspoon of warm water to thin it to the right consistency. The shine won’t be as brilliant as the first time — reheating slightly dulls the gloss — but it will still work for a second batch of bombs or for drizzling over cakes or ice cream. I usually just make enough for the job and enjoy the leftovers as a sweet spoonful!
Share Your Version!
I can’t wait to see your rose gold lychee raspberry mirror glaze bombs! Drop a comment below with a star rating — tell me how the cream heart turned out, or what variation you tried. Did you go with the passionfruit-mango twist? Or maybe you added a pinch of cardamom from your spice drawer? Every kitchen brings something unique to the table, and I love hearing your stories.
Snap a photo of your creation and tag me on Instagram or Pinterest — I’m @chefrecipes2 on Pinterest. I always share my favorite reader recreations in my stories. And if you have a question about the recipe, don’t hesitate to ask in the comments. I read every single one and answer as quickly as I can. From my NYC kitchen to yours — I hope this recipe brings as much warmth to your table as it does to mine. — Sara 🧡
📸 Made this recipe? I’d love to see it! Tag your photo on social media with #CheeryChop and mention @chefrecipes2 on Pinterest. 🌟 Don’t forget to leave a star rating and comment below — your feedback helps me create more recipes you’ll love!
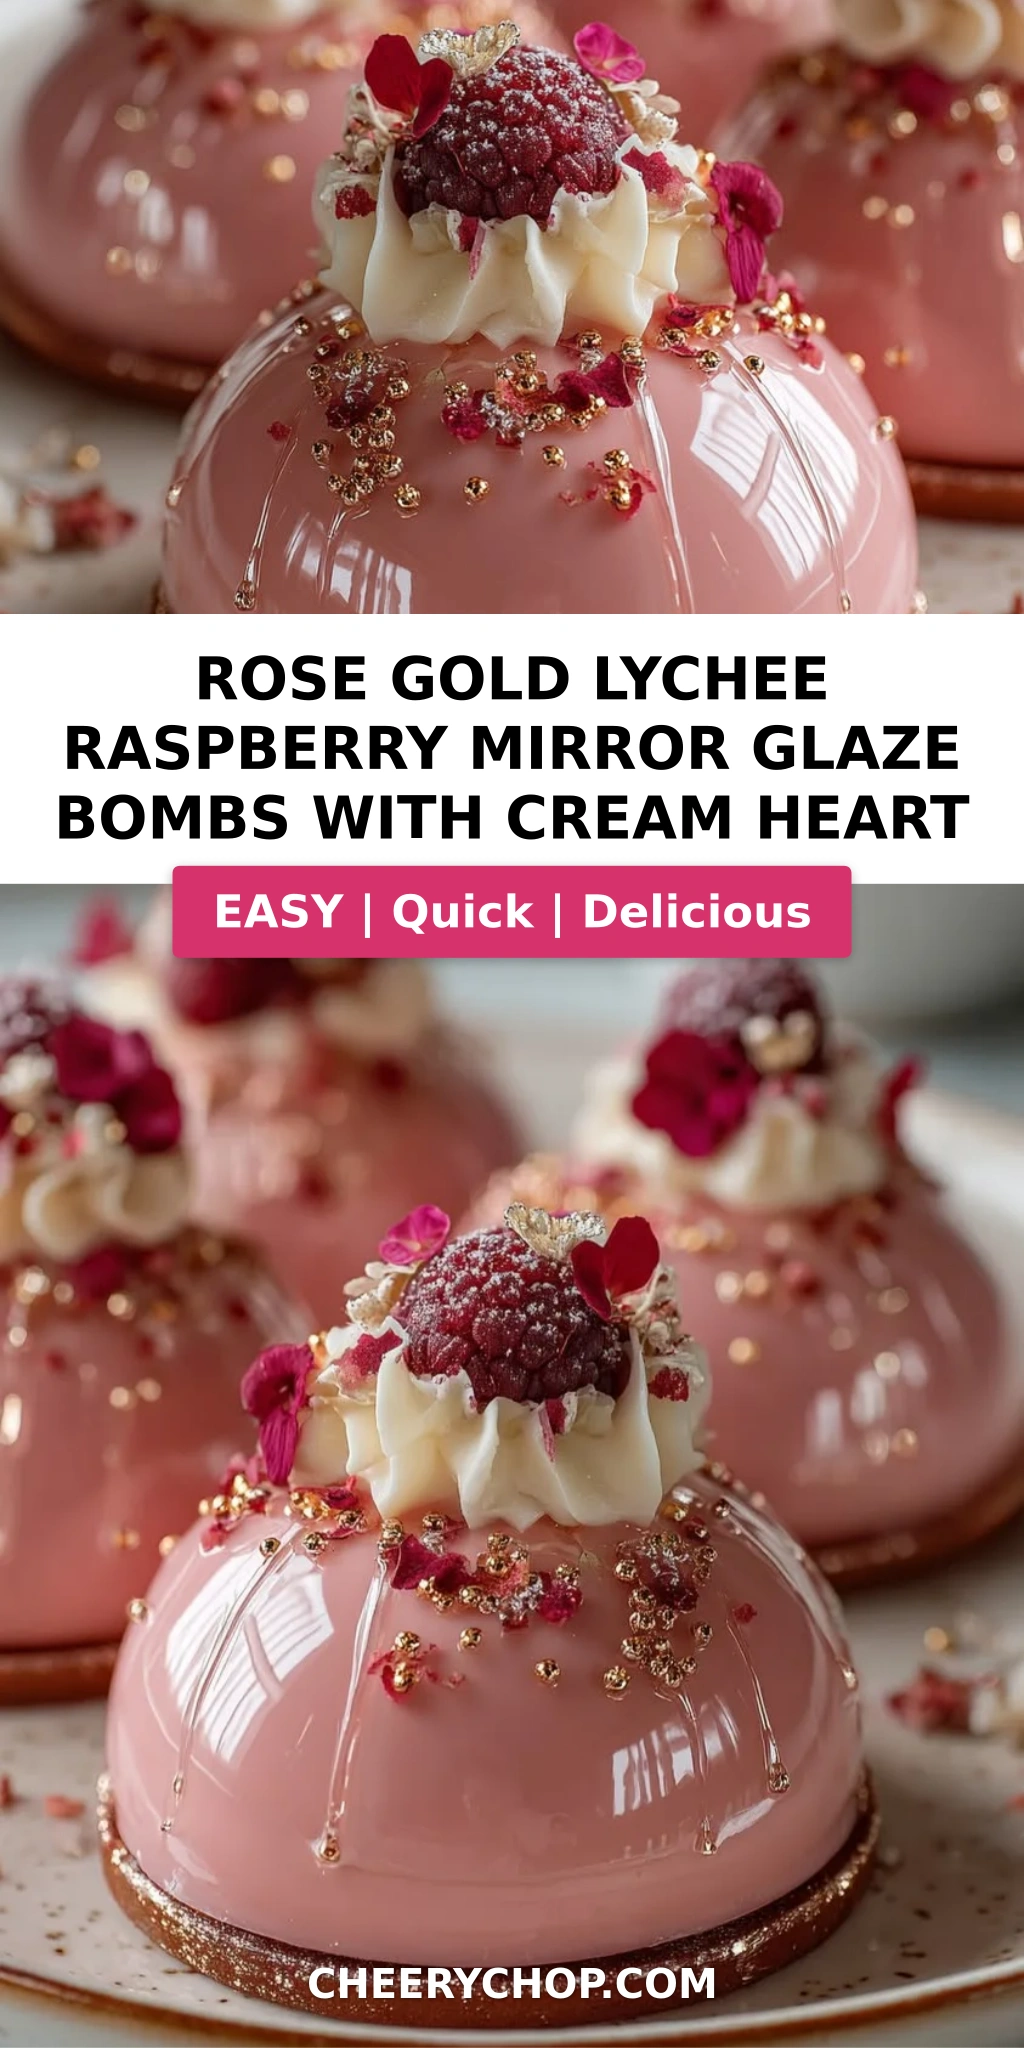
Love This Recipe? Save It to Pinterest!
If you enjoyed this Rose Gold Lychee Raspberry Mirror Glaze Bombs with Cream Heart recipe, don’t let it get lost in your browser tabs! 😄 Pin it now so you can find it again anytime — and explore hundreds more tried-and-tested recipes waiting for you on my Pinterest boards.
👉 Follow Sara on Pinterest @chefrecipes2
📌 Pin this recipe · 🔁 Re-pin your favorites · 💬 Tag me when you make it — I love seeing your creations!
Rose Gold Lychee Raspberry Mirror Glaze Bombs with Cream Heart
Rose Gold Lychee Raspberry Mirror Glaze Bombs with Cream Heart
- Yield: 6 1x
Ingredients
- For the Lychee Raspberry Shells:
- 1 1/2 cups raspberry puree
- 1/2 cup lychee puree
- 1/2 cup coconut milk
- 1/3 cup granulated sugar
- 2 tsp gelatin powder
- 2 tbsp cold water
- 1 tsp lemon juice
- Pinch of salt
- For the Cream Heart:
- 1 cup mascarpone cheese
- 1/2 cup heavy whipping cream
- 3 tbsp powdered sugar
- 1 tsp vanilla extract
- For the Rose Gold Mirror Glaze:
- 1 cup white chocolate, finely chopped
- 1/2 cup sweetened condensed milk
- 1/4 cup water
- 1 tbsp gelatin powder
- 3 tbsp cold water
- 1 tsp vanilla extract
- A few drops pink food coloring
- 1/2 tsp edible gold luster dust
- For Garnish (optional):
- 2 tbsp freeze-dried raspberries, crushed
- 1 tbsp edible rose petals
- Edible gold flakes
Instructions
- Bloom gelatin in cold water for 5 minutes.
- Heat raspberry puree, lychee puree, coconut milk, sugar, salt, and lemon juice until warm and smooth. Remove from heat and stir in bloomed gelatin until fully dissolved.
- Pour a thin layer of the mixture into silicone molds, coating the sides evenly. Chill until partially set.
- Whip mascarpone, heavy cream, powdered sugar, and vanilla extract until light and fluffy.
- Fill the center of each shell with the cream filling, leaving a small border around the edges.
- Cover with remaining fruit mixture and freeze for at least 4 hours until fully firm.
- For the mirror glaze, bloom gelatin in cold water for 5 minutes.
- Heat sweetened condensed milk and water until steaming. Remove from heat and stir in gelatin until dissolved.
- Pour over white chocolate and mix until smooth. Add vanilla extract, pink food coloring, and edible gold luster dust until a rose gold sheen forms.
- Allow glaze to cool until glossy and pourable.
- Unmold frozen bombs and place on a wire rack. Pour mirror glaze evenly over each bomb, letting it drip naturally.
- Let excess set before transferring to serving plates.
- Finish with crushed freeze-dried raspberries, rose petals, and edible gold flakes.
- Serve chilled.
Nutrition
- Calories: 425
- Sugar: 33g
- Fat: 28g
- Carbohydrates: 40g
- Protein: 6g
Tried This Recipe? Leave a Comment!
Did you make this recipe? I’d love to hear how it turned out! Please leave a comment and a rating below. Your feedback helps other home cooks and supports cheerychop.com!
For more delicious inspiration, follow me on Pinterest!


