
Table of Contents
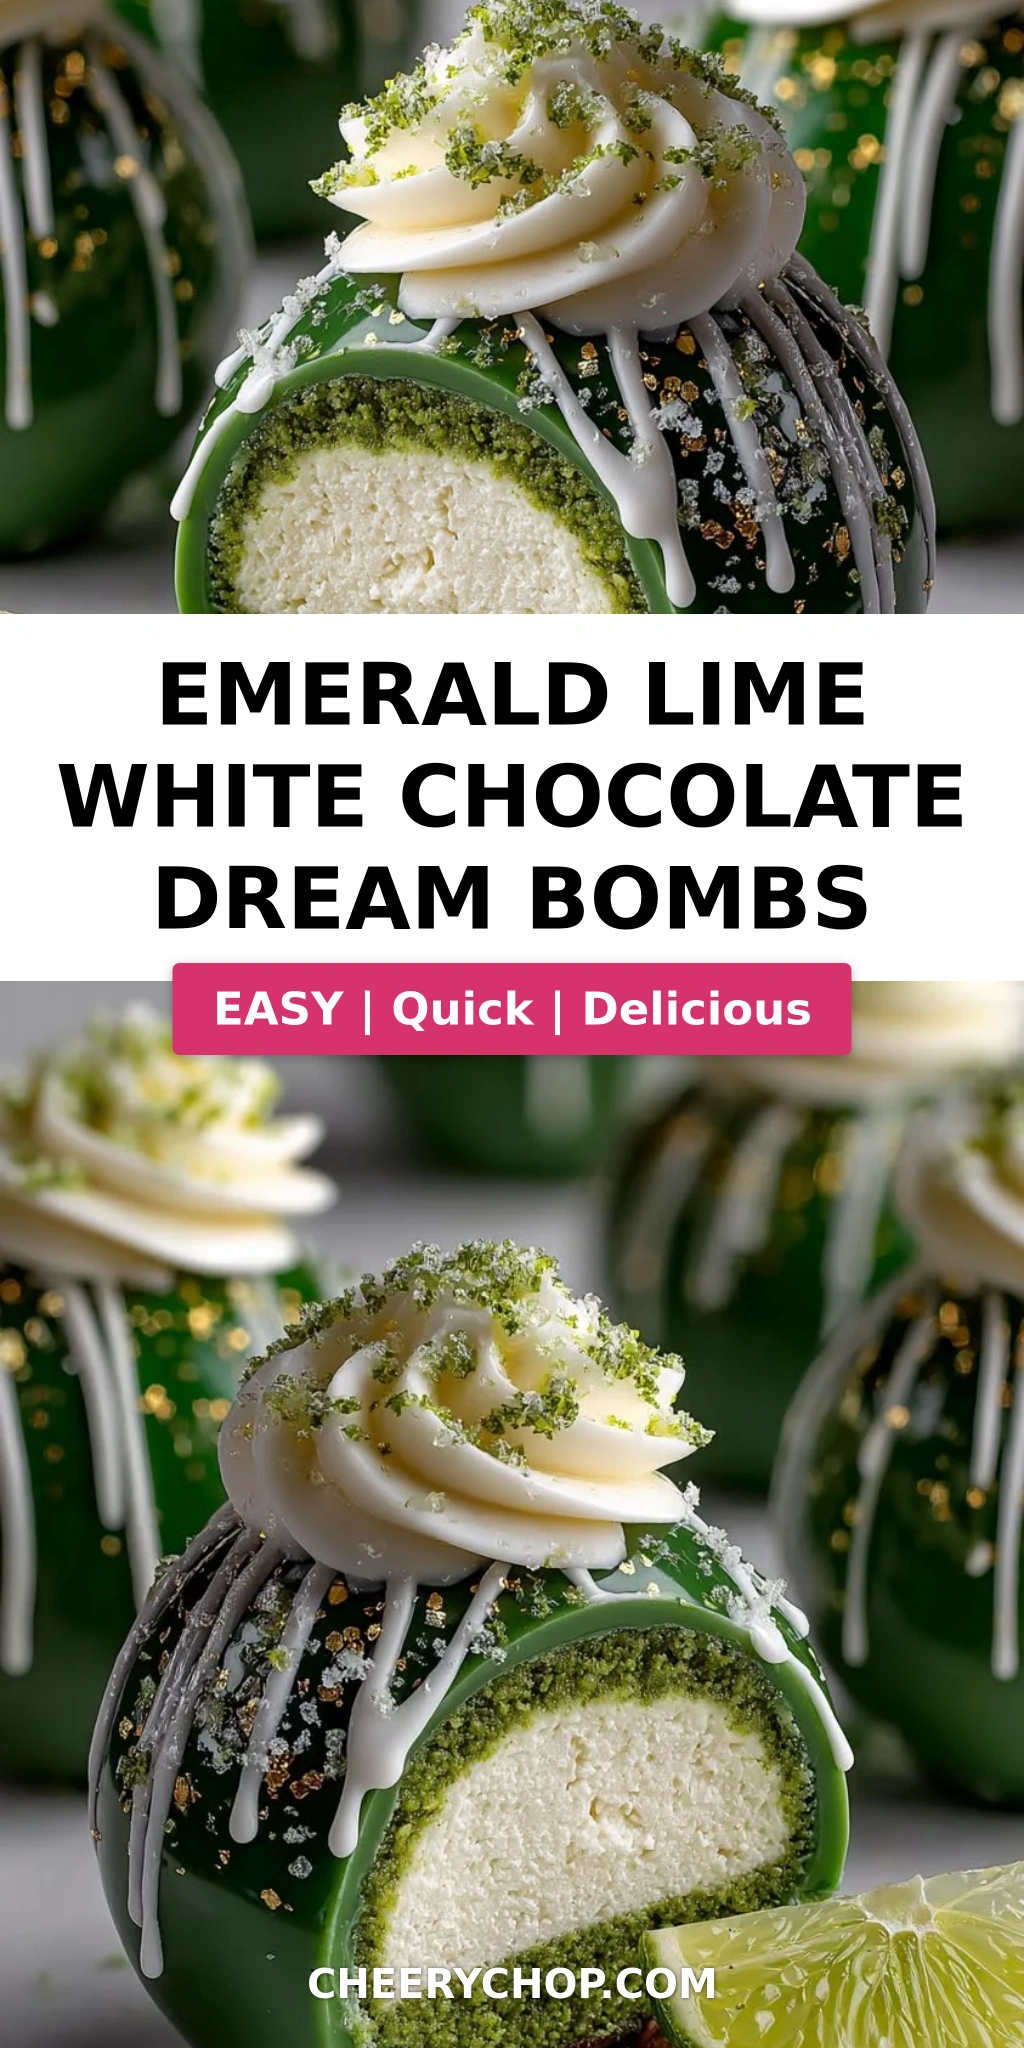
Emerald Lime White Chocolate Dream Bombs with Emerald Mirror Glaze – A Stunning No-Bake Dessert
I’ll never forget the first time I tasted a perfect white chocolate lime creation. It was during my Paris pastry training — my French chef insisted that the best desserts balance richness with bright acidity. Years later, now a New York City food blogger and home cook, I still chase that harmony. These Emerald Lime White Chocolate Dream Bombs are my homage to that lesson: a no-bake dessert that pairs silky white chocolate shells with a tangy lime-spiked center, all wrapped in a stunning emerald mirror glaze that glistens like a jewel.
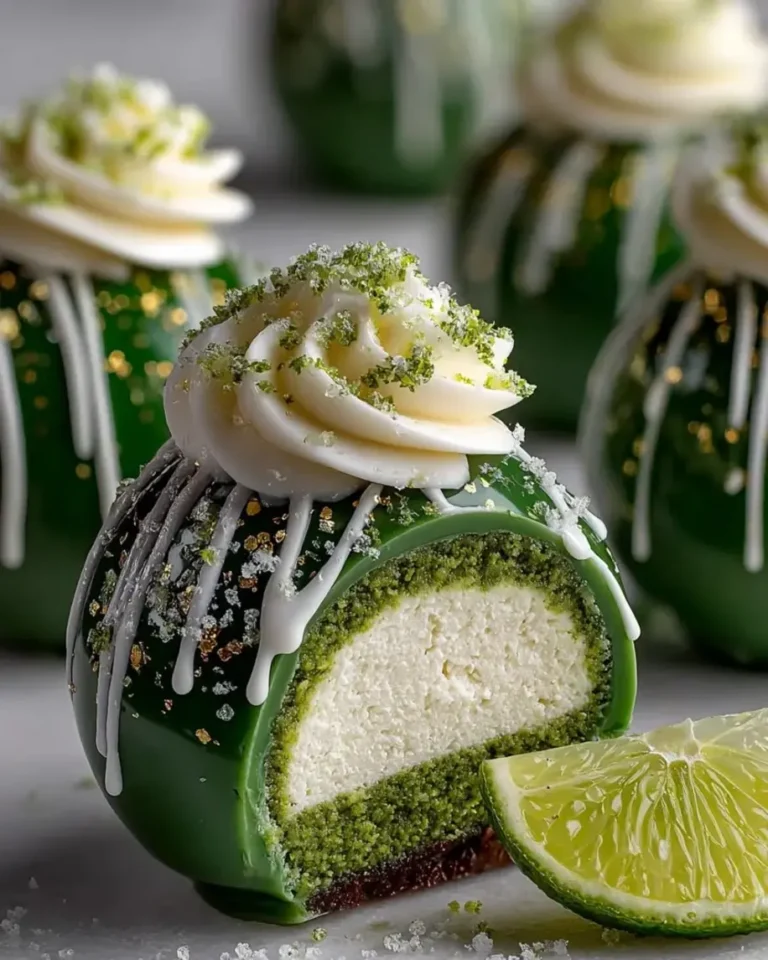
The first bite cracks open the delicate white chocolate coating. Inside, a luscious vanilla mascarpone cream meets the zesty kick of fresh lime. The mirror glaze — tinted emerald green with a hint of edible pearl luster — gives each bomb a mirror-like finish that catches the light. It’s like eating a piece of art: creamy, tart, sweet, and visually breathtaking. My Moroccan grandmother would have called it “baraka” — a blessed treat for special occasions.
I’ve carefully developed this recipe to be foolproof for home bakers. The key is patience with the gelatin-based glaze and the freezing step. One mistake many make is using bottled lime juice — you need fresh for both the shell and glaze to get that bright, natural flavor. I’ll show you exactly how to bloom gelatin, temper the chocolate mixture, and pour the glaze so it coats smoothly. Follow my tested method and you’ll get gorgeous, professional-looking lime white chocolate dessert bombs at home.
Why This Emerald Lime White Chocolate Dream Bombs Recipe Is the Best
The secret lies in the balance of flavors. Most white chocolate bombs are overly sweet, but my version cuts through the richness with fresh lime zest and juice in the shell itself. I learned this trick while cooking alongside my mother in Morocco: we’d add a squeeze of lemon to balance tagines. Here, lime does the same for white chocolate. The result is a bomb that’s tart, sweet, and completely addictive.
Texture is everything. The white chocolate shell needs to be thin enough to crack easily but sturdy enough to hold the creamy center. My French training taught me to use a precise ratio of heavy cream and whole milk to white chocolate, plus a touch of gelatin for structure. The vanilla cream center uses mascarpone cheese, which adds a silky richness without being heavy. Together, they create a melt-in-your-mouth experience.
This recipe is surprisingly approachable for a dessert that looks so high-end. No baking required — just careful heating, chilling, and a glazing step that seems intimidating but is actually very forgiving. I’ve tested it multiple times to ensure beginners can succeed. Plus, you can make the components ahead, which is a lifesaver for parties. Trust me — once you master this, people will think you took a pastry course!
Emerald Lime White Chocolate Dream Bombs Ingredients
I pick up my white chocolate from the French market near my apartment in the West Village — the Callebaut bricks are my go-to for that creamy, non-waxy melt. For limes, I always buy extra because I love using the zest in everything. And mascarpone? The one from the Italian import shop gives the best texture.
Ingredients List
- For the Lime White Chocolate Shells:
- 1 1/2 cups whole milk
- 3/4 cup white chocolate, finely chopped
- 1/2 cup heavy cream
- 1/3 cup granulated sugar
- 3 tbsp fresh lime juice
- 1 tbsp lime zest
- 2 tsp gelatin powder
- 2 tbsp cold water
- Pinch of salt
- For the Vanilla Cream Center:
- 1 cup mascarpone cheese
- 1/2 cup heavy whipping cream
- 3 tbsp powdered sugar
- 1 tsp vanilla bean paste
- For the Emerald Mirror Glaze:
- 1 cup white chocolate, finely chopped
- 1/2 cup sweetened condensed milk
- 1/4 cup water
- 1 tbsp gelatin powder
- 3 tbsp cold water
- 1 tsp lime juice
- 1/2 tsp edible pearl luster dust
- Green food coloring, as needed
- For Garnish (optional):
- 1 tbsp lime zest
- 1 tbsp white chocolate curls
- Edible gold flakes
Ingredient Spotlight
White Chocolate: The star of both shell and glaze. Use a good-quality white chocolate (I prefer Callebaut or Ghirardelli) with at least 30% cocoa butter. Avoid chips that contain stabilizers — they won’t melt smoothly. Substitute: white candy melts (less creamy, still work for shell but not glaze).
Gelatin: Essential for setting the shells and glaze. I use Knox gelatin powder. Bloom it in cold water exactly 5 minutes — no less, no more. Substitution: agar-agar (vegan, but results in different texture — less silky).
Mascarpone Cheese: The heart of the cream center. Its high fat content gives a velvety mouthfeel. You can substitute full-fat cream cheese blitzed with a tablespoon of heavy cream, but the texture will be slightly tangier and firmer.
Lime Juice & Zest: Fresh is non-negotiable. Bottled juice contains preservatives that dull the flavor. Zest adds aromatic oils that lift the entire dessert. Substitution: lemon can work, but the flavor profile shifts from floral to sharp.
| Original Ingredient | Best Substitution | Flavor / Texture Impact |
|---|---|---|
| White Chocolate (shell) | White candy melts | Less creamy, thinner shell; avoid for glaze |
| Gelatin powder | Agar-agar powder | Firmer set, less silky; use 1 tbsp agar to 2 tbsp water |
| Mascarpone | Cream cheese + 2 tbsp heavy cream | Tangier, slightly firmer center |
| Fresh lime juice | Fresh lemon juice | Brighter, less floral; reduce sugar slightly |
How to Make Emerald Lime White Chocolate Dream Bombs — Step-by-Step
This might look like a labor of love, but I promise it’s manageable even for a Sunday afternoon baking session. Each step builds on the previous one, and the results are absolutely worth it.
Step 1: Bloom the Gelatin
In a small bowl, mix 2 teaspoons gelatin powder with 2 tablespoons cold water. Stir until no lumps remain. Set aside for 5 minutes to thicken into a spongy mass. This process, called blooming, ensures the gelatin dissolves evenly without clumps.
💡 Sara’s Pro Tip: Use ice-cold water for blooming. Warm water will dissolve the gelatin too quickly and ruin its setting power.
Step 2: Make the Lime White Chocolate Shell Mixture
In a medium saucepan, combine whole milk, heavy cream, sugar, and a pinch of salt. Heat over medium heat, stirring occasionally, until the mixture is warm (about 150°F — steaming but not boiling). Remove from heat and add the bloomed gelatin, whisking until completely dissolved. Then add finely chopped white chocolate and whisk until smooth. Stir in fresh lime juice and lime zest. Set aside to cool slightly before using.
⚠️ Common Mistake to Avoid: Don’t let the milk mixture boil — it can cause the chocolate to seize or become grainy. Keep it at a gentle simmer at most.
Step 3: Coat the Molds
Pour a thin layer (about 1/8 inch) of the lime white chocolate mixture into each cavity of a silicone bomb mold. Use a small spoon or pastry brush to spread the mixture evenly up the sides, making sure there are no thin spots. Place the molds in the refrigerator for 15–20 minutes until the shells are partially set but still slightly tacky.
💡 Sara’s Pro Tip: For even shells, chill the molds for 10 minutes first, then pour in the mixture and tilt to coat. The cold mold helps the chocolate set quickly.
Step 4: Make the Vanilla Cream Center
In a mixing bowl, combine mascarpone cheese, heavy whipping cream, powdered sugar, and vanilla bean paste. Using a hand mixer or stand mixer with the whisk attachment, beat on medium speed until the mixture is light, fluffy, and holds soft peaks — about 2–3 minutes. Be careful not to over-whip, or it may become grainy.
⚠️ Common Mistake to Avoid: Over-whipping can turn the cream into butter. Stop as soon as it’s airy and holds its shape on a spoon.
Step 5: Fill and Seal the Bombs
Spoon or pipe the vanilla cream mixture into each partially set shell, filling it to just below the rim — leave a 1/4-inch border. Then pour the remaining lime white chocolate mixture over the top to seal each bomb completely. Smooth the top with a small offset spatula. Place the molds in the freezer and freeze for at least 4 hours, or until the bombs are solid.
💡 Sara’s Pro Tip: Freezing overnight is ideal. The bombs need to be rock-solid before glazing; otherwise the heat of the glaze can cause them to crack.
Step 6: Prepare the Emerald Mirror Glaze
Bloom 1 tablespoon gelatin in 3 tablespoons cold water for 5 minutes. In a small saucepan, heat sweetened condensed milk and 1/4 cup water until steaming (about 160°F). Remove from heat, add the bloomed gelatin, and whisk until fully dissolved. Pour this mixture over 1 cup finely chopped white chocolate in a heatproof bowl. Let sit for 1 minute, then whisk until smooth and glossy. Add 1 teaspoon lime juice, 1/2 teaspoon edible pearl luster dust, and green food coloring a few drops at a time until you achieve a vibrant emerald shade. Allow the glaze to cool to about 90°F — it should be slightly thickened but still pourable.
⚠️ Common Mistake to Avoid: If the glaze is too hot (above 100°F), it will melt the frozen bombs. Too cold, and it will set before you can pour. Use a thermometer for accuracy.
Step 7: Glaze the Frozen Bombs
Unmold the frozen bombs and place them on a wire rack set over a baking sheet to catch drips. Working with one bomb at a time, pour the emerald mirror glaze evenly over the top, letting it cascade down the sides. Tilt the rack gently if needed to ensure full coverage. Tap the wire rack lightly to release air bubbles. Let the excess drip off, then use a small spatula to scrape the bottom clean. Transfer to serving plates and chill for at least 10 minutes before serving to allow the glaze to set completely.
💡 Sara’s Pro Tip: For a flawless finish, make sure the bombs are completely frozen and the glaze is at the right temperature. Practice on one bomb first if you’re nervous!
Step 8: Add Garnish (Optional)
While the glaze is still tacky (or after it sets slightly), sprinkle with lime zest, white chocolate curls, and edible gold flakes. These add texture, color, and a touch of elegance. Serve immediately or keep refrigerated.
⚠️ Common Mistake to Avoid: If you add garnishes too early on wet glaze, they may sink. Wait about 1 minute after glazing for a slight tackiness.
| Step | Action | Duration | Key Visual Cue |
|---|---|---|---|
| 1 | Bloom gelatin | 5 min | Spongy, jiggly mass |
| 2 | Heat milk mixture + dissolve chocolate | 5–7 min | Smooth, glossy, no lumps |
| 3 | Coat molds | 15–20 min chill | Shells slightly tacky, not runny |
| 4 | Whip cream center | 2–3 min | Soft peaks, fluffy texture |
| 5 | Fill and seal | 4+ hours freeze | Bombs hard and solid |
| 6 | Make mirror glaze | 10–12 min | Smooth, pourable, emerald color |
| 7 | Glaze bombs | 5 min | Even glossy coating, no bare spots |
| 8 | Garnish | 2 min | Decorations stick to tacky glaze |
Serving & Presentation
Presentation is everything with these bombs. I like to serve them on a white plate to let the emerald green shine. Place one bomb in the center and dust the plate with a little lime zest or gold flakes. The contrast between the shiny glaze and the matte plate is stunning. For a dinner party, serve with a small dollop of whipped cream and a thin lime wheel on the side.
These bombs are meant to be eaten chilled, right out of the fridge. The texture is perfect when cold — the shell cracks cleanly and the cream center is almost ice-cream-like. In the summer, I sometimes serve them semi-frozen as a refreshing treat after a spicy Moroccan tagine. The lime and cream combination pairs beautifully with mint tea or a cold glass of Prosecco.
If you’re feeling extra, arrange the bombs on a mirror or acrylic dessert stand — the reflections will wow your guests. I once made a batch for a NYC rooftop party and people thought they were from a high-end patisserie. They’re that impressive.
| Pairing Type | Suggestions | Why It Works |
|---|---|---|
| Side Dessert | Fresh berries, mango sorbet | Fruit acidity cuts sweetness |
| Beverage | Prosecco, mint tea, limeade | Citrus notes echo the lime |
| Garnish | Edible flowers, micro mint, gold leaf | Adds elegance and color |
| Main Course Pairing | Grilled fish, citrus salad | Light meal followed by light dessert |
Make-Ahead, Storage & Reheating
As a busy NYC cook, I love recipes that can be prepped ahead. The bombs can be made through Step 5 (filled and frozen) up to a week before glazing. The glaze itself can be made a day ahead and stored in the fridge — just rewarm gently to 90°F before using. This makes entertaining a breeze.
| Method | Container | Duration | Reheating Tip |
|---|---|---|---|
| Refrigerator (glazed) | Airtight container | Up to 3 days | Serve cold; no reheating needed |
| Freezer (unglazed) | Freezer-safe bag/container | Up to 1 month | Glaze directly from frozen; no thawing |
| Make-Ahead | Freeze bombs + glaze separate | Bombs frozen up to 1 week | Assemble day of serving |
When storing glazed bombs, place them in a single layer without touching each other, as the glaze can stick. I like to use paper-lined containers. For the best texture, don’t freeze already-glazed bombs — the glaze may crack upon thawing. Instead, glaze only what you’ll serve within 3 days. If you have leftover unglazed bombs, simply glaze them fresh when needed.
Variations & Easy Swaps
One of the best things about this recipe is its adaptability. Whether you’re gluten-free, dairy-sensitive, or just looking for a flavor twist, there’s a variation for you. I’ve tried all of these in my own kitchen, and they each bring something special.
| Variation | Key Change | Best For | Difficulty Impact |
|---|---|---|---|
| Passion Fruit & White Chocolate | Replace lime juice with passion fruit pulp | Tropical flair, summer parties | Same |
| Dairy-Free Version | Use coconut cream + dairy-free white chocolate | Lactose intolerance, vegan diet | Medium (texture changes) |
| Lavender-Lime Bombs | Add 1 tsp dried lavender to milk infusion | Elegant, floral notes | Same |
Passion Fruit & White Chocolate Bombs
Swap the 3 tablespoons lime juice for 3 tablespoons passion fruit pulp (strained). The passion fruit seeds add a pleasant crunch if you leave them in, but I prefer to strain for a smoother glaze. The tropical flavor pairs beautifully with the white chocolate, and the glaze becomes a sunset orange. A nod to my Paris days when we used passion fruit in everything.
Dairy-Free Version
Replace whole milk with full-fat coconut milk (the canned kind), heavy cream with coconut cream, and mascarpone with a blend of coconut cream and a tablespoon of cornstarch. Use a good dairy-free white chocolate like Enjoy Life or Pascha. The texture will be a bit less stable — freeze for at least 6 hours — but the coconut-lime combination is heavenly. I tested this for a friend’s dairy-free baby shower and it was a hit.
Lavender-Lime Bombs
When I find fresh lavender at the Union Square Greenmarket, I love to infuse the milk mixture. Add 1 teaspoon dried culinary lavender buds to the milk when heating, then strain them out. The floral notes add sophistication, and the lime still cuts through. This version is perfect for spring bridal showers. Use a tiny bit of violet gel food coloring in the glaze for a pale purple emerald combo.
💡 Sara’s Pro Tip: When experimenting with flavors, keep the lime zest in the shell — it adds a brightness that supports any twist.
What are Emerald Lime White Chocolate Dream Bombs made of?
Emerald Lime White Chocolate Dream Bombs are a layered no-bake dessert. They consist of a lime-infused white chocolate shell, a creamy vanilla mascarpone center, and a glossy emerald mirror glaze. Key ingredients include white chocolate, fresh lime juice and zest, gelatin for setting, mascarpone cheese, and sweetened condensed milk for the glaze. The bombs are finished with optional garnishes like lime zest, white chocolate curls, and edible gold flakes. Each component is prepared separately and then assembled before freezing.
Can I use a different type of chocolate for Emerald Lime White Chocolate Dream Bombs?
Yes, you can substitute the white chocolate, but the flavor profile will change significantly. For the shell, you could use milk chocolate or high-quality dark chocolate (around 50-60% cocoa). However, the lime flavor will be less pronounced, and the glaze won’t be a true emerald. If using dark chocolate, reduce the lime juice slightly to avoid curdling. The mirror glaze needs a fat-based chocolate to set properly; dark chocolate works well and gives a deep blue-green glaze with green coloring. Expect a richer, less sweet result.
How long do Emerald Lime White Chocolate Dream Bombs need to set before serving?
After filling and sealing the bombs, they must freeze for at least 4 hours, preferably overnight, until completely solid. This ensures the shell holds its shape during glazing. After glazing, the bombs need only 10 minutes in the fridge to set the glaze. So total setting time is a minimum of 4 hours and 10 minutes from assembly to serving. For best results, prepare the bombs a day ahead: freeze them overnight, glaze them in the morning, and serve chilled that evening.
How should I store Emerald Lime White Chocolate Dream Bombs to keep them fresh?
Store glazed bombs in an airtight container in the refrigerator for up to 3 days. Keep them in a single layer, separated by parchment paper, to prevent sticking. For longer storage, freeze unglazed bombs (without the mirror glaze) for up to 1 month — wrap each bomb tightly in plastic wrap, then place in a freezer bag. When ready to serve, glaze the frozen bombs directly without thawing. Never refreeze already-glazed bombs, as the glaze may crack or become cloudy.
What is the best way to achieve a smooth emerald mirror glaze?
A smooth, shiny mirror glaze depends on three things: proper gelatin blooming, correct temperature, and straining. Always bloom gelatin in cold water for exactly 5 minutes. Heat the condensed milk mixture to just steaming (160°F), then dissolve the gelatin completely. Pour the liquid over finely chopped white chocolate and whisk until silky. Use an immersion blender to remove air bubbles — that’s a pro trick from my Paris training. Cool the glaze to 90°F, which is optimal for pouring. Lastly, strain through a fine-mesh sieve before pouring if you see any lumps.
Can I make Emerald Lime White Chocolate Dream Bombs without a mold?
Yes, you can shape the bombs without a silicone mold by using small ice cream scoops or even greased measuring cups as molds. However, the process is trickier and the bombs won’t be perfectly spherical. Alternatively, you can form the white chocolate mixture into balls by hand, freeze them, then dip in the glaze. For a flat-topped version, pour the chocolate mixture into greased mini muffin tins, fill with cream, and seal. The classic bomb shape is easiest with a proper silicone bomb mold, which I recommend for beginners.
Are these bombs suitable for a gluten-free diet?
Yes, the recipe is naturally gluten-free as written. None of the ingredients — white chocolate, gelatin, mascarpone, fresh lime — contain gluten. However, always check labels on store-bought white chocolate, as some brands may include wheat-based additives. For the garnish, ensure edible gold flakes and white chocolate curls are certified gluten-free. If you’re celiac, I recommend choosing white chocolate from a dedicated gluten-free brand like Divvies or Pascha. The recipe remains delicious and safe without any substitutions.
Why is my mirror glaze not shiny?
A dull mirror glaze usually results from one of three issues. First, the gelatin may have been overheated — never exceed 180°F when dissolving. Second, the glaze might be too cold when poured; it should be around 90°F and still liquid. Third, air bubbles can cause tiny craters that disrupt the shine. To fix, always use an immersion blender to emulsify the glaze, then pass it through a fine strainer. Another tip from my chef: add 1 tablespoon of light corn syrup during preparation — it boosts glossiness. If the glaze is already dull, you can’t reheat it once set; start fresh.
Can I use lime juice from a bottle?
I strongly recommend against it. Bottled lime juice often contains preservatives and lacks the bright, natural acidity of fresh limes. It can also alter the gelatin set, making the shell less firm. Fresh lime zest is equally important for aroma. For this recipe, you really want the real thing. If you absolutely must use bottled, reduce the amount by 1 tablespoon and add extra zest to compensate. But honestly, a trip to the produce aisle for a couple of limes makes all the difference in these bombs.
What can I serve with these bombs for a party look?
For a show-stopping presentation, place each emerald bomb on a small pedestal or a cake stand. Surround with fresh berries, mint sprigs, and a dusting of powdered sugar. If you have edible flower petals, scatter them around the plate. A drizzle of leftover lime glaze on the plate adds elegance. For a themed party, you can customize the garnishes: use patriotic colors for the Fourth of July with blueberries and star-shaped gold flakes, or go all green for St. Patrick’s Day. The bombs already look like gems — your job is just to frame them.
Share Your Version!
I hope these Emerald Lime White Chocolate Dream Bombs bring a little sparkle to your kitchen. They’re a joy to make — especially when you see that glossy emerald glaze come together. If you give them a try, please leave a star rating below and let me know how they turned out. Did you try a variation? I’d love to hear about it.
Snap a photo of your bombs and share it on Instagram or Pinterest with the hashtag #cheerychop — tag me @cheerychop so I can see your creations. And if you’re wondering about a particular swap or technique, drop your question in the comments. I read every single one and answer personally.
From my NYC kitchen to yours — I hope this recipe brings as much warmth to your table as it does to mine. — Sara 🧡
Did you make this recipe? Let me know below! ⭐⭐⭐⭐⭐
What’s your favorite way to decorate these bombs? I’m always looking for new garnish ideas!
Love This Recipe? Save It to Pinterest!
If you enjoyed this Emerald Lime White Chocolate Dream Bombs recipe, don’t let it get lost in your browser tabs! 😄 Pin it now so you can find it again anytime — and explore hundreds more tried-and-tested recipes waiting for you on my Pinterest boards.
👉 Follow Sara on Pinterest @chefrecipes2
📌 Pin this recipe · 🔁 Re-pin your favorites · 💬 Tag me when you make it — I love seeing your creations!
Emerald Lime White Chocolate Dream Bombs

A decadent dessert featuring lime-infused white chocolate shells, a creamy vanilla center, and a striking emerald mirror glaze.
- Yield: 6 1x
Ingredients
- For the Lime White Chocolate Shells:
- 1 1/2 cups whole milk
- 3/4 cup white chocolate, finely chopped
- 1/2 cup heavy cream
- 1/3 cup granulated sugar
- 3 tbsp fresh lime juice
- 1 tbsp lime zest
- 2 tsp gelatin powder
- 2 tbsp cold water
- Pinch of salt
- For the Vanilla Cream Center:
- 1 cup mascarpone cheese
- 1/2 cup heavy whipping cream
- 3 tbsp powdered sugar
- 1 tsp vanilla bean paste
- For the Emerald Mirror Glaze:
- 1 cup white chocolate, finely chopped
- 1/2 cup sweetened condensed milk
- 1/4 cup water
- 1 tbsp gelatin powder
- 3 tbsp cold water
- 1 tsp lime juice
- 1/2 tsp edible pearl luster dust
- Green food coloring, as needed
- For Garnish (optional):
- 1 tbsp lime zest
- 1 tbsp white chocolate curls
- Edible gold flakes
Instructions
- Bloom gelatin in cold water for 5 minutes.
- Heat milk, heavy cream, sugar, and salt until warm. Remove from heat and stir in the bloomed gelatin until fully dissolved.
- Add white chocolate and whisk until smooth. Stir in lime juice and lime zest.
- Pour a thin layer of the mixture into silicone bomb molds, coating the sides evenly. Chill until partially set.
- Whip mascarpone, heavy cream, powdered sugar, and vanilla bean paste until light and fluffy.
- Fill the center of each shell with the vanilla cream mixture, leaving a small border around the edges.
- Seal with the remaining lime white chocolate mixture and freeze for at least 4 hours until fully firm.
- For the mirror glaze, bloom gelatin in cold water for 5 minutes.
- Heat sweetened condensed milk and water until steaming. Remove from heat and stir in gelatin until dissolved.
- Pour over white chocolate and whisk until smooth and glossy. Add lime juice, pearl luster dust, and green food coloring to create a vibrant emerald finish.
- Allow the glaze to cool until slightly thickened but still pourable.
- Unmold the frozen bombs and place on a wire rack. Pour the emerald mirror glaze evenly over each bomb, allowing excess glaze to drip away.
- Transfer to serving plates and chill for 10 minutes before serving.
- Finish with lime zest, white chocolate curls, and edible gold flakes.
Nutrition
- Calories: 430
- Sugar: 33g
- Fat: 29g
- Carbohydrates: 38g
- Protein: 6g
Tried This Recipe? Leave a Comment!
Did you make this recipe? I’d love to hear how it turned out! Please leave a comment and a rating below. Your feedback helps other home cooks and supports cheerychop.com!
For more delicious inspiration, follow me on Pinterest!


