
Table of Contents
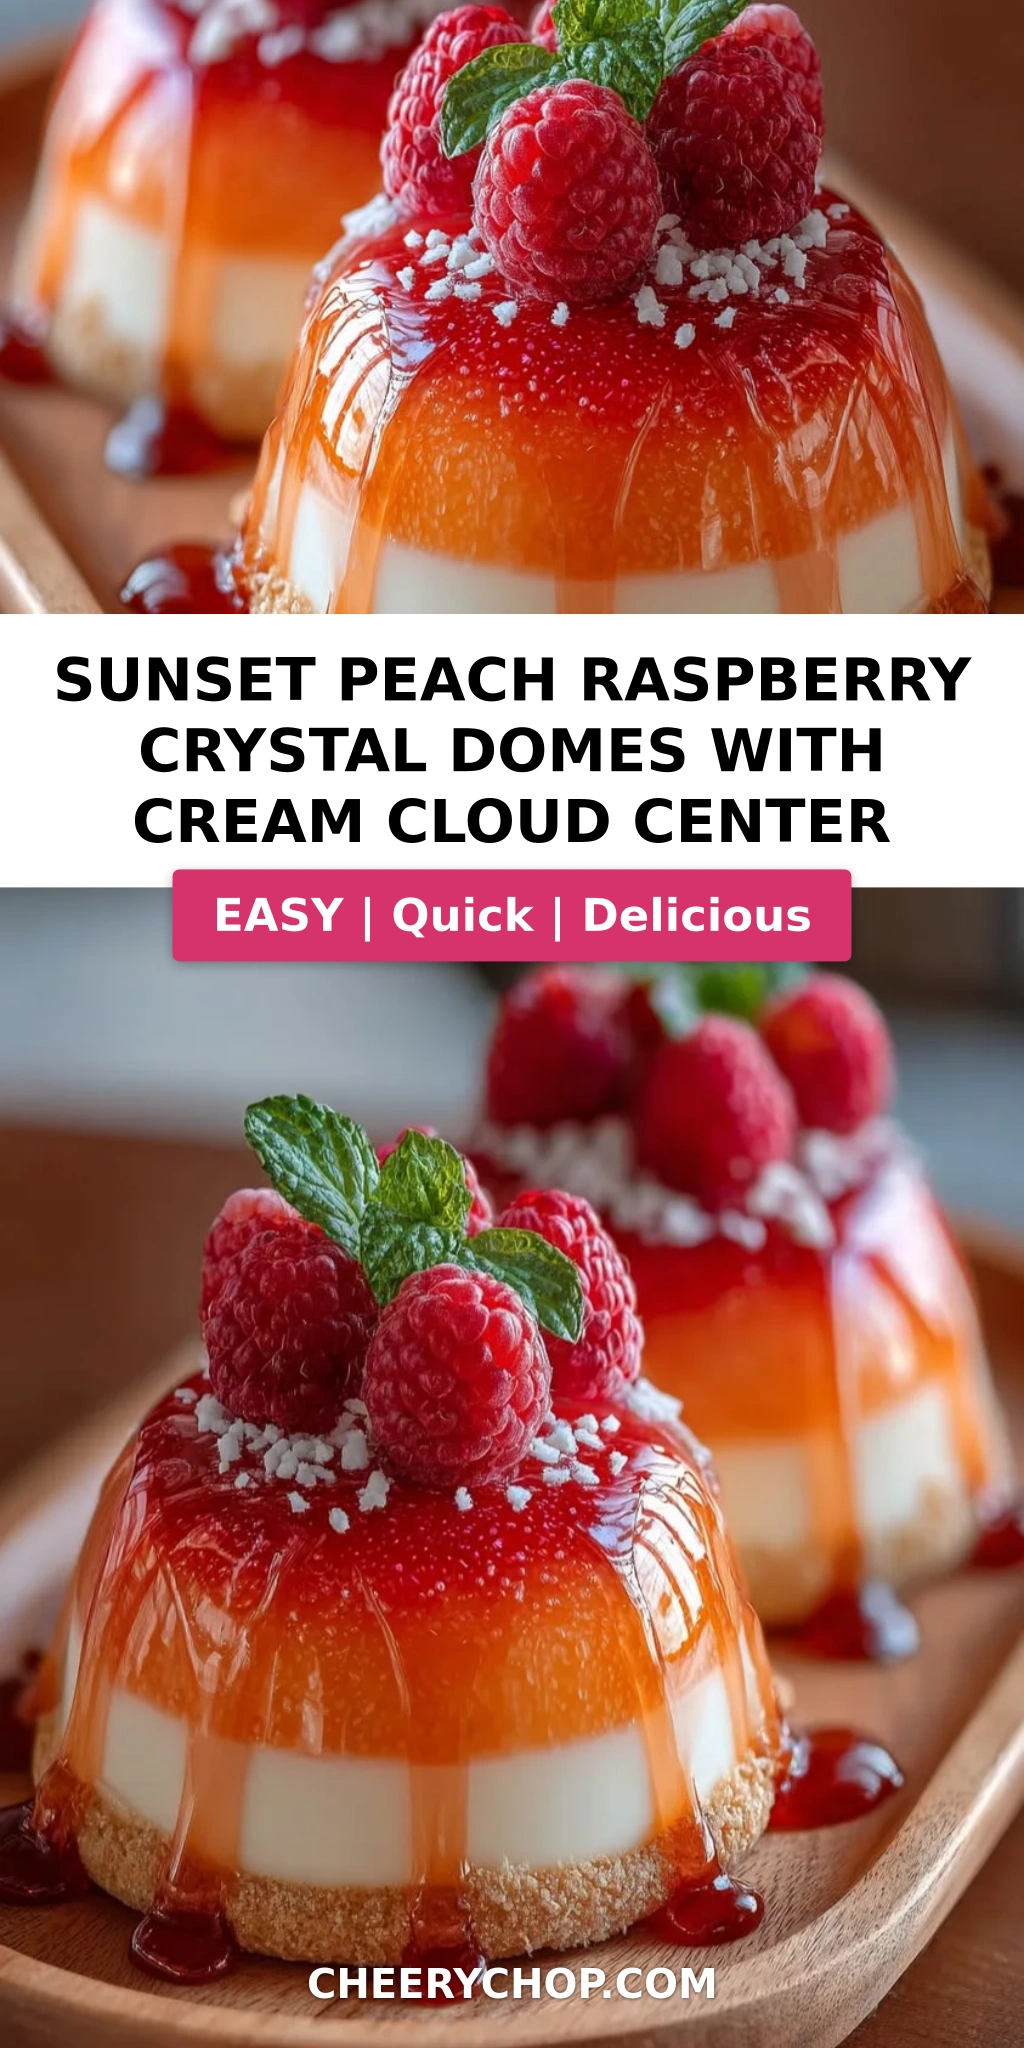
Sunset Peach Raspberry Crystal Domes with Cream Cloud Center – A No-Bake Showstopper
I still remember the first time I made these Sunset Peach Raspberry Crystal Domes with Cream Cloud Center — I was standing in my tiny Paris apartment kitchen, dreaming of the peach orchards my grandmother used to take me to in Marrakech. The way the afternoon sun lit up the fruit, the way the juices ran down your chin… I wanted to capture that golden-pink glow in a single bite. This easy no-bake dessert recipe is the result of that memory meeting my French pastry training. Every spoonful gives you a silky peach raspberry mousse, a hidden cream cloud center that melts on your tongue, and a jewel-like crystal glaze that shatters ever so slightly as you dig in. This is the dessert that says “I spent hours on this” — even though we both know it’s secretly simple to assemble.
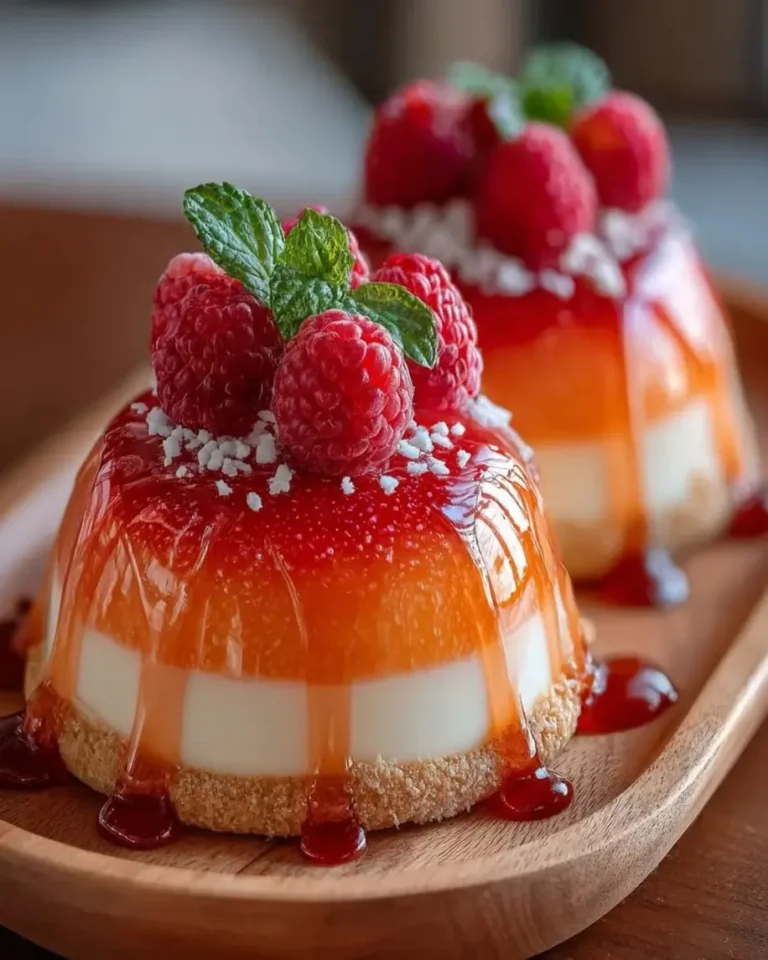
The beauty of this peach raspberry mousse domes recipe lies in the contrast: the bright, tangy raspberry puree cutting through the sweet peach, the luscious cream cheese mousse wrapped around a cloud-light center, and that gorgeous translucent glaze in sunset shades of coral and blush. When you lift the lid on a dinner party and these domes are sitting there, gleaming like edible gemstones, your guests will actually gasp. I’ve seen it happen every single time. The texture is pure silk — no oven required, just a little patience while the freezer does the work. And that crystal glaze? It sets to a delicate, shiny shell that cracks open with the gentlest tap of your spoon.
What makes my version of these crystal dome desserts truly stand out is the three-part structure — a crunchy vanilla cookie base, a luscious mousse body with a surprise cream center, and that shimmering glaze that looks like stained glass. I’ve tested this recipe at least a dozen times in my NYC kitchen to make sure it works for home cooks. The key is in how you bloom the gelatin and how you freeze the cream centers so they hold their shape. One common mistake people make is not freezing the cream cloud centers long enough — they need to be rock-solid before you embed them in the mousse. I’ll walk you through every detail so your domes come out perfect on the very first try.
Why This Sunset Peach Raspberry Crystal Domes Recipe Is the Best
The flavor secret here comes straight from my Moroccan roots — the combination of peach and raspberry is pure North African sunshine, but I elevate it with a French technique called a mousse légère, where whipped cream is folded into a cream cheese base for an airy yet stable texture. In my mother’s kitchen in Morocco, we’d have used fresh-picked peaches from the medina market, but here in New York I rely on high-quality frozen purees from the farmers market in Union Square, which give consistent results year-round. The cream cheese cuts the sweetness just enough so the fruit shines through bright and clear.
Perfected texture is everything with a no-bake dessert, and I’ve dialed in the gelatin ratio so the mousse sets firmly enough to unmold cleanly but stays silky on the palate. The cream cloud center is a trick I learned at Le Cordon Bleu — it’s essentially a stabilized cream cheese chantilly that you freeze into small pucks before embedding in the mousse. This creates a surprise pocket of velvety richness at the heart of each dome. The crystal glaze, made from white chocolate and condensed milk with a touch of gelatin, sets with a glossy finish that doesn’t run or weep — it stays picture-perfect for hours.
This recipe is foolproof and fast because I’ve streamlined the process so that while the cream centers are freezing, you can prepare the mousse and the glaze. No baking, no complicated equipment — just a good silicone dome mold and a piping bag (or a zip-top bag with a corner snipped off). I’ve also included substitutions that work, so whether you’re dairy-free or gluten-free, you can still enjoy these stunning crystal dome desserts. And because everything is made ahead and frozen, you can assemble and glaze them the day of your party with zero stress.
Sunset Peach Raspberry Crystal Domes Recipe Ingredients
I source my peaches and raspberries from the Greenmarket in Union Square when they’re in season, but high-quality frozen purees are my secret weapon for this peach raspberry mousse domes recipe. The cream cheese I always use is full-fat Philadelphia — it gives the most stable, luxurious texture. And for the crystal glaze, I use a good-quality white chocolate like Valrhona or Ghirardelli, because the flavor really matters when it’s the star of the show. Let me walk you through what you’ll need.
Ingredients List
- For the Peach Raspberry Mousse: 3/4 cup peach puree
- 3/4 cup raspberry puree
- 8 oz cream cheese, softened
- 1/2 cup powdered sugar
- 1 cup heavy cream
- 1 tsp vanilla extract
- 1 tbsp gelatin powder
- 3 tbsp warm water
- For the Cream Cloud Center: 4 oz cream cheese, softened
- 1/4 cup powdered sugar
- 1/4 cup heavy cream
- 1 tsp vanilla extract
- For the Crystal Glaze: 1 cup white chocolate, finely chopped
- 1/2 cup sweetened condensed milk
- 1 tbsp gelatin powder
- 3 tbsp warm water
- Peach food coloring, as needed
- Pink food coloring, as needed
- For the Cookie Base: 1 cup vanilla cookie crumbs
- 3 tbsp melted butter
- 1 tbsp granulated sugar
- Pinch of salt
- For Garnish (optional): Fresh peach slices, fresh raspberries, white chocolate curls
Ingredient Spotlight
Peach Puree and Raspberry Puree: These are the soul of the recipe. Look for purees with no added sugar so you control the sweetness. If using fresh fruit, blanch the peaches to remove skins, then blend and strain. For raspberries, press through a fine-mesh sieve to remove seeds. Frozen fruit works beautifully — just thaw, blend, and strain.
Cream Cheese: Full-fat, block-style cream cheese is non-negotiable here. The lower-fat versions contain more water and can make the mousse runny. Let it come to room temperature so it blends silky-smooth with no lumps. In a pinch, you can use mascarpone for a richer, even softer texture.
Gelatin Powder: This is what gives both the mousse and the glaze their structure. Use unflavored powdered gelatin (like Knox). Bloom it in cool water for 5 minutes, then gently warm to dissolve. If you need a vegetarian option, agar-agar works but behaves differently — use 1 tsp agar powder per 1 tbsp gelatin, and simmer it in liquid for 2 minutes to activate.
| Original Ingredient | Best Substitution | Flavor / Texture Impact |
|---|---|---|
| Cream cheese (mousse) | Mascarpone | Richer, softer, less tangy |
| Heavy cream (mousse) | Coconut cream (chilled, solid part) | Dairy-free, slight coconut flavor, less stable |
| White chocolate (glaze) | Dairy-free white chocolate | Slightly different melt, still glossy |
| Vanilla cookie crumbs | Graham cracker crumbs or shortbread | Slightly different sweetness, still crunchy |
| Gelatin powder | Agar-agar (1 tsp agar per 1 tbsp gelatin) | Vegetarian, firmer set, requires simmering |
How to Make Sunset Peach Raspberry Crystal Domes — Step-by-Step
I promise this is easier than it looks. The key is to work in stages and let the freezer do the heavy lifting. Here’s exactly how I build these crystal dome desserts in my NYC kitchen.
Step 1: Bloom the Gelatin
Sprinkle the gelatin powder over the warm water in a small bowl. Do not stir — let it sit undisturbed for 5 minutes until the grains absorb the water and form a firm, jiggly mass. This process, called blooming, ensures the gelatin dissolves evenly and gives the mousse a smooth, lump-free texture. After 5 minutes, gently warm the bowl over a pan of simmering water or microwave in 5-second bursts until the gelatin is liquid but not hot.
💡 Sara’s Pro Tip: If you microwave the gelatin, stop the moment it becomes liquid — overheated gelatin loses its setting power and your mousse won’t hold its shape. Warm, not hot, is the goal.
Step 2: Make the Peach Raspberry Mousse
In a large bowl, beat the softened cream cheese and powdered sugar together until completely smooth — no lumps allowed. Mix in the peach puree, raspberry puree, and vanilla extract. The mixture will look thin and slightly separated at this point; that’s perfectly fine. In a separate cold bowl, whip the heavy cream to soft peaks — it should hold a gentle curl when you lift the whisk. Fold the whipped cream into the fruit-cream cheese mixture in three additions, using a gentle figure-eight motion to keep the air in. Finally, pour in the dissolved gelatin and fold just until combined. Set aside at room temperature while you prepare the cream cloud center.
⚠️ Common Mistake to Avoid: Don’t over-fold the whipped cream into the mousse base. You want to maintain as much air as possible — over-mixing deflates the mousse and yields a dense, heavy texture instead of that ethereal, cloud-like bite.
Step 3: Make the Cream Cloud Center
In a medium bowl, beat 4 oz cream cheese and 1/4 cup powdered sugar until silky smooth. Add 1/4 cup heavy cream and 1 tsp vanilla extract, then whip on medium-high speed until the mixture thickens and holds stiff peaks. This only takes about 2 minutes with an electric mixer. Transfer the cream to a piping bag fitted with a round tip — or use a zip-top bag with a corner snipped off. Pipe small rounds (about 1 tablespoon each) into a silicone mini hemisphere mold or onto a parchment-lined tray in dome shapes. Freeze these for at least 2 hours until they are rock solid.
💡 Sara’s Pro Tip: The cream cloud centers must be fully frozen — like ice cubes. If they’re even slightly soft when you embed them in the mousse, they’ll blend into the surrounding mixture instead of staying distinct. Freeze them overnight if you’re prepping ahead.
Step 4: Assemble the Domes
Fill each silicone dome mold about halfway with the peach raspberry mousse. Use the back of a spoon or a small offset spatula to spread the mousse up the sides of the mold a little. Remove the frozen cream cloud centers from the freezer and place one into the center of each mold, pressing it gently into the mousse. The cream center should be fully surrounded by mousse — make sure no part of it is exposed at the surface. Pipe or spoon the remaining mousse over the top to fill the mold completely. Use the back of a spoon to smooth the surface level with the rim of the mold. Freeze for at least 4 hours, or overnight.
⚠️ Common Mistake to Avoid: If the cream cloud center is exposed on the surface of the mousse, the glaze won’t cover it evenly and you’ll get a bare spot on top of your dome. Make sure the mousse completely encases the cream center.
Step 5: Make the Crystal Glaze
In a heatproof bowl set over a pan of barely simmering water, combine the finely chopped white chocolate and sweetened condensed milk. Stir gently until the white chocolate is fully melted and the mixture is smooth. In a separate small bowl, bloom 1 tbsp gelatin powder in 3 tbsp warm water for 5 minutes, then warm until liquid. Stir the dissolved gelatin into the white chocolate mixture until well combined. Divide the glaze into two bowls — tint one bowl with peach food coloring and the other with pink. Let the glaze cool to room temperature — it should be thick but still pourable, like warm honey.
💡 Sara’s Pro Tip: To get that marbled crystal effect, pour the peach and pink glazes side by side onto a small tray, then gently drag a toothpick through the boundary between them. Dip your frozen domes into this swirled mixture for a unique pattern every time.
Step 6: Glaze and Finish
Remove the frozen domes from the freezer and unmold them by gently pulling the silicone away from the edges. Place each dome on a wire rack set over a baking sheet (to catch drips). Pour the swirled crystal glaze evenly over each dome, covering the top and letting it cascade down the sides. Work quickly — the glaze sets fast on the frozen surface. While the glaze is still tacky, mix the vanilla cookie crumbs, melted butter, granulated sugar, and salt together, then press into small round discs about 2 inches wide. Place each glazed dome onto a cookie base, garnish with fresh peach slices, raspberries, and white chocolate curls, then chill for 15 minutes before serving. The glaze will firm up to a glossy, crackable shell.
| Step | Action | Duration | Key Visual Cue |
|---|---|---|---|
| 1 | Bloom gelatin | 5 mins | Firm, jiggly mass |
| 2 | Make mousse | 10 mins | Smooth, airy, pale pink |
| 3 | Make cream centers | 5 mins + 2 hrs freeze | Stiff peaks, rock solid frozen |
| 4 | Assemble domes | 10 mins + 4 hrs freeze | Smooth surface, level with rim |
| 5 | Make glaze | 15 mins plus cooling | Pourable, shiny, warm honey consistency |
| 6 | Glaze and finish | 15 mins + 15 mins chill | Glossy shell, firm to touch |
Serving & Presentation
These Sunset Peach Raspberry Crystal Domes are meant to be the centerpiece of your dessert table. I like to serve them on a large white platter with a few fresh peach slices and raspberries scattered around for color. The glaze catches the light beautifully, so place them under a lamp or near a window if you’re serving during the day. Each dome sits on its own cookie base, so guests can pick one up and eat it with their hands if they’re casual, or you can serve with a small fork and spoon for a more elegant approach.
For a party, I sometimes drizzle a little extra raspberry coulis on the plate and add a tiny mint sprig on top of each dome. The freshness of the mint cuts through the richness of the cream cheese and white chocolate glaze. In the summer, I’ll pair these with a chilled glass of rosé or a sparkling peach iced tea — the fruity notes echo the flavors in the dome without overwhelming them. My mother in Morocco would serve these with a hot mint tea, which is also a gorgeous contrast.
| Pairing Type | Suggestions | Why It Works |
|---|---|---|
| Side Dish | Fresh fruit salad, lemon sorbet | Light, bright flavors complement the richness |
| Sauce / Dip | Raspberry coulis, salted caramel | Adds tang or salt to balance sweetness |
| Beverage | Rosé, sparkling peach iced tea, mint tea | Fruity or herbal notes echo the dome flavors |
| Garnish | Mint sprig, edible flowers, white chocolate curls | Adds freshness, color, and visual appeal |
Make-Ahead, Storage & Reheating
These crystal dome desserts are the ultimate make-ahead treat for busy hosts. I regularly prep them for dinner parties in my NYC apartment — I make the mousse and cream centers the day before, freeze the assembled domes overnight, then glaze them about an hour before guests arrive. The freezer does all the work while I focus on the main course and enjoying my company.
| Method | Container | Duration | Reheating Tip |
|---|---|---|---|
| Refrigerator | Airtight container, single layer | Up to 3 days | Serve cold — no reheating needed |
| Freezer | Airtight container, parchment between layers | Up to 1 month | Thaw in fridge 1 hour before glazing and serving |
| Make-Ahead | Assemble in molds, freeze unglazed | Up to 2 days before glazing | Glaze directly from frozen for best shine |
If you’re storing glazed domes in the refrigerator, place them on a tray and cover loosely with plastic wrap — don’t seal them tightly or the glaze can sweat. For longer storage, I freeze the domes before glazing, then glaze them straight from the freezer. The cold surface helps the glaze set instantly with a high shine. Once glazed, the domes should be served within 2-3 hours for the most dramatic crystal effect. They’re still delicious the next day, but the glaze loses a bit of its crackle. Not that anyone in your house will complain about leftovers!
Variations & Easy Swaps
| Variation | Key Change | Best For | Difficulty Impact |
|---|---|---|---|
| Mango-Coconut | Replace peach with mango, raspberry with passion fruit | Tropical-themed parties | Same — easy swap |
| Dairy-Free / Vegan | Use vegan cream cheese, coconut cream, dairy-free white chocolate | Dairy-free guests | Medium — texture changes slightly |
| Berry-Citrus Twist | Replace peach with blood orange, keep raspberry | Winter holiday table | Same — easy swap |
Variation: Mango-Coconut Domes
For a tropical spin, swap the peach puree for mango and add a tablespoon of lime juice to brighten it up. Replace the raspberry puree with passion fruit pulp for that signature tang. I like to add a pinch of cardamom to the mousse — it’s a spice I grew up with in Morocco and it pairs beautifully with mango. The cream cloud center can stay as is, or you can replace the vanilla with coconut extract for an extra layer of tropical flavor. This version is a hit at summer parties in the Hamptons.
Variation: Gluten-Free / Vegan Option
To make this easy no-bake dessert recipe gluten-free, simply use gluten-free vanilla cookie crumbs or crushed gluten-free graham crackers for the base. For a vegan version, substitute the cream cheese with a high-quality vegan cream cheese (like Miyoko’s or Violife), use chilled coconut cream in place of heavy cream, and choose a dairy-free white chocolate for the glaze. The texture will be slightly softer — vegan cream cheese has a higher water content — so I recommend adding an extra half teaspoon of agar-agar to the mousse to firm it up. I’ve tested this version for a vegan friend’s birthday and it was a huge success.
Variation: Berry-Citrus Twist
In winter, when peaches aren’t in season, I use blood orange puree instead — the deep ruby color creates a stunning sunset effect with the raspberry. Add a teaspoon of orange blossom water to the mousse for a floral note that reminds me of the orange groves outside Marrakech. The tartness of the blood orange cuts through the sweetness of the white chocolate glaze beautifully. I find this variation particularly elegant for holiday dinners, and the color palette shifts from summer peach to deep winter crimson.
What is the best way to prevent the peach and raspberry crystal dome from sticking to the mold?
The best way to prevent sticking is to use a high-quality silicone dome mold — the flexible, food-grade silicone kind that you can bend and pop the domes out of easily. Avoid hard plastic molds, which will require greasing. Even with silicone, I recommend giving the mold a very light spritz of neutral oil (like grapeseed or canola) and wiping it out with a paper towel so only a microscopic film remains. This extra step ensures the frozen mousse releases cleanly without any torn edges. Also, make sure the domes are fully frozen — at least 4 hours — before you attempt to unmold them. If they’re still soft in the center, they’ll stick and lose their shape.
Can I use frozen peaches or raspberries for Sunset Peach Raspberry Crystal Domes?
Absolutely — frozen fruit works beautifully for this peach raspberry mousse domes recipe. In fact, I often use high-quality frozen fruit purees because they are consistent year-round and save you the step of peeling and seeding. To use frozen peaches, thaw them completely, then blend them into a smooth puree and strain if needed to remove any fibrous bits. For frozen raspberries, thaw and press through a fine-mesh sieve to remove the seeds. The key is to measure the puree after straining, not before, because frozen fruit releases water as it thaws. If your puree is very watery, you can simmer it gently for 5-10 minutes to concentrate the flavor before using it in the mousse.
How do you make the cream cloud center stable enough to hold its shape inside the dome?
The cream cloud center stays stable because of two things: the cream cheese and the freezing process. Cream cheese is naturally high in fat and contains stabilizers that help it hold its shape when whipped. When you beat 4 oz of cream cheese with 1/4 cup of heavy cream and powdered sugar, you’re creating a stiff, pipeable mixture that sets firmly in the freezer. The critical step is freezing the cream centers for at least 2 hours — ideally overnight — until they are completely solid. If they’re even slightly soft when you embed them in the mousse, they’ll merge with the surrounding mixture and you’ll lose that distinct creamy pocket. I also recommend using a silicone mini hemisphere mold so the centers have a uniform domed shape that nests perfectly inside the larger dome.
How far in advance can I prepare Sunset Peach Raspberry Crystal Domes for a party?
You can prepare these crystal dome desserts up to 2 days ahead if you’re storing them in the refrigerator after glazing, or up to 1 month ahead if you freeze them unglazed. My preferred timeline is: make the cream cloud centers and freeze them solid (2 hours or overnight), then assemble the domes in the molds and freeze them for at least 4 hours or up to 1 week. On the day of your party, unmold the frozen domes, prepare the crystal glaze, glaze them, place them on the cookie bases, and garnish. The glazed domes can sit in the refrigerator for up to 3 hours before serving — the glaze stays shiny and the texture remains perfect. I often do the assembly on a Thursday for a Saturday dinner party, then glaze on Saturday afternoon.
Can I make these domes without a silicone dome mold?
Yes, you can make these without a specialty mold — though the shape will be different. Use a standard muffin tin lined with plastic wrap (press the wrap snugly into each cup) and fill it with the mousse and cream center as directed. Freeze until firm, then lift the plastic wrap to remove the domes. You’ll get more of a rounded top shape rather than a perfect hemisphere. Alternatively, you can set the mousse in a regular 8-inch cake pan and use a round cookie cutter to punch out circles, though you won’t get the dome shape at all — more of a tall layered cake bite. For the true crystal dome experience, silicone dome molds are widely available online for around $10-15, and they’re reusable for hundreds of uses.
Why did my crystal glaze turn out cloudy instead of clear and shiny?
A cloudy glaze usually happens for one of three reasons. First, the white chocolate mixture may have been overheated — white chocolate is sensitive and can seize or turn grainy if heated above 110°F. Always melt it gently over barely simmering water or in short microwave bursts. Second, if the gelatin wasn’t fully dissolved, tiny particles can create a hazy appearance. Make sure the bloomed gelatin is completely liquid and smooth before adding it to the white chocolate mixture. Third, and most common, the glaze needs to be at room temperature — not hot and not cold — before you pour it over the frozen domes. If the glaze is too warm, it melts the surface of the mousse and becomes cloudy. If it’s too cool, it thickens and doesn’t flow evenly. Aim for a honey-like consistency at about 70-75°F.
What can I use instead of white chocolate for the crystal glaze?
If you’re not a fan of white chocolate, you can make a clear mirror glaze using sweetened condensed milk, glucose syrup (or corn syrup), sugar, water, and gelatin — this creates a completely transparent, high-shine finish that you can tint any color you like. Another option is a simple gelatin-based fruit glaze: combine 1/2 cup of clear fruit juice (like peach nectar or apple juice) with 1 tbsp of gelatin bloomed in 3 tbsp water, and 2 tbsp of sugar. Warm everything together and pour over the frozen domes. This will give you a translucent, glossy finish that’s lighter and more fruit-forward than the white chocolate version. The texture will be more jelly-like and less creamy, but it’s a lovely dairy-free alternative.
How do I store leftover Sunset Peach Raspberry Crystal Domes?
Leftover glazed domes should be stored in an airtight container in the refrigerator for up to 3 days. Place them on a tray in a single layer and cover loosely — don’t wrap them tightly in plastic or the glaze can sweat and lose its shine. If you haven’t glazed the domes yet, you can keep them frozen in the molds for up to 1 month. To freeze unglazed domes, pop them out of the molds and place them on a parchment-lined baking sheet, freeze for 1 hour until hard, then transfer to a freezer-safe container with parchment between layers. When you’re ready to serve, glaze them straight from the freezer — the cold surface helps the glaze set instantly. Leftover glazed domes are still delicious the next day, though the glaze may soften slightly.
Can I reduce the sweetness of these dome desserts?
Yes, there are several ways to dial back the sweetness without sacrificing texture. First, use unsweetened fruit purees — many commercial purees contain added sugar, so look for ones labeled “100% fruit” or make your own. Second, reduce the powdered sugar in the mousse from 1/2 cup to 1/3 cup. The cream cheese and fruit provide plenty of sweetness on their own. Third, use dark chocolate instead of white chocolate in the glaze — dark chocolate adds a bitter counterpoint that balances the overall sweetness beautifully. Just note that a dark chocolate glaze will be brown rather than translucent pink and peach. Fourth, add a pinch of salt to the mousse and the cookie base — salt enhances flavor and reduces perceived sweetness. I personally prefer my desserts on the less sweet side, so I often use these adjustments myself.
What is the best way to get a perfect dome shape without bubbles or gaps?
The secret to a flawless dome is in how you fill the mold and how you tap out air bubbles. After piping or spooning the mousse into the mold, tap the filled mold firmly on the counter several times — this forces any air bubbles to rise to the surface and pop. Then, use a small offset spatula or the back of a spoon to spread the mousse in a thin layer against the walls of the mold before adding more mousse to fill it. This prevents gaps and crevices. When you insert the frozen cream cloud center, press it gently into the mousse so it’s fully surrounded — if any part of the cream center is touching the mold wall, you’ll get a visible pocket after unmolding. Finally, make sure the surface of the filled mold is level and smooth with a straight edge scraped across the top. A perfect fill equals a perfect dome.
Share Your Version!
I absolutely love seeing how these Sunset Peach Raspberry Crystal Domes turn out in your kitchen. Did you try a different fruit combination? Did your crystal glaze come out like stained glass? Drop a comment below and let me know how it went — your feedback helps other home cooks feel confident trying this recipe too. If you’re on Instagram or Pinterest, tag me @cheerychop when you share your creation. I personally read every comment and love answering your questions, especially about the cream cloud center or the marbling technique.
If you enjoyed this recipe, please give it a star rating ⭐⭐⭐⭐⭐ — it helps more people discover these crystal dome desserts and gives me the encouragement to keep developing new no-bake creations for you. And here’s a question for you: what flavor combination would you love to see turned into a crystal dome next? I’m thinking mango-passion fruit or maybe a chocolate-hazelnut version. Let me know in the comments! From my NYC kitchen to yours — I hope this recipe brings as much warmth to your table as it does to mine. — Sara 🧡
⭐ Loved this recipe? Share the love!
Tap the stars below, leave a comment, or tag me in your crystal dome photos. Your support keeps this NYC kitchen buzzing! 🧡
Love This Recipe? Save It to Pinterest!
If you enjoyed this Sunset Peach Raspberry Crystal Domes with Cream Cloud Center recipe, don’t let it get lost in your browser tabs! 😄 Pin it now so you can find it again anytime — and explore hundreds more tried-and-tested recipes waiting for you on my Pinterest boards.
👉 Follow Sara on Pinterest @chefrecipes2
📌 Pin this recipe · 🔁 Re-pin your favorites · 💬 Tag me when you make it — I love seeing your creations!
Sunset Peach Raspberry Crystal Domes with Cream Cloud Center
- Yield: 8 1x
Ingredients
- For the Peach Raspberry Mousse:
- 3/4 cup peach puree
- 3/4 cup raspberry puree
- 8 oz cream cheese, softened
- 1/2 cup powdered sugar
- 1 cup heavy cream
- 1 tsp vanilla extract
- 1 tbsp gelatin powder
- 3 tbsp warm water
- For the Cream Cloud Center:
- 4 oz cream cheese, softened
- 1/4 cup powdered sugar
- 1/4 cup heavy cream
- 1 tsp vanilla extract
- For the Crystal Glaze:
- 1 cup white chocolate, finely chopped
- 1/2 cup sweetened condensed milk
- 1 tbsp gelatin powder
- 3 tbsp warm water
- Peach food coloring, as needed
- Pink food coloring, as needed
- For the Cookie Base:
- 1 cup vanilla cookie crumbs
- 3 tbsp melted butter
- 1 tbsp granulated sugar
- Pinch of salt
- For Garnish (optional):
- Fresh peach slices
- Fresh raspberries
- White chocolate curls
Instructions
- 1. Bloom gelatin in warm water and let stand for 5 minutes.
- 2. Beat cream cheese and powdered sugar until smooth.
- 3. Mix in peach puree, raspberry puree, and vanilla extract.
- 4. Whip heavy cream to soft peaks and fold into the fruit mixture.
- 5. Stir in dissolved gelatin until fully incorporated.
- 6. In a separate bowl, beat cream cheese, powdered sugar, heavy cream, and vanilla until smooth for the cream cloud center.
- 7. Pipe the cream mixture into small molds and freeze until firm.
- 8. Fill silicone dome molds halfway with the peach raspberry mousse.
- 9. Place a frozen cream cloud center into each mold.
- 10. Cover with remaining mousse and freeze until completely firm.
- 11. Combine white chocolate, condensed milk, dissolved gelatin, and divide into two portions.
- 12. Tint one portion peach and the other pink, then lightly swirl together for a crystal effect.
- 13. Unmold the frozen domes and place on a wire rack.
- 14. Pour the crystal glaze evenly over each dome.
- 15. Mix cookie crumbs, melted butter, sugar, and salt, then press into small round bases.
- 16. Place each glazed dome onto a prepared base.
- 17. Garnish with fresh peach slices, raspberries, and white chocolate curls.
- 18. Chill for 15 minutes before serving.
Nutrition
- Calories: 425
- Sugar: 32 g
- Fat: 29 g
- Carbohydrates: 38 g
- Protein: 6 g
Tried This Recipe? Leave a Comment!
Did you make this recipe? I’d love to hear how it turned out! Please leave a comment and a rating below. Your feedback helps other home cooks and supports cheerychop.com!
For more delicious inspiration, follow me on Pinterest!


