
Table of Contents
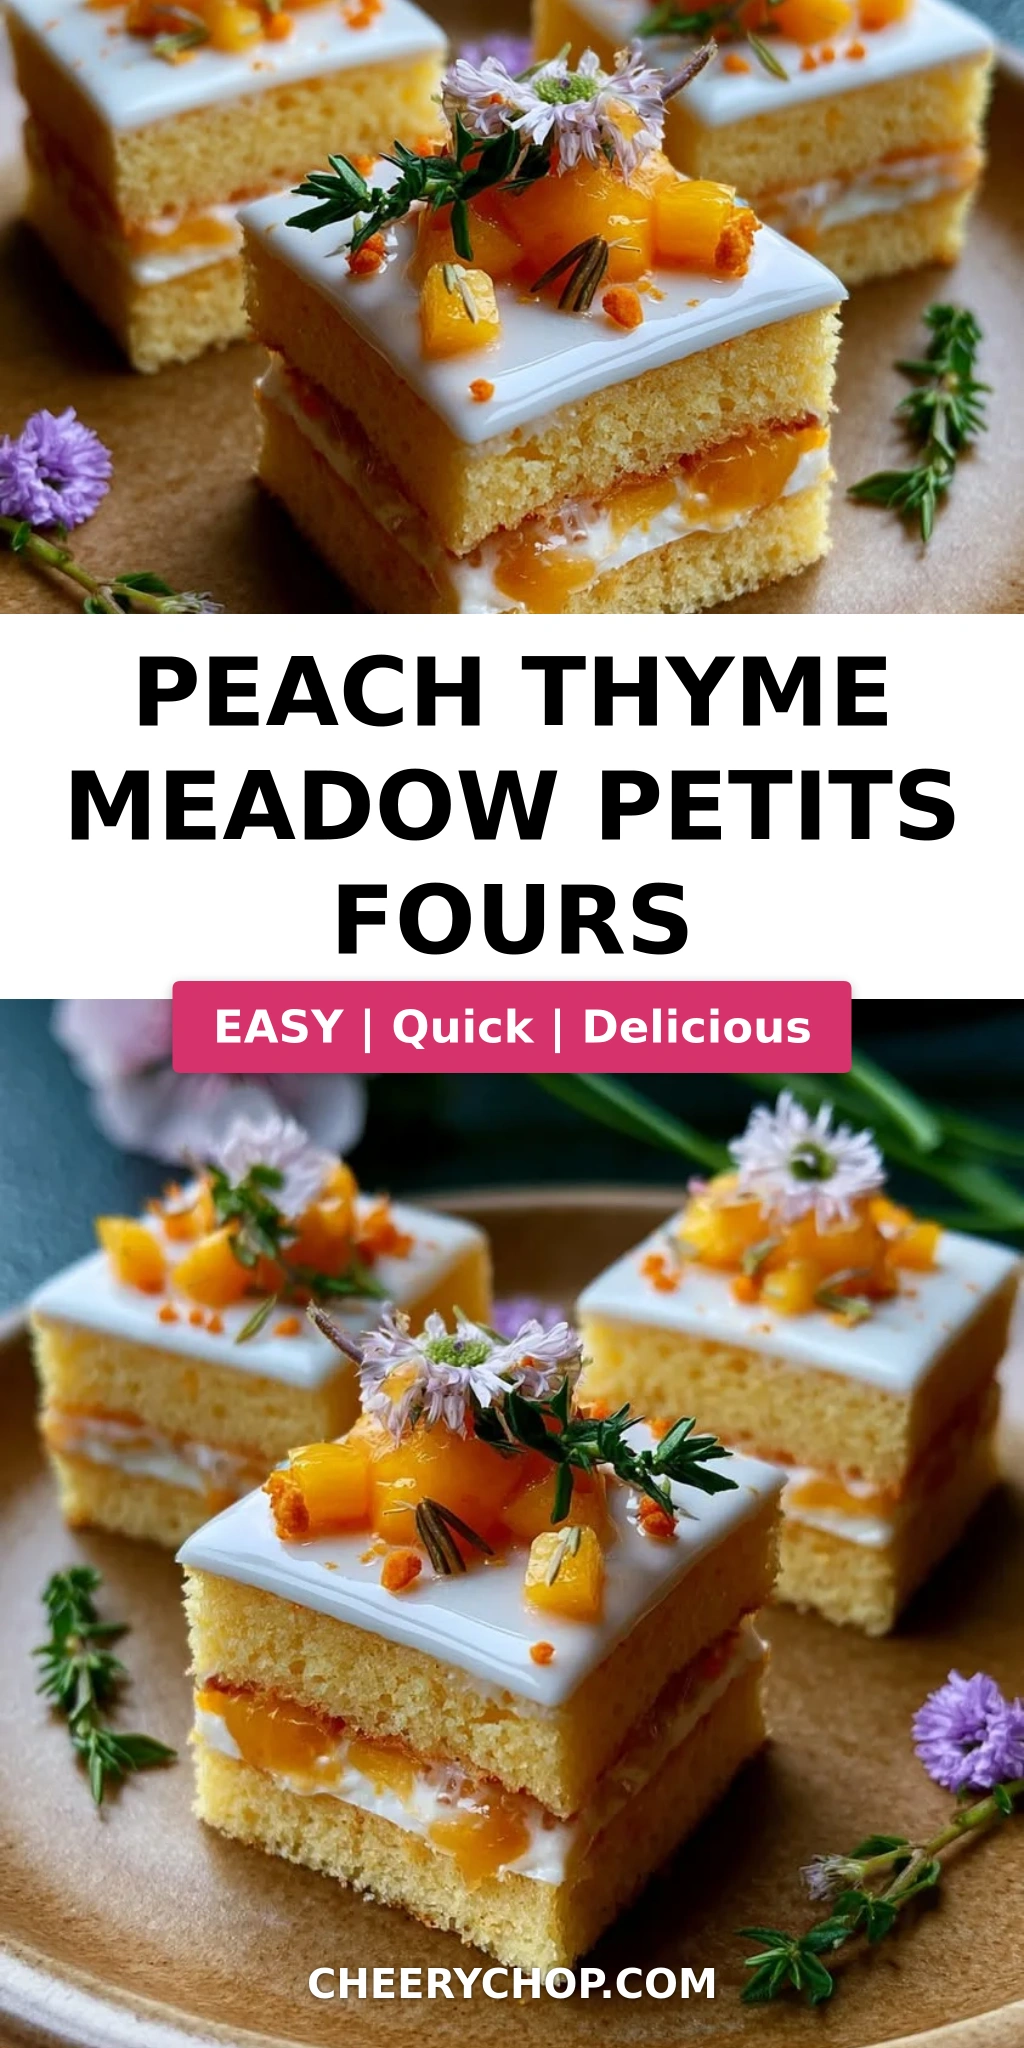
Peach Thyme Meadow Petits Fours – A Garden-Fresh French Delight
I still remember the first time I tasted a perfect petit four — it was during my pastry training in Paris, and the chef placed a tiny square of peach-glazed cake on my tasting plate. That single bite, with its tender crumb and floral fruitiness, stopped me mid-conversation. Years later, standing at the Union Square Greenmarket in New York City with a basket of just-picked peaches and a bundle of fresh thyme, I knew exactly what I wanted to create: a peach thyme petits fours recipe that captures the meadow-sweet essence of summer in every bite. This thyme petits fours recipe is my love letter to that Parisian moment and my adopted New York home.
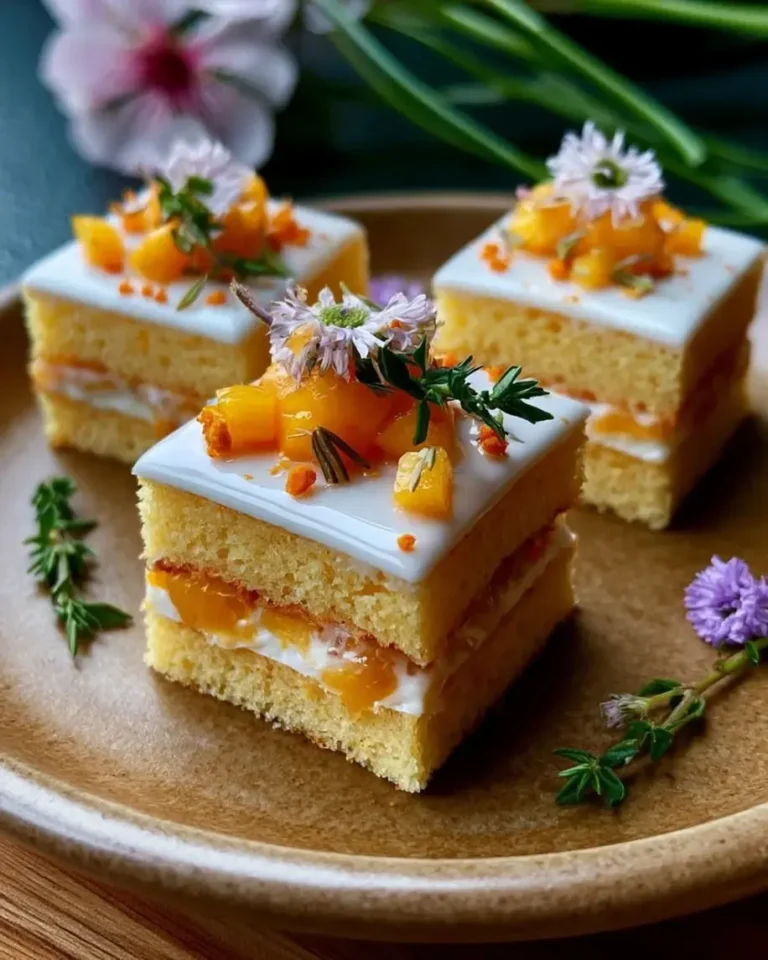
Imagine biting into a tiny, perfectly square cake — the peach petits fours base is impossibly tender, infused with vanilla and real peach puree. Then comes the surprise: a luscious petits fours with peach filling, where diced peaches are simmered with honey and fresh thyme until jammy and fragrant. The whole thing is finished with a silken petits fours glaze recipe that sets to a glossy, just-sweet-enough shell. The aroma alone — sun-ripened peaches, floral honey, and the earthy whisper of thyme — will transport you to a Provençal meadow, even if you’re standing in a tiny NYC apartment kitchen like mine.
What makes my version special is how I balance the thyme so it enhances the peach without stealing the show — a trick I learned from watching my mother use fresh herbs in Moroccan tagines. You’ll get the fragrance of garden herbs woven through every layer, but the peach remains the star. I’m also sharing my foolproof method for getting that bakery-smooth glaze every single time, plus the one mistake home bakers make that turns petits fours into a crumbly mess (hint: it has to do with how you cut the cake). Let’s make something beautiful together.
Why This Peach Thyme Meadow Petits Fours Recipe Is the Best
The Flavor Secret: Most petits fours rely on jam or artificial flavorings, but I insist on real peach puree in the cake and fresh diced peaches in the filling. The honey-thyme combination is directly inspired by the way my mother would drizzle honey over fresh fruit in Morocco, then add a pinch of something green and aromatic. Here in NYC, I found that Meadowood Farm’s thyme has a lemony, slightly floral note that pairs magically with the acidity of peaches. The result is a petit four that tastes like sunshine and herb gardens — sophisticated but utterly approachable.
Perfected Texture: Achieving a tender, fine-crumbed cake that holds up to glazing without crumbling is a pastry school essential — and I teach it here without any fuss. The trick is to fold the dry ingredients in gently and to use room-temperature butter and eggs. I also insist on chilling the assembled cake before cutting, which gives you those razor-sharp edges that make petits fours look so professional. The filling stays soft and spoonable, not runny, because we cook it down just enough to concentrate the flavor.
Foolproof & Fast: Despite the fancy name, this peach thyme petits fours recipe comes together in under an hour and uses one 8-inch square pan — no special molds or equipment needed. The glaze sets in 20 minutes flat, so you can go from mixing bowl to serving platter faster than you’d think. I’ve tested this recipe with beginner home bakers in my NYC cooking workshops, and every single person walked away with perfect, glossy petits fours. If you can make a simple cake and stir a glaze, you can absolutely nail this.
Peach Thyme Petits Fours Recipe Ingredients
I source my peaches from the Union Square Greenmarket in summer, but any ripe, fragrant peach will do. For the thyme, I love the slim, bright-green sprigs from my local farmers market — they’re more aromatic than the woody supermarket bunches. And the honey? I use a mild wildflower honey from a small apiary in upstate New York, but any good-quality honey works beautifully. Let me walk you through exactly what you need.
Ingredients List
- For the Peach Vanilla Cake: 1 1/2 cups all-purpose flour, 1 tsp baking powder, 1/4 tsp salt, 1/2 cup unsalted butter (softened), 3/4 cup granulated sugar, 2 large eggs (room temperature), 1 tsp vanilla extract, 1/2 cup peach puree (from about 2 ripe peaches), 1/4 cup milk (whole or 2%)
- For the Peach Thyme Filling: 1 cup finely diced peaches (about 1 large peach), 2 tbsp honey, 1 tsp fresh thyme leaves (stripped from stems), 1 tsp lemon juice
- For the Glaze: 2 cups powdered sugar (sifted), 3 tbsp milk (plus more if needed), 1 tsp vanilla extract, 1 drop peach gel food coloring (optional, for a blush tint)
- For Garnish (optional): Fresh thyme leaves, tiny peach cubes (from the remaining peach)
Ingredient Spotlight
Peaches: The heart of this recipe. Choose peaches that are fragrant and give slightly to gentle pressure — underripe peaches lack sweetness and won’t puree smoothly. If fresh peaches aren’t in season, you can use frozen peaches (thawed and drained) or canned peaches in juice (drained well). The filling will be slightly less vibrant but still delicious.
Fresh Thyme: This herb is what elevates these petits fours from simple to memorable. Use only the leaves, not the stems, and add them at the end of cooking the filling to preserve their essential oils. Dried thyme is not a good substitute here — it will taste dusty and medicinal rather than fresh and bright.
Honey: Wildflower honey or orange blossom honey both work beautifully. The honey adds a floral depth that granulated sugar alone can’t provide. If you’re vegan, you can substitute maple syrup, but reduce the liquid in the filling slightly and expect a more pronounced maple flavor.
Peach Puree: To make your own, peel and dice 2 ripe peaches, then blend them in a food processor until smooth. You need 1/2 cup for the cake. If you’re short on time, you can use store-bought peach puree (look for one with no added sugar) — just know the color might be slightly different.
| Original Ingredient | Best Substitution | Flavor / Texture Impact |
|---|---|---|
| All-purpose flour | Gluten-free 1:1 baking blend | Slightly denser crumb; still tender if blend contains xanthan gum |
| Unsalted butter | Vegan butter (like Miyoko’s) | Slightly less rich; texture remains tender |
| Honey | Maple syrup (reduce liquid slightly) | More pronounced maple flavor; still sweet and floral |
| Fresh thyme | Lemon balm or mint (fresh only) | Different herbal note; bright and fresh |
How to Make Peach Thyme Meadow Petits Fours — Step-by-Step
This process is straightforward and so rewarding. I’ll guide you through every step with the exact timing and visual cues I use in my own NYC kitchen.
Step 1: Prep the Pan and Oven
Preheat your oven to 350°F (175°C). Line an 8-inch square baking pan with parchment paper, leaving a 2-inch overhang on two opposite sides — this creates handles for lifting the cake out later. Grease the parchment lightly with butter or nonstick spray.
💡 Sara’s Pro Tip: For the cleanest petits fours edges, also grease the inside of the pan above the parchment line. It prevents any batter from creeping up and burning.
Step 2: Mix the Dry Ingredients
In a medium bowl, whisk together 1 1/2 cups all-purpose flour, 1 tsp baking powder, and 1/4 tsp salt. Whisking aerates the flour and ensures the baking powder is evenly distributed — no bitter pockets in your cake.
⚠️ Common Mistake to Avoid: Don’t skip sifting or whisking the dry ingredients. If the baking powder isn’t evenly mixed, your cake will rise unevenly and you’ll get lopsided petits fours.
Step 3: Cream Butter and Sugar
In a large bowl, beat 1/2 cup softened unsalted butter with 3/4 cup granulated sugar until light and fluffy — about 3 minutes with a hand mixer or stand mixer fitted with the paddle attachment. Scrape the bowl halfway through. The mixture should look pale and aerated.
💡 Sara’s Pro Tip: Your butter must be truly softened — cool to the touch but pressable with a finger. Cold butter won’t trap air, and melted butter will make the cake greasy. Leave it on the counter for 45 minutes before starting.
Step 4: Add Eggs and Vanilla
Add the 2 large eggs one at a time, beating well after each addition. Then mix in 1 tsp vanilla extract. If the mixture looks slightly curdled, don’t panic — it will come together once the flour goes in.
⚠️ Common Mistake to Avoid: Adding both eggs at once can cause the emulsion to break. Always add them one at a time and beat until fully incorporated before adding the next.
Step 5: Stir in Peach Puree and Milk
Stir in 1/2 cup peach puree and 1/4 cup milk until just combined. The batter will look a little thin at this point — that’s exactly right.
Step 6: Fold in the Dry Ingredients
Add the flour mixture to the wet ingredients and fold gently with a rubber spatula until no streaks of flour remain. Do not overmix — that develops gluten and makes the cake tough. You want a tender, delicate crumb.
💡 Sara’s Pro Tip: Use a light hand here. Fold in a J-shape motion — down the center, across the bottom, and up the side. 12 to 15 folds is usually enough.
Step 7: Bake the Cake
Spread the batter evenly into the prepared pan and bake for 22–25 minutes, until a toothpick inserted in the center comes out clean with just a few moist crumbs. The top should be golden and spring back when lightly pressed.
⚠️ Common Mistake to Avoid: Overbaking dries out the cake. Start checking at 22 minutes. If your oven runs hot, check at 20 minutes. A dry cake will crumble when you try to cut it into petits fours.
Step 8: Cool Completely
Let the cake cool in the pan for 10 minutes, then use the parchment handles to lift it onto a wire rack. Cool completely — at least 1 hour. Wrapping the cooled cake in plastic wrap and chilling it for 30 minutes makes it much easier to slice cleanly.
💡 Sara’s Pro Tip: Patience here is everything. If you try to cut or fill the cake while it’s still warm, it will crumble and the filling will soak in instead of staying in a distinct layer. I always chill my cake for at least 30 minutes before slicing.
Step 9: Make the Filling
While the cake cools, combine 1 cup finely diced peaches, 2 tbsp honey, 1 tsp fresh thyme leaves, and 1 tsp lemon juice in a small saucepan. Cook over medium heat for 5–7 minutes, stirring occasionally, until the peaches are soft and the liquid has thickened slightly. Remove from heat and cool completely.
Step 10: Assemble the Layers
Slice the cooled cake horizontally into two even layers. Place the bottom layer on a cutting board or serving platter. Spread the peach thyme filling evenly over it, leaving a 1/4-inch border around the edges. Top with the second cake layer and press gently to adhere.
⚠️ Common Mistake to Avoid: Don’t spread the filling all the way to the edge — when you press the top layer on, the filling will squish out and make the sides messy. A small border prevents this.
Step 11: Cut into Petits Fours
Using a sharp chef’s knife, trim the edges of the assembled cake to make them perfectly straight, then cut into 16 small squares (4 rows by 4 rows). Clean the knife between cuts for the neatest edges.
💡 Sara’s Pro Tip: For the cleanest cuts, chill the assembled cake for 20 minutes before slicing. Use a long, sharp knife and wipe it clean with a damp paper towel after each cut. This gives you those bakery-perfect edges.
Step 12: Make the Glaze
Whisk together 2 cups sifted powdered sugar, 3 tbsp milk, and 1 tsp vanilla extract until smooth. If you want a soft blush color, add 1 drop of peach gel food coloring. The glaze should be thick but pourable — it should coat the back of a spoon and slowly drip off.
Step 13: Glaze the Petits Fours
Place the cake squares on a wire rack set over a baking sheet (to catch drips). Spoon the glaze over each petit four, letting it run down the sides. Work quickly, as the glaze sets fast. Let the glaze set for 20 minutes at room temperature.
⚠️ Common Mistake to Avoid: If your glaze is too thick, it won’t flow smoothly over the cakes. If it’s too thin, it will run off entirely. Adjust with a tiny splash of milk or extra powdered sugar until you get that slow-drip consistency.
Step 14: Garnish and Serve
Before the glaze fully sets, garnish each petit four with a tiny fresh thyme leaf or a small cube of fresh peach. Serve at room temperature for the best flavor and texture.
| Step | Action | Duration | Key Visual Cue |
|---|---|---|---|
| 1 | Prep pan | 5 min | Parchment overhang on two sides |
| 2 | Whisk dry ingredients | 2 min | Uniform color, no lumps |
| 3 | Cream butter and sugar | 3 min | Pale, fluffy, doubled in volume |
| 4 | Add eggs and vanilla | 3 min | Smooth, well combined |
| 5 | Add puree and milk | 1 min | Batter looks thin but smooth |
| 6 | Fold in dry ingredients | 1 min | No flour streaks, just combined |
| 7 | Bake | 22–25 min | Golden top, toothpick comes clean |
| 8 | Cool completely | 1 hour | Room temperature, firm to touch |
| 9 | Cook filling | 5–7 min | Softened peaches, thickened liquid |
| 10 | Assemble layers | 5 min | Even filling, straight edges |
| 11 | Cut into squares | 5 min | 16 clean, even squares |
| 12 | Make glaze | 3 min | Smooth, glossy, slow-drip consistency |
| 13 | Glaze | 5 min | Evenly coated, dripping sides |
| 14 | Garnish and serve | 5 min | Glaze set, garnishes in place |
Serving & Presentation
These peach thyme meadow petits fours are designed to be the jewel of any dessert table. I love serving them on a simple white platter or a marble cake stand — the pale pink glaze and tiny green thyme leaves pop beautifully against a light background. For a bridal shower or afternoon tea, arrange them in a single layer with a few fresh peach slices and sprigs of thyme scattered around the platter for a garden-party feel.
In my NYC cooking classes, I always tell students to serve petits fours at room temperature — the cake is tender, the filling is soft, and the glaze has a delicate snap that gives way to a creamy interior. If you’ve chilled them, let them sit out for 20 minutes before serving. They pair wonderfully with a cup of Earl Grey tea, a glass of chilled rosé, or even a small espresso for an after-dinner treat.
My mother would have served these with a pot of Moroccan mint tea, and honestly, that’s still one of my favorite pairings. The sweetness of the peaches and honey mingles with the cool mint in a way that feels both nostalgic and fresh. For a truly stunning presentation, dust the platter with a tiny pinch of confectioners’ sugar just before serving — it looks like morning frost on a meadow.
| Pairing Type | Suggestions | Why It Works |
|---|---|---|
| Side Dish | Fresh fruit salad, light sorbet | Adds freshness and color contrast |
| Sauce / Dip | Honey drizzle, creme fraiche, raspberry coulis | Enhances sweetness or adds tangy balance |
| Beverage | Earl Grey tea, chilled rosé, Moroccan mint tea, espresso | Tea and wine complement floral notes; espresso cuts sweetness |
| Garnish | Fresh thyme leaves, tiny peach cubes, edible flowers, confectioners’ sugar | Adds visual appeal and reinforces the meadow theme |
Make-Ahead, Storage & Reheating
As someone with a busy NYC schedule — between recipe testing, teaching, and exploring new farmers markets — I rely on make-ahead strategies constantly. These peach thyme petits fours are surprisingly friendly for advance preparation, and I’ll show you exactly how to store them so they taste just-baked when you’re ready to serve.
| Method | Container | Duration | Reheating Tip |
|---|---|---|---|
| Refrigerator | Airtight container, single layer | Up to 3 days | Serve at room temp; let sit 20 min |
| Freezer | Freezer-safe container, parchment between layers | Up to 1 month | Thaw in fridge overnight, then bring to room temp |
| Make-Ahead | Bake cake and make filling separately | Up to 2 days in advance | Assemble, cut, and glaze on day of serving |
For the best texture, I recommend assembling and glazing the petits fours no more than 12 hours before serving — the glaze stays glossy and the cake remains perfectly moist. If you’re making them a day ahead, store the unglazed cut squares in an airtight container in the refrigerator, then glaze them the morning of your event. The glaze itself can be made a day ahead and stored covered at room temperature; just whisk it well before using.
To freeze, arrange the unglazed cake squares on a baking sheet and freeze for 1 hour until firm, then transfer to a freezer-safe container with parchment paper between layers. When you’re ready, thaw them in the refrigerator overnight, then bring them to room temperature before glazing. The texture remains remarkably tender — I’ve tested this multiple times for my own holiday parties.
Variations & Easy Swaps
| Variation | Key Change | Best For | Difficulty Impact |
|---|---|---|---|
| Lavender-Honey Petits Fours | Replace thyme with 1 tsp dried culinary lavender in filling | Tea parties, bridal showers | Same difficulty |
| Gluten-Free Version | Use 1:1 gluten-free flour blend with xanthan gum | Gluten-sensitive guests | Same difficulty |
| Winter Spice Petits Fours | Replace thyme with 1/2 tsp cinnamon + 1/4 tsp cardamom in filling | Holiday parties, winter entertaining | Same difficulty |
Lavender-Honey Petits Fours
For a floral twist that feels straight out of a French patisserie, swap the fresh thyme for 1 teaspoon of dried culinary lavender in the filling. The lavender pairs beautifully with the peach and honey, creating a more perfumed, romantic flavor. I love making this version for bridal showers — it’s elegant, unexpected, and the purple flecks in the filling are gorgeous against the pale glaze. Use food-grade lavender only, and crush it lightly between your fingers before adding it to release the oils.
Gluten-Free Version
I tested this with my favorite gluten-free 1:1 baking blend (the one with xanthan gum), and the results were outstanding. The crumb is slightly more delicate, so handle the cake with extra care when slicing and glazing. No other adjustments are needed — the peach puree and milk provide enough moisture to keep the cake tender. This version has been a hit at my NYC workshops with gluten-sensitive students, and honestly, I’ve served it to guests who didn’t even notice the difference.
Winter Spice Petits Fours
When peaches aren’t in season, I swap the fresh thyme for a warm spice blend of 1/2 teaspoon cinnamon and 1/4 teaspoon cardamom in the filling. The result is a cozy, holiday-ready petit four that still feels special. I use frozen peaches (thawed and drained) for the puree and filling, and the spices make the kitchen smell incredible. This version is perfect for Christmas parties or winter afternoon teas — serve it with a chai latte or a glass of mulled wine.
Frequently Asked Questions
What is the best way to incorporate fresh thyme into a petits fours recipe without overpowering the peach flavor?
The key is to use thyme as a background note, not the main event. I add the fresh thyme leaves to the peach filling at the very end of cooking — just 1 teaspoon for the whole batch — and I let it simmer for only 5–7 minutes. This gentle heat releases the herb’s aromatic oils without making it bitter or medicinal. I also recommend using fresh thyme rather than dried, as dried thyme can be more concentrated and woody. If you’re nervous about overdoing it, start with 1/2 teaspoon and taste the filling before adding more. The thyme should whisper, not shout — you want guests to ask, “What is that lovely herb?” rather than identifying it immediately.
Can I use canned or frozen peaches instead of fresh for peach thyme petits fours?
Absolutely! Frozen peaches work beautifully in this recipe — just thaw them completely and drain off any excess liquid before pureeing or dicing. I’ve used frozen peaches from my local NYC grocery store many times during winter, and the flavor is still excellent. Canned peaches (in juice, not syrup) also work; drain them well and reduce the honey in the filling slightly, since canned peaches are already sweet. The texture of the filling will be slightly softer than with fresh peaches, so cook it for an extra minute or two to thicken. One note: fresh peaches give the brightest, most vibrant flavor, so if it’s summer and you can find fragrant local peaches, that’s always my first choice.
How far in advance can I make peach thyme meadow petits fours for a party?
You can absolutely make these ahead, and I often do for my own events. My recommended timeline is: bake the cake and make the filling up to 2 days in advance, storing them separately in the refrigerator. On the day before your party, assemble the cake layers, cut them into squares, and store the unglazed squares in an airtight container in the fridge. On the morning of your event, make the glaze and glaze them — this takes only 15 minutes. The glaze needs about 20 minutes to set, so you can do this while you’re setting up the rest of your spread. For the absolute best texture and appearance, I don’t recommend glazing more than 12 hours ahead, as the glaze can lose its shine and start to absorb into the cake over time.
What is the ideal serving size for petits fours at a bridal shower or afternoon tea?
For a bridal shower or afternoon tea, plan on 2–3 petits fours per person if you’re serving them alongside other desserts like scones, cookies, or fruit. If these are the only dessert, 4–5 per person is a good estimate. The beauty of petits fours is that they’re bite-sized — about 1.5 inches square — so guests can easily enjoy a few without feeling overwhelmed. This recipe makes 16 petits fours, which serves about 4–6 people as a standalone dessert or 8–10 people as part of a larger dessert spread. I always recommend making a double batch for parties because they disappear fast! For a wedding shower with 20 guests, I’d suggest making at least 3 batches to ensure you have plenty.
Can I make these petits fours gluten-free or dairy-free?
Yes to both! For a gluten-free version, use a high-quality 1:1 gluten-free baking blend that contains xanthan gum — this is essential for structure. I’ve tested this with Bob’s Red Mill 1:1 and King Arthur Measure for Measure, both with excellent results. For dairy-free, substitute the unsalted butter with a good vegan butter like Miyoko’s or Earth Balance, and use your favorite plant-based milk (oat milk or soy milk work best). The texture will be slightly less tender but still very good. Just make sure all your ingredients are at room temperature, and don’t overmix the batter. I’ve served the dairy-free version to friends with sensitivities, and they couldn’t tell the difference!
Why did my glaze turn out too thick or too thin, and how do I fix it?
Glaze consistency is everything for petits fours, and it’s easy to adjust. If your glaze is too thick — it mounds on the cake instead of flowing down the sides — add milk one teaspoon at a time, whisking after each addition, until it reaches a slow-drip consistency. If it’s too thin and runs off the cake entirely, whisk in sifted powdered sugar one tablespoon at a time until it thickens. The ideal glaze should coat the back of a spoon and slowly drip off in a ribbon that holds its shape for a moment before melting back in. Temperature matters too: if your kitchen is very hot and humid, the glaze will be thinner, so you may need extra powdered sugar. Work quickly once the glaze is the right consistency, as it starts to set almost immediately.
Can I use a different herb instead of thyme in this petits fours recipe?
Absolutely! While thyme is my favorite for its earthy, slightly lemony note that complements peaches beautifully, you can experiment with other fresh herbs. Lemon balm is a wonderful substitute — it has a bright, citrusy flavor that feels very garden-fresh. Mint is another excellent option, especially if you’re serving these with Moroccan tea or a chocolate dessert. Basil (specifically lemon basil or sweet basil) adds an unexpected but delicious twist. Use the same amount — 1 teaspoon of finely chopped fresh leaves — and add them at the end of cooking the filling. I’d avoid rosemary or sage, as their flavors are too strong and woody for this delicate dessert. Dried herbs are not recommended for this recipe, as they lack the fresh, bright character that makes these petits fours so special.
What’s the best way to cut petits fours cleanly without them crumbling?
This is the number one question I get in my NYC cooking classes, and the answer is all about temperature and technique. First, chill the assembled cake in the refrigerator for at least 30 minutes — this firms up the butter in the cake and the filling, making both much easier to cut. Second, use a long, sharp chef’s knife (not a serrated knife, which creates crumbs). Third, wipe the blade clean with a damp paper towel after each cut — this prevents the cake from sticking to the knife and dragging crumbs. Fourth, use a gentle sawing motion rather than pressing straight down — this cuts through the layers without compressing the cake. Finally, trim the edges of the cake before cutting it into squares to remove any uneven or browned edges. With these steps, you’ll get bakery-perfect petits fours every time.
Can I make the petit fours cake layers in advance and freeze them?
Yes, and this is actually my preferred make-ahead method. Bake the peach vanilla cake in its 8-inch square pan, cool it completely, then wrap the entire cake (still in the pan) tightly in plastic wrap, followed by a layer of aluminum foil. Freeze for up to 1 month. When you’re ready to use it, thaw the cake in the refrigerator overnight — still wrapped — to prevent condensation from making the cake soggy. Once thawed, unwrap it, let it come to room temperature for about 30 minutes, then slice it horizontally and proceed with the filling and assembly. The cake texture remains remarkably tender and moist with this method. I do recommend making the filling fresh on the day you assemble, as the herb flavor is best when fresh.
How do I get a perfectly smooth, glossy glaze on my petits fours?
A smooth, glossy glaze is all about technique and patience. First, make sure your powdered sugar is sifted — lumps will create bumps in the glaze. Second, whisk the glaze thoroughly until it’s completely smooth with no streaks. Third, work with one petit four at a time: place it on a wire rack over a baking sheet, and spoon the glaze over the center, letting it flow naturally down the sides. Don’t spread it with a knife — let gravity do the work. Fourth, tap the wire rack gently against the baking sheet after glazing each batch to help the glaze settle and self-level. Finally, let the glaze set undisturbed for a full 20 minutes at room temperature. If you’re adding garnishes like thyme leaves or peach cubes, place them on while the glaze is still wet — about 30 seconds after glazing — so they stick. The result is a professional, mirror-smooth finish every time.
Share Your Version!
I absolutely love seeing how you make this recipe your own. Whether you stick with the classic peach thyme petits fours recipe or try one of the variations — lavender-honey, gluten-free, or winter spice — I want to hear about it. Leave a star rating and a comment below to tell me how it turned out, what substitutions you tried, and who you served it to. Your feedback helps me and every other home baker who visits this page.
Tag me in your photos on Instagram or Pinterest @cheerychop — I’m always scrolling and loving your creations. And here’s a question I’d love you to answer: What’s one flavor combination you’ve always wanted to try in a petit four but haven’t seen anywhere? I’m always looking for new ideas to test in my NYC kitchen, and your suggestion might just become my next recipe! From my NYC kitchen to yours — I hope this recipe brings as much warmth to your table as it does to mine. — Sara 🧡
Love This Recipe? Save It to Pinterest!
If you enjoyed this Peach Thyme Meadow Petits Fours recipe, don’t let it get lost in your browser tabs! 😄 Pin it now so you can find it again anytime — and explore hundreds more tried-and-tested recipes waiting for you on my Pinterest boards.
👉 Follow Sara on Pinterest @chefrecipes2
📌 Pin this recipe · 🔁 Re-pin your favorites · 💬 Tag me when you make it — I love seeing your creations!
🍑 What’s your dream petit four flavor combination? Drop it in the comments — I read every single one!
Peach Thyme Meadow Petits Fours

Petits fours with peach vanilla cake, peach thyme filling, and a delicate glaze.
- Prep Time: 30 minutes
- Cook Time: 22 minutes
- Total Time: 52 minutes
- Yield: 16 1x
- Method: Dessert
- Cuisine: French
Ingredients
- For the Peach Vanilla Cake:
- 1 1/2 cups all-purpose flour
- 1 tsp baking powder
- 1/4 tsp salt
- 1/2 cup unsalted butter, softened
- 3/4 cup granulated sugar
- 2 large eggs
- 1 tsp vanilla extract
- 1/2 cup peach puree
- 1/4 cup milk
- For the Peach Thyme Filling:
- 1 cup finely diced peaches
- 2 tbsp honey
- 1 tsp fresh thyme leaves
- 1 tsp lemon juice
- For the Glaze:
- 2 cups powdered sugar
- 3 tbsp milk
- 1 tsp vanilla extract
- 1 drop peach gel food coloring, optional
- For Garnish (optional):
- Fresh thyme leaves
- Tiny peach cubes
Instructions
- 1. Preheat oven to 350°F (175°C) and line an 8-inch square baking pan with parchment paper.
- 2. Whisk together flour, baking powder, and salt.
- 3. Beat butter and sugar until light and fluffy.
- 4. Add eggs one at a time, then mix in vanilla extract.
- 5. Stir in peach puree and milk.
- 6. Fold in the dry ingredients until just combined.
- 7. Spread batter into the prepared pan and bake for 22–25 minutes.
- 8. Cool completely before removing from the pan.
- 9. Meanwhile, combine peaches, honey, thyme, and lemon juice in a small saucepan.
- 10. Cook for 5–7 minutes until soft and lightly thickened.
- 11. Allow the filling to cool completely.
- 12. Slice the cake horizontally into two even layers.
- 13. Spread the peach thyme filling over the bottom layer and top with the second layer.
- 14. Cut into small bite-sized squares.
- 15. Whisk together powdered sugar, milk, and vanilla extract until smooth.
- 16. Add peach coloring if desired.
- 17. Place cake squares on a wire rack and spoon glaze over each petit four.
- 18. Allow the glaze to set for 20 minutes.
- 19. Garnish with fresh thyme leaves and tiny peach cubes.
- 20. Serve at room temperature.
Nutrition
- Calories: 185
- Sugar: 20 g
- Fat: 7 g
- Carbohydrates: 29 g
- Protein: 2 g
Tried This Recipe? Leave a Comment!
Did you make this recipe? I’d love to hear how it turned out! Please leave a comment and a rating below. Your feedback helps other home cooks and supports cheerychop.com!
For more delicious inspiration, follow me on Pinterest!


