
Table of Contents
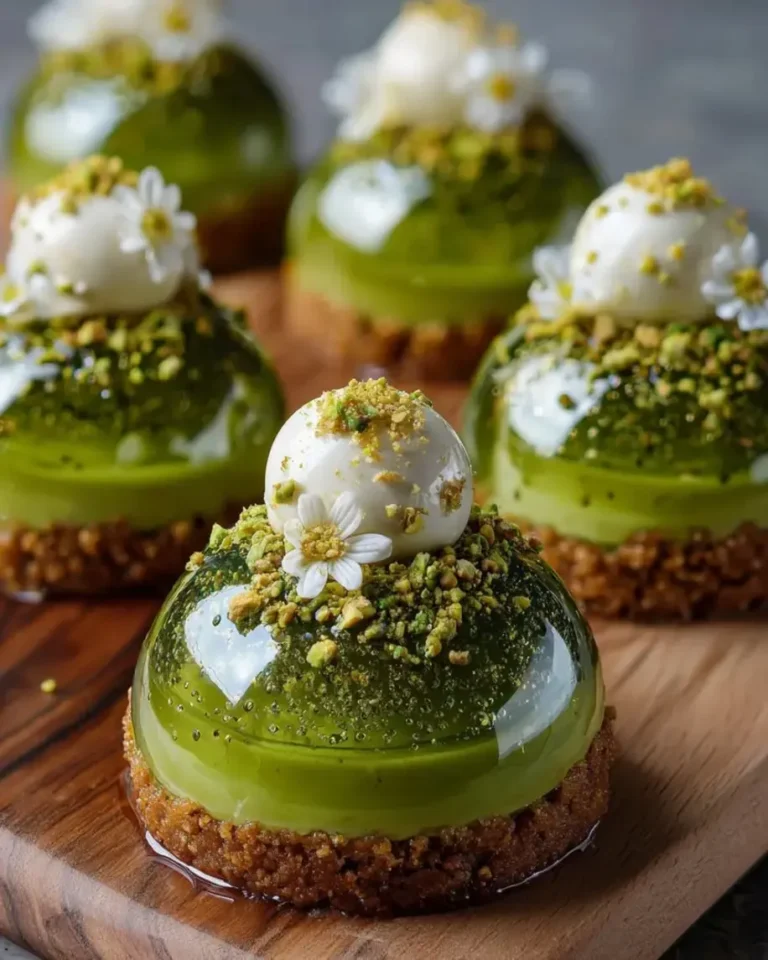
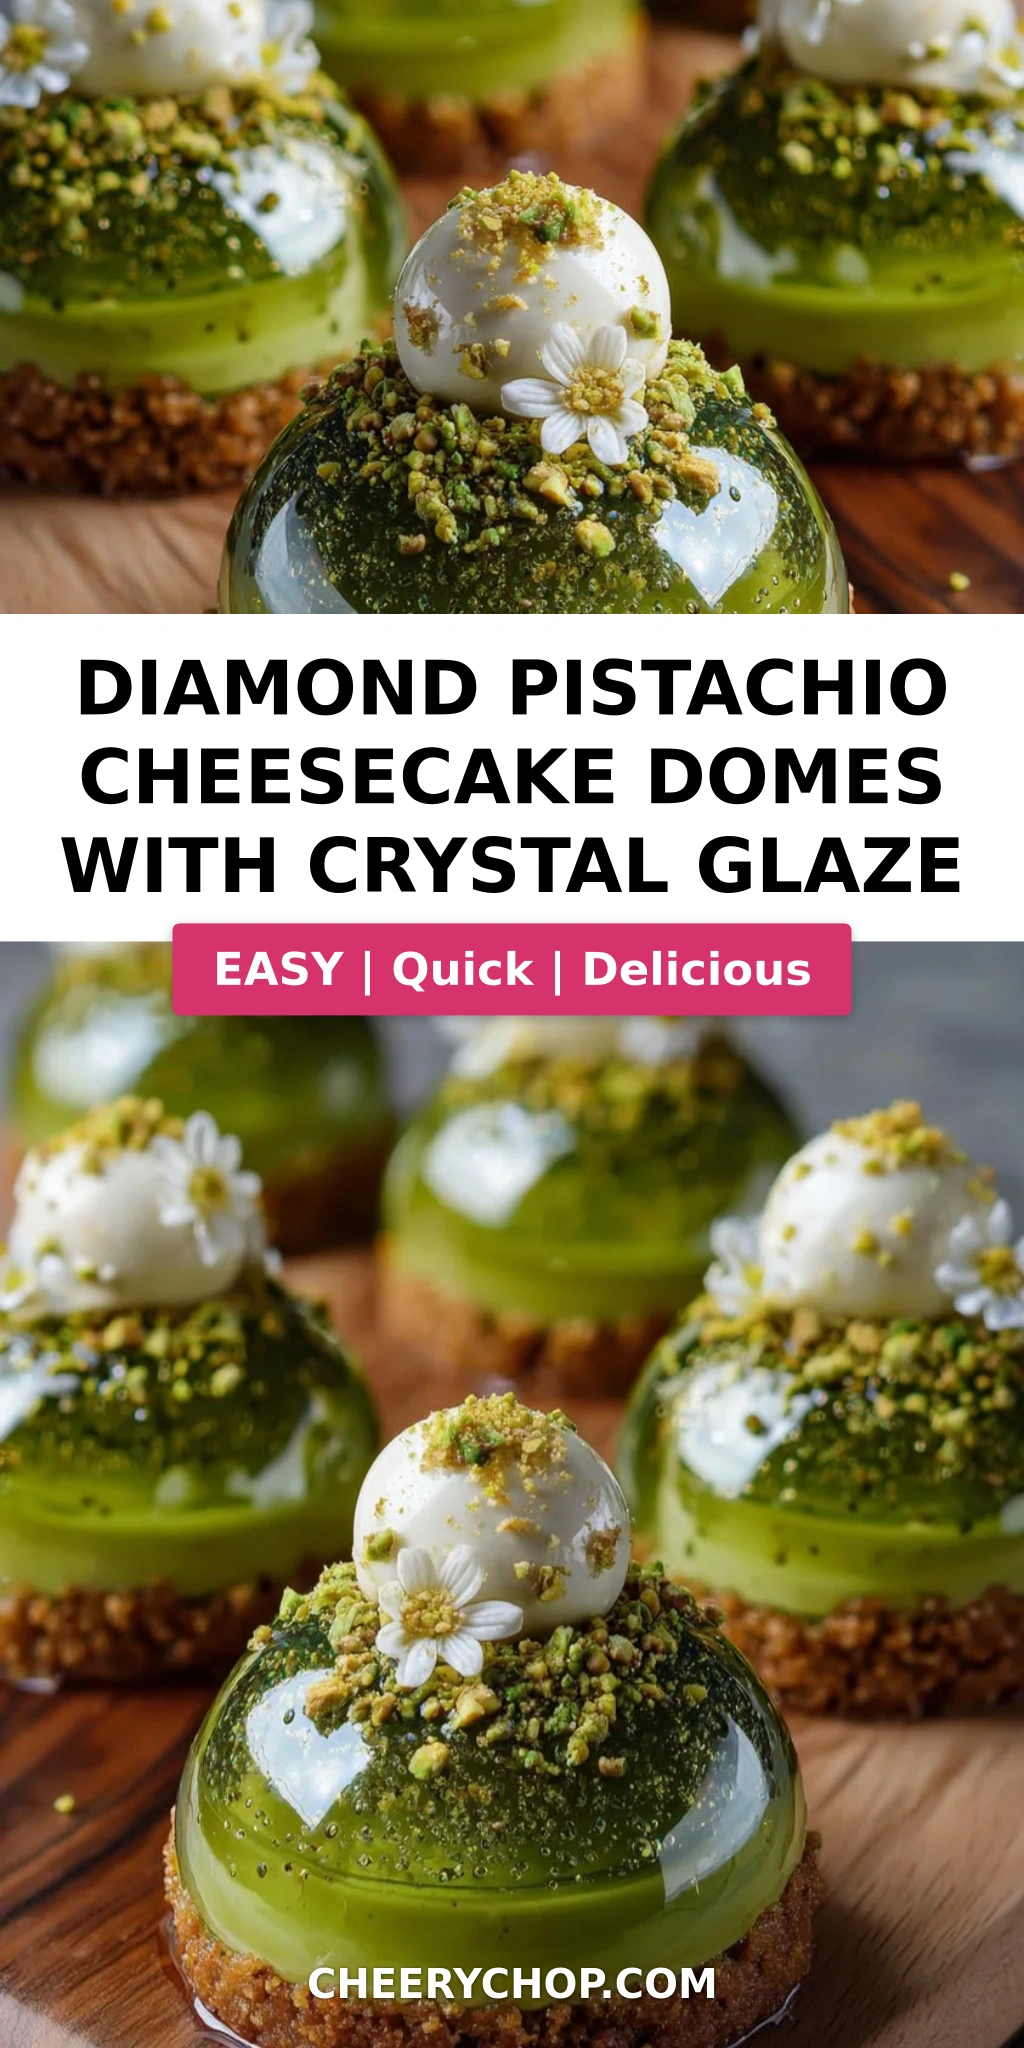
Diamond Pistachio Cheesecake Domes with Crystal Glaze – A Stunning Mirror-Glazed Dessert
I still remember the first time I saw a mirror-glazed dessert in a Parisian pâtisserie window — it stopped me mid-step. The glossy, jewel-like surface seemed almost too perfect to eat. Years later, after endless tests in my NYC kitchen, I created my own version: Diamond Pistachio Cheesecake Domes with Crystal Glaze. This pistachio cheesecake domes recipe combines my French pastry training with the warm, nutty flavors I grew up with in Morocco. The crystal glaze — a technique I mastered during my time at Le Cordon Bleu — gives each dome a brilliant, mirror-like finish that catches the light like a gemstone. Every time I serve these at a dinner party, guests lean in closer, mesmerized by the shine. That moment never gets old.
Each spoonful of these cheesecake domes is a study in contrasts. The smooth, velvety pistachio cheesecake filling melts on your tongue, while the buttery graham cracker base adds a gentle crunch. Then comes the glaze — a translucent, pistachio-tinged shell that shatters ever so slightly as you cut through it. The aroma of toasted pistachios mingles with vanilla, and the edible gold dust catches the light with every movement. It’s the kind of dessert that makes people stop talking and just savor every single bite. I love watching faces light up around the table — it reminds me of my mother’s kitchen in Morocco, where food was always about bringing people together.
After testing this recipe more times than I care to count, I’ve refined every step to ensure it’s as achievable as it is stunning. The key is in the temperature — both for the cheesecake base and the glaze. Get that right, and you’ll have perfectly smooth domes with a crack-free crystal glaze cheesecake finish every time. In this post, I’ll walk you through my French-meets-Moroccan approach, share the 💡 Sara’s Pro Tip: that prevents glaze cracking, and point out the most common mistake I see home bakers make. Trust me — if I can make these in my tiny NYC apartment kitchen, you can absolutely make them in yours.
Why This Pistachio Cheesecake Domes Recipe Is the Best
The Flavor Secret. The heart of this pistachio dome cake is the pistachio paste — a rich, aromatic blend of finely ground pistachios that brings an authentic, deep nuttiness to the cheesecake. I use a French technique of warming a small portion of the cheesecake mixture to dissolve the bloomed gelatin, ensuring the texture stays silky smooth without any lumps. Growing up in Morocco, my mother taught me that the best desserts balance richness with brightness — so I add a tiny pinch of salt and just enough vanilla to lift the pistachio flavor rather than overpower it. This is the same approach I use in my NYC cooking classes, and it never fails to impress.
Perfected Texture. The dual-cream base — cream cheese plus mascarpone — gives these domes an ultra-luxurious mouthfeel that’s lighter than a traditional cheesecake yet still satisfyingly rich. The gelatin provides just enough structure to hold the dome shape after freezing, while the whipped cream keeps the filling airy. I learned this balance during my pastry training in Paris, where precision in texture is everything. The result is a filling that slices cleanly, holds its shape under the glaze, and still tastes wonderfully creamy at room temperature.
Foolproof & Fast. Despite the advanced-looking result, this pistachio cheesecake domes recipe is surprisingly forgiving if you follow a few key temperature rules. The silicone dome molds do most of the shaping work for you, and the mirror glaze — while dramatic — comes together in under 15 minutes on the stove. I’ve tested this recipe with home bakers of all skill levels in my NYC workshops, and everyone walks away with gorgeous, glossy domes on their first try. The secret is all in the setup: prep your ingredients before you start, and you’ll cruise through every step with confidence.
Pistachio Cheesecake Domes Recipe Ingredients
I source my pistachio paste from a little specialty shop near Union Square Market — it’s worth seeking out a good-quality brand because the paste is the backbone of this entire dessert. In Morocco, we used fresh pistachios from the souk and ground them by hand with a mortar and pestle. These days, I rely on Italian or Sicilian pistachio paste for its vibrant color and concentrated flavor. Every ingredient in this recipe has been chosen to work in harmony, creating a dessert that tastes as luxurious as it looks.
Ingredients List
- For the Pistachio Cheesecake Domes: 12 oz cream cheese, softened
- 1/2 cup mascarpone cheese
- 1/2 cup heavy cream
- 1/3 cup granulated sugar
- 1 tsp vanilla extract
- 1/2 cup pistachio paste
- 2 tsp gelatin powder
- 2 tbsp cold water
- Pinch of salt
- For the Biscuit Base: 1 cup graham cracker crumbs
- 3 tbsp melted butter
- 1 tbsp sugar
- 1/2 tsp cinnamon
- For the Crystal Pistachio Glaze: 1 cup granulated sugar
- 1/2 cup water
- 1/2 cup light corn syrup
- 1 tbsp gelatin powder
- 3 tbsp cold water
- 1 tbsp pistachio paste
- 1 tsp vanilla extract
- 1 tbsp coconut oil
- For Garnish (optional): 2 tbsp crushed pistachios
- 1 tbsp white chocolate shavings
- Pinch of edible gold dust
Ingredient Spotlight
Pistachio Paste: This is the soul of the recipe. Look for 100% pure pistachio paste with no added oils or sugars — the color should be a vibrant emerald green. I recommend brands like Sicilian Pistachio Paste or Rustichella d’Abruzzo. If you can only find pistachio butter, it will work but may be slightly less vibrant in color. 💡 Sara’s Pro Tip: Store pistachio paste in the fridge after opening — it keeps its color and flavor much longer.
Gelatin Powder: This is the structural backbone of both the cheesecake filling and the crystal glaze. Use high-quality powdered gelatin like Knox or Great Lakes. The blooming process — soaking the gelatin in cold water for 5 minutes — is non-negotiable for a smooth, lump-free result. Never use gelatin sheets in this recipe unless you convert the weight precisely, as the water ratio differs.
Mascarpone Cheese: This Italian cream cheese adds a luxurious richness and a silky texture that American cream cheese alone can’t achieve. I buy mine from Eataly in NYC, but most US grocery stores carry it in the specialty cheese section. In a pinch, you can substitute with an equal amount of full-fat cream cheese, though the texture will be slightly denser.
| Original Ingredient | Best Substitution | Flavor / Texture Impact |
|---|---|---|
| Pistachio Paste | Almond paste + green food coloring | Nutty but milder; color will be less vibrant |
| Mascarpone Cheese | Full-fat cream cheese | Denser texture, slightly tangier |
| Graham Cracker Crumbs | Digestive biscuit crumbs or vanilla wafer crumbs | Slightly different sweetness and crunch |
| Light Corn Syrup | Glucose syrup or honey (thinned slightly) | Glaze may be slightly less clear with honey |
| Coconut Oil | Refined coconut oil or grapeseed oil | Similar shine; unrefined adds coconut aroma |
How to Make Pistachio Cheesecake Domes — Step-by-Step
I’ve broken down every step with the exact timing, visual cues, and the pro tips I share with my NYC cooking students. Follow these closely, and you’ll be serving restaurant-quality diamond pistachio dessert domes that look like they came from a high-end pâtisserie.
Step 1: Bloom the Gelatin
In a small bowl, sprinkle 2 tsp gelatin powder over 2 tbsp cold water. Let it sit undisturbed for 5 minutes until the gelatin absorbs the water and becomes a firm, spongy mass. This process, called blooming, ensures the gelatin dissolves evenly without clumps.
💡 Sara’s Pro Tip: Use cold water — never warm — for blooming. Warm water will dissolve the gelatin prematurely and ruin its setting power. Think of it like a sponge: it needs cold water to expand properly.
Step 2: Make the Biscuit Base
Mix 1 cup graham cracker crumbs, 3 tbsp melted butter, 1 tbsp sugar, and 1/2 tsp cinnamon until the mixture looks like wet sand and holds together when pressed. Firmly press about 1 heaping tablespoon of the mixture into the bottom of each silicone dome mold, using a small glass or your fingers to compact it evenly.
⚠️ Common Mistake to Avoid: Pressing too lightly. If the base isn’t compact, it will crumble when you unmold the domes. Press firmly and evenly — you want a solid, cohesive layer that stays intact after freezing.
Step 3: Whip the Cheesecake Filling
In a large bowl, beat 12 oz softened cream cheese, 1/2 cup mascarpone, 1/2 cup heavy cream, 1/3 cup sugar, 1 tsp vanilla, 1/2 cup pistachio paste, and a pinch of salt. Use an electric mixer on medium speed for about 3 minutes until the mixture is completely smooth, fluffy, and uniformly pale green. Scrape the sides and bottom of the bowl at least once to ensure even mixing.
💡 Sara’s Pro Tip: Make sure your cream cheese and mascarpone are truly at room temperature — about 70°F. Cold cream cheese will leave lumps that no amount of mixing can fully remove. Take them out of the fridge 1 hour before starting.
Step 4: Dissolve the Gelatin
Scoop out about 1/4 cup of the cheesecake mixture into a small microwave-safe bowl. Warm it in the microwave for 10 seconds. Add the bloomed gelatin and stir vigorously until fully dissolved — about 30 seconds. The mixture should look smooth and homogeneous with no streaks of gelatin.
⚠️ Common Mistake to Avoid: Adding the gelatin directly to the cold mixture. It will seize up and form rubbery strands. Always warm a small portion first, dissolve the gelatin in that, and then fold it back into the full mixture.
Step 5: Fill the Molds
Fold the gelatin mixture back into the main cheesecake bowl using a rubber spatula, mixing gently until fully combined. Spoon or pipe the filling into the silicone dome molds over the biscuit base, filling each mold to the top. Use an offset spatula to smooth the tops flat. The molds should be completely filled with no air pockets.
💡 Sara’s Pro Tip: Tap the filled molds gently on the counter 3-4 times to release any trapped air bubbles. This ensures a perfectly smooth surface under the glaze.
Step 6: Freeze the Domes
Place the filled molds on a baking sheet and freeze for at least 4 hours, or overnight. The domes must be completely frozen solid before unmolding — this is crucial for the glazing step. If they’re even slightly soft in the center, they’ll lose their shape when you unmold them.
⚠️ Common Mistake to Avoid: Rushing the freezing time. Four hours is the minimum; 6-8 hours is better. A fully frozen dome unmolds cleanly and holds its shape perfectly under the warm glaze.
Step 7: Bloom Gelatin for the Glaze
While the domes freeze, prepare the glaze. Sprinkle 1 tbsp gelatin powder over 3 tbsp cold water in a small bowl. Let it bloom for 5 minutes until firm and spongy. Set aside.
💡 Sara’s Pro Tip: Always bloom the glaze gelatin fresh — don’t try to use pre-bloomed gelatin from the fridge. The texture changes and can make the glaze grainy.
Step 8: Make the Crystal Glaze
In a small saucepan, combine 1 cup sugar, 1/2 cup water, and 1/2 cup light corn syrup. Heat over medium heat, stirring gently, until the sugar fully dissolves and the liquid becomes clear — about 3-4 minutes. Do not let it boil vigorously. Remove from heat and stir in the bloomed gelatin, 1 tbsp pistachio paste, 1 tsp vanilla extract, and 1 tbsp coconut oil. Stir until the glaze is glossy and completely smooth.
⚠️ Common Mistake to Avoid: Overheating the sugar mixture. If it boils too hard, water evaporates and the glaze becomes too thick to pour smoothly. Keep the heat at medium and remove as soon as the sugar dissolves.
Step 9: Cool the Glaze
Let the glaze cool at room temperature, stirring occasionally, until it thickens slightly but is still pourable — about 15-20 minutes. You want it to be around 90-95°F (barely warm to the touch). If it’s too hot, it will melt the frozen domes; if too cold, it will set before you can pour it smoothly.
💡 Sara’s Pro Tip: Test the glaze on the back of a spoon — it should coat the spoon evenly and drip off in a smooth, continuous sheet. If it drips in separate drops, it’s too cold; warm it gently for 5 seconds in the microwave.
Step 10: Unmold and Glaze
Remove the frozen domes from the freezer. Gently flex the silicone molds to release each dome — they should pop out cleanly. Place each dome on a wire rack set over a baking sheet (to catch excess glaze). Working one at a time, pour the crystal pistachio glaze evenly over each dome, starting from the top and letting it cascade down the sides. Allow the excess to drip off for about 15 seconds before transferring.
⚠️ Common Mistake to Avoid: Glazing over a plate instead of a wire rack. The pooled glaze will create an uneven edge around the base. A wire rack allows the excess to drip cleanly away, giving you a professional finish.
Step 11: Chill and Garnish
Carefully transfer the glazed domes to serving plates. Place them in the refrigerator for 20 minutes to allow the glaze to set completely — it will become firm and glossy to the touch. Just before serving, finish with a sprinkle of crushed pistachios, white chocolate shavings, and a pinch of edible gold dust for that diamond-like sparkle.
💡 Sara’s Pro Tip: Use tweezers to place the gold dust and chocolate shavings — it gives you precision control and makes each dome look like a piece of jewelry. Less is more; a tiny pinch goes a long way.
| Step | Action | Duration | Key Visual Cue |
|---|---|---|---|
| 1 | Bloom gelatin | 5 mins | Firm, spongy mass |
| 2 | Make biscuit base | 5 mins | Wet sand texture |
| 3 | Whip cheesecake filling | 3 mins | Smooth, fluffy, pale green |
| 4 | Dissolve gelatin | 1 min | No streaks of gelatin |
| 5 | Fill molds | 5 mins | Smooth tops, no air pockets |
| 6 | Freeze domes | 4+ hrs | Frozen solid |
| 7 | Bloom gelatin for glaze | 5 mins | Firm, spongy mass |
| 8 | Make crystal glaze | 5 mins | Clear, glossy liquid |
| 9 | Cool glaze | 15-20 mins | Coats spoon, drips smoothly |
| 10 | Unmold and glaze | 10 mins | Even glaze coverage |
| 11 | Chill and garnish | 20 mins | Glaze set to the touch |
Serving & Presentation
These mirror glaze cheesecake domes are a showstopper on any dessert table. I like to serve them on minimalist white plates to let the jewel-toned glaze take center stage. Place each dome slightly off-center, and add a small quenelle of lightly sweetened whipped cream or a dollop of crème fraîche on the side to balance the richness. In Morocco, we often serve sweet pastries with a touch of floral — a tiny drizzle of orange blossom honey or a scatter of edible rose petals would be a beautiful nod to my heritage.
For a holiday or celebration, arrange the domes on a mirrored cake stand or a slate board for maximum visual impact. The edible gold dust catches the light from every angle, making the domes look like they’re glowing from within. I once served these at a New Year’s Eve dinner party in my NYC apartment, and guests literally pulled out their phones before picking up their forks — that’s when you know you’ve created something special.
Pair these domes with a dessert wine like a late-harvest Riesling or a strong espresso to cut through the richness. For a non-alcoholic option, a Moroccan mint tea (my mother’s recipe, naturally) is absolutely divine alongside the pistachio and vanilla notes.
| Pairing Type | Suggestions | Why It Works |
|---|---|---|
| Side Dish | Lightly sweetened whipped cream, fresh berries, citrus salad | Adds freshness and cuts the richness |
| Sauce / Dip | Raspberry coulis, salted caramel, dark chocolate ganache | Fruit tartness or chocolate depth complement pistachio |
| Beverage | Espresso, late-harvest Riesling, Moroccan mint tea | Coffee and tea balance sweetness; wine echoes nuttiness |
| Garnish | Crushed pistachios, white chocolate shavings, edible gold dust, rose petals | Adds texture, visual drama, and a touch of luxury |
Make-Ahead, Storage & Reheating
One of the best things about this pistachio cheesecake domes recipe is how well it works for make-ahead entertaining. In my busy NYC life, I rarely have time to assemble a dessert from scratch on party day — so I rely on this recipe’s forgiving timeline. The domes can be fully prepared and glazed up to 2 days in advance, which means you can enjoy your own party instead of being stuck in the kitchen.
| Method | Container | Duration | Reheating Tip |
|---|---|---|---|
| Refrigerator | Airtight container, single layer | Up to 2 days | Serve straight from fridge; no reheating needed |
| Freezer | Freezer-safe container, parchment between layers | Up to 1 month | Thaw in fridge 3 hours before serving |
| Make-Ahead | Freeze unglazed domes; glaze on serving day | Up to 1 week | Glaze while frozen; no need to thaw first |
If you’re planning ahead, I recommend freezing the unglazed domes and making the fresh glaze on the day you plan to serve them. The glaze is at its most brilliant and glossy within the first 24 hours. If you’ve already glazed the domes, store them in the refrigerator in a single layer — don’t stack them or the glaze will stick and crack. And whatever you do, don’t reheat these domes — they’re meant to be served chilled. The cold temperature is what keeps the texture firm and the glaze perfectly set.
Variations & Easy Swaps
This diamond pistachio dessert recipe is wonderfully adaptable. Over the years, I’ve tested dozens of variations in my NYC kitchen, and these three are my absolute favorites. Each one brings a new personality to the domes while keeping the signature crystal glaze shine intact.
| Variation | Key Change | Best For | Difficulty Impact |
|---|---|---|---|
| Almond & Orange Blossom | Substitute almond paste for pistachio paste; add orange blossom water | North African flavor profile | Same difficulty |
| Chocolate-Hazelnut | Replace pistachio paste with hazelnut-chocolate spread; add cocoa to glaze | Kids and chocolate lovers | Slightly easier (glaze is more forgiving) |
| Vegan Coconut | Use vegan cream cheese, coconut cream, and agar-agar instead of gelatin | Dairy-free / vegan guests | More advanced (agar sets differently) |
Variation 1: Almond & Orange Blossom
This variation is a love letter to my Moroccan roots. Swap the pistachio paste with the same amount of high-quality almond paste (or marzipan, softened), and add 1 teaspoon of orange blossom water to the cheesecake mixture. The floral notes of orange blossom pair beautifully with the almond, and the crystal glaze stays the same — just omit the pistachio paste from the glaze and use a drop of green food coloring if you want to keep the color. This version is a regular at my family gatherings in NYC, and it always sparks conversations about Morocco.
Variation 2: Gluten-Free / Dairy-Free
To make this recipe gluten-free, simply substitute the graham cracker crumbs with gluten-free digestive biscuits or almond flour mixed with a touch of coconut oil. For a dairy-free version, use vegan cream cheese (I like Miyoko’s or Kite Hill), full-fat coconut cream instead of heavy cream, and a vegan mascarpone alternative. The gelatin can be replaced with agar-agar, but be careful — agar sets at room temperature and needs to be boiled for 2 minutes to activate. I’ve tested this version for friends with dietary restrictions, and while the texture is slightly different (a bit less creamy), the visual impact is just as stunning.
Variation 3: Seasonal Berry Twist
During summer in NYC, I love adding a layer of fresh berry compote between the biscuit base and the cheesecake filling. Simply simmer 1 cup of mixed berries (raspberries, blueberries, or sliced strawberries) with 2 tablespoons of sugar and 1 teaspoon of lemon juice until thickened, then cool completely before spooning into the molds. The tartness of the berries cuts through the rich pistachio cheesecake beautifully. For the glaze, you can swap the pistachio paste for a berry puree — just strain it first to remove seeds. The result is a dome with a hidden jewel-toned center that surprises everyone at the table.
How do you make the crystal glaze for Diamond Pistachio Cheesecake Domes without it cracking?
The key to a crack-free crystal glaze is temperature control. First, make sure your cheesecake domes are completely frozen — at least 4 hours, ideally overnight. A frozen surface allows the warm glaze to set instantly without absorbing into the cheesecake. Second, cool the glaze to 90-95°F before pouring; if it’s too hot, it will melt the dome and cause cracks as it cools. Third, use a wire rack so excess glaze drips away cleanly — pooled glaze at the base can pull and crack as it sets. Finally, don’t skip the coconut oil in the glaze — it adds flexibility that helps prevent cracking as the glaze firms up in the fridge. If you follow these steps, you’ll get a flawless, mirror-smooth finish every time.
Can I use a different nut instead of pistachios in this cheesecake dome recipe?
Absolutely! While pistachios give this recipe its signature flavor and beautiful green hue, you can easily swap in other nuts. Almond paste or marzipan works wonderfully — just soften it before mixing. Hazelnut paste (like the kind used in Italian pastries) creates a rich, chocolatey variation, especially if you add a touch of cocoa to the glaze. Walnut or pecan butter can also work, though their flavors are stronger and more earthy. Keep in mind that the color of the glaze will change based on your nut choice — almond will give a pale ivory glaze, while hazelnut will turn a warm brown. Adjust the food coloring if you want a specific look.
What is the best way to achieve a perfectly smooth dome shape for cheesecake domes?
The secret to perfectly smooth domes is threefold: use high-quality silicone dome molds, tap out air bubbles, and freeze thoroughly. Silicone molds are non-negotiable — they flex easily for clean unmolding without damaging the shape. After filling each mold, tap the tray firmly on the counter 3-4 times to release any trapped air bubbles; these bubbles create pits and dimples on the surface that the glaze will highlight. Finally, freeze the domes for at least 4 hours — 6-8 is better. A fully frozen dome unmolds cleanly with a glass-smooth surface. If your dome has any rough edges after unmolding, you can gently smooth them with a warm, dry finger before glazing.
How far in advance can I prepare Diamond Pistachio Cheesecake Domes for a party?
You can prepare these domes several days in advance, making them a perfect party dessert. For best results, freeze the unglazed domes up to 1 week ahead — store them in a freezer-safe container with parchment paper between layers. On the day of your party, make the fresh crystal glaze and pour it over the frozen domes. Once glazed, the domes can be refrigerated for up to 2 days, but the glaze is at its most brilliant and glossy within the first 24 hours. I recommend glazing no more than 24 hours before serving for that show-stopping mirror finish. If you need to prep even further ahead, you can make the biscuit base and cheesecake filling separately and assemble them up to 2 days before freezing.
Can I make these cheesecake domes without gelatin?
Yes, you can substitute gelatin with agar-agar powder for a vegetarian or vegan version. Use the same amount of agar-agar by weight, but note that agar sets differently — it needs to be boiled for 2 minutes to activate, and it sets at room temperature rather than in the fridge. For the cheesecake filling, dissolve the agar in a small amount of the cream mixture and boil briefly before folding back in. For the glaze, boil the agar with the sugar and water mixture until fully dissolved. The texture with agar is slightly firmer and less creamy than with gelatin, and the glaze may be slightly less glossy. If you’re new to working with agar, I recommend doing a small test batch first.
What is pistachio paste and where can I buy it?
Pistachio paste is a smooth, spreadable mixture made from finely ground pistachios, often with a small amount of oil to maintain a silky texture. It’s different from pistachio butter (which is coarser) and pistachio cream (which contains added sugar and milk). Look for 100% pure pistachio paste with no added oils or sugars for the best color and flavor. In the US, you can find it at specialty grocery stores like Whole Foods, Eataly, or online through Amazon or brands like Sicilian Pistachio Paste. I buy mine from a little shop near Union Square Market in NYC. Store it in the refrigerator after opening, and it will keep for up to 6 months.
How do I store leftover Diamond Pistachio Cheesecake Domes?
Leftover glazed domes should be stored in an airtight container in the refrigerator for up to 2 days. Place them in a single layer with enough space between each dome so the glaze doesn’t touch — otherwise, they’ll stick together and the glaze will crack when separated. If you need to stack them, use parchment paper rounds between layers. Do not freeze glazed domes, as the glaze will crack and become cloudy during thawing. If you have unglazed domes in the freezer, you can keep them for up to 1 month and glaze them fresh whenever you’re ready. Leftover domes are best enjoyed within 24 hours of glazing, when the surface is still brilliantly glossy.
Can I freeze the cheesecake domes before glazing?
Yes, absolutely — in fact, freezing the domes before glazing is a critical step in this recipe. The domes must be completely frozen solid (at least 4 hours, ideally overnight) before you pour the crystal glaze over them. The frozen surface causes the warm glaze to set instantly upon contact, creating that smooth, mirror-like finish. If the domes are even slightly thawed, the glaze will melt the surface and create a messy, uneven result. Once glazed, the domes go into the refrigerator for 20 minutes to finish setting. For make-ahead prep, you can freeze the unglazed domes for up to 1 week and glaze them fresh on serving day for the best results.
What type of mold is best for making cheesecake domes?
Silicone dome molds are the best and most reliable option for this recipe. They flex easily, allowing you to unmold the frozen domes cleanly without damaging their shape. Look for molds with a smooth interior surface — any texture or seam lines will transfer to the cheesecake. Half-sphere molds that are about 2.5 to 3 inches in diameter work perfectly for individual servings. I use a set from a French brand called Silikomart, but you can find affordable options on Amazon or at baking supply stores. Avoid using metal or ceramic molds, as the domes won’t release cleanly and you’ll lose the smooth shape that makes this dessert so stunning.
Why did my crystal glaze crack and how can I fix it?
Cracked glaze usually happens for one of three reasons: the glaze was too cold when poured, the domes weren’t frozen enough, or the glaze layer was too thick. If the glaze is below 85°F, it will set too quickly and crack as it contracts. If the domes are not fully frozen, the warm glaze will melt the surface and create fissures as it cools. And if you pour too much glaze, the weight can cause the layer to split. To fix a cracked glaze, gently warm the dome with a hairdryer on low heat to melt the glaze slightly, then smooth it with an offset spatula and return to the fridge. Alternatively, you can scrape off the cracked glaze entirely and re-glaze with a fresh, properly cooled batch — the dome will still look beautiful.
Share Your Version!
I absolutely love seeing how this pistachio cheesecake domes recipe turns out in your kitchen! Did you try the classic version, or did you experiment with one of the variations? Maybe you added your own twist — a drizzle of honey, a sprinkle of sea salt, or a totally new flavor combination? Drop a comment below with your star rating and tell me how it went. Your feedback helps other home bakers know what works, and I personally read every single comment.
Snap a photo of your Diamond Pistachio Cheesecake Domes and share it on Instagram or Pinterest — tag me @cheerychop so I can see your beautiful creation. I love featuring reader versions on my stories! And here’s a fun question for you: what’s the one dessert you’ve always wanted to try making with a mirror glaze? Let me know in the comments — it might just inspire my next recipe!
From my NYC kitchen to yours — I hope this recipe brings as much warmth to your table as it does to mine. — Sara 🧡
Love This Recipe? Save It to Pinterest!
If you enjoyed this Diamond Pistachio Cheesecake Domes with Crystal Glaze recipe, don’t let it get lost in your browser tabs! 😄 Pin it now so you can find it again anytime — and explore hundreds more tried-and-tested recipes waiting for you on my Pinterest boards.
👉 Follow Sara on Pinterest @chefrecipes2
📌 Pin this recipe · 🔁 Re-pin your favorites · 💬 Tag me when you make it — I love seeing your creations!
Diamond Pistachio Cheesecake Domes with Crystal Glaze

- Yield: 6 1x
Ingredients
- For the Pistachio Cheesecake Domes:
- 12 oz cream cheese, softened
- 1/2 cup mascarpone cheese
- 1/2 cup heavy cream
- 1/3 cup granulated sugar
- 1 tsp vanilla extract
- 1/2 cup pistachio paste
- 2 tsp gelatin powder
- 2 tbsp cold water
- Pinch of salt
- For the Biscuit Base:
- 1 cup graham cracker crumbs
- 3 tbsp melted butter
- 1 tbsp sugar
- 1/2 tsp cinnamon
- For the Crystal Pistachio Glaze:
- 1 cup granulated sugar
- 1/2 cup water
- 1/2 cup light corn syrup
- 1 tbsp gelatin powder
- 3 tbsp cold water
- 1 tbsp pistachio paste
- 1 tsp vanilla extract
- 1 tbsp coconut oil
- For Garnish (optional):
- 2 tbsp crushed pistachios
- 1 tbsp white chocolate shavings
- Pinch of edible gold dust
Instructions
- Bloom gelatin in cold water for 5 minutes.
- Mix graham cracker crumbs, melted butter, sugar, and cinnamon until evenly combined. Press firmly into silicone dome molds as the base layer.
- Whip cream cheese, mascarpone, heavy cream, sugar, vanilla, pistachio paste, and salt until smooth and fluffy.
- Warm a small portion of the mixture and dissolve the bloomed gelatin, then fold it back into the full mixture.
- Fill molds over the biscuit base and smooth the tops. Freeze for at least 4 hours until fully set.
- For the glaze, bloom gelatin in cold water for 5 minutes.
- Heat sugar, water, and corn syrup until fully dissolved and clear. Remove from heat and stir in gelatin, pistachio paste, vanilla extract, and coconut oil until glossy.
- Allow glaze to cool until slightly thick but still pourable.
- Unmold frozen domes and place on a wire rack. Pour the crystal pistachio glaze evenly over each dome, allowing excess to drip off.
- Transfer to serving plates and chill for 20 minutes before serving.
- Finish with crushed pistachios, white chocolate shavings, and edible gold dust.
Nutrition
- Calories: 450
- Sugar: 30g
- Fat: 31g
- Carbohydrates: 38g
- Protein: 7g
Tried This Recipe? Leave a Comment!
Did you make this recipe? I’d love to hear how it turned out! Please leave a comment and a rating below. Your feedback helps other home cooks and supports cheerychop.com!
For more delicious inspiration, follow me on Pinterest!


