
Table of Contents
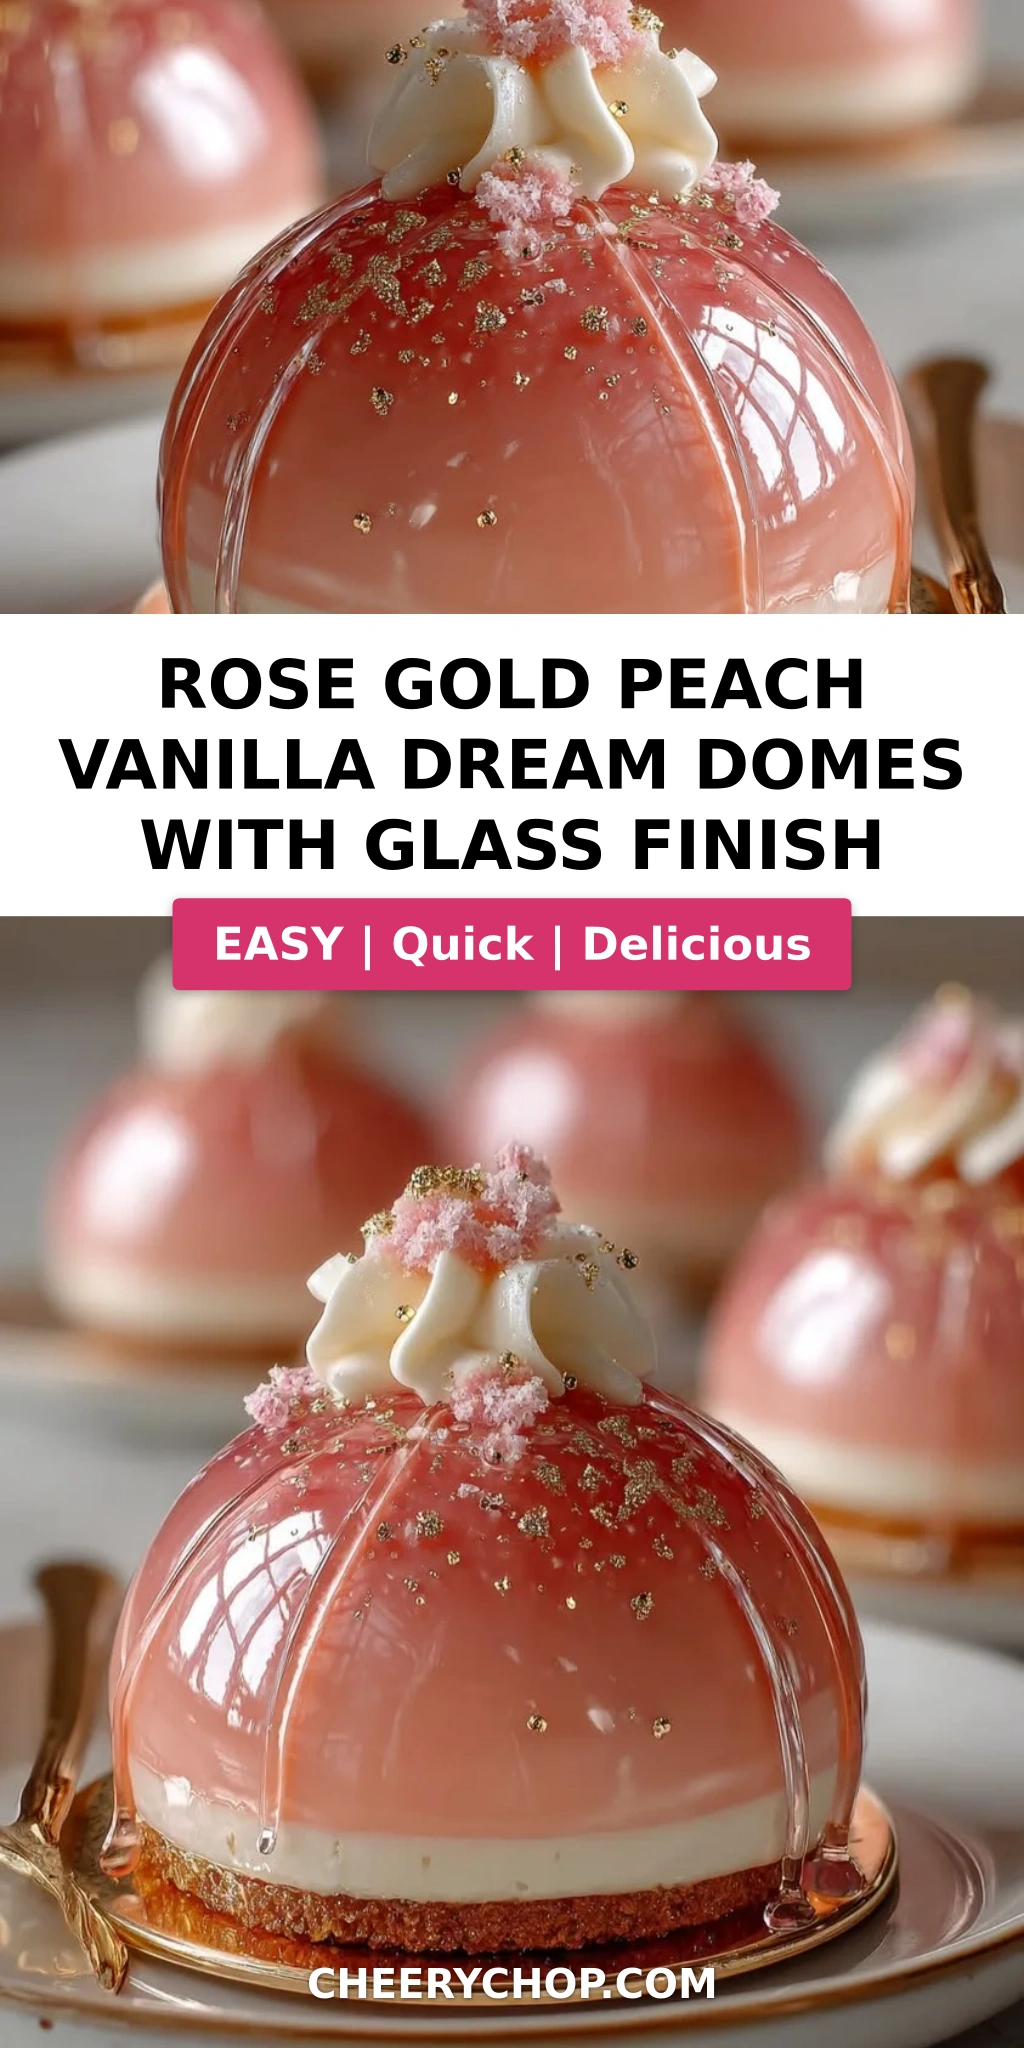
Rose Gold Peach Vanilla Dream Domes with Glass Finish – A Stunning Dessert That Steals the Show
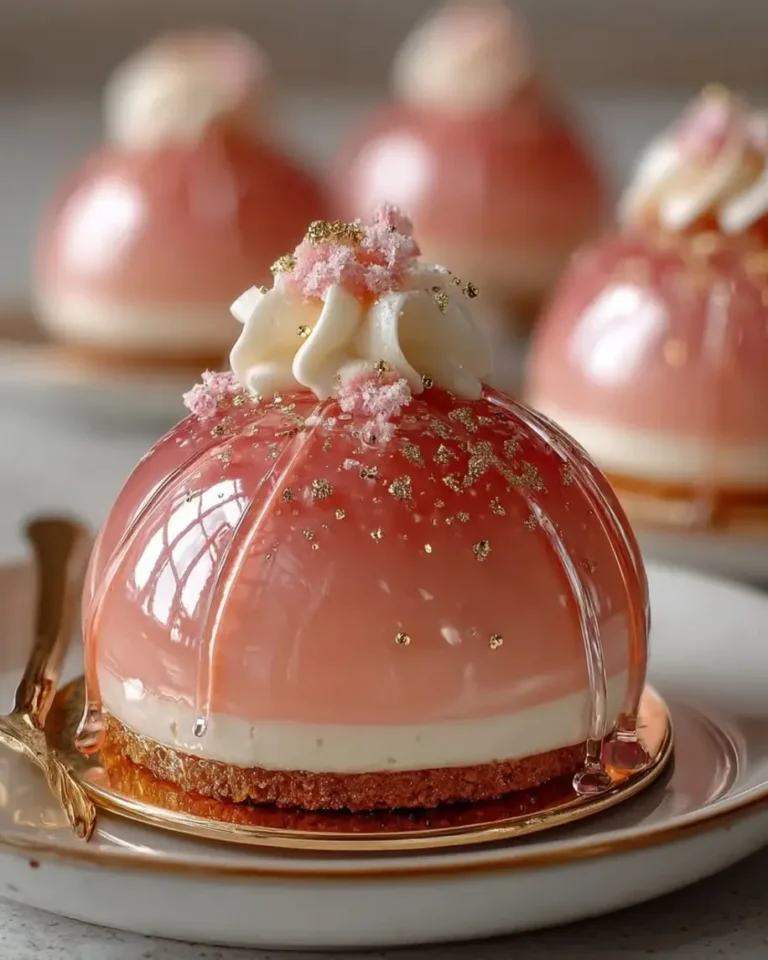
I still remember the first time I made these rose gold peach vanilla dream domes for a dinner party in my Upper West Side apartment. My guests went silent after the first bite — that moment when a dessert speaks louder than words. Growing up in Morocco, my mother would make delicate fruit-based sweets scented with orange blossom and honey, always presented with such care that they felt like jewelry. These domes carry that same spirit: elegant, personal, and full of warmth. The glass finish glaze gives them a mirror-like shine that catches every bit of light at your table, making them the centerpiece of any celebration.
The flavor here is a layered story. A silky peach vanilla shell gives way to a luscious mascarpone cream center — sweet but balanced, with the bright acidity of peach and the floral warmth of vanilla bean paste tying it all together. The rose gold glass glaze, shimmering with edible gold luster dust, adds that wow factor. Each bite brings a creamy, fruity, and lightly tangy experience, finished with the crunch of white chocolate curls and freeze-dried peach crumbs. It’s a dessert that feels simultaneously decadent and refreshing — exactly the kind of thing I love creating after my years training in Parisian pastry kitchens.
What sets my version apart is the technique. I spent three months testing this recipe to make sure the glass glaze stays crack-free and glossy every time — and I’m sharing every trick I learned. From the proper way to bloom gelatin to controlling glaze temperature for that perfect rose gold sheen, I’ll walk you through each step. One common mistake home cooks make is pouring the glaze too hot, which melts the frozen dome and ruins the finish. I’ll show you exactly how to avoid that. These rose gold peach vanilla dream domes look like they came from a high-end patisserie, but with my guidance, you’ll be amazed at how achievable they are in your own kitchen.
Why This Rose Gold Peach Vanilla Dream Domes Recipe Is the Best
The flavor secret lies in how I layer the peach and vanilla. Instead of mixing everything together, I create a peach vanilla shell that wraps around a pure vanilla mascarpone core. This way, each spoonful gives you the bright fruitiness of peach first, then the creamy richness of vanilla. It’s a technique I picked up during my pastry training in Paris, where we learned that contrast — not blending — creates the most memorable desserts. The vanilla bean paste I use here has real vanilla seeds that speckle the shell beautifully, adding both flavor and visual appeal.
Perfected texture is what makes these domes truly special. The shell has a delicate, mousse-like consistency that melts on your tongue, while the center stays thick and creamy thanks to mascarpone. The glass glaze forms a thin, snappy shell that shatters slightly when you tap it with a spoon — that contrast between the soft interior and the crisp exterior is pure magic. I tested over a dozen ratios of gelatin to liquid to get that balance right. The key is letting the glaze cool to exactly 90°F before pouring, which gives you that flawless, crack-free mirror finish every time.
This recipe is more foolproof than it looks. Despite the elegant presentation, the steps are straightforward if you follow them in order. I’ve broken everything down into clear stages — make the shell, freeze, prepare the cream, assemble, freeze again, then glaze. You can prepare these entirely in advance, which makes them perfect for entertaining. I’ve had readers who never attempted a molded dessert before succeed on their first try. The rose gold peach vanilla dream domes look like you spent days on them, but the active work is only about an hour. The rest is just letting the freezer do its job.
Rose Gold Peach Vanilla Dream Domes Ingredients
I source my peaches from the Union Square Greenmarket in late summer when they’re at their peak, but good-quality frozen peach puree works beautifully year-round. The vanilla bean paste I order online from a small Vermont producer — it’s thicker and more aromatic than extract. For the edible gold luster dust, I recommend a brand like Chefmaster or The Sugar Art; they give the truest rose gold shimmer without a metallic taste. Let me walk you through everything you’ll need.
Ingredients List
For the Peach Vanilla Dome Shells:
- 2 cups peach puree (from fresh or frozen peaches)
- 1 cup heavy cream
- 1/3 cup granulated sugar
- 1 tsp vanilla bean paste
- 2 tsp gelatin powder
- 2 tbsp cold water (for blooming gelatin)
- 1 tbsp lemon juice
- Pinch of salt
For the Vanilla Cream Core:
- 1 cup mascarpone cheese
- 1/2 cup heavy whipping cream
- 3 tbsp powdered sugar
- 1 tsp vanilla extract
For the Glass Rose Gold Glaze:
- 1 cup white chocolate, finely chopped
- 1/2 cup sweetened condensed milk
- 1/4 cup water
- 1 tbsp gelatin powder
- 3 tbsp cold water (for blooming gelatin)
- 1 tsp vanilla extract
- A few drops peach coloring (gel-based preferred)
- 1/2 tsp edible gold luster dust
For Garnish (optional):
- 1 tbsp white chocolate curls
- 1 tsp freeze-dried peach crumbs
- Edible gold flakes
Ingredient Spotlight
Peach Puree: This is the backbone of your dome shells. The sweetness and acidity of the peaches determine the entire flavor profile. In US grocery stores, look for frozen peach puree in the frozen fruit aisle, or make your own by blending thawed frozen peaches until smooth. If using fresh peaches, choose ones that are fragrant and yield slightly to pressure — that means they’re fully ripe. A tested substitution is high-quality apricot puree, which gives a similar sweetness and color but with a slightly tarter edge that some people actually prefer.
White Chocolate for the Glaze: Not all white chocolate is created equal. For a glass finish that pours smoothly and sets with high shine, use a couverture white chocolate with at least 30% cocoa butter. Brands like Valrhona Ivoire or Callebaut are my go-to choices available at specialty stores like Whole Foods or online. Avoid white melting wafers or candy melts — they contain added oils that prevent the glaze from setting into that hard, glossy shell. If you can’t find couverture, Ghirardelli premium white chocolate bars are a solid supermarket alternative, though the shine will be slightly less intense.
Edible Gold Luster Dust: This is what gives the glaze its signature rose gold shimmer. Not all luster dusts are created equal — some are labeled “non-toxic” but aren’t actually edible. Always look for a brand that explicitly says “edible” on the label. The difference between a cheap drugstore version and a professional one is dramatic: professional dust disperses evenly through the glaze and creates a metallic sheen that catches light from every angle. I’ve tested both, and the professional version is absolutely worth the extra few dollars. You can find it at baking supply stores or online at shops like Naked Kitchen.
| Original Ingredient | Best Substitution | Flavor / Texture Impact |
|---|---|---|
| Peach puree | Apricot puree | Slightly more tart, equally smooth |
| Mascarpone cheese | Full-fat cream cheese + 2 tbsp heavy cream | Slightly tangier, still creamy |
| Vanilla bean paste | 1 vanilla bean, scraped + 1/4 tsp vanilla extract | Same floral depth, no vanilla seeds visible |
| White chocolate (couverture) | Premium white chocolate bar (e.g., Ghirardelli) | Slightly less glossy, still delicious |
| Edible gold luster dust | Pearl dust + a drop of yellow food coloring | Less metallic shimmer, more pearlescent |
How to Make Rose Gold Peach Vanilla Dream Domes — Step-by-Step
Trust me when I say that if you take these steps one at a time, you’ll be amazed at what you can create. I’ve designed the process so each stage builds on the last, and I’ve included all my chef-tested cues so you know exactly what to look for. Let’s do this together.
Step 1: Bloom the Gelatin
In a small bowl, sprinkle 2 teaspoons of gelatin powder over 2 tablespoons of cold water. Do not stir — let it sit undisturbed for 5 minutes. The gelatin will absorb the water and form a firm, jiggly mass. This process, called blooming, ensures the gelatin dissolves evenly into your warm liquid without clumping. I use Knox brand gelatin powder, which is widely available in US grocery stores and gives consistent results every time.
💡 Sara’s Pro Tip: Always use cold water for blooming — never warm or hot. Warm water will cause the gelatin to dissolve partially and create lumps in your final mixture. If your kitchen is very warm, set the bowl in the fridge for those 5 minutes so the gelatin stays firm.
Step 2: Make the Peach Vanilla Mixture
In a medium saucepan, combine 2 cups peach puree, 1 cup heavy cream, 1/3 cup granulated sugar, 1 teaspoon vanilla bean paste, a pinch of salt, and 1 tablespoon lemon juice. Warm over medium heat, stirring occasionally, until the mixture is hot but not boiling — you should see steam rising but no bubbles breaking the surface. Remove from heat and add the bloomed gelatin, whisking until fully dissolved. The mixture should be smooth and slightly thickened.
⚠️ Common Mistake to Avoid: Heating the mixture too quickly or to a boil can cause the cream to separate and the gelatin to lose its setting power. Keep the heat at medium and stir gently. If you see any small bubbles forming around the edges, pull the pan off the heat immediately.
Step 3: Coat the Dome Molds
Pour a thin layer of the warm peach vanilla mixture into your dome molds — about 1/3 full. Use the back of a small spoon or a pastry brush to coat the sides evenly, creating a shell about 1/8-inch thick. Work quickly before the mixture begins to set. Place the molds in the refrigerator for 10–12 minutes, until the shell is partially set and feels firm to the touch but still slightly tacky in the center.
💡 Sara’s Pro Tip: If you don’t have dome molds, you can use 6-ounce glass bowls or even silicone muffin cups. The shape will be slightly different but the flavor and texture will be just as amazing. Just make sure whatever you use is freezer-safe.
Step 4: Prepare the Vanilla Cream Core
In a large bowl, combine 1 cup mascarpone cheese, 1/2 cup heavy whipping cream, 3 tablespoons powdered sugar, and 1 teaspoon vanilla extract. Using a hand mixer or stand mixer with the whisk attachment, whip on medium-high speed until the mixture is light, fluffy, and holds soft peaks — about 2 to 3 minutes. Be careful not to overwhip, as mascarpone can become grainy if beaten too long.
⚠️ Common Mistake to Avoid: Overwhipping mascarpone is the most common error here. It goes from silky to grainy very quickly. Stop the mixer the moment you see soft, billowy peaks that gently hold their shape. If you’re unsure, err on the side of under-whipped — it’s better to have a slightly loose center than a grainy one.
Step 5: Fill the Domes
Spoon or pipe the vanilla cream into the center of each partially set peach shell, filling almost to the top but leaving a 1/4-inch border around the edges. The cream should be mounded slightly above the rim. Carefully pour or spoon the remaining peach vanilla mixture over the cream to completely enclose it, spreading it evenly with a small offset spatula. The goal is to seal the cream completely inside the peach shell.
💡 Sara’s Pro Tip: Use a piping bag for the cream filling — it’s much easier to control and keeps the edges clean. If you don’t have a piping bag, a zip-top bag with one corner snipped off works perfectly. This step is all about precision, so take your time.
Step 6: Freeze Until Firm
Place the filled dome molds on a small baking sheet and transfer to the freezer. Freeze for at least 4 hours, or overnight, until the domes are completely solid. They should feel hard to the touch with no give when pressed. This thorough freezing is critical for the glazing step — if the domes aren’t frozen solid, they’ll collapse when you unmold them and the warm glaze will cause them to melt unevenly.
⚠️ Common Mistake to Avoid: Don’t rush the freezing time. Four hours is the minimum, but if your freezer is opened frequently or runs warmer, give them 6 hours. An overnight freeze is ideal and actually improves the texture by allowing the flavors to meld.
Step 7: Make the Glass Glaze
About 20 minutes before you’re ready to glaze, start preparing the glass rose gold glaze. First, bloom 1 tablespoon of gelatin powder in 3 tablespoons of cold water for 5 minutes. In a small saucepan, heat 1/2 cup sweetened condensed milk and 1/4 cup water until steaming — do not boil. Remove from heat and add the bloomed gelatin, stirring until fully dissolved. Pour this hot mixture over 1 cup of finely chopped white chocolate in a heatproof bowl. Let sit for 1 minute, then stir gently until smooth. Add 1 teaspoon vanilla extract, a few drops of peach gel coloring, and 1/2 teaspoon edible gold luster dust. Stir until the color is uniform and the glaze has a shimmering rose gold sheen. Let the glaze cool to about 90°F — it should be glossy and pourable, like warm honey.
💡 Sara’s Pro Tip: The temperature of the glaze is everything. Too hot and it will melt your frozen domes; too cool and it will thicken and lose its mirror shine. I use an instant-read thermometer for accuracy, but if you don’t have one, test the glaze on the back of a spoon — it should coat the spoon and run off in a smooth, continuous ribbon.
Step 8: Glaze the Domes
Remove the frozen domes from the freezer and unmold them carefully. If they stick, dip the bottom of the mold in warm water for 5 seconds. Place each dome on a wire rack set over a baking sheet. Pour the cooled glaze evenly over each dome, starting from the top and letting it cascade down the sides. Allow the excess to drip off completely. Work quickly but deliberately — the glaze sets within seconds on the frozen surface. Transfer the glazed domes to serving plates using a wide offset spatula.
⚠️ Common Mistake to Avoid: Pouring the glaze too slowly or from too high up can cause air bubbles and uneven coverage. Instead, hold the measuring cup or pitcher about 2 inches above the dome and pour confidently in a single, steady stream. If you see any bare spots, you can do a quick second pour, but don’t overwork it.
Step 9: Garnish and Serve
While the glaze is still slightly tacky (within 30 seconds of pouring), sprinkle white chocolate curls, freeze-dried peach crumbs, and a few edible gold flakes on top. The garnish will adhere to the glaze as it sets. Serve immediately for the best texture — the glaze should shatter slightly when tapped, revealing the creamy peach vanilla interior. If you need to hold them, keep them in the refrigerator for up to 2 hours before serving, but note that the glaze may soften slightly over time.
💡 Sara’s Pro Tip: For the most dramatic presentation, serve these on a dark plate or a slate board. The rose gold shimmer pops beautifully against a dark background. And don’t skip the flaky sea salt — a tiny pinch on top of each dome just before serving elevates all the flavors, just like we do with caramel in France.
| Step | Action | Duration | Key Visual Cue |
|---|---|---|---|
| 1 | Bloom gelatin | 5 mins | Firm, jiggly mass forms |
| 2 | Make peach vanilla mixture | 6 mins | Steaming, not boiling; smooth when stirred |
| 3 | Coat dome molds | 12 mins (chill) | Sides firm, center tacky |
| 4 | Prepare vanilla cream core | 3 mins | Soft peaks hold shape |
| 5 | Fill domes | 5 mins | 1/4-inch border clean, cream sealed |
| 6 | Freeze domes | 4+ hrs | Completely hard with no give |
| 7 | Make glass glaze | 15 mins | Glossy, pourable, rose gold sheen |
| 8 | Glaze domes | 2 mins per dome | Even coverage, smooth mirror finish |
| 9 | Garnish and serve | 1 min per dome | Garnish adheres to tacky glaze |
Serving & Presentation
These rose gold peach vanilla dream domes are made for showing off. I like to serve them on individual white porcelain plates with a small spoonful of fresh peach compote or a drizzle of honey alongside. The contrast of the warm gold glaze against the white plate is stunning. A tiny pinch of flaky sea salt — I use Maldon — on top of each dome just before serving brings out the sweetness of the peach and the richness of the cream. In the summer, I’ll add a small sprig of fresh mint or a few edible pansies for color.
When I make these for gatherings in my NYC apartment, I often pair them with a light dessert wine like a late-harvest Riesling or a Moscato d’Asti. The floral notes in the wine echo the vanilla and peach beautifully. For a non-alcoholic pairing, a chilled sparkling water with a splash of peach nectar and a twist of lemon is refreshing and elegant. If you’re serving these after a heavy meal, the lightness of the peach and mascarpone is perfect — it satisfies the sweet craving without weighing anyone down.
For a truly memorable presentation, I learned this trick at Le Cordon Bleu: place each glazed dome on a small mirror or acrylic disc — the reflection doubles the visual impact. At home, a simple white cake stand or a marble board works just as well. Let the domes sit at room temperature for 3–4 minutes before serving to soften slightly, but don’t wait too long — the contrast between the cool, creamy interior and the snappy glaze is part of the magic.
| Pairing Type | Suggestions | Why It Works |
|---|---|---|
| Side Dish | Fresh berries, peach compote, honey drizzle | Adds brightness and textural contrast |
| Sauce / Dip | Raspberry coulis, caramel sauce, lemon curd | The acidity cuts through the rich cream |
| Beverage | Late-harvest Riesling, Moscato d’Asti, sparkling peach water | Floral and fruit notes complement the vanilla |
| Garnish | Edible gold flakes, mint sprigs, flaky sea salt | Elevates visual appeal and flavor complexity |
Make-Ahead, Storage & Reheating
One of the best things about these rose gold peach vanilla dream domes is how beautifully they work for make-ahead entertaining. I often prepare the full recipe through the freezing step two days before a party, then glaze and garnish them the day of. This way, I get to enjoy my guests instead of being stuck in the kitchen. Let me share exactly how to store each component and the assembled domes so everything stays perfect.
| Method | Container | Duration | Reheating Tip |
|---|---|---|---|
| Refrigerator | Airtight container, single layer | Up to 2 days | Serve directly from fridge; let sit 3 mins at room temp |
| Freezer | Wrap each dome individually in plastic wrap, then in foil | Up to 1 month | Thaw in fridge 2 hrs before serving, then glaze fresh |
| Make-Ahead | Freeze unglazed domes on a baking sheet, then transfer to a freezer bag | Up to 2 weeks | Glaze directly from frozen — no need to thaw |
If you’re storing the fully assembled and glazed domes in the refrigerator, place them in a single layer in an airtight container with a lid that doesn’t touch the tops. The glaze will stay glossy for up to 24 hours, but after that it may start to weep slightly. For the best texture, I recommend glazing no more than 6 hours before serving. The unglazed frozen domes, however, are your best friend for party planning — they’ll sit happily in your freezer for up to two weeks, waiting for their glaze bath.
A quick note on “reheating”: these are meant to be served chilled, not warm. If you’ve stored them in the fridge, let them sit at room temperature for 3–5 minutes before serving to take the chill off. This softens the cream center just enough to make it luscious while keeping the glaze firm. Never microwave them — the glaze will melt and the cream will separate. If you want a warm element alongside, serve with a warm fruit compote or a hot espresso.
Variations & Easy Swaps
Over the years, I’ve developed several variations on these rose gold peach vanilla dream domes that keep the recipe exciting year-round. Whether you want to change the fruit, adapt for dietary needs, or simply try something new, these tested swaps will work beautifully. Each one maintains the signature glass finish and creamy center while offering a fresh flavor twist.
| Variation | Key Change | Best For | Difficulty Impact |
|---|---|---|---|
| Tropical Mango Passion | Replace peach puree with mango puree, add 2 tbsp passion fruit pulp | Summer parties, tropical themes | Same difficulty |
| Dairy-Free & Vegan | Use coconut cream instead of heavy cream, vegan white chocolate, agar-agar instead of gelatin | Dairy-free guests, vegan diets | Slightly more complex |
| Berry Rose Gold | Replace peach puree with raspberry or strawberry puree | Valentine’s Day, romantic dinners | Same difficulty |
Tropical Mango Passion Twist
This variation takes me right back to the spice markets of Marrakech, where dried mango and passion fruit were staples. Replace the peach puree with an equal amount of mango puree and add 2 tablespoons of passion fruit pulp to the shell mixture. The passion fruit seeds add a pleasant crunch and the tartness balances the sweetness. I like to fold a little lime zest into the vanilla cream core for extra brightness. The rose gold glaze still works beautifully here — the mango color deepens the gold tones. This version is especially popular at summer celebrations.
Dairy-Free & Vegan Adaptation
For my dairy-free friends, I’ve developed a version that uses full-fat coconut cream in place of heavy cream and a high-quality vegan white chocolate for the glaze. The trick is to use agar-agar powder instead of gelatin — use 1 teaspoon of agar-agar powder bloomed in 2 tablespoons of water for the shell, and 2 teaspoons for the glaze. The texture is slightly less creamy but still very satisfying. I recommend using a mascarpone-style vegan cream cheese for the core, whipped with a little coconut cream. This adaptation requires careful attention to temperatures, as agar-agar sets at a different rate than gelatin, but it’s absolutely achievable at home.
Berry Rose Gold Variation
For a romantic twist that’s perfect for Valentine’s Day or anniversaries, swap the peach puree for raspberry or strawberry puree. I discovered this combination when I found gorgeous Long Island strawberries at the Union Square market and wanted to showcase their color. The berry version creates a naturally deeper pink shell that peeks through the rose gold glaze stunningly. Add 1 tablespoon of freeze-dried berry powder to the vanilla cream for an extra pop of flavor and color. The glaze remains the same rose gold, but I sometimes add a tiny drop of pink coloring to intensify the rosy hue. Garnish with chocolate curls and fresh raspberries.
Can I use frozen peaches instead of fresh for the Rose Gold Peach Vanilla Dream Domes?
Absolutely — and honestly, I often prefer frozen peaches for this recipe. Frozen peaches are picked at peak ripeness and flash-frozen, which means their flavor is consistently bright and sweet. Just thaw them completely, then puree them in a blender or food processor until smooth. If the puree is very watery, strain it through a fine-mesh sieve to remove excess liquid, because too much water can affect the set of the gelatin. One cup of frozen peach puree weighs about 8 ounces, so measure by volume after pureeing. I’ve tested this dozens of times and the results are identical to fresh — sometimes even more consistent, since frozen fruit isn’t subject to seasonal variability.
How do I achieve a smooth glass finish on dessert domes without it cracking?
The secret to a flawless glass finish is all about temperature control. Your glaze needs to be cooled to exactly 90°F — warm enough to flow smoothly but cool enough to set instantly on contact with the frozen dome. I recommend using an instant-read thermometer for precision. The dome itself must be completely frozen solid, ideally at 0°F or below. When you pour, work in one confident, steady stream from about 2 inches above the dome. Too slow and you get uneven coverage; too fast and you trap air bubbles. Finally, make sure your white chocolate is finely chopped so it melts evenly in the glaze mixture — lumps in the chocolate will ruin the smooth finish. If your glaze does crack, it’s usually because the dome wasn’t cold enough or the glaze was too warm.
What is the best way to create the rose gold color for the glaze on these dream domes?
Creating that perfect rose gold color is a two-step process. Start with a high-quality white chocolate base — avoid anything with added oils or waxes. Add a few drops of peach-colored gel food coloring to the warm glaze and stir until evenly distributed. The peach color gives you the warm, pinkish base. Then, stir in 1/2 teaspoon of edible gold luster dust. The gold dust creates the metallic shimmer characteristic of rose gold. I recommend using a brand like The Sugar Art or Chefmaster, as cheaper luster dusts can look gray or muddy. The key is to add the luster dust gradually and stir thoroughly — you’re looking for a warm, glowing sheen that catches the light. If the color leans too pink, add a tiny drop of yellow; if too gold, add a tiny drop of pink. Adjust in small increments until it looks like a rose gold ring.
How far in advance can I prepare the Peach Vanilla Dream Domes for a party?
These domes are actually perfect for party prep because they can be made largely in advance. I recommend preparing and freezing the unglazed domes up to two weeks ahead of time. Keep them tightly wrapped in plastic wrap and stored in a freezer-safe container or bag. On the day of your party, make the glaze, unmold the frozen domes, and glaze them fresh. The glazed domes can sit in the refrigerator for up to 6 hours, but for the best mirror shine and texture, I suggest glazing no more than 2 to 3 hours before serving. If you need to go further ahead, you can also prepare the vanilla cream core and the peach mixture separately and store them in the refrigerator for up to 2 days before assembling. Just make sure to bring the cream to room temperature before whipping it, so it incorporates properly.
Can I make these domes without a dome mold or silicone mold?
Yes, you absolutely can. If you don’t have dome molds, the next best option is to use 6-ounce glass or metal bowls — the type you’d use for individual desserts. Line each bowl with a strip of plastic wrap for easier removal. Silicone muffin cups also work well; they’re flexible so unmolding is easy. The shape will be slightly different — more rounded on top than a perfect hemisphere — but the flavor and texture are identical. If you’re using bowls or cups, just make sure they’re freezer-safe and that you coat the sides evenly. You can also use a small biscuit cutter to shape the peach mixture into discs, layer them with the cream, and freeze on a flat sheet. The dome shape is beautiful, but the dessert is really about the combination of textures and flavors, and that translates to any shape.
Why did my glass glaze turn out cloudy instead of clear and glossy?
A cloudy glaze is almost always the result of one of three issues. First, the white chocolate may have gotten too hot, causing the cocoa butter to separate and the emulsion to break. Always melt white chocolate gently — use the hot liquid method as the recipe instructs, and stir only until smooth. Second, the gelatin may not have been fully dissolved. Make sure your gelatin is completely bloomed and that you stir it into the hot liquid until no granules remain. Third, condensation can form on the surface if the frozen domes are moved from a very cold freezer into a warm, humid room. Let the domes sit in the freezer for 5 minutes after glazing to stabilize the glaze before moving them. If your glaze does turn cloudy, you can sometimes salvage it by gently reheating it with a tablespoon of warm cream and re-pouring, but it’s usually better to start fresh with a new batch.
What can I use instead of gelatin in this recipe to make it vegetarian?
For a vegetarian version, agar-agar powder is your best substitute. It’s a plant-based setting agent derived from seaweed. To replace the gelatin in the peach vanilla shell, use 1 teaspoon of agar-agar powder bloomed in 2 tablespoons of water, and for the glaze, use 2 teaspoons bloomed in 3 tablespoons of water. The key difference is that agar-agar needs to be brought to a full boil for 2 minutes to activate its setting properties, unlike gelatin which simply needs to be dissolved in warm liquid. The texture with agar-agar is slightly firmer and less creamy than with gelatin, but it sets beautifully and holds its shape well. I recommend testing the setting time with a small spoonful on a chilled plate before committing to the full batch, as different brands of agar-agar can vary in strength. The result is a perfectly vegetarian-friendly dome that still delivers that impressive glass finish.
How do I unmold the frozen domes without breaking them?
Unmolding frozen domes is easier than you might think if you follow a few simple tricks. First, make sure the domes are completely frozen — at least 4 hours, ideally overnight. If you’re using silicone molds, gently flex the mold from the outside to loosen the dome, then push up from the bottom to release it. For rigid plastic or metal molds, dip the bottom of the mold into a bowl of warm water for 5 to 8 seconds — no longer, or the dome will start to melt. Then invert the mold onto a parchment-lined baking sheet and tap gently. If the dome doesn’t release, wait another 2 minutes and try again. Never use a knife or metal tool to pry it out, as you’ll scratch the surface and ruin the finish. If the edges look a bit rough after unmolding, you can smooth them with a warm, dry finger before glazing.
Share Your Version!
I absolutely love seeing how these rose gold peach vanilla dream domes turn out in your kitchen. Every time a reader shares their creation with me, it feels like a little piece of my culinary journey is continuing in someone else’s home. If you make these, please come back and leave a star rating and a comment below — I read every single one and I answer questions personally within 48 hours. Your feedback helps me refine my recipes and helps other home cooks know what to expect.
Snap a photo of your glazed domes and tag me on Instagram or Pinterest with @cheerychop — I feature my favorites in my monthly newsletter. I’d especially love to know: which variation did you try, and what occasion did you make these for? Your story might be the inspiration someone else needs to take on this recipe. From my NYC kitchen to yours — I hope this recipe brings as much warmth to your table as it does to mine. — Sara 🧡
Love This Recipe? Save It to Pinterest!
If you enjoyed this Rose Gold Peach Vanilla Dream Domes with Glass Finish recipe, don’t let it get lost in your browser tabs! 😄 Pin it now so you can find it again anytime — and explore hundreds more tried-and-tested recipes waiting for you on my Pinterest boards.
👉 Follow Sara on Pinterest @chefrecipes2
📌 Pin this recipe · 🔁 Re-pin your favorites · 💬 Tag me when you make it — I love seeing your creations!
🌟 Made this recipe? Share the love!
If you enjoyed these Rose Gold Peach Vanilla Dream Domes, please leave a ⭐⭐⭐⭐⭐ star rating and a quick comment below. It helps other home cooks find this recipe and warms my heart every time!
💬 Already have a question? Check the FAQ above or drop it in the comments — I personally answer every one.
Rose Gold Peach Vanilla Dream Domes with Glass Finish
Elegant individual domes with a peach vanilla shell, creamy vanilla center, and a shimmering rose gold glass glaze, topped with white chocolate curls, peach crumbs, and edible gold flakes.
- Total Time: 4 hours 30 minutes (including freezing)
- Yield: 6 1x
- Method: Dessert
Ingredients
- For the Peach Vanilla Dome Shells:
- 2 cups peach puree
- 1 cup heavy cream
- 1/3 cup granulated sugar
- 1 tsp vanilla bean paste
- 2 tsp gelatin powder
- 2 tbsp cold water
- 1 tbsp lemon juice
- Pinch of salt
- For the Vanilla Cream Core:
- 1 cup mascarpone cheese
- 1/2 cup heavy whipping cream
- 3 tbsp powdered sugar
- 1 tsp vanilla extract
- For the Glass Rose Gold Glaze:
- 1 cup white chocolate, finely chopped
- 1/2 cup sweetened condensed milk
- 1/4 cup water
- 1 tbsp gelatin powder
- 3 tbsp cold water
- 1 tsp vanilla extract
- A few drops peach coloring
- 1/2 tsp edible gold luster dust
- For Garnish (optional):
- 1 tbsp white chocolate curls
- 1 tsp freeze-dried peach crumbs
- Edible gold flakes
Instructions
- Bloom gelatin in cold water for 5 minutes.
- Heat peach puree, heavy cream, sugar, vanilla bean paste, salt, and lemon juice until warm and smooth. Remove from heat and stir in bloomed gelatin until fully dissolved.
- Pour a thin layer of the peach vanilla mixture into dome molds, coating the sides evenly. Chill until partially set.
- Whip mascarpone, heavy cream, powdered sugar, and vanilla extract until light and fluffy.
- Fill the center of each dome with the vanilla cream core, leaving a small border around the edges.
- Cover with remaining peach vanilla mixture and freeze for at least 4 hours until fully firm.
- For the glass glaze, bloom gelatin in cold water for 5 minutes.
- Heat sweetened condensed milk and water until steaming. Remove from heat and stir in gelatin until dissolved.
- Pour over white chocolate and mix until smooth. Add vanilla extract, peach coloring, and edible gold luster dust until a rose gold sheen forms.
- Allow glaze to cool until glossy and pourable.
- Unmold frozen domes and place on a wire rack. Pour glass glaze evenly over each dome.
- Let excess drip off, then transfer to serving plates.
- Finish with white chocolate curls, freeze-dried peach crumbs, and edible gold flakes.
- Serve chilled.
Nutrition
- Calories: 410
- Sugar: 31g
- Fat: 27g
- Carbohydrates: 37g
- Protein: 5g
Tried This Recipe? Leave a Comment!
Did you make this recipe? I’d love to hear how it turned out! Please leave a comment and a rating below. Your feedback helps other home cooks and supports cheerychop.com!
For more delicious inspiration, follow me on Pinterest!


