
Table of Contents
Rose Quartz Lychee Hibiscus Dream Domes – A Stunning Triple-Layered French-Moroccan Dessert
Introduction
Growing up in Morocco, the scent of orange blossoms and steeping hibiscus tea was the heartbeat of my mother’s kitchen. It’s a fragrance that instantly transports me back to lazy afternoons in Marrakech. These Rose Quartz Lychee Hibiscus Dream Domes are my love letter to those memories, reimagined through the lens of my classical French pastry training in Paris. This lychee hibiscus mousse recipe combined with a brilliant rose quartz mirror glaze dessert technique creates an utterly unforgettable dessert that tastes as incredible as it looks.
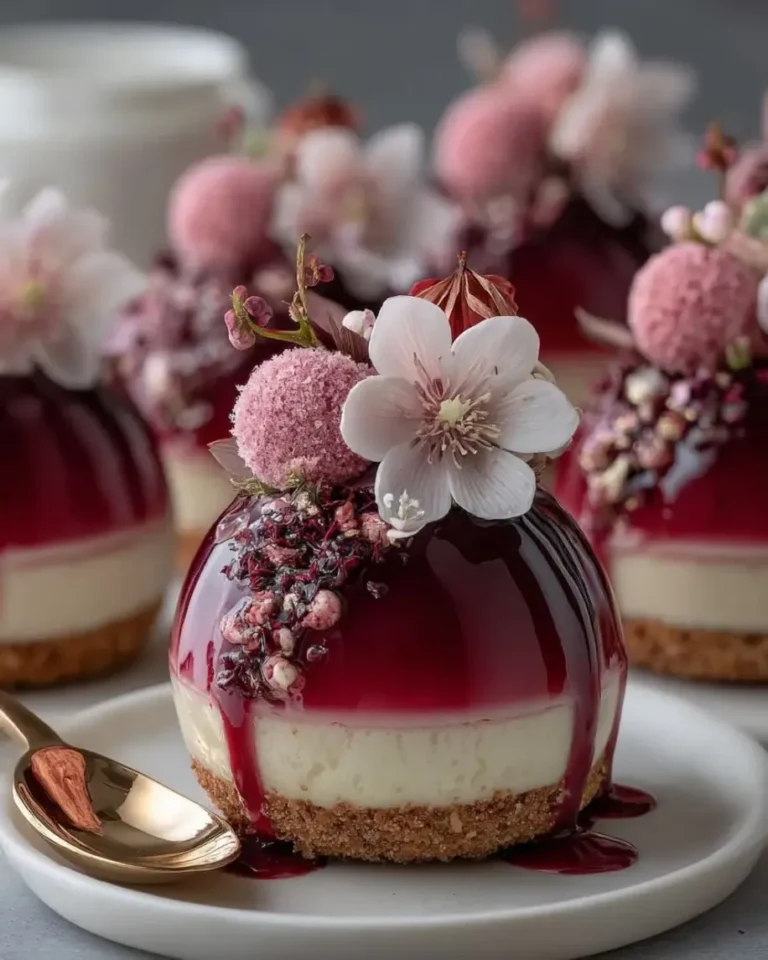
Imagine a delicate, cloud-like lychee and cream cheese mousse wrapped around a jewel-bright, tart hibiscus syrup core. Now picture that entire dome resting on a buttery biscuit base, all enveloped in a glossy, rose quartz mirror finish that shimmers with every movement. The first bite hits you with sweet lychee, followed by a wave of floral hibiscus, all balanced by the creamy, smooth texture of the mousse. It’s a harmonious blend of North African warmth and French elegance.
Perfecting this lychee dessert dome recipe took many tries in my tiny NYC test kitchen! The secret to that flawless mirror glaze is all in the temperature — something my Parisian chef drilled into me. I’ve broken down every single step here, including my foolproof tips for a perfect dome and what to do if your glaze cracks. Let me guide you through creating this showstopping hibiscus lychee cake that will leave everyone speechless.
Why This Rose Quartz Lychee Hibiscus Dream Domes Recipe Is the Best
The Flavor Secret: This isn’t just a pretty face! The flavor profile is incredibly unique. The tartness of the hibiscus syrup core cuts through the sweet, creamy lychee mousse in a way that feels both exotic and perfectly balanced. Drawing from my Moroccan roots, I use hibiscus the way my mother did — not just for color, but as a vibrant, tangy main event. It’s a sophisticated twist you won’t find in standard dome recipes.
Perfected Texture: Achieving that ethereal mousse texture requires a gentle hand and precise technique. I apply the French method of folding properly whipped cream into a rich cream cheese and lychee base. This guarantees a mousse that is light, airy, and melts on your tongue, providing the perfect contrast to the firm, jelly-like hibiscus core and the crunchy biscuit base. Every layer is designed to complement the next.
Foolproof & Fast: While this dessert looks incredibly complex, I’ve streamlined the process specifically for the home baker. I provide clear visual cues for every critical stage — from blooming gelatin to testing the glaze temperature. Plus, I’m sharing my exact troubleshooting tips for the mirror glaze, which is often the most intimidating part. With my guidance, even a beginner can create a professional-looking dessert that tastes like it came from a top NYC patisserie.
Rose Quartz Lychee Hibiscus Dream Domes Ingredients
Sourcing the right ingredients is half the battle. For the lychee puree, I often head straight to the Asian markets in Chinatown, NYC, where I can find perfectly sweet canned lychees in syrup. The dried hibiscus is a staple I keep stocked from a local spice shop, reminding me of the vibrant souks of my childhood.
Ingredients List
- For the Lychee Hibiscus Mousse: 2 cups lychee puree, 1 cup heavy cream, 1/2 cup cream cheese (softened), 1/3 cup granulated sugar, 2 tbsp dried hibiscus flowers, 1 tsp vanilla extract, 2 tsp powdered gelatin, 3 tbsp cold water.
- For the Hibiscus Syrup Core: 1 cup water, 2 tbsp dried hibiscus flowers, 1/3 cup granulated sugar, 1/2 cup lychee juice, 1 tsp powdered gelatin, 1 tbsp cold water.
- For the Biscuit Base: 1 cup digestive biscuits (finely crushed), 3 tbsp melted butter.
- For the Rose Quartz Mirror Finish: 1 cup granulated sugar, 1/2 cup water, 1/2 cup sweetened condensed milk, 1 cup white chocolate (finely chopped), 1 tbsp powdered gelatin, 3 tbsp cold water, 1 tsp rosewater, 1–2 drops pink food coloring (optional).
- For Garnish (optional): Fresh lychee halves, dried hibiscus petals, edible shimmer dust.
Ingredient Spotlight
Lychee Puree: This provides the primary sweetness and floral fruitiness for the mousse. I always recommend using canned lychees in syrup and blending them until smooth for a consistent puree. Fresh lychees are wonderful when in season, but canned are incredibly reliable and available year-round in the US.
Dried Hibiscus Flowers: Hibiscus is the soul of this dessert. It provides a gorgeous ruby-red color and a tart, cranberry-like flavor that is essential for cutting through the sweetness of the lychee and white chocolate. Look for dried hibiscus (often called jamaica or flor de jamaica) in Latin markets, health food stores, or the tea aisle of your grocery store.
Gelatin: This is the backbone of our mousse and glaze structure. I use powdered gelatin because it’s widely available and easy to work with. It must be “bloomed” in cold water before use to ensure it dissolves smoothly without lumps. A 1:3 ratio of gelatin to water is my golden rule for a reliable set.
White Chocolate: For the mirror glaze, high-quality white chocolate is non-negotiable. It provides the glossy shine and creamy sweetness that makes the glaze coat perfectly. Avoid white chocolate chips, as they often contain stabilizers that prevent smooth melting. Use a good-quality baking bar, finely chopped.
| Original Ingredient | Best Substitution | Flavor / Texture Impact |
|---|---|---|
| Lychee Puree | Raspberry or Mango Puree | Raspberry adds more tartness; mango is sweeter and tropical. |
| Dried Hibiscus | Dried Rose Petals or Cranberry Juice | Rose petals give a softer floral note; cranberry juice offers similar tartness without the floral depth. |
| Powdered Gelatin | Agar-Agar (for vegetarian option) | Agar creates a firmer, less creamy set; follow package directions carefully as it sets at room temperature. |
| White Chocolate | Coconut Butter + Sugar | A homemade white chocolate substitute; flavor will be more coconut-forward. |
How to Make Rose Quartz Lychee Hibiscus Dream Domes — Step-by-Step
Trust me, if you take it step by step, this gorgeous dessert is absolutely achievable. I’ve broken down my professional technique so you can feel confident at every stage. Let’s get started!
Step 1: Prepare the Biscuit Base
Mix the finely crushed digestive biscuits with the melted butter until the texture resembles wet sand. Firmly press about 1 tablespoon of the mixture into the bottom of each dome mold. Use the back of a spoon to pack it down tightly — this is your foundation. Chill the molds in the refrigerator for at least 15 minutes while you prepare the core.
💡 Sara’s Pro Tip: For a cleaner, neater base, use a flat-bottomed shot glass to press the biscuit mixture into the molds. This ensures a perfectly even layer.
Step 2: Make the Hibiscus Syrup Core
First, bloom the 1 tsp of powdered gelatin in the 1 tbsp of cold water for about 5 minutes. In a small saucepan, simmer the 1 cup of water and 2 tbsp of dried hibiscus flowers for 5 minutes until the liquid turns a deep, dark red. Strain the liquid through a fine-mesh sieve into a bowl, discarding the flowers. Whisk in the 1/3 cup of sugar until fully dissolved, then add the 1/2 cup of lychee juice. Finally, whisk in the bloomed gelatin until completely smooth.
⚠️ Common Mistake to Avoid: Don’t let the hibiscus mixture boil fiercely. A gentle simmer extracts the color and flavor perfectly. Boiling can make the syrup bitter.
Step 3: Freeze the Core Inserts
Pour the hibiscus syrup into small hemisphere molds or an ice cube tray. You want them small enough to fit inside your main dome molds. Freeze for at least 2-3 hours, or until completely solid. The cores need to be fully frozen to stay centered when you add the mousse.
💡 Sara’s Pro Tip: Use silicone mini ice cube trays for your hibiscus cores. They pop out perfectly and come in fun shapes!
Step 4: Bloom Gelatin & Steep Cream for Mousse
Bloom the 2 tsp of powdered gelatin for the mousse in 3 tbsp of cold water. In a separate small pan, gently warm about 1/4 cup of your heavy cream with the 2 tbsp of dried hibiscus flowers. Do not boil. Let it steep for 10 minutes off the heat, then strain out the flowers and let the infused cream cool to room temperature.
Step 5: Make the Lychee Mousse Base
In a large bowl, beat the softened cream cheese, 1/3 cup of sugar, and 1 tsp of vanilla extract until smooth and lump-free. Gradually beat in the 2 cups of lychee puree until the mixture is completely homogeneous. In a small microwave-safe bowl, gently heat the hibiscus-infused cream until warm (not hot) and dissolve the bloomed gelatin into it, stirring until clear. Immediately whisk this gelatin mixture into the lychee-cream cheese base.
Step 6: Fold in the Whipped Cream
In a separate bowl, whip the remaining heavy cream to soft peaks. Using a large rubber spatula, gently fold the whipped cream into the lychee base in two additions. Fold carefully, scraping the bottom and sides, until no white streaks remain. This lightens the mousse and gives it its signature airy texture.
⚠️ Common Mistake to Avoid: Don’t overmix the mousse once you add the whipped cream! Overmixing can deflate the air bubbles, resulting in a dense, heavy mousse instead of a light, ethereal one.
Step 7: Assemble the Domes
Remove the chilled molds with the biscuit base from the fridge. Spoon or pipe the lychee mousse halfway up the sides of each mold. Press a frozen hibiscus core into the center of the mousse. Then, cover the core with the remaining mousse, filling the mold to the top and smoothing off the back. Ensure the mousse completely encases the frozen core.
💡 Sara’s Pro Tip: A piping bag makes filling the molds much cleaner and helps prevent air pockets. Snip a 1/2-inch opening at the tip.
Step 8: Freeze the Domes Solid
This is the most critical waiting period. Place the assembled molds into the freezer and freeze for at least 6 hours, but preferably overnight. The domes must be completely frozen solid to withstand the warm glaze. A partially frozen dome will collapse or break apart when unmolded and glazed.
Step 9: Prepare the Rose Quartz Mirror Glaze
Bloom the 1 tbsp of powdered gelatin in 3 tbsp of cold water. In a medium saucepan, combine 1 cup of sugar and 1/2 cup of water. Heat over medium heat until the sugar dissolves and the liquid begins to steam. Add the 1/2 cup of sweetened condensed milk and stir to combine. Remove from the heat and add the finely chopped white chocolate. Let it sit for 1 minute, then whisk until completely smooth.
Step 10: Color and Strain the Glaze
Add the bloomed gelatin to the warm glaze mixture and whisk until fully dissolved. Add the 1 tsp of rosewater. If using, add 1-2 drops of pink food coloring and whisk to achieve your desired rose quartz hue. For the smoothest finish, pass the entire glaze through a fine-mesh strainer into a bowl or tall measuring cup to remove any lumps or air bubbles.
💡 Sara’s Pro Tip: The ideal temperature for pouring the mirror glaze is exactly 90°F (32°C). Use an instant-read thermometer to be precise. If it’s too hot, it will melt the mousse; too cold, and it will be too thick to form a smooth coat.
Step 11: Unmold and Glaze the Domes
Remove the frozen domes from the freezer. If they are in silicone molds, gently flex the mold to release them. If using metal molds, you may need to briefly dip them in warm water. Place the frozen domes on a wire rack set over a baking sheet. Working quickly, pour the 90°F glaze evenly over each dome, starting from the center and allowing the glaze to flow down the sides. Make sure the entire surface is covered.
⚠️ Common Mistake to Avoid: Do not touch or brush the dome after pouring the glaze! Let the excess drip off naturally. Touching it will ruin the perfect mirror finish.
Step 12: Chill and Serve
Carefully transfer the glazed domes to serving plates or a baking sheet. Transfer them to the refrigerator to thaw for at least 30 minutes. The mousse needs to soften to a creamy texture. Before serving, gently remove any excess glaze drips from the bottom. Garnish with fresh lychee halves, dried hibiscus petals, and a dusting of edible shimmer.
| Step | Action | Duration | Key Visual Cue |
|---|---|---|---|
| 1 | Make Base | 10 mins | Wet sand texture, firmly packed |
| 2 | Make Core | 15 mins + freezing | Deep red, gelatin dissolved |
| 3 | Make Mousse | 15 mins | Soft peaks, no lumps |
| 4 | Assemble | 10 mins | Core centered, molds full |
| 5 | Freeze | 6+ hours | Completely solid to the touch |
| 6 | Make Glaze | 15 mins | Smooth, glossy, 90°F |
| 7 | Glaze | 5 mins | Smooth glass-like coat |
Serving & Presentation
The reveal of these domes at the table is a moment of pure magic. I love serving them on stark white plates to make the pink rose quartz color pop. Let the domes sit at room temperature for 5-10 minutes after their 30-minute chill — this softens the mousse to the perfect dreamy consistency.
For an extra touch of elegance that reminds me of the ornate tea ceremonies in Morocco, I’ll add a tiny pinch of edible shimmer dust just before serving. The contrast of the gleaming glaze against the matte shimmer is breathtaking. A fresh lychee half placed delicately on top adds a beautiful, organic finishing touch.
💡 Sara’s Pro Tip: To clean up the plate, use a warm, damp paper towel to wipe away any small drips of glaze at the base of the dome. This creates a perfectly polished, restaurant-quality presentation.
| Pairing Type | Suggestions | Why It Works |
|---|---|---|
| Side Dish | Fresh berries (raspberries, blackberries) | The tartness of the berries cuts the sweetness of the glaze and mousse. |
| Sauce / Dip | Coulis of raspberry or passion fruit | Adds a layer of bright acidity and beautiful color contrast. |
| Beverage | Mint tea, Champagne, or an off-dry Riesling | Mint tea echoes the floral notes; Champagne cleanses the palate. |
| Garnish | Fresh mint sprigs, dried rose petals, edible gold leaf | Enhances the visual appeal and adds a touch of luxury. |
Make-Ahead, Storage & Reheating
Balancing a busy NYC schedule with a passion for elaborate desserts means I’m the queen of make-ahead strategies! These domes are perfect for prepping in stages, taking the stress out of entertaining. You can have the entire dessert assembled and glazed days before your party.
| Method | Container | Duration | Reheating Tip |
|---|---|---|---|
| Refrigerator | Airtight container | Up to 3 days | Serve directly from fridge, no reheating needed. |
| Freezer | Freezer-safe wrap & container | Up to 1 month | Thaw in the refrigerator for 2-3 hours before serving. |
| Make-Ahead | In the mold, unglazed | 5 days in advance | Glaze on the day of serving for the brightest finish. |
The best part? This dessert is served cold, so there’s absolutely no reheating! If you’ve stored it in the refrigerator, just let it sit on the counter for 5 minutes to take the chill off before serving. This allows the mousse to soften to its ideal creamy, dreamy texture.
💡 Sara’s Pro Tip: If storing glazed domes in the fridge, place them on a tray and very gently tent them with plastic wrap. Make sure the wrap does not touch the glaze, or it will leave permanent marks on your perfect finish.
Variations & Easy Swaps
While I adore this classic combination, one of the joys of cooking is making a recipe your own. Here are my favorite variations for this rose quartz lychee hibiscus dream domes recipe, each tested in my own kitchen.
| Variation | Key Change | Best For | Difficulty Impact |
|---|---|---|---|
| Mango Passion Core | Replace lychee juice in core with mango-passionfruit juice. | A tropical, slightly tangier twist. | No change |
| Vegan / Dairy-Free | Use coconut cream, vegan cream cheese, and agar-agar. | Dietary restrictions without sacrificing elegance. | Medium (requires careful agar handling) |
| Chocolate Bottom | Add 1 tbsp cocoa powder to the biscuit base. | A richer, more decadent base layer. | No change |
Mango Passion Core
For a burst of tropical sunshine, swap the lychee juice in the hibiscus core for a mix of mango puree and passion fruit juice. The tangy passion fruit plays beautifully with the tart hibiscus, creating a vibrant, multi-layered flavor explosion. I came up with this variation after a trip to a tropical fruit stand in Union Square.
Vegan / Dairy-Free Option
Yes, you can make this stunning dessert vegan! Replace the heavy cream and cream cheese with full-fat coconut cream and a high-quality vegan cream cheese. Use agar-agar instead of gelatin for both the mousse and the glaze. Be sure to follow the specific hydration and boiling instructions for your agar-agar, as it sets much more firmly than gelatin.
Chocolate Biscuit Bottom
For the chocoholics among us, add 1 tablespoon of unsweetened cocoa powder to the digestive biscuit crumbs before mixing with the butter. This gives the base a subtle chocolate flavor that pairs wonderfully with the floral notes of the lychee and rose. It’s a small change that makes a big impact on the overall flavor profile.
What can I use instead of lychee in Rose Quartz Lychee Hibiscus Dream Domes?
If you can’t find lychee, don’t worry! The best substitutes for the mousse are raspberry puree or mango puree, as they both have a similar texture and sweetness level. Raspberries will add a lovely tartness that complements the hibiscus beautifully, while mango will give a sweeter, more tropical vibe. For the core, you can replace the lychee juice with white grape juice mixed with a little lemon juice to keep that balance of sweetness and acidity.
How do I achieve the perfect rose quartz color for the dome glaze?
The perfect rose quartz color comes from a very precise amount of pink food coloring. I recommend using a gel or powdered food coloring for the most vibrant, non-streaky results. Start with just 1 drop of a pale pink color. If you want a deeper rose, add a tiny second drop until you achieve your desired hue. The warm, slightly caramelized tone of the white chocolate and condensed milk base will naturally soften the pink into a beautiful quartz-like shade.
Can I make Rose Quartz Lychee Hibiscus Dream Domes ahead of time for a party?
Absolutely, and I highly recommend it! This is a fantastic make-ahead dessert. You can fully assemble and freeze the unglazed domes up to 5 days in advance. Then, on the day of your party, simply make the mirror glaze, pour it over the frozen domes, and let them thaw in the fridge for a few hours. Alternatively, you can glaze them and store them carefully in the refrigerator for up to 2 days. This makes entertaining completely stress-free.
How long do you need to freeze the domes before unmolding them?
Freezing the domes solid is absolutely essential for success. You must freeze them for at least 6 hours, but overnight is truly best. The domes need to be completely frozen solid so they can withstand the process of unmolding and the temperature of the warm glaze. If they are not frozen through, they will be too soft to unmold cleanly and may melt or collapse when the warm glaze is poured over them.
What exactly is a mirror glaze, and why is it so shiny?
A mirror glaze, also known as a glaçage miroir, is a type of icing that sets with a high-gloss, reflective finish. It’s typically made from sugar, sweetened condensed milk, white chocolate, gelatin, and water. The intense shine comes from the combination of emulsified fats from the condensed milk and white chocolate, the structure provided by the gelatin, and the smooth, even application over a perfectly frozen surface. The temperature must be exactly right, around 90°F, for the gloss to be at its peak.
Can I use frozen lychees instead of canned or fresh?
Yes, frozen lychees can work very well, especially when fresh ones are out of season. Thaw them completely, then puree them in a blender or food processor until smooth. You may need to strain the puree through a fine-mesh sieve to remove any fibrous bits. The flavor is often just as good as fresh, and the texture is perfect for a mousse. Just make sure to measure the puree after it has been thawed and blended.
Is the rosewater necessary, or can I leave it out?
While the rosewater is technically optional, I strongly recommend including it! The rosewater enhances the floral, aromatic quality of the entire dessert and adds that authentic “rose quartz” perfume that makes this recipe so special. It ties the lychee and hibiscus together beautifully. If you absolutely don’t have it or dislike floral flavors, you can replace it with 1/2 teaspoon of vanilla extract or simply omit it altogether.
Can I use agar-agar instead of gelatin to make this dessert vegetarian?
Yes, you can substitute agar-agar for gelatin to make this dessert vegetarian-friendly. However, it’s important to know that agar sets much faster and firmer than gelatin. For the mousse, you’ll need to boil the agar in the liquid portion for 1-2 minutes to fully activate it, and it will begin to set at room temperature. For the glaze, agar creates a much stiffer gel, so the texture will be slightly different — less creamy and more jelly-like. Follow the package directions for exact substitution ratios.
My mirror glaze cracked. What did I do wrong?
Cracked mirror glaze is usually caused by a temperature shock. The most common reason is that the domes were too cold, or the glaze was too hot when poured. Ensure your domes are frozen solid but not ice-cold from a deep freeze, and that your glaze is around 90°F. Another reason could be that the cake settled or shrunk slightly while thawing in the fridge after glazing. Make sure your mousse is properly set with the correct amount of gelatin.
What kind of molds should I use for these domes?
For this recipe, I highly recommend using silicone hemisphere molds. They are flexible, which makes unmolding the frozen domes incredibly easy without damaging their shape. You can find these in various sizes online or at kitchen supply stores. If you don’t have silicone molds, you can use metal dome molds, but you’ll need to be very careful when unmolding. Briefly dipping the metal molds in warm water can help release the frozen domes without melting them.
Share Your Version!
There’s something truly magical about pulling together a dessert this sophisticated and seeing the look on your guests’ faces. I hope you feel incredibly proud of yourself when you take that first bite — you deserve it!
If you tried this Rose Quartz Lychee Hibiscus Dream Domes recipe, I would be so grateful if you left a star rating or comment below! Did your mirror glaze come out perfectly? Was your mousse light and airy? Snap a picture of your beautiful creation and share it with me on Instagram or Pinterest by tagging @cheerychop. I can’t wait to see your versions! It truly makes my day to see these gorgeous domes coming to life in your kitchens.
From my NYC kitchen to yours — I hope this recipe brings as much warmth to your table as it does to mine. — Sara 🧡
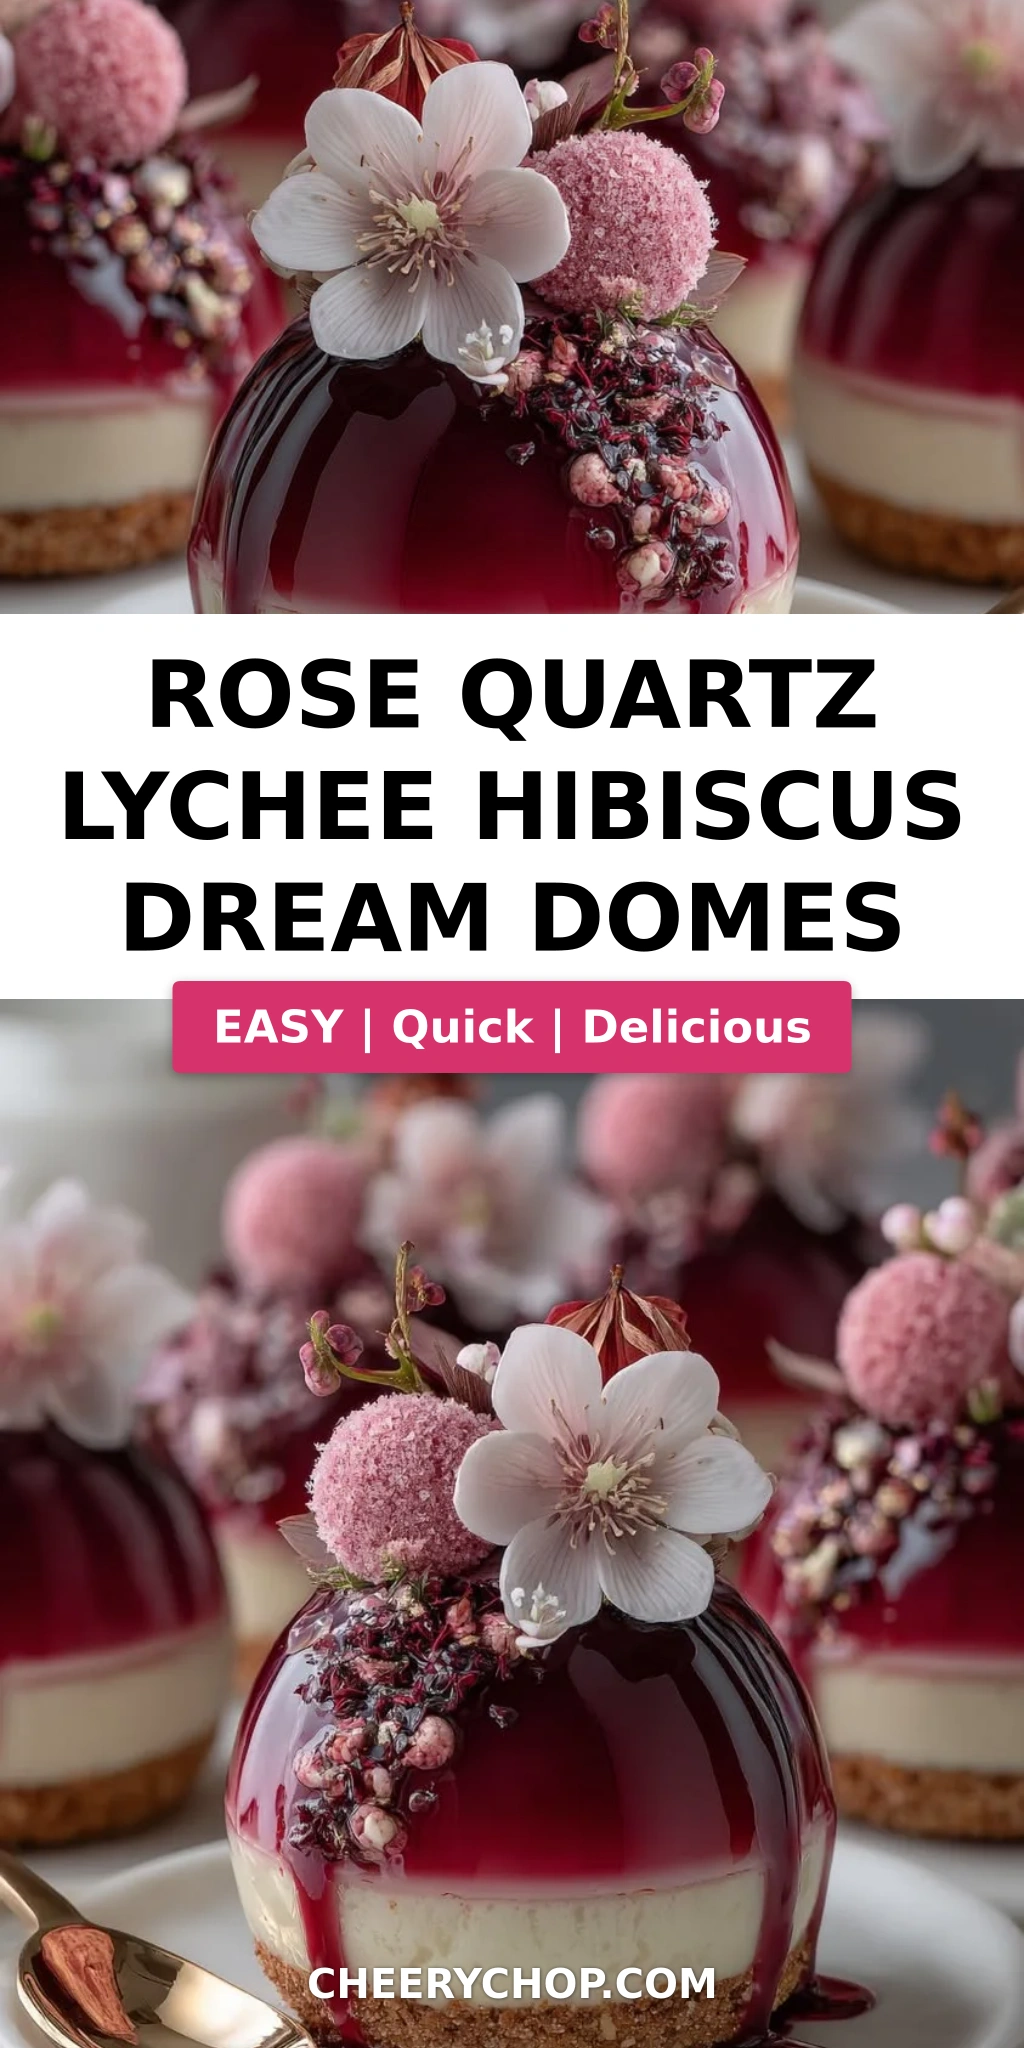
Love This Recipe? Save It to Pinterest!
If you enjoyed this Rose Quartz Lychee Hibiscus Dream Domes recipe, don’t let it get lost in your browser tabs! 😄 Pin it now so you can find it again anytime — and explore hundreds more tried-and-tested recipes waiting for you on my Pinterest boards.
👉 Follow Sara on Pinterest @chefrecipes2
📌 Pin this recipe · 🔁 Re-pin your favorites · 💬 Tag me when you make it — I love seeing your creations!
Rose Quartz Lychee Hibiscus Dream Domes
A stunning and elegant dessert featuring lychee hibiscus mousse, a hibiscus syrup core, and a rose quartz mirror finish, perfect for special occasions.
- Prep Time: 45 minutes
- Cook Time: 20 minutes
- Total Time: 7 hours (includes freezing)
- Yield: 8 1x
- Method: Dessert
- Cuisine: Fusion
Ingredients
- For the Lychee Hibiscus Mousse:
- 2 cups lychee puree
- 1 cup heavy cream
- 1/2 cup cream cheese, softened
- 1/3 cup granulated sugar
- 2 tbsp dried hibiscus flowers
- 1 tsp vanilla extract
- 2 tsp powdered gelatin
- 3 tbsp cold water
- For the Hibiscus Syrup Core:
- 1 cup water
- 2 tbsp dried hibiscus flowers
- 1/3 cup granulated sugar
- 1/2 cup lychee juice
- 1 tsp powdered gelatin
- 1 tbsp cold water
- For the Biscuit Base:
- 1 cup digestive biscuits, finely crushed
- 3 tbsp melted butter
- For the Rose Quartz Mirror Finish:
- 1 cup granulated sugar
- 1/2 cup water
- 1/2 cup sweetened condensed milk
- 1 cup white chocolate, finely chopped
- 1 tbsp powdered gelatin
- 3 tbsp cold water
- 1 tsp rosewater
- 1–2 drops pink food coloring (optional)
- For Garnish (optional):
- Fresh lychee halves
- Dried hibiscus petals
- Edible shimmer dust
Instructions
- 1. Mix crushed biscuits with melted butter and press into dome molds as the base layer. Chill for 15 minutes.
- 2. Bloom gelatin for hibiscus core in cold water for 5 minutes.
- 3. Simmer water and hibiscus flowers for 5 minutes, strain, then stir in sugar until dissolved.
- 4. Add lychee juice and dissolved gelatin, then pour into small inserts. Freeze until firm.
- 5. Bloom gelatin for mousse in cold water.
- 6. Steep hibiscus in a small portion of warm cream, then strain and cool.
- 7. Beat cream cheese, sugar, vanilla, and lychee puree until smooth.
- 8. Warm hibiscus-infused cream, dissolve gelatin, then mix into base.
- 9. Whip remaining cream to soft peaks and fold into mixture.
- 10. Fill molds halfway with mousse, add a frozen hibiscus core, then cover with remaining mousse.
- 11. Freeze for at least 6 hours until fully set.
- 12. Bloom gelatin for glaze in cold water.
- 13. Heat sugar, water, and condensed milk until steaming (do not boil).
- 14. Remove from heat and add white chocolate and gelatin, stirring until smooth.
- 15. Blend in rosewater and optional pink coloring until glossy.
- 16. Cool glaze to about 90°F (32°C).
- 17. Unmold frozen domes and place on a rack.
- 18. Pour rose quartz glaze evenly over domes until fully coated.
- 19. Chill for 30 minutes before serving.
- 20. Garnish with lychee, hibiscus petals, and shimmer dust.
Notes
The glaze should be at the correct temperature (around 90°F) for the best mirror finish. Freezing the domes thoroughly is essential for a clean unmolding.
Nutrition
- Calories: 325
- Sugar: 32 g
- Fat: 17 g
- Carbohydrates: 37 g
- Protein: 4 g
Tried This Recipe? Leave a Comment!
Did you make this recipe? I’d love to hear how it turned out! Please leave a comment and a rating below. Your feedback helps other home cooks and supports cheerychop.com!
For more delicious inspiration, follow me on Pinterest!


