
“`html
Table of Contents
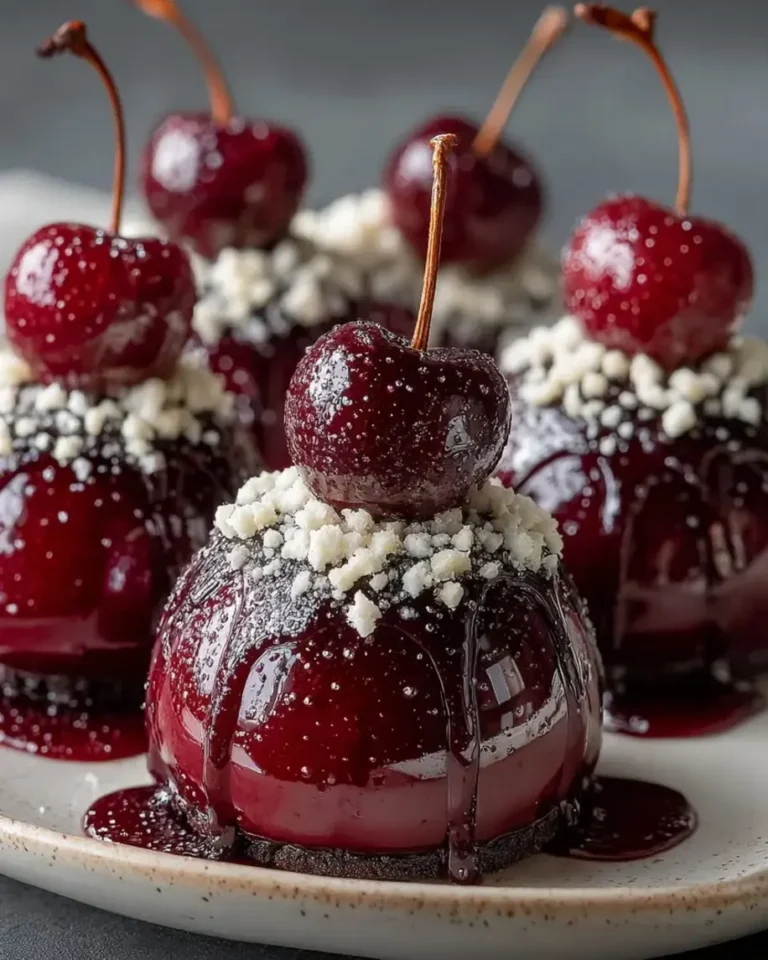
Ruby Cherry Cheesecake Spheres with Hidden Cream Burst Center – A Show-Stopping Dessert
I still remember the first time I made these ruby cherry cheesecake spheres for a dinner party in my tiny NYC apartment. My guests didn’t just compliment them — they went silent. That’s the kind of dessert these are: a glossy, jewel-toned sphere that cracks open to reveal a hidden cream burst center. As a trained pastry chef who grew up in Morocco and later studied in Paris, I’ve always loved the drama of a dessert that surprises you. And this one? It delivers on every level. The ruby cherry cheesecake spheres combine the tart brightness of cherries with the creamy richness of mascarpone, all wrapped in a stunning mirror glaze that shimmers like a gemstone.
Imagine this: you cut into a perfectly chilled sphere and suddenly a rush of silky cream flows out, mingling with the light cherry mousse and tender vanilla sponge underneath. The ruby mirror glaze catches the light with flecks of edible shimmer, and the first bite is a cool, creamy, fruity explosion that tastes like a fancy Parisian patisserie dessert — but made in your own kitchen. The cherries bring a natural sweetness that dances with the tangy cream cheese, while the vanilla sponge adds just enough structure to ground all those luscious textures. This isn’t just a dessert; it’s an experience.
I’ve perfected this recipe over several rounds in my home kitchen, tweaking the gelatin ratios and the freezing times so that the hidden cream burst center stays perfectly intact until you serve it. The secret? A frozen mascarpone core that gets enveloped by the mousse before it goes into the mold. I’ll walk you through every single step, including the one mistake most home bakers make that causes the cream center to leak. Whether you’re making these for a birthday, a holiday table, or just to impress someone special, these ruby cherry cheesecake spheres will absolutely steal the show.
Why This Ruby Cherry Cheesecake Spheres Recipe Is the Best
The magic of this recipe lies in the hidden cream burst center. I learned a similar technique during my time at culinary school in Paris, where we would freeze flavored cream cores inside mousse-based entremets. The frozen mascarpone and cream center stays solid during assembly and freezing, then gently thaws to a luscious, pourable consistency once plated. This means every single sphere delivers a dramatic cream burst the moment your spoon breaks through. No dry centers here — just pure, decadent surprise.
Texture is everything in a multi-component dessert like this cherry cheesecake spheres recipe. The cherry mousse is airy yet stable thanks to carefully bloomed gelatin, and the vanilla sponge base gives a soft, cake-like contrast. The ruby mirror glaze sets to a smooth, shiny finish that doesn’t crack or wrinkle — a hallmark of professional pastry work. I’ve tested this recipe with both homemade and store-bought cherry puree, and I’ll tell you exactly which works best so you get that perfect consistency every single time.
What makes this recipe foolproof for home cooks is the make-ahead factor. You can assemble and freeze the spheres up to two weeks in advance, then glaze them the day of your party. No last-minute stress, no complicated piping bags — just perfectly portioned, stunning desserts waiting in your freezer. I’ve broken down each component into manageable steps so even if you’re new to mirror glaze or mousse, you’ll feel confident. And if something goes wrong? I’ve included my tested fixes for the most common issues, from cracked glaze to weeping centers.
Ruby Cherry Cheesecake Spheres Ingredients
I source most of my cherries from the Union Square Greenmarket in the summer, but frozen cherries work beautifully for the puree year-round. For the mascarpone, I always buy the imported Italian kind — it makes a real difference in the cream burst center. And the ruby shimmer dust? You can find it at specialty baking stores or online; a little goes a long way to give that mirror glaze its signature glow. Here’s everything you’ll need.
Ingredients List
- For the Cherry Cheesecake Mousse:
- 2 cups cherry puree (from fresh or frozen cherries)
- 8 oz cream cheese, softened
- 1/3 cup granulated sugar
- 1 tbsp lemon juice
- 1 cup heavy cream
- 2 tsp powdered gelatin
- 2 tbsp cold water (for blooming gelatin)
- For the Hidden Cream Burst Center:
- 1/2 cup heavy cream
- 2 tbsp powdered sugar
- 1 tsp vanilla extract
- 4 oz mascarpone cheese
- For the Vanilla Sponge Base:
- 1 cup all-purpose flour
- 1/2 tsp baking powder
- 1/4 tsp salt
- 1/4 cup unsalted butter, softened
- 1/3 cup granulated sugar
- 1 large egg
- 1/2 tsp vanilla extract
- 1/4 cup milk
- For the Ruby Mirror Glaze:
- 1 cup white chocolate, finely chopped
- 1/3 cup sweetened condensed milk
- 1/4 cup water
- 1/2 cup granulated sugar
- 2 tsp powdered gelatin
- 2 tbsp cold water (for blooming gelatin)
- Red food coloring, as needed
- Edible ruby shimmer dust, as needed
- For Garnish (optional):
- Fresh cherries
- White chocolate curls
Ingredient Spotlight
Cherry Puree: This is the backbone of the mousse. Use dark sweet cherries for a vibrant color and natural sweetness. If you’re using frozen cherries, thaw them completely and drain off excess liquid before pureeing. You want a thick, concentrated puree — not watery. In a pinch, high-quality cherry preserves that are pureed smooth can work, but the texture will be slightly less airy.
Mascarpone: This Italian cream cheese is richer and silkier than standard cream cheese, which is exactly what you want for the hidden cream burst center. Don’t substitute with regular cream cheese here — it will be too firm and won’t create that lovely liquid burst. If mascarpone is hard to find, you can blend 4 oz cream cheese with 2 tbsp heavy cream as a backup substitute.
White Chocolate for the Glaze: Use a good-quality white chocolate that contains cocoa butter (real white chocolate, not candy melts). This ensures a smooth, shiny mirror glaze that sets properly. Chopping it finely before pouring the hot liquid over it helps it melt evenly. Callebaut or Ghirardelli white chocolate chips work well if you don’t have a bar.
Gelatin: Powdered gelatin is what gives both the mousse and the mirror glaze their structure. Always bloom it in cold water for at least 5 minutes before heating. This step is non-negotiable — skipping it will leave you with a grainy texture and a glaze that won’t set. I use Knox brand gelatin which is widely available in US grocery stores.
| Original Ingredient | Best Substitution | Flavor / Texture Impact |
|---|---|---|
| Cherry puree | Raspberry or strawberry puree | Slightly tarter, less sweet; color turns pinkish-red |
| Mascarpone cheese | 4 oz cream cheese + 2 tbsp heavy cream (blended) | Slightly firmer center, less rich; still functional |
| White chocolate | High-quality white chocolate chips (Callebaut or Ghirardelli) | Same result; chips may need slightly more stirring to melt smooth |
| Powdered gelatin | Sheet gelatin (bloom in ice water; use 4 sheets for 2 tsp powdered) | Same setting power; sheets dissolve more cleanly |
How to Make Ruby Cherry Cheesecake Spheres — Step-by-Step
Take this one component at a time and you’ll be rewarded with the most stunning homemade dessert. I’ve organized the steps so you can prep the sponge and cream center while the mousse sets, then assemble everything in one go.
Step 1: Prepare the Vanilla Sponge
Preheat your oven to 350°F (175°C) and line a small baking sheet or an 8×8 inch pan with parchment paper. In a medium bowl, whisk together 1 cup all-purpose flour, 1/2 tsp baking powder, and 1/4 tsp salt. In a separate bowl, beat 1/4 cup softened unsalted butter with 1/3 cup granulated sugar until light and fluffy — about 2 minutes with a hand mixer. Add 1 large egg and 1/2 tsp vanilla extract and beat until combined. Alternate adding the dry ingredients and 1/4 cup milk, starting and ending with the flour mixture, mixing just until smooth after each addition. Pour the batter into the prepared pan and spread evenly. Bake for 18–20 minutes, until a toothpick inserted in the center comes out clean. Cool completely in the pan, then use a small round cutter (about 1.5 inches wide) to cut out 8 circles. Set aside.
💡 Sara’s Pro Tip: Don’t overmix the batter once you add the flour — you want a tender sponge, not a tough one. A few small lumps are perfectly fine and will bake out.
Step 2: Make the Hidden Cream Burst Center
In a chilled mixing bowl, combine 1/2 cup heavy cream, 2 tbsp powdered sugar, 1 tsp vanilla extract, and 4 oz mascarpone cheese. Beat with a hand mixer on medium speed until the mixture thickens and holds stiff peaks — this should take about 2–3 minutes. Transfer the cream to a piping bag fitted with a round tip (or use a ziplock bag with a small corner snipped off). Pipe small, dome-shaped portions onto a parchment-lined tray — you want about 8 portions, each roughly the size of a walnut. Place the tray in the freezer and freeze for at least 2 hours, until the centers are completely solid.
⚠️ Common Mistake to Avoid: If the cream centers aren’t fully frozen (at least 2 hours), they’ll start to soften and leak into the mousse when you assemble the spheres. Give them the full time — frozen solid is the goal.
Step 3: Bloom Gelatin for the Mousse
In a small bowl, sprinkle 2 tsp powdered gelatin over 2 tbsp cold water. Stir gently to combine — the gelatin will absorb the water and thicken into a firm, jelly-like mass within 5 minutes. Set it aside while you prepare the cherry base. This step is crucial because it ensures the gelatin dissolves evenly into the warm cherry mixture without clumps.
💡 Sara’s Pro Tip: Use ice-cold water for blooming gelatin. If the water is too warm, the gelatin will dissolve prematurely and lose its setting power. The texture should be firm and jiggly before you add it to the warm liquid.
Step 4: Prepare the Cherry Cheesecake Mousse
In a large bowl, beat 8 oz softened cream cheese until completely smooth, with no lumps. In a small saucepan, combine 2 cups cherry puree, 1/3 cup granulated sugar, and 1 tbsp lemon juice. Warm over medium heat, stirring occasionally, until the mixture is hot but not boiling — about 3–4 minutes. Remove from heat and immediately add the bloomed gelatin, stirring until fully dissolved. Let the cherry mixture cool for 5 minutes, then pour it into the beaten cream cheese and mix until smooth and uniform. Set aside to cool to room temperature. In a separate bowl, whip 1 cup heavy cream to soft peaks. Gently fold the whipped cream into the cherry-cream cheese mixture until no white streaks remain. Be gentle — you want to keep the mousse airy.
⚠️ Common Mistake to Avoid: If the cherry mixture is too hot when you add it to the cream cheese, it will melt the cream cheese and make the mousse runny. Let it cool for at least 5 minutes before combining.
Step 5: Assemble the Spheres
You’ll need a half-sphere silicone mold (2.5 to 3 inches in diameter) with 8 cavities. Fill each cavity halfway with the cherry cheesecake mousse. Take a frozen cream center from the freezer and press it gently into the center of the mousse — make sure it’s fully surrounded. Cover with more mousse until the cavity is about 90% full. Press a vanilla sponge circle into the top, flat side facing the mousse, so it sits flush with the rim of the mold. Repeat for all 8 spheres. Place the mold in the freezer and freeze for at least 4 hours, or overnight, until the spheres are completely solid.
💡 Sara’s Pro Tip: When you place the frozen cream center into the mousse, make sure no part of it is touching the sides of the mold. It needs to be fully encased in mousse so that when it thaws, the cream bursts from the center — not from a leak at the edge.
Step 6: Bloom Gelatin for the Glaze
In another small bowl, sprinkle 2 tsp powdered gelatin over 2 tbsp cold water. Stir and set aside for 5 minutes until firm. While the gelatin blooms, prepare the rest of the glaze ingredients. Have your 1 cup finely chopped white chocolate ready in a heatproof bowl. The glaze comes together quickly once you start heating the sugar mixture, so it’s best to be organized.
⚠️ Common Mistake to Avoid: Forgetting to bloom the glaze gelatin while the spheres are freezing. Set a timer so you don’t forget — the glaze needs to be made and used while the spheres are still frozen solid.
Step 7: Make the Ruby Mirror Glaze
In a small saucepan, combine 1/4 cup water, 1/2 cup granulated sugar, and 1/3 cup sweetened condensed milk. Heat over medium heat, stirring constantly, until the sugar dissolves and the mixture is smooth and hot — about 3 minutes. Do not let it boil. Remove from heat and add the bloomed gelatin, stirring until completely dissolved. Pour this hot liquid over the 1 cup finely chopped white chocolate in the bowl. Let it sit for 1 minute, then stir gently until the chocolate is fully melted and the mixture is smooth. Add red food coloring drop by drop until you achieve a deep ruby red — I usually add about 6–8 drops. Stir in a pinch of edible ruby shimmer dust for that gorgeous sparkle. Let the glaze cool to about 95°F (35°C) — it should be pourable but not hot. If it thickens too much, you can gently reheat it in the microwave in 5-second bursts.
💡 Sara’s Pro Tip: The ideal glaze temperature is 95°F — it should feel warm to the touch but not hot. If the glaze is too hot, it will melt the frozen mousse and create a messy, thin coating. Use an instant-read thermometer for accuracy.
Step 8: Glaze the Frozen Spheres
Remove the frozen spheres from the mold. Place each sphere on a wire rack set over a baking sheet to catch the drips. Working quickly, pour the ruby mirror glaze over each sphere, covering the entire surface. The glaze will set almost immediately on the frozen surface. Let the spheres sit on the rack for 10–15 minutes to allow the glaze to fully set and the excess to drip off. Transfer each glazed sphere to a serving plate or a parchment-lined tray. If you’re serving them later, return them to the freezer for up to 2 days — just let them sit at room temperature for 5 minutes before serving so the cream center can soften.
⚠️ Common Mistake to Avoid: Don’t pour the glaze over spheres that have started to thaw. If the surface is wet, the glaze won’t stick properly and will slide off. Always work with frozen-solid spheres straight from the freezer.
Step 9: Garnish and Serve
Once the glaze has set, garnish each sphere with a fresh cherry on top and a few white chocolate curls scattered around the base. Serve immediately while the spheres are still cold but the center has had a few minutes at room temperature to soften into that luscious cream burst. To serve, place each sphere on a small plate and encourage guests to tap it gently with a spoon — the mirror glaze cracks beautifully to reveal the hidden cream inside.
💡 Sara’s Pro Tip: For clean white chocolate curls, warm the chocolate bar slightly with the heat of your hand or a few seconds in the microwave before using a vegetable peeler. This gives you long, elegant curls that look professional.
| Step | Action | Duration | Key Visual Cue |
|---|---|---|---|
| 1 | Bake vanilla sponge | 18-20 min | Toothpick comes out clean; golden edges |
| 2 | Freeze cream centers | 2+ hours | Solid to the touch, no give when pressed |
| 3 | Bloom gelatin | 5 min | Firm, jelly-like mass |
| 4 | Assemble spheres | 15 min | Mousse fills mold halfway; cream center submerged |
| 5 | Freeze spheres | 4+ hours | Completely solid, no soft spots |
| 6 | Make mirror glaze | 10 min | Smooth, glossy, ruby red; 95°F |
| 7 | Glaze spheres | 10-15 min set | Shiny, even coating; no bare spots |
| 8 | Garnish and serve | 5 min | Cherries and white chocolate curls on top |
Serving & Presentation
These ruby cherry cheesecake spheres are designed to be a showpiece. I like to serve them on small, dark-colored plates — black or deep navy — to make the ruby mirror glaze really pop. Place one sphere in the center of the plate and add a small spoonful of extra cherry compote or a drizzle of fresh cream around the base. The contrast of the glossy red sphere against the dark plate is absolutely stunning. A tiny pinch of flaky sea salt on top just before serving can also elevate the sweetness of the glaze beautifully.
If you’re serving these at a party, I recommend taking them out of the freezer about 10 minutes before serving. This allows the hidden cream burst center to soften just enough to flow when the sphere is cracked open. Let your guests do the honors themselves — hand them a small spoon and let them tap the shell. The look of surprise and delight when the cream spills out is absolutely worth all the effort. In my NYC dinner parties, this has become my signature finale, and it always gets the same reaction: stunned silence, then applause.
For a truly memorable presentation, arrange the spheres on a tiered cake stand with fresh cherries, edible flowers, and a dusting of powdered sugar around the base. If you’re feeling extra French patisserie, add a tiny gold leaf flake to the top of each sphere. It’s a small touch that makes the dessert feel like it came straight from a Parisian boutique. And if you’re serving kids or a casual gathering, just place them on a platter with a stack of small plates — they’re still the most exciting thing on the table.
| Pairing Type | Suggestions | Why It Works |
|---|---|---|
| Side / Accompaniment | Fresh cherry compote, vanilla bean ice cream, crème anglaise | Adds extra fruitiness or creamy contrast |
| Sauce / Dip | Chocolate ganache drizzle, salted caramel, raspberry coulis | Deepens flavor complexity |
| Beverage | Espresso, champagne, Hibiscus iced tea, cherry lambic beer | Acidity cuts richness; bubbles celebrate the occasion |
| Garnish | Fresh cherries, white chocolate curls, edible gold leaf, mint sprigs, ruby shimmer dust | Elevates visual appeal and adds texture |
Make-Ahead, Storage & Reheating
This ruby cherry cheesecake spheres recipe is a dream for busy home cooks because almost everything can be made ahead. In my NYC schedule, I often prep the sponge and cream centers on a Sunday, assemble the spheres on a Monday, freeze them, and then glaze them the morning of my event. The key is to keep the spheres frozen solid until the moment you glaze them. If you’re planning a party, I recommend assembling the spheres up to 2 weeks in advance and storing them in the freezer in an airtight container. The mirror glaze should be applied fresh on the day you serve for the shiniest finish.
| Method | Container | Duration | Reheating / Serving Tip |
|---|---|---|---|
| Refrigerator (glazed) | Airtight container, single layer | Up to 2 days | Serve cold; glaze may soften slightly |
| Freezer (unglazed) | Airtight container, separated by parchment | Up to 2 weeks | Glaze directly from frozen; do not thaw first |
| Make-Ahead (assembled) | Silicone mold, wrapped in plastic | Up to 2 weeks in freezer | Unmold and glaze the day of serving |
If you’ve stored glazed spheres in the refrigerator, transfer them to the freezer for 15 minutes before serving to re-chill the surface. This helps the mirror glaze regain its shine and keeps the cream burst center properly chilled. Never microwave these spheres — the heat will melt the mousse and ruin the texture. Just let them sit at room temperature for 5-10 minutes before serving so the cream center softens to a pourable consistency. If you notice the glaze looking a bit dull after refrigeration, you can gently warm it with a hairdryer on low heat for a few seconds — a trick I picked up in Paris that restores the mirror finish instantly.
Variations & Easy Swaps
| Variation | Key Change | Best For | Difficulty Impact |
|---|---|---|---|
| Chocolate Cherry Spheres | Add 2 oz melted dark chocolate to mousse; use dark chocolate glaze | Chocolate lovers, birthdays | Same difficulty |
| Raspberry Rose Spheres | Replace cherry puree with raspberry; add 1 tsp rose water to mousse | Spring parties, brunch | Same difficulty |
| Dairy-Free / Vegan | Use vegan cream cheese, coconut cream, and plant-based gelatin | Dairy-free guests | More difficult (texture changes) |
Chocolate Cherry Spheres
For a deeper, more indulgent version, melt 2 oz of high-quality dark chocolate and fold it into the cherry mousse after adding the cream. Replace the white chocolate in the mirror glaze with dark or milk chocolate and use a deep red-brown food coloring. This variation is especially popular with chocolate lovers and feels extra decadent for winter holidays. I like to add a tiny pinch of cayenne pepper to the mousse for warmth — a trick my mother used in Morocco when making sweet-tart desserts.
Raspberry Rose Spheres
Substitute the cherry puree with an equal amount of raspberry puree, and add 1 teaspoon of rose water to the mousse mixture. The floral notes pair beautifully with the tangy raspberry and the creamy mascarpone center. For the glaze, use a pink food coloring instead of red and garnish with fresh raspberries and dried rose petals. This version feels especially lovely for bridal showers, Valentine’s Day, or any spring celebration. I discovered this combination at a Parisian patisserie near the Luxembourg Gardens and have been making it ever since.
Dairy-Free / Vegan Spheres
To make this recipe dairy-free, use vegan cream cheese (like Kite Hill or Miyoko’s), full-fat coconut cream instead of heavy cream, and a plant-based mascarpone alternative. For the gelatin, you can substitute agar-agar — use 1 tsp of agar powder in place of each 2 tsp of gelatin, and heat it to boiling for 1 minute to activate. The texture will be slightly less creamy and more gel-like, but the overall effect is still stunning. This variation takes a bit more experimentation, but I’ve tested it in my kitchen and it works beautifully for those with dietary restrictions.
How do you create a hidden cream burst center in ruby cherry cheesecake spheres without it leaking during freezing?
The key to a successful hidden cream burst center is making sure the mascarpone cream cores are completely frozen solid before you encase them in the mousse. I freeze my piped cream portions for at least 2 hours, but overnight is even better. When you place the frozen center into the mousse-filled mold, press it gently so it’s fully surrounded by mousse on all sides — none of the frozen center should touch the edges of the mold. The mousse itself also needs to be properly set with gelatin so it forms a stable barrier around the core. If you skip the full freezing time or if the cream center is still soft, it will start to melt into the mousse and leak out, ruining the surprise. Also, make sure your mousse is thick enough to hold its shape — if it’s too runny, the frozen center will sink and create an uneven distribution.
What is the best substitute for ruby cherry if I can’t find it at the grocery store?
If you can’t find ruby cherries (also called Rainier or red sweet cherries), the best substitute is dark sweet cherries, such as Bing or Lambert cherries. They have a deep red color and a similar sweetness level. Frozen dark sweet cherries work just as well as fresh — just thaw them completely and drain any excess liquid before pureeing. If cherries are out of season, you can use high-quality cherry preserves or cherry pie filling, but make sure to puree them smooth and adjust the sugar since preserves are already sweetened. For a completely different but equally delicious flavor, raspberries or strawberries make excellent substitutes and will still give you a beautiful red color. Just remember that raspberries are tarter, so you may need to add a bit more sugar to the mousse.
How long should you chill or freeze ruby cherry cheesecake spheres before serving?
After assembling the spheres in the mold, they need to freeze for at least 4 hours — but overnight is ideal for a perfectly solid interior. The spheres must be completely frozen before you unmold and glaze them. Once glazed, you can serve them immediately, or return them to the freezer for up to 2 days. When you’re ready to serve, take the spheres out of the freezer and let them sit at room temperature for 5-10 minutes. This brief resting time allows the hidden cream burst center to soften to a luscious, pourable consistency without melting the mousse or the glaze. If you serve them directly from the freezer, the cream center will be too firm to flow. If you let them sit too long (over 15 minutes), the mousse may start to soften and lose its shape.
Can you make ruby cherry cheesecake spheres ahead of time for a party, and how should you store them?
Absolutely — this is one of the best make-ahead desserts you can prepare for a party. You can assemble the spheres in the mold up to 2 weeks in advance and keep them frozen in an airtight container. The mirror glaze, however, should be applied fresh on the day you plan to serve, because the glaze loses some of its shine after a day in the refrigerator. If you want to prep even further ahead, you can bake the vanilla sponge and freeze the cream centers up to a month in advance. For the glazed spheres, they can be stored in the refrigerator for up to 2 days in a single layer in an airtight container. Just before serving, transfer them to the freezer for 15 minutes to refresh the shine, then let them sit at room temperature for 5 minutes before plating. This make-ahead flexibility is perfect for busy hosts — I do it all the time for my NYC dinner parties.
Why did my ruby mirror glaze turn out dull instead of shiny?
A dull mirror glaze is usually caused by one of three issues. First, the glaze temperature was too low when you poured it — it should be around 95°F (35°C), warm to the touch but not hot. If it’s too cool, it won’t flow smoothly and will set with a matte finish. Second, the frozen spheres might have had condensation on the surface when you poured the glaze. Make sure the spheres are completely dry before glazing; any moisture creates a cloudy film. Third, the gelatin ratio might be off — too much gelatin makes the glaze rigid and dull, while too little makes it runny. Stick to the 2 tsp powdered gelatin per batch and make sure it’s properly bloomed in cold water. If your glaze is already set and looking dull, you can try warming it very gently with a hairdryer on low heat for a few seconds — this sometimes restores the shine.
Can I use a different type of fruit puree instead of cherry for the mousse and glaze?
Yes, you can swap the cherry puree for almost any fruit puree, but keep a few things in mind. The puree needs to be thick and not watery — fruits like mango, raspberry, strawberry, or blackberry work beautifully. If you use a high-water fruit like watermelon or citrus, the mousse may be too loose and not set properly. You’ll also need to adjust the sugar level depending on the natural sweetness of the fruit. For the glaze, if you change the puree, the color will change too — use food coloring to achieve your desired shade. My favorite alternative is raspberry with a touch of lemon zest for brightness. Just remember that the gelatin ratio stays the same regardless of the fruit you choose, as long as the total liquid volume remains the same.
What type of mold should I use for the spheres, and can I use a different shape?
I recommend using a silicone half-sphere mold with cavities that are 2.5 to 3 inches in diameter. Silicone is essential because it allows you to easily unmold the frozen spheres without damaging them. Metal molds won’t work because the spheres will stick and you’ll have trouble releasing them cleanly. You can find silicone sphere molds at most baking supply stores or online. If you don’t have a sphere mold, you can use a dome-shaped silicone mold or even a small bowl-shaped silicone muffin pan. The shape will be different, but the concept is the same — just make sure the mold is flexible enough to unmold frozen contents. For the best visual impact, a true sphere shape gives the most dramatic mirror glaze effect.
How do I prevent the mirror glaze from cracking or peeling off the spheres?
Cracked or peeling mirror glaze is almost always a temperature issue. The spheres must be frozen solid and the glaze should be around 95°F (35°C) when you pour it. If the glaze is too hot, it will melt the surface of the frozen sphere, creating a layer of water between the glaze and the mousse — this causes peeling. If the glaze is too cold, it will set too quickly and crack as the sphere expands slightly during thawing. Another common cause is over-thickening the glaze: if you cook the sugar mixture too long or add too much gelatin, the glaze becomes brittle. Always use an instant-read thermometer to check the temperature, and if the glaze thickens as it sits, gently reheat it in 5-second microwave bursts, stirring in between. A properly made glaze should be smooth, flexible, and adhere perfectly to the frozen surface.
Can I skip the vanilla sponge base and make this a gluten-free dessert?
Yes, you can make this dessert gluten-free by substituting the vanilla sponge with a gluten-free sponge or a nut-based base. Use a 1:1 gluten-free all-purpose flour blend (like Bob’s Red Mill or King Arthur) in place of the regular flour. The texture will be slightly more delicate, so handle the sponge gently when cutting out the circles. Alternatively, you can use a thin layer of almond flour-based cake or even a gluten-free shortbread cookie as the base. If you want to skip the sponge entirely, you can simply fill the molds all the way with mousse and freeze — the spheres will still hold their shape, but you’ll lose the textural contrast of the cake layer. I’ve tested both versions and they work, so choose based on your dietary needs. Just make sure any substitute is firm enough to press into the mousse without crumbling.
What is the best way to transport ruby cherry cheesecake spheres to a party?
Transporting these spheres is easier than you might think. Assemble and freeze the spheres in their silicone molds up to 2 weeks in advance. On the day of the party, unmold the frozen spheres and place them in a single layer in a sturdy, airtight container with a tight-fitting lid. Place a sheet of parchment paper between layers if you need to stack them (I recommend keeping them in a single layer). Transport them in a cooler bag or an insulated container with ice packs to keep them frozen. Glaze them at your destination — the glaze can be made at home, poured into a jar, and gently reheated in the microwave at the party venue. If you’re short on time, you can glaze them at home and transport them frozen in the same container. Once you arrive, keep them in the freezer until serving. I’ve transported these to countless NYC dinner parties and they’ve always arrived in perfect condition.
Share Your Version!
I truly hope you love making these ruby cherry cheesecake spheres as much as I love sharing them. There’s something so magical about presenting a dessert that looks like a gemstone and delivers a hidden surprise with every single bite. If you make this recipe, I’d love to hear all about it — leave a star rating and a comment below telling me how yours turned out, and whether your guests were as amazed as mine always are. Did you try one of the variations? Did you come up with your own twist? I read every comment and I love hearing your kitchen stories.
Snap a photo of your creation and share it on Instagram or Pinterest using the tag @cheerychop — I feature my favorites on my stories. And if you have a specific question that wasn’t answered in the FAQ above, drop it in the comments and I’ll get back to you. From my NYC kitchen to yours — I hope this recipe brings as much warmth to your table as it does to mine. — Sara 🧡
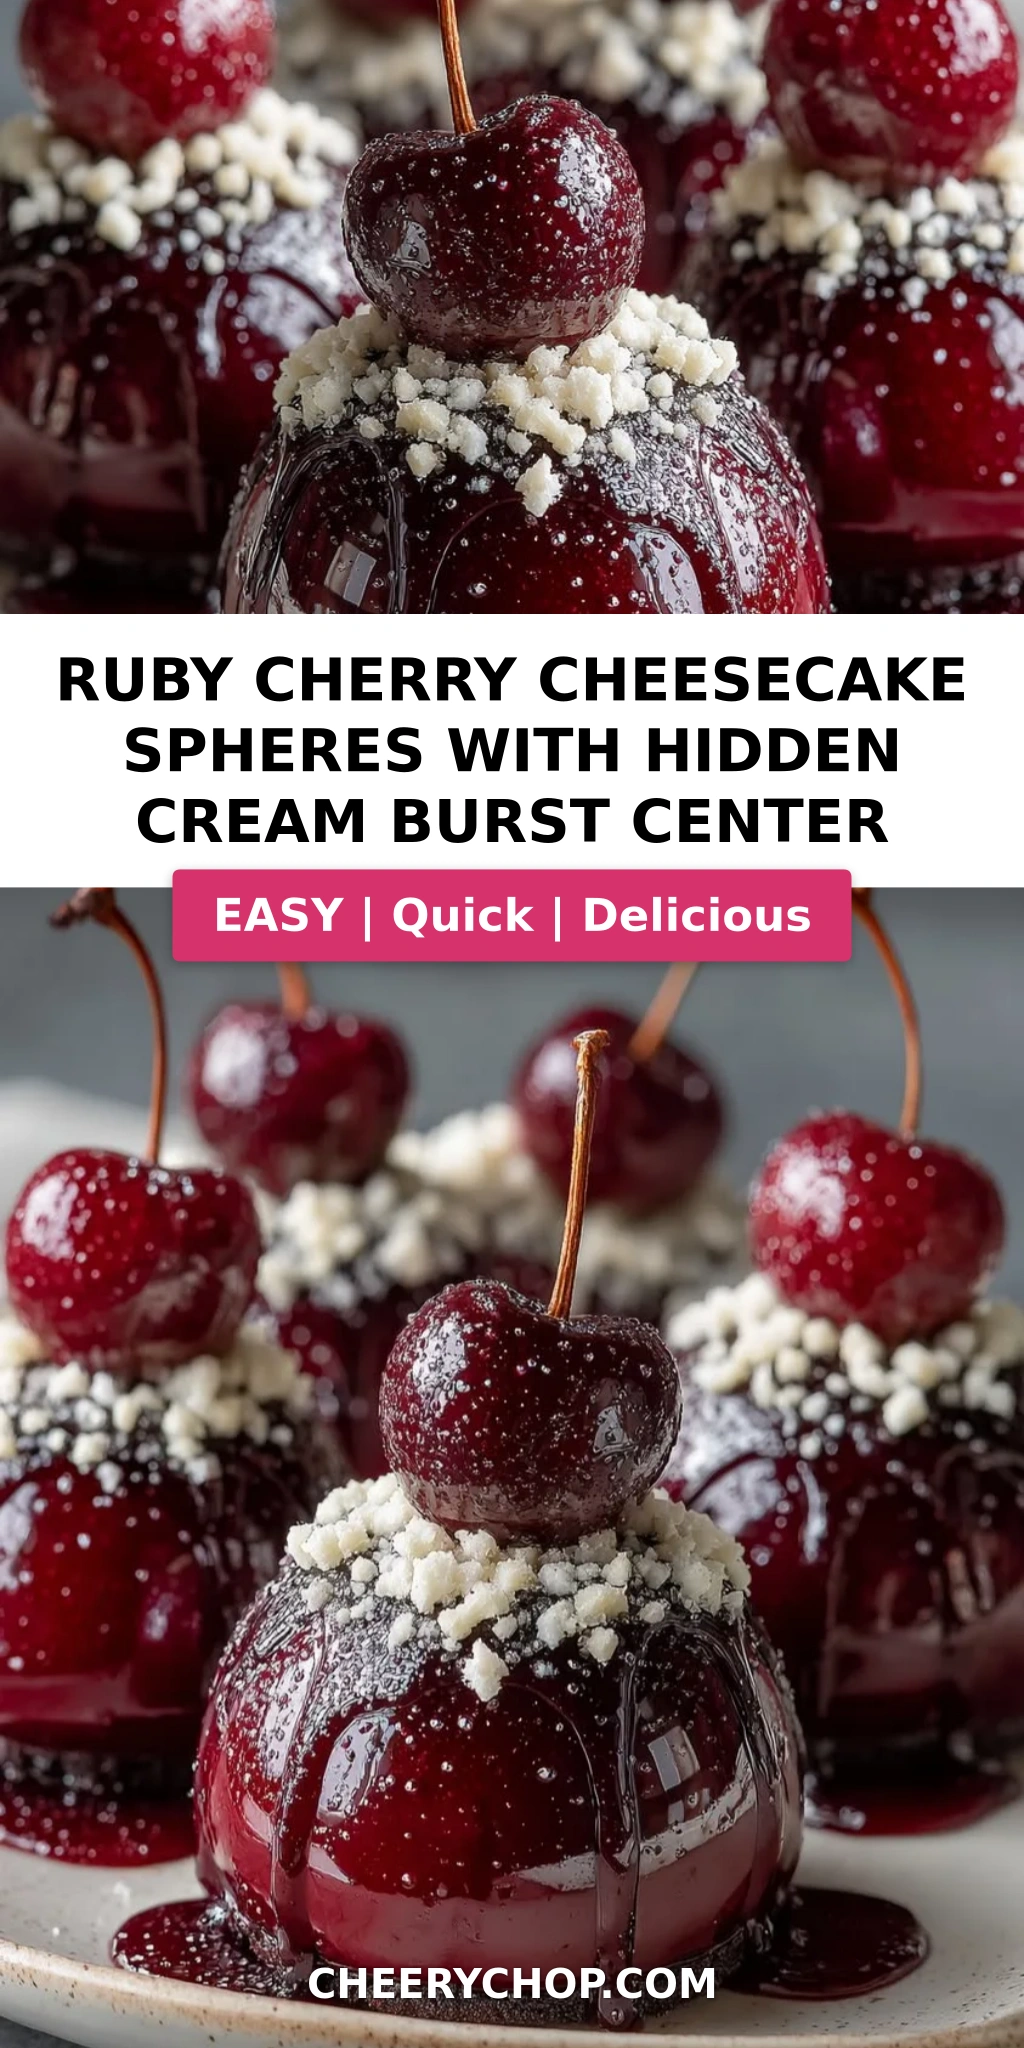
Love This Recipe? Save It to Pinterest!
If you enjoyed this Ruby Cherry Cheesecake Spheres recipe, don’t let it get lost in your browser tabs! 😄 Pin it now so you can find it again anytime — and explore hundreds more tried-and-tested recipes waiting for you on my Pinterest boards.
👉 Follow Sara on Pinterest @chefrecipes2
📌 Pin this recipe · 🔁 Re-pin your favorites · 💬 Tag me when you make it — I love seeing your creations!
“`
Print
Ruby Cherry Cheesecake Spheres with Hidden Cream Burst Center
Ruby Cherry Cheesecake Spheres with Hidden Cream Burst Center
- Yield: 8 1x
Ingredients
- For the Cherry Cheesecake Mousse:
- 2 cups cherry puree
- 8 oz cream cheese, softened
- 1/3 cup granulated sugar
- 1 tbsp lemon juice
- 1 cup heavy cream
- 2 tsp powdered gelatin
- 2 tbsp cold water
- For the Hidden Cream Burst Center:
- 1/2 cup heavy cream
- 2 tbsp powdered sugar
- 1 tsp vanilla extract
- 4 oz mascarpone cheese
- For the Vanilla Sponge Base:
- 1 cup all-purpose flour
- 1/2 tsp baking powder
- 1/4 tsp salt
- 1/4 cup unsalted butter, softened
- 1/3 cup granulated sugar
- 1 large egg
- 1/2 tsp vanilla extract
- 1/4 cup milk
- For the Ruby Mirror Glaze:
- 1 cup white chocolate, finely chopped
- 1/3 cup sweetened condensed milk
- 1/4 cup water
- 1/2 cup granulated sugar
- 2 tsp powdered gelatin
- 2 tbsp cold water
- Red food coloring, as needed
- Edible ruby shimmer dust, as needed
- For Garnish (optional):
- Fresh cherries
- White chocolate curls
Instructions
- 1. Preheat oven to 350°F (175°C) and line a small baking pan.
- 2. Whisk together flour, baking powder, and salt.
- 3. Beat butter and sugar until fluffy.
- 4. Add egg and vanilla extract.
- 5. Alternate adding dry ingredients and milk until smooth.
- 6. Bake for 18–20 minutes. Cool completely and cut into small circles.
- 7. Beat mascarpone, powdered sugar, vanilla, and heavy cream until thick.
- 8. Pipe small portions onto a tray and freeze until firm.
- 9. Bloom gelatin in cold water for the mousse.
- 10. Beat cream cheese until smooth.
- 11. Heat cherry puree, sugar, and lemon juice until warm and stir in gelatin until dissolved.
- 12. Combine with cream cheese and cool slightly.
- 13. Whip heavy cream to soft peaks and fold into the cherry mixture.
- 14. Fill sphere molds halfway with mousse.
- 15. Place a frozen cream center inside each sphere and cover with more mousse.
- 16. Add sponge circles and freeze until fully set, about 4 hours.
- 17. Bloom gelatin in cold water for the glaze.
- 18. Heat water, sugar, and condensed milk until smooth.
- 19. Remove from heat and stir in gelatin.
- 20. Pour over white chocolate and mix until glossy.
- 21. Add red food coloring and ruby shimmer dust.
- 22. Cool glaze to a pourable consistency.
- 23. Unmold frozen spheres and place on a wire rack.
- 24. Pour glaze evenly over each sphere until fully coated.
- 25. Allow glaze to set for 10–15 minutes.
- 26. Garnish with fresh cherries and white chocolate curls before serving.
Nutrition
- Calories: 390
- Sugar: 35 g
- Fat: 22 g
- Carbohydrates: 44 g
- Protein: 6 g
Tried This Recipe? Leave a Comment!
Did you make this recipe? I’d love to hear how it turned out! Please leave a comment and a rating below. Your feedback helps other home cooks and supports cheerychop.com!
For more delicious inspiration, follow me on Pinterest!


