
Table of Contents
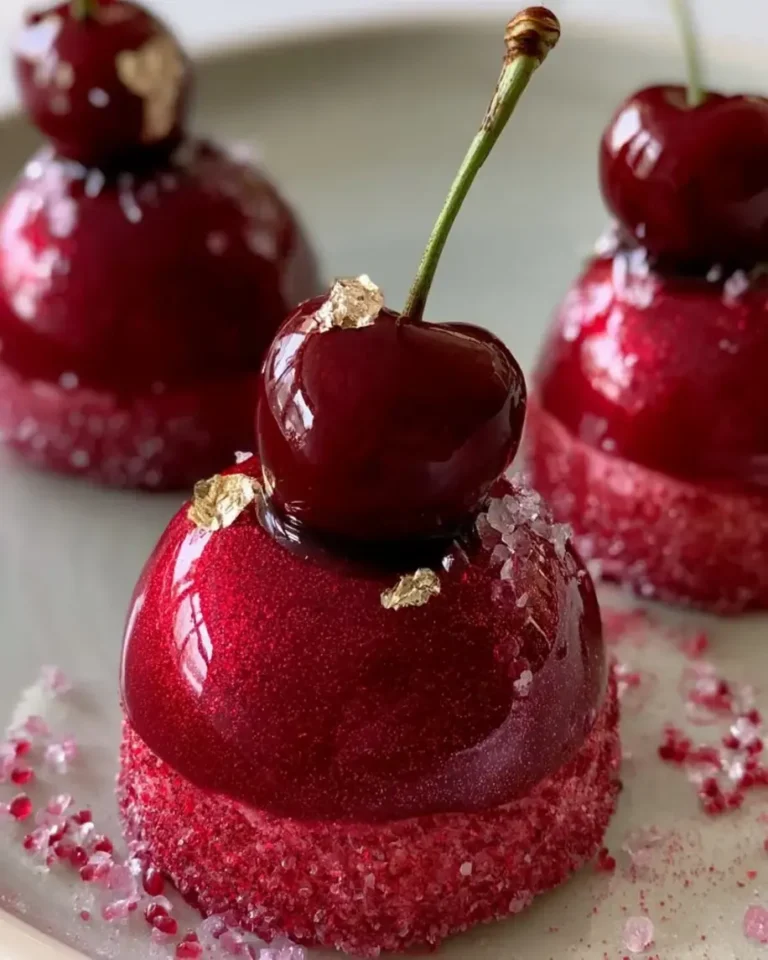
Ruby Cherry Velvet Jewels Recipe – A Velvet Mirror Glaze Dessert
Growing up in Morocco, my mother would simmer fresh cherries with a whisper of orange blossom water and a cinnamon stick until the kitchen smelled like a jewel box. Years later, as a pastry student in Paris, I discovered the magic of mirror glazes — those impossibly shiny, glass-like coatings that transform a simple mousse into a work of art. This ruby cherry velvet jewels recipe is the love child of those two worlds: the bold, sun-drenched fruit of my North African childhood and the refined technique of a French pâtisserie kitchen. Every bite is a little ruby treasure with a creamy surprise at its center.
The first time you cut into one of these cherry velvet jewels dessert pieces, you will understand the name. The mirror glaze shatters ever so slightly under your spoon, revealing a deep ruby-red cherry velvet layer that is both airy and luscious. Hidden inside is a silky vanilla mascarpone core — cool, creamy, and subtly sweet. The cherries bring a natural tartness that cuts through the richness, while the edible ruby shimmer dust catches the light like a gemstone. It is a dessert that commands attention, yet the flavors are warmly familiar and deeply comforting.
I have spent years perfecting this cherry cream cheese jewels recipe in my NYC kitchen, testing every variable from cherry variety to gelatin bloom time. What I am sharing with you today is the version that never fails: a foolproof method that delivers bakery-quality results at home. The key is in the frozen vanilla cream core — it locks in moisture and ensures a picture-perfect center every time. I will walk you through each step, from blooming gelatin to achieving that flawless ruby mirror glaze dessert finish. No specialty equipment required, just patience and a little love.
Why This Ruby Cherry Velvet Jewels Recipe Is the Best
The Flavor Secret: Most cherry mascarpone jewels recipes rely on artificial cherry flavoring or canned fillings that taste flat. I use fresh cherry puree — simmered briefly to concentrate its natural sweetness — and pair it with cream cheese for a tangy, velvety base that complements the fruit rather than masking it. The vanilla mascarpone core adds a lush, almost pudding-like contrast that makes the whole thing sing. This combination was inspired by a cherry clafoutis I ate at a tiny bistro in the 6th arrondissement in Paris, and I have been chasing that balance ever since.
Perfected Texture: Achieving a mirror glaze that is both smooth and stable requires precise temperature control. I learned this the hard way during my pastry training — one degree too hot and the glaze becomes a runny mess; one degree too cold and it sets before you can pour. My method uses a gelatin-stabilized white chocolate base with sweetened condensed milk for richness and shine. The result is a glaze that flows like silk and sets to a jewel-like sheen that will make your guests gasp. Every cherry velvet jewels dessert piece comes out looking like a museum display.
Foolproof & Fast: I know that home cooks do not have hours to fuss with complicated techniques. This ruby cherry velvet jewels recipe is designed with clear visual cues and forgiving timelines. The components can be made in stages over two days, which makes it perfect for holiday entertaining or dinner party prep. Even if you have never worked with gelatin or mirror glaze before, my step-by-step guidance will help you nail it on the first try. I promise — if I can make this work in my tiny Paris apartment kitchen with a hand mixer and a prayer, you can absolutely make it in yours.
Ruby Cherry Velvet Jewels Recipe Ingredients
Every Saturday morning during cherry season, I walk to the Union Square Greenmarket in NYC and fill my canvas bag with the darkest, ripest cherries I can find. The smell alone — sweet, jammy, with a hint of almond — takes me right back to the medina markets of Marrakech. For this cherry cream cheese jewels recipe, quality ingredients matter because each one plays a starring role. Here is everything you will need, divided by component for clarity.
Ingredients List
For the Ruby Cherry Velvet Layer:
- 2 cups cherries, pitted and pureed
- 8 oz cream cheese, softened
- 1 cup heavy cream
- 1/3 cup powdered sugar
- 1 tsp vanilla extract
- 2 tsp unflavored gelatin
- 2 tbsp cold water
- Red gel food coloring (optional)
For the Vanilla Cream Core:
- 1/2 cup mascarpone cheese
- 2 tbsp heavy cream
- 1 tbsp powdered sugar
- 1 tsp vanilla bean paste
For the Velvet Mirror Glaze:
- 1 cup white chocolate, finely chopped
- 1/2 cup sweetened condensed milk
- 2 tsp unflavored gelatin
- 2 tbsp cold water
- 1/4 cup warm water
- 1 tsp edible ruby shimmer dust
For Garnish (optional):
- Fresh cherries
- Edible sugar crystals
- Gold leaf flakes
Ingredient Spotlight
Cherries: Fresh, dark sweet cherries like Bing or Rainier give the puree a deep ruby hue and natural sweetness. If you can only find tart cherries, add an extra tablespoon of powdered sugar to balance the acidity. Frozen cherries work beautifully too — just thaw them completely and drain off any excess liquid before pureeing. This is the heart of your ruby mirror glaze dessert, so choose the best you can find.
Mascarpone: This Italian cream cheese is the soul of the vanilla core. Its high butterfat content creates a silky, luscious texture that contrasts perfectly with the airy cherry velvet layer. Look for mascarpone in the specialty cheese section of your grocery store. In a pinch, you can substitute an equal amount of full-fat cream cheese beaten with 1 tablespoon of heavy cream, but the texture will be slightly firmer — still delicious, just a touch less decadent.
White Chocolate: For the mirror glaze, use a high-quality white chocolate with at least 30% cocoa butter. Chips or wafers work fine, but a chopped bar melts more evenly and produces a glossier finish. Do not use white baking morsels that contain vegetable oils — they will not set properly and your cherry mascarpone jewels will lose that signature shine. Callebaut or Ghirardelli are my go-to brands.
Edible Ruby Shimmer Dust: This is the secret to the velvet effect. It is a fine, food-grade powder made from mica and titanium dioxide that catches the light without adding flavor. You can find it at specialty baking stores or online. If you cannot source it, a pinch of luster dust in a deep red shade works beautifully too. Just avoid anything labeled “non-toxic” or “for decoration only” — you want a product that is safe to eat.
| Original Ingredient | Best Substitution | Flavor / Texture Impact |
|---|---|---|
| Fresh cherries (pureed) | Frozen cherries, thawed & drained | Slightly less bright flavor; add 1 tsp lemon juice to lift |
| Mascarpone cheese | Full-fat cream cheese + 1 tbsp heavy cream | Firmer core; still creamy but less luxurious |
| White chocolate (mirror glaze) | High-quality white chocolate chips (30% cocoa butter) | Slightly less glossy but still stable; do not use baking morsels |
| Edible ruby shimmer dust | Red luster dust (food-grade) | Similar visual effect; use sparingly to avoid streaking |
| Vanilla bean paste | 1 tsp vanilla extract + seeds from 1/2 vanilla bean | Slightly less intense vanilla flavor; still very good |
How to Make Ruby Cherry Velvet Jewels — Step-by-Step
Making cherry velvet jewels dessert at home is easier than you think when you break it down into simple, manageable steps. I have organized this guide so you can work through each component without feeling overwhelmed. Take your time, trust the process, and remember — every pastry chef I know has ruined at least one mirror glaze before getting it right. You have got this.
Step 1: Bloom the Gelatin
In a small bowl, sprinkle 2 teaspoons of unflavored gelatin over 2 tablespoons of cold water. Let it sit undisturbed for 5 minutes. The gelatin will absorb the water and turn into a firm, jiggly mass — this is called blooming. It is essential for a smooth, lump-free texture in your cherry velvet layer. Do not skip this step; adding dry gelatin directly to the mixture will result in gritty, uneven setting.
💡 Sara’s Pro Tip: Use cold water — not warm — for blooming. Warm water can dissolve the gelatin prematurely and weaken its setting power. I learned this the hard way during my first week at Le Cordon Bleu in Paris. Cold water is your friend.
Step 2: Make the Cherry Velvet Layer
In a large mixing bowl, beat 8 oz of softened cream cheese with 1/3 cup powdered sugar, 1 teaspoon vanilla extract, and 2 cups of cherry puree until the mixture is completely smooth and uniform. A hand mixer works perfectly for this — no need to break out the stand mixer. The color should be a deep, dusty rose at this point. If you want a more intense ruby hue, add a drop or two of red gel food coloring and mix until evenly distributed.
⚠️ Common Mistake to Avoid: Do not overbeat the cream cheese. Overworking it can incorporate too much air and make the mixture grainy. Beat just until smooth and stop.
Step 3: Whip and Fold
In a separate chilled bowl, whip 1 cup of heavy cream to soft peaks — when you lift the whisk, the cream should droop slightly but hold its shape. Now, gently microwave the bloomed gelatin for 10–15 seconds until it becomes liquid. Stir it into the cherry-cream cheese mixture immediately. Then, using a rubber spatula, fold in the whipped cream in three additions. Fold gently — you want to keep the mixture airy and light.
💡 Sara’s Pro Tip: Use a large, wide bowl for folding. The wider surface area means fewer strokes to incorporate the cream, which reduces the risk of deflating the mixture. Fold in a J-shape motion, scraping the bottom and sides of the bowl.
Step 4: Make the Vanilla Cream Core
In a small bowl, combine 1/2 cup mascarpone cheese, 2 tablespoons heavy cream, 1 tablespoon powdered sugar, and 1 teaspoon vanilla bean paste. Stir until smooth and creamy. Transfer the mixture to a piping bag fitted with a small round tip (or use a zip-top bag with a corner snipped off). Pipe 8 small dollops — about the size of a cherry — onto a parchment-lined baking sheet. Freeze these for at least 30 minutes until they are firm to the touch.
⚠️ Common Mistake to Avoid: Do not skip freezing the cores. If they are not fully frozen when you embed them in the cherry velvet mixture, they will blend into the surrounding layer and you will lose that beautiful defined center.
Step 5: Assemble the Jewels
Spoon the cherry velvet mixture into jewel-shaped silicone molds, filling each cavity about halfway. Place one frozen vanilla cream core into the center of each mold, pressing it gently into the mixture. Then cover with the remaining cherry velvet mixture, smoothing the tops with a small offset spatula. Tap the molds gently on the counter to release any air bubbles.
💡 Sara’s Pro Tip: Silicone molds are non-negotiable for this cherry cream cheese jewels recipe. They make unmolding effortless and give you that perfect jewel shape. If you do not have jewel molds, small dome or half-sphere molds work beautifully too.
Step 6: Freeze Until Firm
Place the filled molds in the freezer for at least 5 hours, or ideally overnight. The mixture needs to be completely solid to hold its shape during unmolding and glazing. I usually make this component a day ahead — it makes the whole process feel much more relaxed and the results are worth the wait.
⚠️ Common Mistake to Avoid: Do not rush the freezing time. If the jewels are not fully frozen, they will crack or crumble when you unmold them. The gelatin needs that full 5 hours to set the structure firmly.
Step 7: Make the Velvet Mirror Glaze
Bloom 2 teaspoons of gelatin in 2 tablespoons of cold water for 5 minutes. In a small saucepan, warm 1/2 cup sweetened condensed milk with 1/4 cup warm water over low heat until it is just steaming — do not let it boil. Remove from heat, add the bloomed gelatin, and stir until dissolved. Pour this mixture over 1 cup of finely chopped white chocolate in a heatproof bowl. Let it sit for 2 minutes, then stir gently until the chocolate is fully melted and the glaze is smooth. Stir in 1 teaspoon of edible ruby shimmer dust until evenly distributed.
💡 Sara’s Pro Tip: The ideal temperature for pouring the glaze is 90–95°F (32–35°C). If it is too hot, it will be thin and will not coat properly. If it is too cool, it will set before you finish glazing. Use an instant-read thermometer for precision — this is one of those moments where a chef’s tool makes all the difference.
Step 8: Glaze the Jewels
Unmold the frozen jewels and place them on a wire rack set over a baking sheet. Pour the slightly cooled glaze evenly over each piece, working quickly and confidently. The glaze should flow over the surface in a smooth, even curtain, coating every side. Tap the rack gently to encourage any stubborn spots. Let the excess drip off — do not be tempted to touch or spread the glaze. Let them set on the rack for 2–3 minutes.
⚠️ Common Mistake to Avoid: Do not pour the glaze over cold jewels straight from the freezer without letting them sit for 30 seconds. If the jewels are too cold, the glaze will seize and create a dull, uneven finish. A brief rest at room temperature ensures a glass-smooth surface.
Step 9: Garnish and Serve
While the glaze is still slightly tacky, place a fresh cherry on top of each jewel, then sprinkle with edible sugar crystals and a few flakes of gold leaf for that extra-special touch. Transfer the glazed jewels to a serving platter and chill for at least 30 minutes before serving. This allows the glaze to fully set and the interior to soften slightly to a mousse-like texture.
💡 Sara’s Pro Tip: Use tweezers or a small pair of kitchen tongs to place the gold leaf — it is incredibly delicate and will stick to your fingers if you try to handle it directly. I keep a pair of surgical tweezers in my utensil drawer just for this purpose.
| Step | Action | Duration | Key Visual Cue |
|---|---|---|---|
| 1 | Bloom gelatin for cherry layer | 5 mins | Firm, jiggly mass forms |
| 2 | Make cherry velvet layer | 5 mins | Smooth, uniform rose color |
| 3 | Whip cream and fold | 5 mins | Soft peaks; airy, light mixture |
| 4 | Make vanilla cream core | 5 mins + 30 mins freeze | Firm, pipeable dollops |
| 5 | Assemble jewels in molds | 10 mins | Core centered, tops smooth |
| 6 | Freeze until firm | 5+ hours | Solid, unmold cleanly |
| 7 | Make velvet mirror glaze | 10 mins | Glossy, smooth, shimmering |
| 8 | Glaze the jewels | 5 mins | Even coat, no bare spots |
| 9 | Garnish and serve | 30 mins chill | Glaze set, garnishes secure |
Serving & Presentation
These ruby cherry velvet jewels are meant to be the showstopper of any table. I love serving them on a simple white platter — the contrast of the deep ruby mirror glaze against the white ceramic is absolutely stunning. For a more dramatic presentation, place each jewel on a small rectangle of dark chocolate or a thin almond tuile cookie. The slight bitterness of dark chocolate is a beautiful counterpoint to the sweet, tangy cherry and creamy vanilla core.
In the summer, I serve these jewels with a small scoop of honey-lavender ice cream on the side — a nod to the floral aromas I grew up with in Morocco. In the winter, a drizzle of warm cherry compote and a dusting of confectioners’ sugar feels cozy and festive. The jewels themselves are rich enough to stand alone, but a thoughtful accompaniment elevates them from dessert to experience. For a dinner party, I arrange them on a mirrored tray or a slab of marble and let the gold leaf catch the candlelight.
If you are serving these at a brunch or afternoon tea, place them on a tiered stand with fresh berries and tiny floral garnishes like edible violas or rose petals. The jewels are sturdy enough to hold their shape at room temperature for about 30 minutes, which gives you time to present them beautifully without rushing. I always tell my guests to take a moment to admire the shine before diving in — it is part of the magic.
| Pairing Type | Suggestions | Why It Works |
|---|---|---|
| Side Dish | Dark chocolate shards, almond tuile cookies, fresh berries | Adds textural contrast and visual height |
| Sauce / Dip | Warm cherry compote, honey-lavender syrup, white chocolate ganache | Enhances the fruit and adds richness |
| Beverage | Earl Grey tea, espresso, rosé Champagne, cherry lambic beer | The floral and tart notes complement the cherry and vanilla |
| Garnish | Fresh cherries with stems, edible gold leaf, sugar crystals, mint sprigs | Adds visual drama and a touch of luxury |
Make-Ahead, Storage & Reheating
One of the best things about this cherry velvet jewels dessert is how well it works for entertaining. As a busy NYC food blogger, I rely on make-ahead recipes that let me enjoy my own dinner parties instead of sweating in the kitchen. The cherry velvet layer and vanilla cream core can both be prepared a day in advance and assembled the next morning. The mirror glaze should be made fresh on the day you plan to serve, but the entire process is calm and unfussy when you break it into stages.
| Method | Container | Duration | Reheating Tip |
|---|---|---|---|
| Refrigerator | Airtight container in a single layer | Up to 3 days | Serve cold; do not reheat |
| Freezer | Freezer-safe container, wax paper between layers | Up to 1 month | Thaw in fridge 2 hours before serving |
| Make-Ahead | Assemble in molds, freeze uncovered until solid, then wrap | Up to 2 days before glazing | Glaze directly from frozen; no need to thaw first |
To store leftovers, place the glazed jewels in an airtight container with a sheet of wax paper between layers to protect the mirror finish. They will keep in the refrigerator for up to three days, though the glaze may soften slightly over time. If you want to freeze the unglazed jewels, wrap each one individually in plastic wrap after they are fully frozen, then transfer to a freezer bag. When you are ready to serve, glaze them directly from the freezer — the glaze will set beautifully on the cold surface.
Variations & Easy Swaps
This ruby mirror glaze dessert is endlessly adaptable. Over the years, I have experimented with different fruits, flavor profiles, and dietary restrictions to keep things exciting. Here are three of my favorite variations — each one brings a new personality to the same elegant technique.
| Variation | Key Change | Best For | Difficulty Impact |
|---|---|---|---|
| Berry Velvet Jewels | Substitute cherries with mixed berries (strawberry, raspberry, blueberry) | Summer entertaining, brunch | Same difficulty |
| Dairy-Free / Vegan Version | Use vegan cream cheese, coconut cream, and dairy-free white chocolate | Dairy-free guests, vegan diets | Slightly more challenging |
| Citrus Velvet Jewels | Replace cherry puree with blood orange or Meyer lemon curd | Winter holidays, citrus season | Same difficulty |
Berry Velvet Jewels
This is my go-to summertime version. Substitute the cherry puree with an equal amount of mixed berry puree — strawberries, raspberries, and a handful of blueberries create a gorgeous magenta hue. I like to add a teaspoon of rose water to the berry puree for a floral note that reminds me of the rose-scented pastries my mother used to buy at the souk in Marrakech. The vanilla mascarpone core stays the same, and the mirror glaze can be tinted with a touch of pink gel food coloring instead of the ruby shimmer dust for a softer, more romantic finish.
Dairy-Free / Vegan Version
I developed this version for a close friend who is vegan, and it has become a staple in my repertoire. Use a high-quality vegan cream cheese (I like the one from Miyoko’s Kitchen) and full-fat coconut cream in place of the heavy cream. For the mascarpone core, blend soaked cashews with a splash of coconut milk and vanilla bean paste — it is surprisingly close to the real thing. The mirror glaze requires dairy-free white chocolate (check the label for cocoa butter and sugar only) and condensed coconut milk. The texture is slightly less firm but equally luscious.
Citrus Velvet Jewels
When winter citrus hits the NYC farmers markets, I cannot resist swapping the cherries for blood orange or Meyer lemon. Use 2 cups of fresh-squeezed and strained citrus juice, simmered with 2 tablespoons of sugar until reduced by half, in place of the cherry puree. The tangy, bright flavor is a perfect match for the creamy mascarpone core. For the mirror glaze, omit the ruby shimmer dust and use a pinch of edible gold luster dust instead — the golden sheen against the deep orange or yellow is absolutely stunning. It feels like eating sunshine.
What is the difference between Ruby Cherry Velvet Jewels and traditional red velvet cake?
The two desserts are fundamentally different in both form and flavor. Traditional red velvet cake is a baked layer cake with a mild cocoa flavor, tinted red with food coloring, and typically frosted with cream cheese frosting. Ruby Cherry Velvet Jewels, on the other hand, are a no-bake chilled dessert made with a gelatin-set cherry cream cheese mousse, a hidden vanilla mascarpone core, and a glossy white chocolate mirror glaze. The texture is silky and mousse-like rather than cakey, and the flavor is bright and fruity rather than chocolaty. The only real similarity is the “velvet” in the name, which refers to the smooth, velvety texture of both desserts — though they achieve it through completely different methods.
Can I use frozen cherries instead of fresh for Ruby Cherry Velvet Jewels?
Absolutely — frozen cherries work beautifully in this ruby cherry velvet jewels recipe. In fact, I often use frozen cherries when fresh ones are out of season or when I want a more consistent flavor. The key is to thaw the cherries completely and drain off any excess liquid before pureeing. Frozen cherries release more water than fresh ones during thawing, and that extra liquid can make the mousse layer too loose to set properly. I recommend placing the thawed cherries in a fine-mesh strainer over a bowl for about 20 minutes to drain naturally. After that, puree them as directed and proceed with the recipe. The flavor will be just as vibrant and the texture will be identical.
How do I prevent the cherry pieces from sinking to the bottom of the batter?
This is a common concern with fruit-based mousses, but for this cherry cream cheese jewels recipe, the cherries are pureed rather than left in pieces, so sinking is not an issue. The cherry puree is fully incorporated into the cream cheese mixture before the whipped cream is folded in, creating a homogeneous base. However, if you decide to add small chunks of cherry or other fruit to the mixture for texture, there is a simple trick to prevent sinking: toss the fruit pieces in a tablespoon of powdered sugar before folding them in. The sugar coats the fruit and helps suspend it in the mousse. Another method is to freeze the fruit pieces briefly before folding them in — cold pieces are less likely to sink than room-temperature ones.
What is the best way to store Ruby Cherry Velvet Jewels to keep them moist?
The best way to store these cherry velvet jewels dessert pieces is in an airtight container in the refrigerator, where they will stay moist and fresh for up to three days. The mirror glaze acts as a protective seal that locks in moisture, so the mousse does not dry out. Place a sheet of wax paper or parchment between layers if you are stacking them to prevent the glaze from sticking or scratching. For longer storage, freeze the unglazed jewels in an airtight container for up to one month — the frozen mousse stays perfectly moist because the gelatin and cream cheese retain their structure. When you are ready to serve, glaze them directly from the freezer and let them thaw in the refrigerator for about 30 minutes before serving.
Can I make Ruby Cherry Velvet Jewels without gelatin?
Gelatin is a key structural component in this ruby mirror glaze dessert, both in the mousse layer and in the mirror glaze itself. If you need a vegetarian or vegan alternative, you can substitute agar-agar, a plant-based gelling agent derived from seaweed. Use the same amount of agar-agar as gelatin (2 teaspoons for the mousse and 2 teaspoons for the glaze), but note that agar-agar sets differently — it needs to be brought to a full boil for about 2 minutes to activate, and it sets at room temperature rather than requiring refrigeration. The texture will be slightly firmer and less creamy than the gelatin version, but it will still hold its shape beautifully. I have tested this substitution and it works well, though the mouthfeel is subtly different.
Why did my mirror glaze turn out streaky instead of smooth?
A streaky or uneven mirror glaze is almost always a temperature issue. The most common cause is pouring the glaze when it is too cool — if the white chocolate mixture starts to thicken before you pour, it will not flow evenly over the frozen jewels. I recommend using an instant-read thermometer to ensure the glaze is between 90°F and 95°F (32°C to 35°C). Another culprit is over-stirring the glaze, which can incorporate air bubbles that create a textured surface. Stir gently and slowly to avoid bubbles. Finally, make sure your frozen jewels are uniformly cold — if some are warmer than others, the glaze will set at different rates and create an uneven finish. A quick rest at room temperature for 30 seconds before glazing helps ensure consistency.
Can I use a different type of chocolate for the mirror glaze?
White chocolate is the traditional base for a colored mirror glaze because its neutral color allows you to tint it any shade with food coloring or shimmer dust. You can use milk chocolate or dark chocolate, but the resulting glaze will be brown or dark brown, which may not give you the vibrant ruby hue this cherry mascarpone jewels recipe is known for. If you do use milk chocolate, omit the ruby shimmer dust and consider adding a touch of gold luster dust for warmth instead. Keep in mind that darker chocolates contain cocoa solids that can make the glaze slightly thicker, so you may need to warm it a degree or two higher to achieve the same pourable consistency. The flavor will be richer and more chocolaty, which pairs beautifully with the cherry and vanilla.
How do I unmold the jewels without breaking them?
Unmolding these jewel-shaped desserts is simple if you follow a few key steps. First, make sure the jewels are fully frozen — at least 5 hours, but overnight is ideal. The frozen mousse is firm enough to hold its shape during unmolding but fragile enough to crack if you force it. Gently flex the silicone mold from the bottom, pressing upward on the base of each cavity. If the jewel does not release easily, let it sit at room temperature for 30 seconds and try again. Never pull or tug at the edges of the jewel — this can cause the mousse to tear. For stubborn molds, you can dip the bottom of the mold in warm water for 5 seconds, but be careful not to let water touch the jewel itself, as it can melt the surface and ruin the smooth finish.
Can I use a different fruit puree instead of cherry?
Absolutely — this ruby cherry velvet jewels recipe is wonderfully adaptable. You can substitute the cherry puree with an equal amount of any fruit puree, such as raspberry, strawberry, mango, passion fruit, or even peach. The key is to use a thick, concentrated puree rather than a thin juice. If your chosen fruit is very watery (like watermelon or citrus), simmer the puree over low heat until it reduces by about one-third to concentrate the flavor and thicken the texture. You may also need to adjust the sweetness level — tart fruits like raspberry or passion fruit pair beautifully with the creamy mascarpone core, while very sweet fruits like mango might require a splash of lemon juice to balance the flavors. Each fruit will give the jewels a different personality, so feel free to experiment.
What if I do not have jewel-shaped silicone molds?
No problem at all — you can still make this cherry velvet jewels dessert using any small silicone mold you have on hand. Half-sphere or dome molds create beautiful, elegant jewels that look like glazed gems. Mini bundt or fluted molds work well too, and they add a lovely decorative edge. If you do not have any silicone molds, you can use a standard muffin tin lined with plastic wrap or parchment paper cups, though the shape will be more rustic. For a truly no-mold approach, line a small loaf pan with plastic wrap, pour in the entire mousse mixture, and freeze it solid. Then unmold, cut into cubes or rectangles, and glaze each piece individually. The presentation will be different, but the flavor and texture will be just as spectacular.
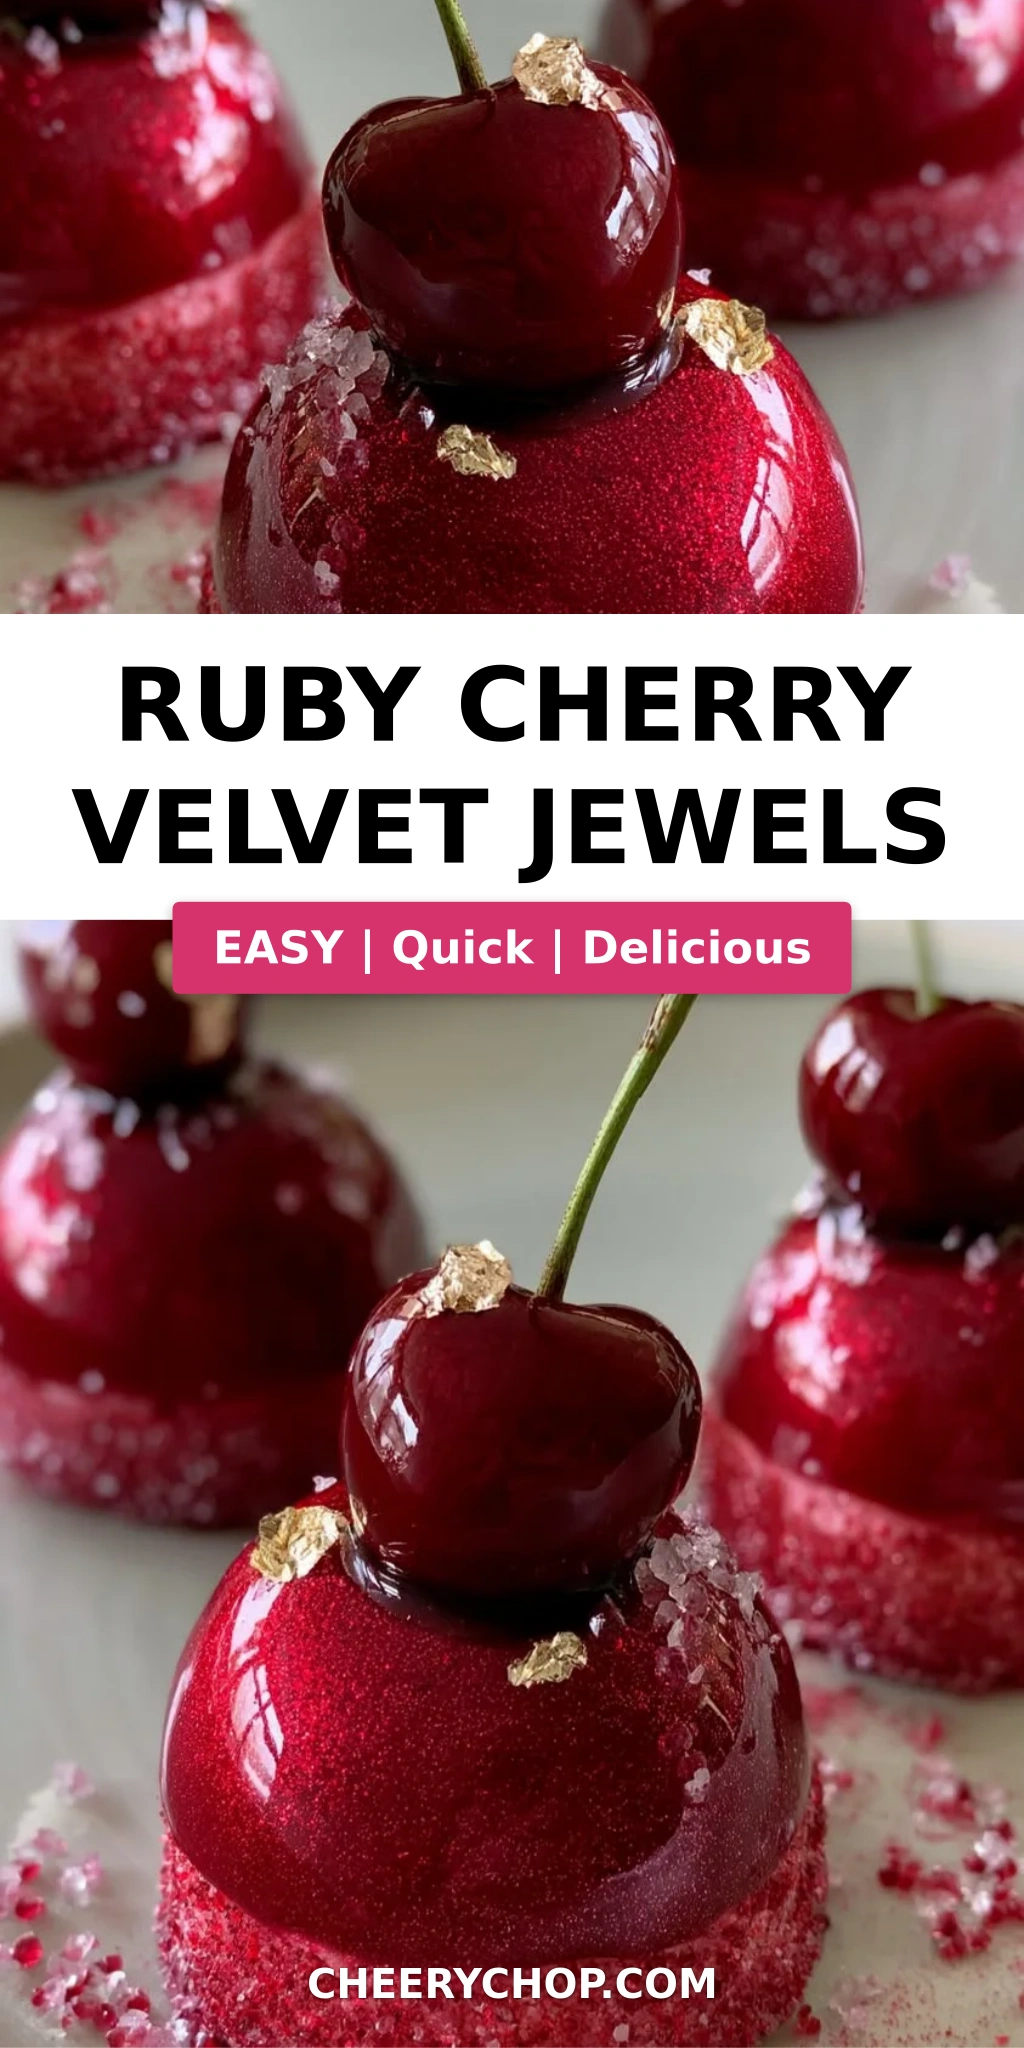
Love This Recipe? Save It to Pinterest!
If you enjoyed this Ruby Cherry Velvet Jewels recipe, don’t let it get lost in your browser tabs! 😄 Pin it now so you can find it again anytime — and explore hundreds more tried-and-tested recipes waiting for you on my Pinterest boards.
👉 Follow Sara on Pinterest @chefrecipes2
📌 Pin this recipe · 🔁 Re-pin your favorites · 💬 Tag me when you make it — I love seeing your creations!
Share Your Version!
I cannot wait to see how your Ruby Cherry Velvet Jewels turn out! Drop a star rating and a comment below to let me know how it went — did you try the classic version or one of the variations? Tag me in your photos on Instagram or Pinterest with @cheerychop so I can see your gorgeous creations. And if you have any questions about the mirror glaze technique or the vanilla mascarpone core, just ask — I read every single comment and I am always here to help you nail this recipe. Your kitchen success means the world to me.
From my NYC kitchen to yours — I hope this recipe brings as much warmth to your table as it does to mine. — Sara 🧡
Ruby Cherry Velvet Jewels
A ruby red cherry jewel with a creamy vanilla center, topped with a shimmering velvet mirror glaze.
- Yield: 8 1x
Ingredients
- For the Ruby Cherry Velvet Layer:
- 2 cups cherries, pitted and pureed
- 8 oz cream cheese, softened
- 1 cup heavy cream
- 1/3 cup powdered sugar
- 1 tsp vanilla extract
- 2 tsp unflavored gelatin
- 2 tbsp cold water
- Red gel food coloring (optional)
- For the Vanilla Cream Core:
- 1/2 cup mascarpone cheese
- 2 tbsp heavy cream
- 1 tbsp powdered sugar
- 1 tsp vanilla bean paste
- For the Velvet Mirror Glaze:
- 1 cup white chocolate, finely chopped
- 1/2 cup sweetened condensed milk
- 2 tsp unflavored gelatin
- 2 tbsp cold water
- 1/4 cup warm water
- 1 tsp edible ruby shimmer dust
- For Garnish (optional):
- Fresh cherries
- Edible sugar crystals
- Gold leaf flakes
Instructions
- 1. Bloom gelatin in cold water for 5 minutes.
- 2. Beat cream cheese, powdered sugar, vanilla extract, and cherry puree until smooth.
- 3. Melt bloomed gelatin and stir into cherry mixture.
- 4. Add red gel food coloring for a deeper ruby tone if desired.
- 5. Whip heavy cream to soft peaks and gently fold into mixture.
- 6. Combine mascarpone, heavy cream, powdered sugar, and vanilla bean paste until smooth.
- 7. Pipe small vanilla cream cores into molds and freeze until firm.
- 8. Fill jewel molds halfway with cherry mixture.
- 9. Place frozen cores into each mold.
- 10. Cover with remaining mixture and smooth tops.
- 11. Freeze for at least 5 hours until fully set.
- 12. Bloom gelatin for glaze and dissolve into warm condensed milk.
- 13. Pour over white chocolate and mix until glossy.
- 14. Stir in ruby shimmer dust until evenly blended.
- 15. Cool glaze to a pourable consistency.
- 16. Unmold jewels and place on a rack.
- 17. Pour glaze evenly over each piece for a velvet crystal finish.
- 18. Garnish with cherries, sugar crystals, and gold leaf.
- 19. Chill before serving.
- 20. Serve cold.
Nutrition
- Calories: 375
- Sugar: 28 g
- Fat: 26 g
- Carbohydrates: 32 g
- Protein: 5 g
Tried This Recipe? Leave a Comment!
Did you make this recipe? I’d love to hear how it turned out! Please leave a comment and a rating below. Your feedback helps other home cooks and supports cheerychop.com!
For more delicious inspiration, follow me on Pinterest!


