
Table of Contents
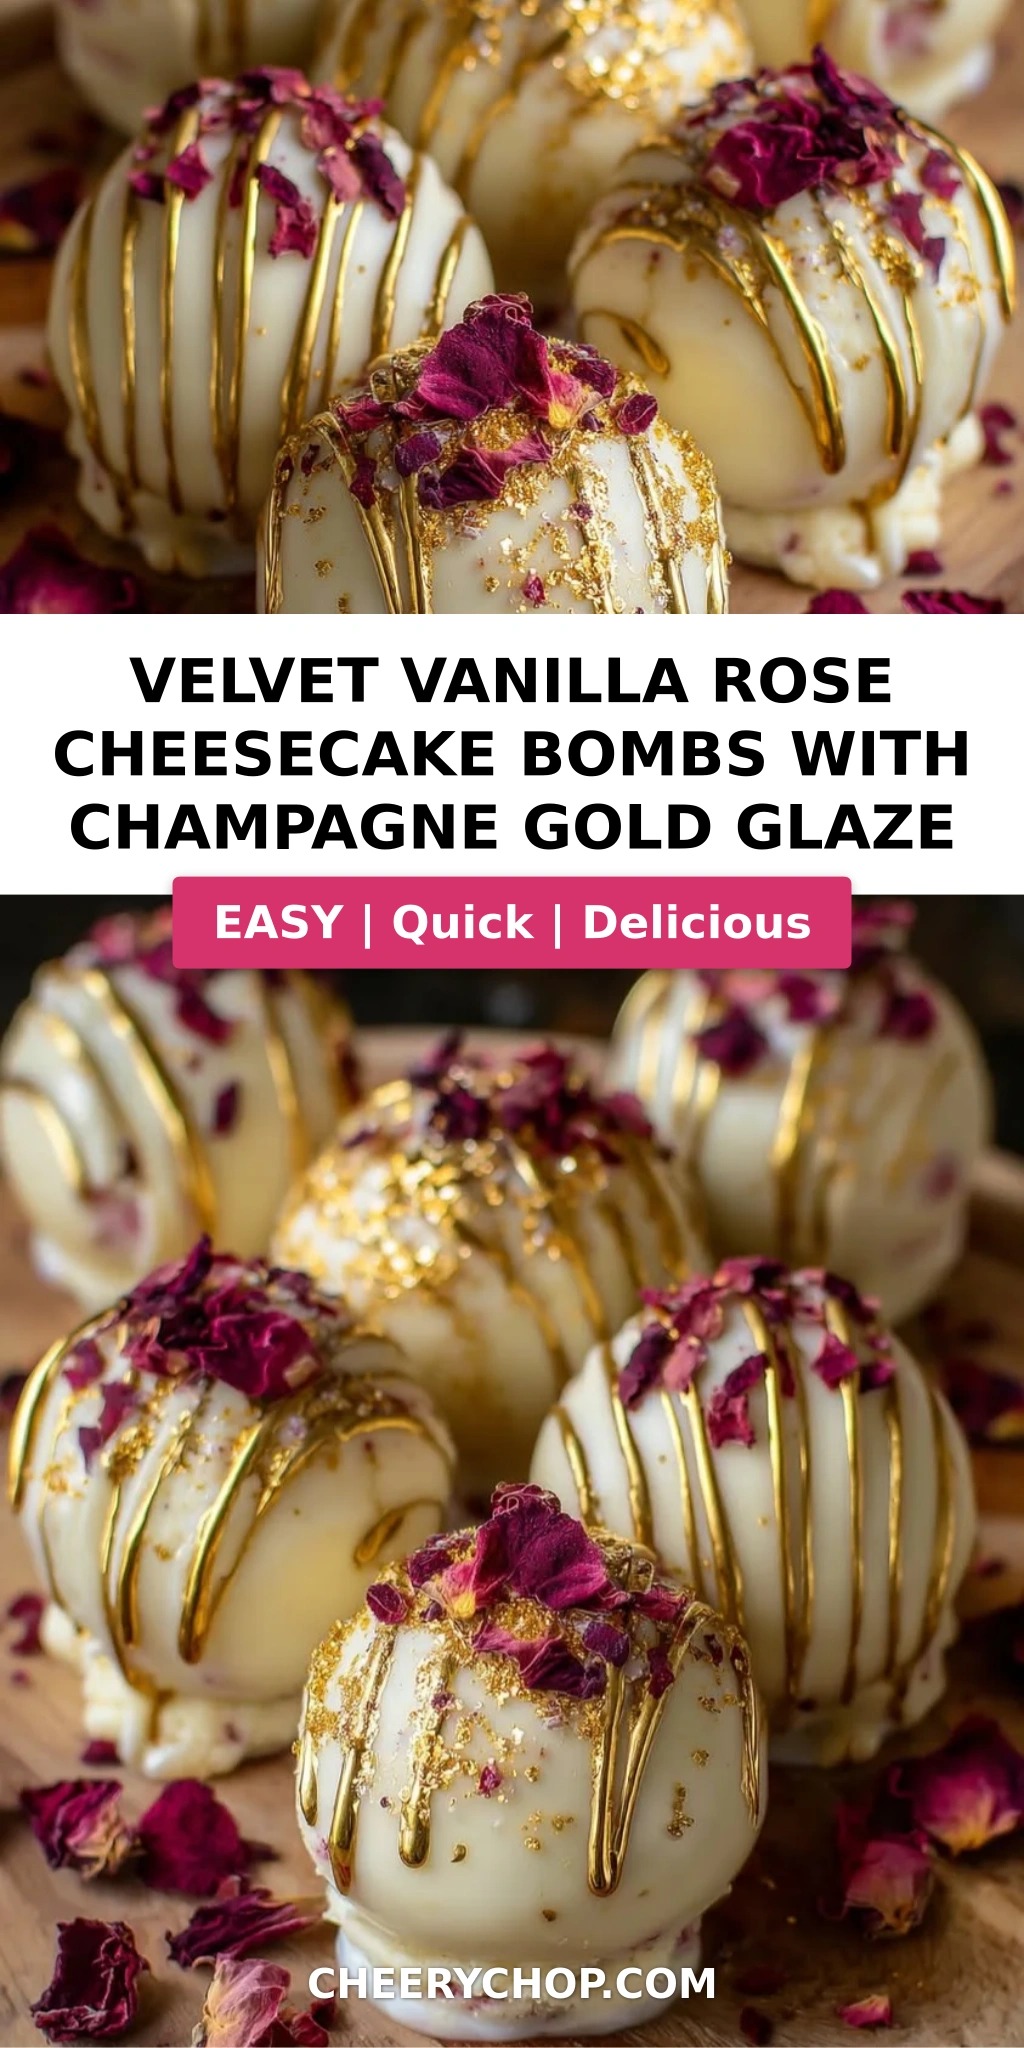
Velvet Vanilla Rose Cheesecake Bombs with Champagne Gold Glaze – A Luxurious No-Bake Delight
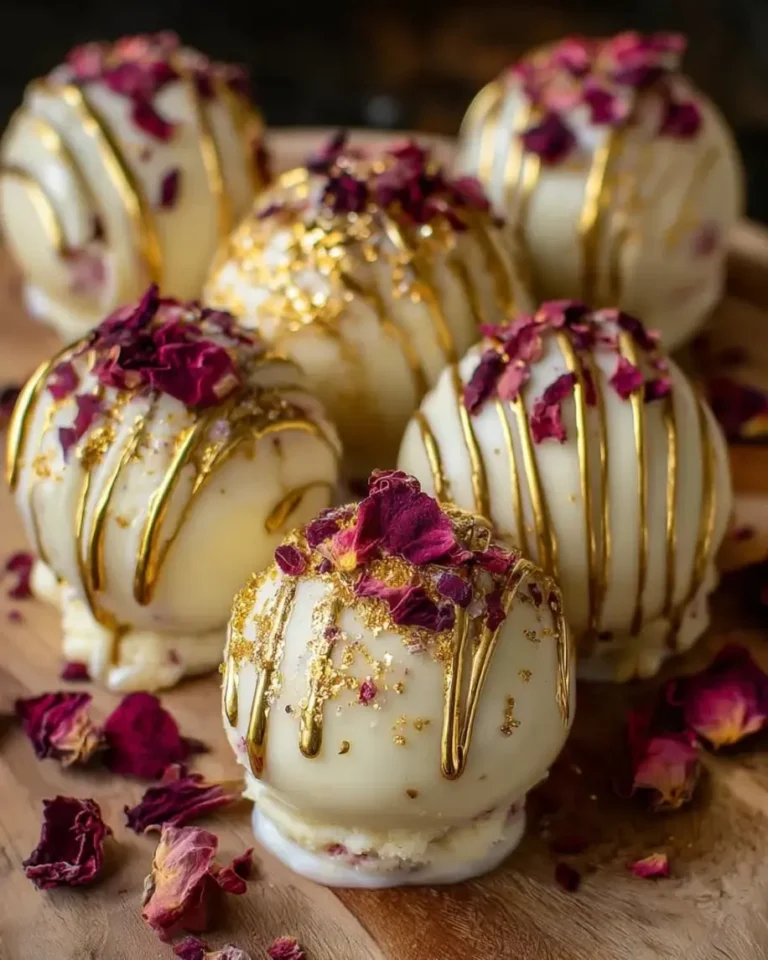
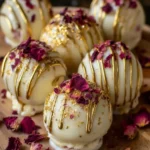
I still remember the first time I tasted rose in a dessert — not the cloying, perfumed kind that tastes like a hand soap, but a delicate, floral whisper that made me close my eyes and pause. It was in my mother’s kitchen in Morocco, where she would gently infuse warm milk with dried rose petals for a simple pudding. That memory came rushing back the first time I tested these velvet vanilla rose cheesecake bombs with champagne gold glaze in my tiny NYC apartment. The combination of creamy vanilla, fragrant rose, and a shimmering champagne-infused gold glaze is nothing short of magical — a dessert that looks like it belongs in a Parisian patisserie but comes together without ever turning on the oven.
Each bite of these rose cheesecake bomb desserts is an experience: the outer shell is silky and mousse-like, give way to a luscious rose cream center that tastes like liquid velvet. The champagne gold glaze is the showstopper — glossy, mirror-like, and sprinkled with edible gold flakes that catch the light with every movement. The rose water I use is the same kind I buy at the Moroccan grocer on Atlantic Avenue in Brooklyn — fragrant but not overpowering, with an authenticity that no extract can replicate. Paired with the sweetness of white chocolate and the subtle tang of mascarpone, every flavor is balanced, intentional, and utterly luxurious.
What makes this gourmet no-bake cheesecake bite recipe truly special is that it was built for home cooks who want restaurant-worthy results without the stress. I developed this version after years of testing in my Paris training and my NYC kitchen, tweaking the gelatin ratios and glaze temperatures so that even a beginner can nail that perfect shine. The secret lies in the blooming technique for the gelatin and the precise temperature of the glaze — two details I will walk you through so you get that flawless finish every time. Whether you are hosting a bridal shower, celebrating a milestone, or simply treating yourself to something extraordinary, these velvet vanilla rose cheesecake bombs will make you feel like a pastry chef in your own home.
Why This Velvet Vanilla Rose Cheesecake Bombs Recipe Is the Best
The Flavor Secret — I infuse the cheesecake base with both vanilla bean paste and high-quality rose water, creating a floral-vanilla harmony that feels elegant, not artificial. The rose cream center adds a concentrated burst of floral richness that makes every bite feel like a discovery. This technique comes straight from my French pastry training, where layering flavors is the key to unforgettable desserts.
Perfected Texture — The gelatin is bloomed and melted at exactly the right temperature so the cheesecake bombs set up creamy and firm, not rubbery or dense. The heavy cream is whipped to soft peaks before folding, which gives the bombs their signature airy, mousse-like texture. I tested this recipe eight times to get the gelatin-to-cream ratio exactly right for a velvety mouthfeel that holds its shape even after glazing.
Foolproof & Fast — Despite the impressive presentation, these are no-bake cheesecake bites that require zero oven time. The hardest part is waiting for them to freeze! The glaze comes together in minutes and pours like liquid silk. I have designed every step with clear visual cues so you know exactly what to look for — no pastry degree required.
Velvet Vanilla Rose Cheesecake Bombs Ingredients
Every ingredient in this recipe was chosen to create a specific texture or flavor, and I have tested substitutions so you know exactly what works. I pick up my rose water at a Middle Eastern market in Brooklyn, but good-quality rose water is now available at most Whole Foods and specialty grocers. The edible gold luster dust and gold flakes are easy to find online — I love the ones from The Sugar Art for their vibrant shimmer.
Ingredients List
For the Velvet Vanilla Rose Cheesecake Bombs:
- 8 oz cream cheese, softened
- 1 cup heavy cream
- 1/3 cup powdered sugar
- 1 tsp vanilla bean paste
- 1 tbsp rose water
- 2 tsp unflavored gelatin
- 2 tbsp cold water
- 1/4 cup white chocolate, melted
For the Rose Cream Center:
- 1/2 cup mascarpone cheese
- 1 tbsp powdered sugar
- 1 tsp rose water
- 2 tbsp heavy cream
For the Champagne Gold Glaze:
- 1 cup white chocolate, finely chopped
- 1/2 cup sweetened condensed milk
- 2 tsp unflavored gelatin
- 2 tbsp cold water
- 1/4 cup warm water
- 1 tsp champagne extract
- 1 tsp edible champagne gold luster dust
For Garnish (optional):
- Dried edible rose petals
- Edible gold flakes
Ingredient Spotlight
Rose Water — This is the backbone of the floral flavor. Look for rose water that lists only rose and water as ingredients, with no added sugar or preservatives. The brand Cortas is my go-to and widely available in US grocery stores. Avoid rose extract, which can taste artificial and overpowering.
White Chocolate — Use a high-quality white chocolate with cocoa butter (like Guittard or Callebaut) for the smoothest glaze. Compound white chocolate (melting wafers) works too but will produce a slightly less glossy finish. The cocoa butter in real white chocolate helps the glaze flow and set with a mirror shine.
Champagne Extract — This non-alcoholic extract adds the distinct bubbly flavor without the alcohol. You can substitute with 2 tablespoons of actual champagne if you prefer, but reduce the warm water slightly to maintain the consistency. The extract is more concentrated and gives a cleaner flavor.
Edible Gold Luster Dust — This is what gives the glaze its champagne-gold shimmer. I recommend using a dust that is labeled “edible” and is specifically made for beverages or glazes. The shade “champagne gold” creates a warm, radiant finish that looks like liquid gold on the bombs.
| Original Ingredient | Best Substitution | Flavor / Texture Impact |
|---|---|---|
| Rose water | 1 tsp rose extract + 2 tsp water | More intense floral, slightly less delicate |
| White chocolate (glaze) | White candy melts + 1 tsp coconut oil | Slightly less glossy, still shiny |
| Champagne extract | 2 tbsp actual champagne | Milder flavor, reduce water by 1 tbsp |
| Mascarpone (filling) | Full-fat cream cheese + 1 tsp lemon juice | Slightly tangier, still creamy |
How to Make Velvet Vanilla Rose Cheesecake Bombs — Step-by-Step
The process is straightforward, but timing is key. Work through each step calmly and you will be rewarded with the most beautiful, professional-looking cheesecake bombs you have ever made at home.
Step 1: Bloom the Gelatin
In a small bowl, mix 2 teaspoons of unflavored gelatin with 2 tablespoons of cold water. Stir gently and let it sit for 5 minutes until it becomes a firm, jelly-like block. This process — called blooming — ensures the gelatin dissolves evenly and gives you a silky, lump-free texture.
💡 Sara’s Pro Tip: Use cold water, not warm, for blooming. Warm water will cause the gelatin to dissolve too quickly and create a grainy texture. The bloom should be firm and jiggle like jelly.
Step 2: Make the Cheesecake Base
In a large bowl, beat the softened cream cheese with powdered sugar, vanilla bean paste, and rose water until completely smooth and lump-free. Melt the bloomed gelatin in the microwave for 8–10 seconds (or in a small saucepan over low heat) until it is liquid, then stir it into the cream cheese mixture. Add the melted white chocolate and mix until fully incorporated.
⚠️ Common Mistake to Avoid: Don’t rush the creaming step. If the cream cheese is not fully softened, you will end up with tiny white flecks in your mixture. Leave the cream cheese out on the counter for at least 30 minutes before starting.
Step 3: Whip and Fold
In a separate chilled bowl, whip the heavy cream to soft peaks — when you lift the whisk, the cream should hold a gentle peak that flops over slightly. Gently fold the whipped cream into the cream cheese mixture in three additions, using a rubber spatula. Fold gently and stop as soon as no white streaks remain so you don’t deflate the air.
💡 Sara’s Pro Tip: Use a large, wide bowl for folding and a rubber spatula with a thin edge. Cut through the center of the mixture, scrape the bottom, and fold over the top in a J-shape motion. This preserves the air bubbles that make the bombs velvety.
Step 4: Make the Rose Cream Center
In a small bowl, combine mascarpone, powdered sugar, rose water, and heavy cream. Stir until smooth and thick. This filling should be spoonable but not runny — it will be the hidden surprise in the center of each bomb.
Step 5: Fill the Molds
Spoon the cheesecake mixture into silicone dome molds, filling each cavity about halfway. Make a small well in the center with the back of a spoon, then add about 1 teaspoon of the rose cream filling. Cover with the remaining cheesecake mixture, smoothing the tops with a small offset spatula or the back of a spoon. Tap the molds gently on the counter to release any air bubbles.
⚠️ Common Mistake to Avoid: Do not overfill the molds. Leave about 1/8 inch of space at the top so the bombs have a flat base when frozen. If you overfill, they will look bulbous on the bottom and not sit flat on the serving plate.
Step 6: Freeze
Place the filled molds on a baking sheet and freeze for at least 5 hours, or overnight. The bombs must be completely solid before glazing — if they are even slightly soft, the glaze will absorb into the cheesecake instead of forming a shiny shell on the outside.
💡 Sara’s Pro Tip: Freeze the bombs on a flat, level surface in your freezer. If your freezer has a slanted shelf, the bombs will set lopsided. I use a small baking sheet with a rim to keep everything level.
Step 7: Make the Champagne Gold Glaze
Bloom the gelatin for the glaze in 2 tablespoons of cold water for 5 minutes. In a small saucepan, heat the sweetened condensed milk and 1/4 cup of warm water over low heat until steaming (do not boil). Remove from heat and stir in the bloomed gelatin until completely dissolved. Pour this mixture over the finely chopped white chocolate in a heatproof bowl. Let it sit for 1 minute, then stir gently until smooth. Stir in the champagne extract and the champagne gold luster dust until the glaze is glossy and evenly colored.
⚠️ Common Mistake to Avoid: If the glaze looks streaky or has tiny lumps, the mixture was too hot when you poured it over the chocolate. Let the condensed milk mixture cool for 2–3 minutes before pouring. The ideal temperature is around 110°F — warm to the touch but not hot.
Step 8: Glaze and Garnish
Unmold the frozen bombs and place them on a wire rack set over a baking sheet. Allow the glaze to cool to a pourable consistency — it should coat the back of a spoon and slowly drip off. Pour the glaze evenly over each bomb, covering the entire surface. Work quickly, as the glaze will set within 1–2 minutes on the frozen bombs. Garnish with dried edible rose petals and edible gold flakes while the glaze is still wet. Serve immediately or return to the freezer for up to 2 hours before serving.
💡 Sara’s Pro Tip: For the cleanest glaze application, use a small measuring cup or a spoon to pour the glaze over the center of each bomb, letting it flow naturally over the sides. Do not touch the bomb with the spoon — let gravity do the work. If the glaze thickens too much, warm it gently in 5-second bursts in the microwave.
| Step | Action | Duration | Key Visual Cue |
|---|---|---|---|
| 1 | Bloom gelatin | 5 mins | Firm jelly-like block |
| 2 | Make cheesecake base | 5 mins | Smooth, glossy, no lumps |
| 3 | Whip and fold cream | 5 mins | Soft peaks, no streaks |
| 4 | Make rose cream center | 3 mins | Thick and spoonable |
| 5 | Fill molds | 10 mins | Smooth tops, no air pockets |
| 6 | Freeze | 5+ hrs | Rock solid, unmolds cleanly |
| 7 | Make champagne gold glaze | 10 mins | Glossy, smooth, coats spoon |
| 8 | Glaze and garnish | 5 mins | Shiny, even coverage |
Serving & Presentation
These velvet vanilla rose cheesecake bombs are best served straight from the freezer or after a 5-minute rest at room temperature — the texture should be firm but creamy, like a frozen mousse. I love to plate them on a white platter to let the champagne gold glaze really pop. Scatter a few dried rose petals and a sprinkle of edible gold flakes around the plate for a dramatic, luxurious effect that looks like it belongs on a magazine cover.
In my NYC apartment, I often serve these after dinner with a pot of Moroccan mint tea — the floral notes in the tea echo the rose in the bombs, and the sweetness of the glaze balances the herbaceous mint. For a dinner party, pair them with a glass of chilled Prosecco or a sparkling rosé. The bubbles cut through the richness of the cheesecake and the gold glaze catches the light in the most beautiful way. If you are serving these at a bridal shower or baby shower, arrange them on a tiered stand with fresh flowers and watch your guests light up.
| Pairing Type | Suggestions | Why It Works |
|---|---|---|
| Side Dish | Fresh berries, candied nuts | Bright acidity cuts the richness |
| Sauce / Dip | Raspberry coulis, salted caramel | Adds tang or salt to balance sweet |
| Beverage | Prosecco, mint tea, espresso | Bubbles or bitterness contrast cream |
| Garnish | Rose petals, gold leaf, fresh mint | Elevates visual appeal and aroma |
Make-Ahead, Storage & Reheating
These velvet vanilla rose cheesecake bombs are the ultimate make-ahead dessert for busy hosts. I often prepare them two days before a dinner party and glaze them the morning of — the bombs hold their texture beautifully in the freezer, and the glaze stays glossy for up to 8 hours after application. For my busiest NYC weeks, I keep a batch in the freezer ready to glaze and serve at a moment’s notice.
| Method | Container | Duration | Reheating Tip |
|---|---|---|---|
| Refrigerator | Airtight container, single layer | Up to 3 days | Serve chilled, no reheating needed |
| Freezer | Freezer-safe bag, separated by parchment | Up to 3 months | Thaw 5 mins at room temp before serving |
| Make-Ahead | Glaze on day of serving | 2 days in advance | Unmold and glaze frozen bombs directly |
If you are storing glazed bombs, place them in a single layer in an airtight container with a sheet of parchment between layers. The glaze may soften slightly after 24 hours in the fridge, but the bombs will still taste incredible. I do not recommend microwaving these — the glaze will melt and become sticky. Instead, let them sit at room temperature for 5–8 minutes to soften slightly before eating. The texture should be creamy and mousse-like, not icy.
Variations & Easy Swaps
One of the things I love most about this recipe is how adaptable it is. Whether you are avoiding dairy, want a different flavor profile, or are working with what you have in your pantry, these variations will get you beautiful results every time. I have tested each one in my own kitchen so you can swap with confidence.
| Variation | Key Change | Best For | Difficulty Impact |
|---|---|---|---|
| Berry Rose | Add 2 tbsp raspberry purée to filling | Valentine’s Day, romantic dinners | Same difficulty |
| Dairy-Free | Use vegan cream cheese and coconut cream | Lactose-intolerant guests | Slightly harder (texture varies) |
| Orange Blossom | Substitute orange blossom water for rose | Middle Eastern flavor twist | Same difficulty |
Berry Rose Version
Swirl 2 tablespoons of raspberry purée into the rose cream center before filling the molds. The tartness of the raspberries cuts through the sweetness of the white chocolate and adds a beautiful pink hue to the center. This is my go-to for Valentine’s Day — it feels extra romantic and the color contrast when you bite into the bomb is stunning.
Dairy-Free Version
Use a high-quality vegan cream cheese (I like the brand Kite Hill) and full-fat coconut cream in place of the heavy cream. The mascarpone in the filling can be replaced with a thick coconut yogurt. The texture will be slightly less firm, so freeze the bombs for at least 6 hours before glazing. The glaze can be made with dairy-free white chocolate — just check that it is labeled “vegan.” The flavor is still rich and floral, with a subtle coconut undertone that pairs beautifully with the rose.
Orange Blossom Twist
For a North African-inspired variation, substitute the rose water with orange blossom water in both the cheesecake base and the cream center. The flavor is more delicate and slightly perfumed, with a citrusy note that reminds me of the orange groves I visited as a child in Morocco. Pair with a dark chocolate glaze instead of the champagne gold for a stunning flavor contrast.
What is the best way to infuse rose flavor into a cheesecake bomb without making it taste artificial?
The best way to infuse rose flavor naturally is to use high-quality culinary rose water made from distilled rose petals, not rose extract or rose syrup. I always look for brands that list only rose and water as ingredients — Cortas and Sadaf are excellent and widely available in US grocery stores. Start with 1 tablespoon in the cheesecake base and 1 teaspoon in the center filling, which gives a gentle floral note that builds as you eat. If you want a more intense rose flavor without any artificial taste, steep dried edible rose petals in warm heavy cream for 15 minutes, then strain before using. This method pulls out the natural essential oils from the petals and creates a deeper, more authentic floral profile that tastes like a bouquet rather than a perfume.
Can I use a different type of alcohol or substitute for the champagne in the gold glaze?
Absolutely — the champagne extract is simply a flavoring, so you can swap it with other extracts or actual alcohol. For a non-alcoholic version, use 1 teaspoon of vanilla extract or even a drop of almond extract for a completely different but delicious flavor. If you want to use actual champagne, replace the extract and 2 tablespoons of the warm water with 3 tablespoons of champagne. Keep in mind that the alcohol in real champagne will be very subtle after mixing, so the flavor will be milder. For a sparkling twist, try using prosecco or cava instead of champagne — they have similar flavor profiles. My personal favorite variation is using 1 teaspoon of orange blossom water plus a drop of gold luster dust for a floral-gold combination that is absolutely stunning.
How far in advance can I make Velvet Vanilla Rose Cheesecake Bombs and keep them fresh?
You can make the unglazed cheesecake bombs up to 3 months in advance and store them in the freezer in an airtight container with parchment paper between layers. The glaze is best applied on the day you plan to serve, but glazed bombs will keep beautifully in the refrigerator for up to 3 days in a single layer. For the freshest presentation, I recommend glazing them within 8 hours of serving — the champagne gold glaze stays glossy and mirror-like for about 8 to 10 hours before it starts to soften slightly. If you are hosting a party, you can unmold the bombs the night before, freeze them on a baking sheet, and then glaze them first thing in the morning. They will be perfectly set and ready to serve after dinner.
What can I use instead of white chocolate for the Champagne Gold Glaze to get a similar shiny finish?
If you need to avoid white chocolate, the best alternative is to use a combination of sweetened condensed milk and a clear glaze base like cocoa butter or a neutral mirror glaze. You can use 1/2 cup of cocoa butter (available at baking supply stores) melted with the condensed milk and gelatin mixture for a glossy, translucent finish. Another option is to use high-quality white candy melts — they contain oils that help them set smooth and shiny, though the flavor will be slightly sweeter and less creamy. For a completely white chocolate-free version, I have tested using a classic mirror glaze with gelatin, sugar, and condensed milk (omitting the white chocolate entirely), and it produces a beautiful glass-like finish. Just add the champagne extract and gold luster dust to the warm mirror glaze and pour immediately.
Why did my cheesecake bombs turn out grainy or lumpy?
Grainy or lumpy cheesecake bombs usually happen for one of three reasons. First, the cream cheese was not softened enough — it needs to sit at room temperature for at least 30 minutes so it creams smoothly without lumps. Second, the gelatin was not fully dissolved before being added to the mixture. When you melt the bloomed gelatin, heat it only until it is just liquid — about 8 to 10 seconds in the microwave — and stir it into the cream cheese mixture immediately while both are still warm. Third, the heavy cream was over-whipped into stiff peaks instead of soft peaks. Stiff peaks can deflate when folded and create a dense, grainy texture. Always whip to soft peaks — when you lift the whisk, the cream should hold a gentle peak that flops over slightly.
Can I make these without silicone dome molds?
Yes, you can still make these beautiful cheesecake bombs without specialty molds. The easiest alternative is to use a standard 12-cup muffin tin lined with plastic wrap — press the wrap into each cup, fill with the cheesecake mixture, and freeze. Once frozen, lift the bombs out using the plastic wrap and shape them gently into rounds with your hands. Another option is to line a small baking dish with parchment paper, pour the cheesecake mixture into an even layer, freeze, and then cut into squares or rounds using a cookie cutter. The shape will be less domed, but the flavor and texture will be identical. If you want a more rounded shape, you can use halved plastic Easter eggs or small glass bowls lined with plastic wrap as makeshift molds.
How do I get the champagne gold glaze to be perfectly smooth and mirror-like?
The key to a mirror-smooth glaze is temperature control and straining. After you mix the glaze, pour it through a fine-mesh strainer into a clean bowl to catch any undissolved gelatin or chocolate bits. The glaze should be used at around 95°F to 100°F — warm enough to flow smoothly but not so hot that it melts the frozen bomb. If the glaze is too thick, warm it in 5-second bursts in the microwave. If it is too thin, let it cool for 1 to 2 minutes. When pouring, work quickly and pour the glaze directly over the center of each frozen bomb so it flows evenly over all sides. Do not touch the bomb with the pouring utensil, as this will disturb the smooth surface. The bombs must be frozen solid so the glaze sets instantly.
Can I freeze the cheesecake bombs after they have been glazed?
Yes, you can freeze glazed cheesecake bombs, but the texture of the glaze will change slightly upon thawing. The mirror finish may become slightly less glossy, and the glaze can develop tiny condensation spots as it thaws. For best results, freeze the bombs on a baking sheet until the glaze is fully set (about 1 hour), then transfer them to an airtight container with parchment paper between layers. When you are ready to serve, remove them from the freezer and let them sit at room temperature for 5 to 8 minutes. The glaze will regain some of its shine as it warms. I prefer to glaze the bombs fresh on the day of serving for the most dramatic presentation, but frozen glazed bombs are perfect for unexpected guests.
What is the best way to store leftover cheesecake bombs and keep the glaze intact?
Leftover glazed cheesecake bombs should be stored in a single layer in an airtight container in the refrigerator. Place a sheet of parchment paper over the top before sealing to prevent the lid from touching the glaze. They will keep for up to 3 days, though the glaze may soften slightly after 24 hours. If you have unglazed bombs, store them in the freezer in a freezer-safe bag or container for up to 3 months. When you are ready to enjoy them, glaze them directly from the frozen state — no need to thaw first. I always keep a batch of unglazed bombs in my freezer for last-minute dessert emergencies. Just pull them out, whip up the glaze, and you have a show-stopping dessert in 15 minutes.
Can I use this recipe to make a full-size cheesecake instead of individual bombs?
Yes, you can absolutely adapt this recipe for a full-size cheesecake. Grease a 6-inch springform pan and line the bottom with parchment paper. Pour the cheesecake mixture into the pan, dollop the rose cream filling in the center, and swirl it gently with a knife. The baking time changes since this is a no-bake recipe — you will need to refrigerate for at least 8 hours or overnight instead of freezing. For the glaze, double the recipe and pour it over the chilled cheesecake, letting it drip over the sides. The presentation is different but equally stunning. Keep in mind that the texture of a full-size no-bake cheesecake is creamier and less firm than the frozen bombs, and it must be kept refrigerated until served.
Share Your Version!
I truly believe that cooking is meant to be shared, and there is nothing that makes me happier than hearing how my recipes come alive in your kitchens. If you make these velvet vanilla rose cheesecake bombs with champagne gold glaze, please leave a star rating and a comment below — tell me what occasion you made them for, how you customized them, or simply how they turned out. Your feedback helps me create better recipes and inspires every home cook who visits cheerychop.com.
Snap a photo of your creation and tag me on Instagram or Pinterest @cheerychop — I love seeing your gold-dusted masterpieces! And if you’re feeling adventurous, let me know in the comments: which variation will you try first — the berry rose, the orange blossom, or the dairy-free version? I read every single comment and I cannot wait to hear about your kitchen adventures.
From my NYC kitchen to yours — I hope this recipe brings as much warmth to your table as it does to mine. — Sara 🧡
Love This Recipe? Save It to Pinterest!
If you enjoyed this Velvet Vanilla Rose Cheesecake Bombs recipe, don’t let it get lost in your browser tabs! 😄 Pin it now so you can find it again anytime — and explore hundreds more tried-and-tested recipes waiting for you on my Pinterest boards.
👉 Follow Sara on Pinterest @chefrecipes2
📌 Pin this recipe · 🔁 Re-pin your favorites · 💬 Tag me when you make it — I love seeing your creations!
💬 I’d love to hear from you!
Have a question or a variation you tried? Drop a comment below and I’ll reply personally!
Velvet Vanilla Rose Cheesecake Bombs with Champagne Gold Glaze
Velvet Vanilla Rose Cheesecake Bombs with Champagne Gold Glaze
- Yield: 8 1x
Ingredients
- For the Velvet Vanilla Rose Cheesecake Bombs:
- 8 oz cream cheese, softened
- 1 cup heavy cream
- 1/3 cup powdered sugar
- 1 tsp vanilla bean paste
- 1 tbsp rose water
- 2 tsp unflavored gelatin
- 2 tbsp cold water
- 1/4 cup white chocolate, melted
- For the Rose Cream Center:
- 1/2 cup mascarpone cheese
- 1 tbsp powdered sugar
- 1 tsp rose water
- 2 tbsp heavy cream
- For the Champagne Gold Glaze:
- 1 cup white chocolate, finely chopped
- 1/2 cup sweetened condensed milk
- 2 tsp unflavored gelatin
- 2 tbsp cold water
- 1/4 cup warm water
- 1 tsp champagne extract
- 1 tsp edible champagne gold luster dust
- For Garnish (optional):
- Dried edible rose petals
- Edible gold flakes
Instructions
- Mix gelatin and cold water in a small bowl and let bloom for 5 minutes.
- Beat cream cheese, powdered sugar, vanilla bean paste, and rose water until smooth.
- Melt the bloomed gelatin and stir into the cream cheese mixture.
- Mix in the melted white chocolate until fully incorporated.
- Whip heavy cream to soft peaks and gently fold into the mixture.
- Combine mascarpone, powdered sugar, rose water, and heavy cream until smooth.
- Fill silicone dome molds halfway with the cheesecake mixture.
- Add a spoonful of the rose cream center to each mold.
- Cover with the remaining cheesecake mixture and smooth the tops.
- Freeze for at least 5 hours or until completely firm.
- Bloom gelatin for the glaze.
- Heat condensed milk and warm water, then stir in gelatin until dissolved.
- Pour over white chocolate and mix until smooth.
- Stir in champagne extract and champagne gold luster dust until glossy.
- Allow the glaze to cool to a pourable consistency.
- Unmold the frozen bombs and place on a wire rack.
- Pour the glaze evenly over each bomb.
- Garnish with dried rose petals and edible gold flakes.
- Serve chilled.
Nutrition
- Calories: 365
- Sugar: 25 g
- Fat: 26 g
- Carbohydrates: 29 g
- Protein: 5 g
Tried This Recipe? Leave a Comment!
Did you make this recipe? I’d love to hear how it turned out! Please leave a comment and a rating below. Your feedback helps other home cooks and supports cheerychop.com!
For more delicious inspiration, follow me on Pinterest!


