
Table of Contents
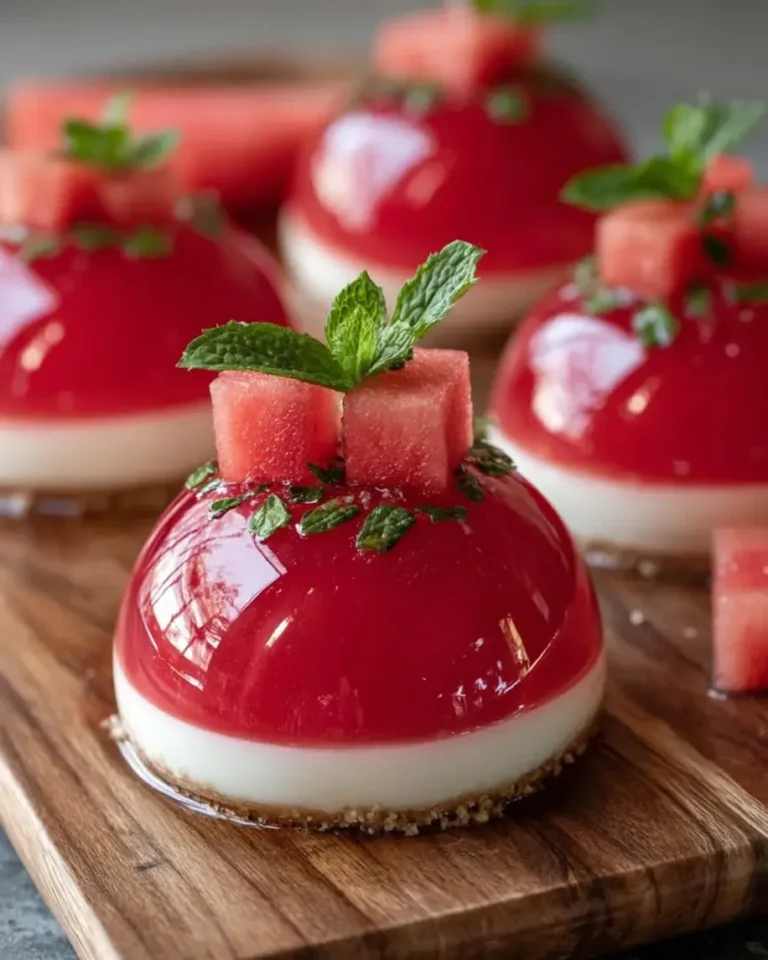
Ruby Watermelon Vanilla Cream Domes with Glossy Shell – A Stunning Summer Dessert
I still remember the first time I tasted a mirror-glaze dome in patisserie school in Paris. My instructor, a stern but brilliant chef from Lyon, insisted that a perfect glaze should look like a jewel. Decades later, living in New York City, I’ve taken that French technique and married it with the bright, juicy sweetness of summer watermelon — a fruit that reminds me of my mother’s market trips in Marrakech. These Ruby Watermelon Vanilla Cream Domes are my love letter to both worlds: a glossy, rubescent shell that shatters slightly as you dig in, revealing a creamy vanilla mousse and a burst of honey-lime watermelon at the center. This watermelon dessert recipe is not just a showstopper for dinner parties — it’s a foolproof way to bring a taste of the medina to your modern American table.
Close your eyes and imagine: a cool, velvety vanilla cream dome perched on a buttery graham cracker crunch, its ruby-red glaze catching the light like a stained-glass window. The first bite gives you that satisfying crack of the shell, then the soft mousse, and then — surprise! — a sweet, slightly tart watermelon core that tastes like a summer afternoon in Union Square Greenmarket. The secret is in the balance: the watermelon filling is cooked just enough to concentrate its flavor without losing its freshness, and the vanilla cream is lightened with gelatin for a mousse-like texture that melts on your tongue. I finish each dome with a tiny green mint leaf and a scattering of sugar crystals, like little diamonds on a velvet cushion.
What sets my version apart is the combination of a foolproof mirror glaze (no thermometers, no stress) and a clever make-ahead method that saves you time. I’ve tested this recipe more times than I can count — yes, even for my daughter’s birthday party — and I’ve learned the tricks that prevent air bubbles in the glaze and keep the watermelon center from weeping. 💡 Sara’s Pro Tip: Bloom your gelatin in ice-cold water, not warm, for a cleaner set. And one common mistake? Rushing the freezing step — the domes must be rock-solid before glazing. Trust me, follow these steps, and you’ll have a dessert that looks like it came from a three-Michelin-star kitchen.
Why This Ruby Watermelon Vanilla Cream Domes Recipe Is the Best
The Flavor Secret — In my mother’s kitchen, watermelon was always paired with a squeeze of lime and a touch of honey. Here, I boost that with a French technique: a quick reduction that concentrates the watermelon juice into a thick, spoonable core. The cream cheese in the vanilla filling adds a subtle tang that cuts through the sweetness, a trick I learned from a pastry chef at Le Cordon Bleu. Every element has a purpose, and together they sing.
Perfected Texture — The key to the glossy shell is a combination of white chocolate, condensed milk, and gelatin — a classic mirror glaze that I’ve simplified for home cooks. By melting the white chocolate gently and stirring the gelatin in at the right temperature, you avoid streaks and bubbles. The result is a smooth, shiny coat that doesn’t crack when you cut into it. And the graham cracker base adds just the right crunch, like a sandy shore under a ruby sea.
Foolproof & Fast — Yes, you need to plan ahead (freezing takes about 4 hours), but the active work is only 40 minutes. You can make the components a day in advance and assemble just before your guests arrive. I’ve taught this recipe to beginners in my NYC cooking classes, and every single person has walked away with perfect domes. The secret? Use silicone molds — they release the frozen domes without fuss. And if the glaze gets too thick, a quick zap in the microwave brings it back to life.
Ruby Watermelon Vanilla Cream Domes Ingredients
I source my watermelon from the Union Square Greenmarket in late summer, but a good grocery store melon works perfectly. For the vanilla cream, I reach for a high-quality vanilla extract — my favorite is from Madagascar, which I buy in bulk from a spice shop in Chelsea Market. And the white chocolate? Use a brand you’d eat on its own; it makes the glaze taste cleaner.
Ingredients List
- For the Vanilla Cream Filling: 2 cups heavy cream, 8 oz cream cheese (softened), 1/2 cup powdered sugar, 1 tsp vanilla extract, 1 tbsp gelatin powder, 3 tbsp warm water
- For the Watermelon Core: 2 cups watermelon (finely diced and drained), 1 tbsp honey, 1 tsp lime juice, 1 tsp cornstarch, 1 tbsp water
- For the Ruby Glossy Shell: 1 cup white chocolate (melted), 1/2 cup sweetened condensed milk, 1 tbsp gelatin powder, 3 tbsp warm water, Red natural food coloring or beet powder (as needed)
- For the Crunch Base: 1 cup graham cracker crumbs, 3 tbsp melted butter, 1 tbsp granulated sugar, Pinch of salt
- For Garnish (optional): Small watermelon cubes, Fresh mint leaves, Sugar crystals
Ingredient Spotlight
Watermelon: The star of the show. Choose a seedless watermelon that feels heavy for its size — that means it’s juicy. I dice it very finely (1/4-inch cubes) and drain them on paper towels to remove excess moisture. If your watermelon is watery, the core will make the dome soggy. A tested substitution: frozen watermelon that has been thawed and drained works surprisingly well.
White chocolate: For the glossiest shell, use a couverture white chocolate (like Callebaut or Valrhona). Avoid white chips that contain vegetable oil; they won’t set properly. If you need a dairy-free option, try a good-quality dairy-free white chocolate bar — the texture will be slightly less shine, but still beautiful.
Gelatin: This recipe uses powdered gelatin. I always bloom it in cold water (not warm) for a minute, then dissolve it in warm water. This prevents clumps. A vegetarian alternative: use agar-agar, but note that it sets firmer and requires a different dissolution method (boil it). I tested it once and the texture was more jelly-like — not bad, but not as melt-in-your-mouth.
| Original Ingredient | Best Substitution | Flavor / Texture Impact |
|---|---|---|
| Heavy cream | Coconut cream (chilled, whipped) | Lighter, coconut flavor; less stable, use extra gelatin |
| Cream cheese | Mascarpone cheese | Richer, slightly sweeter, more decadent |
| White chocolate | Dairy-free white chocolate | Less glossy, slightly grainier; use a high-quality brand |
| Graham cracker crumbs | Gluten-free digestive biscuits | Similar crunch; may be slightly sweeter |
How to Make Ruby Watermelon Vanilla Cream Domes — Step-by-Step
Don’t be intimidated by the glossy finish — this recipe breaks down into simple steps. Work cleanly, keep your gelatin ice-cold, and you’ll have show-stopping domes in no time.
Step 1: Bloom the Gelatin
Sprinkle gelatin powder over warm water (not hot) and let it sit for 5 minutes. It will become a spongy mass. For the filling, use 1 tbsp gelatin + 3 tbsp water; for the glaze, use another 1 tbsp + 3 tbsp water. Keep them separate.
💡 Sara’s Pro Tip: Use ice-cold water for blooming — it prevents the gelatin from dissolving too fast and forming lumps. After blooming, gently warm it in the microwave (5 seconds) to liquefy.
Step 2: Cook the Watermelon Filling
In a small saucepan, combine finely diced watermelon (drained well), honey, lime juice, cornstarch, and water. Stir over medium heat for 4–5 minutes until the mixture thickens and becomes jammy. Remove from heat and let it cool completely. It will continue to thicken as it cools.
⚠️ Common Mistake to Avoid: Don’t skip draining the watermelon — excess liquid will make the filling runny and prevent the dome from holding its shape.
Step 3: Make the Vanilla Cream
Beat cream cheese, powdered sugar, and vanilla extract until smooth and fluffy. In a separate bowl, whip heavy cream to soft peaks (when the cream holds a soft curl when the whisk is lifted). Gently fold the whipped cream into the cream cheese mixture. Stir in the dissolved gelatin until well incorporated. Work quickly, but gently — you want to keep the air in the cream.
💡 Sara’s Pro Tip: If the cream cheese is still cold, it will lump. Let it sit at room temperature for 30 minutes before starting.
Step 4: Fill the Silicone Molds
Take a silicone dome mold (each cavity about 2-inch diameter). Spoon a small amount of vanilla cream into the bottom of each cavity — about one-third full. Then place a teaspoon of the cooled watermelon filling in the center. Cover with more vanilla cream until the mold is full. Smooth the tops with a spatula. Freeze for at least 4 hours, until rock solid.
⚠️ Common Mistake to Avoid: Don’t overfill the molds — leave a tiny gap at the top so the dome seals properly. Overfilled domes can crack when frozen.
Step 5: Make the Ruby Glossy Shell
Melt the white chocolate in a double boiler or in the microwave in 20-second bursts. Stir until smooth. Add sweetened condensed milk and the second batch of dissolved gelatin. Stir in red food coloring drop by drop until you achieve a deep ruby hue (about 6–8 drops of gel color or 1/2 tsp beet powder). The glaze should be fluid but not watery — it should coat the back of a spoon.
💡 Sara’s Pro Tip: To test consistency, dip a spoon into the glaze — if it runs off in a smooth, even stream without leaving bare spots, it’s perfect. If too thick, add a few drops of warm water.
Step 6: Glaze the Domes
Remove the frozen domes from the molds. Place them on a wire rack set over a baking sheet (to catch drips). Pour the ruby glaze evenly over each dome, starting from the top and letting it cascade down. Allow excess to drip off for about 30 seconds. Use a spatula to gently lift each dome and transfer it to the prepared graham cracker base.
⚠️ Common Mistake to Avoid: The domes must be completely frozen when glazing. If they start to thaw, the glaze will slide off unevenly. Work in batches if needed.
Step 7: Make the Crunch Base
Mix graham cracker crumbs, melted butter, sugar, and a pinch of salt until it resembles wet sand. Press about 2 tablespoons of the mixture into small round discs (about 2 inches in diameter) on a parchment-lined tray. Freeze for 10 minutes. Place each glazed dome on top of a disc just before serving.
💡 Sara’s Pro Tip: For a neater look, use a round cookie cutter to shape the base. You can also make the bases a day ahead and store them in the fridge.
Step 8: Garnish and Serve
While the glaze is still tacky (within a minute of pouring), press a small watermelon cube and a mint leaf onto the top of each dome. Sprinkle a few sugar crystals around the edges. Place the completed domes in the refrigerator for at least 15 minutes to thaw slightly before serving. Serve chilled but not frozen.
⚠️ Common Mistake to Avoid: Don’t garnish after the glaze has set — it won’t stick. Have your garnishes ready before you start glazing.
| Step | Action | Duration | Key Visual Cue |
|---|---|---|---|
| 1 | Bloom gelatin | 5 min | Spongy, translucent mass |
| 2 | Cook watermelon filling | 4–5 min | Thick, jammy consistency |
| 3 | Make vanilla cream | 10 min | Light, fluffy mousse texture |
| 4 | Fill molds and freeze | 4 hrs (min) | Firm, solid when pressed |
| 5 | Make ruby glaze | 10 min | Smooth, glossy, fluid |
| 6 | Glaze domes | 5 min | Even coating, drips |
| 7 | Make crunch base | 10 min + freeze | Firm, buttery disc |
| 8 | Garnish and serve | 5 min | Glossy dome with garnish |
Serving & Presentation
These domes are dramatic enough to stand alone, but I love to serve them on a bed of crushed graham crackers or a swirl of watermelon coulis (just blend leftover watermelon with a squeeze of lime). In Morocco, we often serve pastries with mint tea, and a small cup of strong hot tea alongside these domes is a lovely contrast. For a New York-style presentation, plate each dome on a small slate board with a mint sprig and a few edible flowers — guests will think you spent hours.
The key to serving is timing: the domes should be cold but not rock hard. Let them sit at room temperature for 5–7 minutes after removing from the fridge. The graham cracker base should be crunchy, not soggy, so assemble just before serving. If you’re bringing these to a party, assemble the bases on-site and pop the domes on top.
| Pairing Type | Suggestions | Why It Works |
|---|---|---|
| Side Dish | Fresh berries, light salad | Adds acidity and freshness |
| Sauce / Dip | Raspberry coulis, chocolate sauce | Enhances fruitiness or adds richness |
| Beverage | Mint tea, iced coffee, Prosecco | Cuts through sweetness, refreshes palate |
| Garnish | Mint, edible flowers, sugar crystals | Adds color, texture, and elegance |
Make-Ahead, Storage & Reheating
As a busy New York mom and recipe developer, I love that these domes can be made in stages. I often prep the watermelon filling and graham cracker base two days in advance, then freeze the filled domes the night before a party. The glaze must be made fresh on the day of serving, but the whole process takes less than 20 minutes once you have the frozen domes ready.
| Method | Container | Duration | Reheating Tip |
|---|---|---|---|
| Refrigerator | Airtight container, glazed domes | Up to 2 days | No reheating needed — serve cold |
| Freezer | Sealed freezer bag, unglazed domes | Up to 1 month | Glaze after thawing? Not recommended — glaze only on fully frozen domes |
| Make-Ahead | Freeze filled molds (unglazed) | Up to 1 week before glazing | Glaze and assemble the day of serving; keep frozen until glaze is ready |
A word on reheating: you don’t! These are meant to be served cold. If you’ve stored glazed domes in the fridge, simply remove them 10 minutes before serving. If they’re frozen solid, let them thaw in the fridge for 30 minutes. The graham cracker base should be added just before serving to keep it crunchy.
Variations & Easy Swaps
| Variation | Key Change | Best For | Difficulty Impact |
|---|---|---|---|
| Mango-Lime Domes | Replace watermelon with mango, use lemon instead of lime | Winter fruit option | No change |
| Dairy-Free Domes | Use dairy-free cream cheese, coconut cream, and dairy-free white chocolate | Lactose intolerance | Medium – texture is softer |
| Chocolate Shell | Use dark chocolate instead of white + omit coloring | Chocolate lovers | No change – use same method |
Mango-Lime Domes
Inspired by the Moroccan street-side mangoes I ate as a child, this variation swaps the watermelon for ripe mango puree. Cook the mango with honey and lime juice as you would the watermelon, but add a pinch of saffron for a golden glow. The flavor is tropical and bright — a perfect winter substitute when watermelon isn’t in season.
Dairy-Free Domes
For my friends with lactose sensitivity, I’ve tested a version using a high-quality dairy-free cream cheese (like Kite Hill) and chilled coconut cream for whipping. The texture is slightly less firm — add an extra teaspoon of gelatin to compensate. Use dairy-free white chocolate for the glaze. The result is still gorgeous and creamy; just be gentle when unmolding.
Chocolate Shell Variation
If you’re a chocoholic like me, you can replace the white chocolate in the glaze with dark chocolate (70% cacao). Omit the red food coloring — you’ll get a deep, glossy dark brown. The watermelon center still shines through and the flavor pairing is surprisingly elegant, like a sophisticated summer bonbon.
What is the best way to achieve a smooth, glossy shell for the domes without air bubbles?
The key to a flawless mirror glaze is temperature control and gentle mixing. First, make sure your white chocolate is fully melted and smooth before you add the condensed milk and gelatin. Whisk gently — don’t whip air into it. If you see bubbles forming, let the glaze sit for 5 minutes so they rise to the surface, then gently tap the bowl on the counter. You can also strain the glaze through a fine-mesh sieve before pouring. Another pro trick: when glazing, pour the glaze over the dome in one steady stream, starting from the center. Don’t brush or spread — let gravity do the work. And keep the domes frozen solid; a warm dome will create steam and bubbles.
Can I substitute fresh watermelon juice with store-bought juice for the Ruby Watermelon layer?
I wouldn’t recommend it. Fresh watermelon has a delicate sweetness and a natural pectin content that helps the filling thicken properly. Store-bought juice is often diluted with water or other fruit juices, and it’s usually pasteurized, which can break down the fresh flavor. The filling also relies on the fine dice of fresh watermelon for texture — juice alone would be too runny. If you must use juice in a pinch, you’d need to add extra cornstarch and cook it longer to achieve a jammy consistency, but the color and taste won’t be as vibrant. Stick with fresh watermelon from the market; it’s worth it.
How far in advance can I make Ruby Watermelon Vanilla Cream Domes for a dinner party?
You can stay ahead of schedule beautifully. I recommend making the watermelon filling and graham cracker base up to two days before. The filled domes (unglazed) can be frozen in the silicone molds up to one week in advance — just wrap the tray tightly with plastic wrap after they’re solid. On the day of your party, make the ruby glaze, unmold the domes, glaze them, and add the garnish. The glazed domes can sit in the refrigerator for a few hours before serving, but the crunch base should be added just before plating to stay crisp. If you want to serve them the same evening, start glazing about 2 hours before dinner — they need 15 minutes in the fridge after glazing to settle.
What can I use instead of vanilla cream to create a lighter or dairy-free filling for these domes?
For a lighter option, you can replace the heavy cream and cream cheese with a mixture of Greek yogurt and mascarpone — it’s still rich but tangy and less heavy. For dairy-free, my best tested version uses full-fat coconut cream (chilled and whipped to soft peaks) and a dairy-free cream cheese alternative. The texture is a bit softer, so I add an extra 1/2 teaspoon of gelatin to stabilize it. Another wonderful alternative is a fruit mousse base: puree 1 cup of strawberries or raspberries, fold into whipped coconut cream, and use that as the filling. It’s lighter, vegan, and pairs beautifully with the watermelon core. Note that the flavor profile will change, but it’s delicious in its own right.
Can I use fresh watermelon chunks instead of cooking them for the center?
I’ve tried both, and cooking is definitely the way to go. Fresh watermelon chunks release too much liquid as the dome thaws, making the cream soggy and the base slide off. Cooking the diced watermelon with honey and lime juice for just a few minutes concentrates the flavor, kills any enzymes that break down gelatin, and thickens the mixture with cornstarch so it stays put inside the frozen dome. You want a jammy, spoonable consistency — not watery. The resulting texture is like a fruit compote that stays intact even when frozen. If you’re in a hurry, you can skip the cooking and just use fresh diced watermelon that has been drained very well on paper towels, but I promise the cooked version yields a much better final dessert.
How do I get the domes to release cleanly from the silicone mold?
This is one of the most frequently asked questions in my cooking classes! The secret is patience. Freeze the filled molds for at least 4 hours — overnight is even better. When you’re ready to unmold, take the silicone mold out of the freezer and gently flex the edges. If the dome doesn’t release easily, let it sit at room temperature for 30 seconds and try again. Never use a knife or pry — you’ll damage the shape. Also, make sure your silicone molds are clean and dry before filling; any residual oil can prevent a clean release. If you still have trouble, give the bottom of the mold a quick dip in warm water (just 5 seconds) — the slight melting at the surface will help release the dome.
What can I use if I don’t have a silicone dome mold?
No problem — you can still make this dessert! Use a standard muffin tin lined with plastic wrap. Press the wrap into each cup, then fill with the vanilla cream and watermelon filling as directed. Freeze until solid, then lift out each dome using the plastic wrap. The shape won’t be as perfectly rounded, but it will work. Alternatively, use small glass bowls or ramekins — just make sure to line them with plastic wrap for easy removal. Another option is to use a hemisphere ice cube tray (large size). The most important thing is that the mold is flexible enough to release the frozen dome without cracking. Avoid metal molds unless you line them perfectly.
Can I use natural food coloring for the ruby shell, and how much should I add?
Absolutely! I prefer natural red coloring from sources like beet powder or natural food gels (e.g., from India Tree or Bragg). For the deep ruby hue in the photo, I use about 1/2 teaspoon of beet powder dissolved in a teaspoon of warm water, or 6–8 drops of a natural red gel. Start with a small amount and adjust — the glaze should look like a deep red wine. Keep in mind that natural colors can fade slightly after the glaze chills, so aim for a shade slightly darker than your desired final color. Avoid using too much beet powder or it can add an earthy aftertaste. If you want a very intense red without any aftertaste, you can use a commercial red food coloring (no judgment here — it’s for a special occasion!).
Why did my mirror glaze crack or have cracks around the bottom?
Cracks usually happen when the dome is too cold or the glaze is too thick. When you pour the glaze over a frozen dome, the extreme cold can cause the outer layer of the glaze to set too quickly while the inside is still fluid — that tension creates cracks. To avoid this, let the frozen domes sit at room temperature for 3–5 minutes before glazing (just until the surface is no longer frosty but still very cold). Also, make sure your glaze is fluid enough to flow smoothly — if it’s too thick, it will set unevenly. Finally, don’t pour the glaze from a great height; let it gently cascade. If cracks do appear, you can sometimes smooth them with a warm spatula, but it’s better to prevent them.
Can I use this mirror glaze recipe on other desserts like cakes or tarts?
Yes! This mirror glaze works beautifully on frozen mousse cakes, entremets, and even chilled panna cotta. The key is that the surface must be very cold and smooth — any crumbs or texture will show. For a cake, freeze it until firm, then pour the glaze over it placed on a wire rack. You’ll need about double the glaze for a 9-inch cake. One note: this glaze contains white chocolate, so it will set softer on a cake than on these small domes. It’s delightful anyway — a little messy, but delicious. If you want a very firm glaze for a cake, increase the gelatin by 1/2 teaspoon. I’ve also poured it over chocolate tarts (chilled) and it gave a gorgeous mirror finish.
Share Your Version!
I’d love to see your Ruby Watermelon Vanilla Cream Domes! Did you try a variation? Did your glaze turn out perfectly shiny? Drop a photo on Instagram and tag @cheerychop, or leave a comment below with your star rating. Your feedback helps other home cooks feel confident trying this showstopper.
And do me a favor — tell me: what’s the first thing you’ll pair these domes with? A cool mint tea, a bubbly drink, or just a spoon? I’m curious! Drop your answer in the comments.
From my NYC kitchen to yours — I hope this recipe brings as much warmth to your table as it does to mine. — Sara 🧡
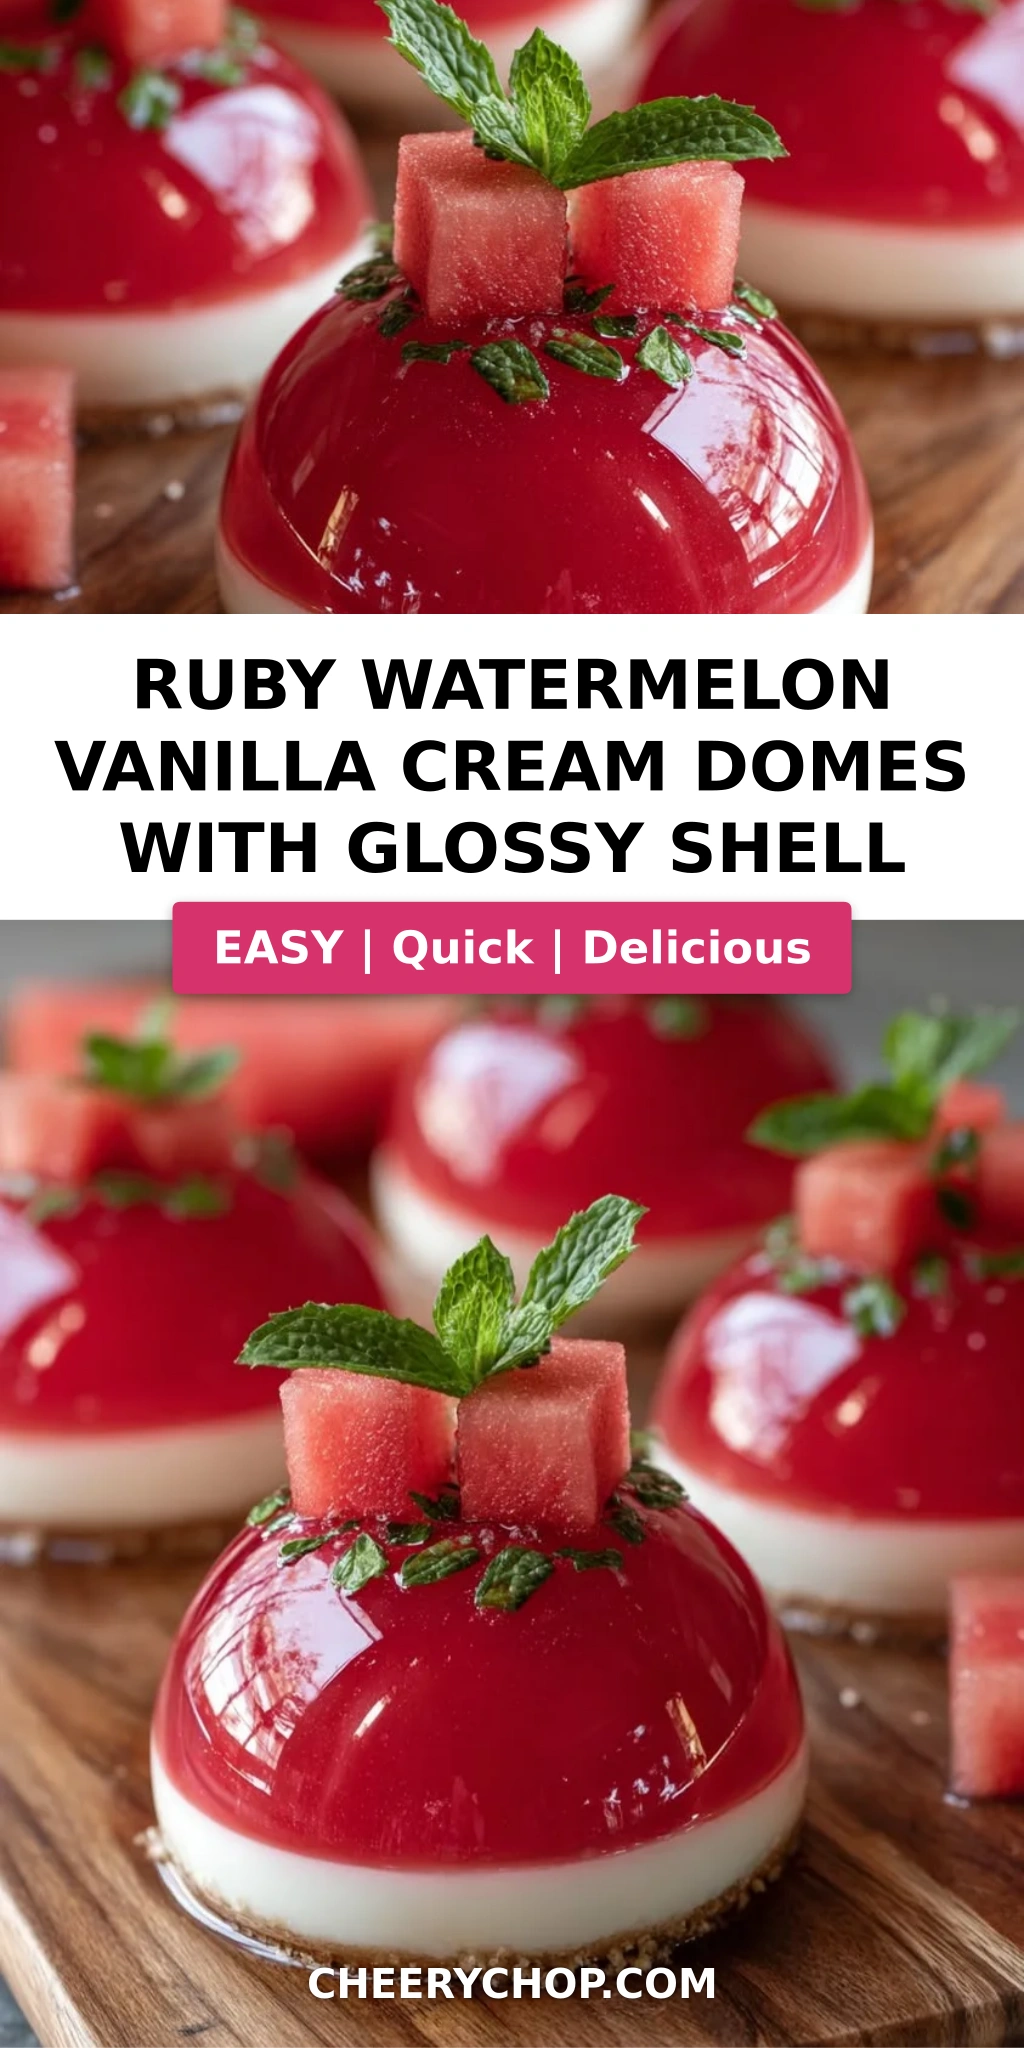
Love This Recipe? Save It to Pinterest!
If you enjoyed this Ruby Watermelon Vanilla Cream Domes recipe, don’t let it get lost in your browser tabs! 😄 Pin it now so you can find it again anytime — and explore hundreds more tried-and-tested recipes waiting for you on my Pinterest boards.
👉 Follow Sara on Pinterest @chefrecipes2
📌 Pin this recipe · 🔁 Re-pin your favorites · 💬 Tag me when you make it — I love seeing your creations!
⭐ Did you make this recipe? Leave a star rating and comment below — your feedback helps other home cooks find the best watermelon dessert recipe! Don’t forget to tag @cheerychop on Instagram with your glossy domes!
Ruby Watermelon Vanilla Cream Domes with Glossy Shell
A stunning dessert featuring vanilla cream domes with a juicy watermelon center, covered in a ruby red glossy shell and served on a crunchy graham cracker base.
- Yield: 8 1x
Ingredients
- For the Vanilla Cream Filling:
- 2 cups heavy cream
- 8 oz cream cheese, softened
- 1/2 cup powdered sugar
- 1 tsp vanilla extract
- 1 tbsp gelatin powder
- 3 tbsp warm water
- For the Watermelon Core:
- 2 cups watermelon, finely diced and drained
- 1 tbsp honey
- 1 tsp lime juice
- 1 tsp cornstarch
- 1 tbsp water
- For the Ruby Glossy Shell:
- 1 cup white chocolate, melted
- 1/2 cup sweetened condensed milk
- 1 tbsp gelatin powder
- 3 tbsp warm water
- Red natural food coloring or beet powder, as needed
- For the Crunch Base:
- 1 cup graham cracker crumbs
- 3 tbsp melted butter
- 1 tbsp granulated sugar
- Pinch of salt
- For Garnish (optional):
- Small watermelon cubes
- Fresh mint leaves
- Sugar crystals
Instructions
- Bloom gelatin in warm water and set aside for 5 minutes.
- Combine watermelon, honey, lime juice, cornstarch, and water in a saucepan.
- Cook over medium heat for 4–5 minutes until slightly thickened. Cool completely.
- Beat cream cheese, powdered sugar, and vanilla until smooth.
- Whip heavy cream to soft peaks and gently fold into the cream cheese mixture.
- Stir in the dissolved gelatin until fully incorporated.
- Fill silicone dome molds halfway with the vanilla cream mixture.
- Add a spoonful of watermelon filling to the center of each mold.
- Cover with remaining cream mixture and freeze until firm.
- Mix melted white chocolate, condensed milk, dissolved gelatin, and red coloring until smooth and glossy.
- Unmold the frozen domes and place on a wire rack.
- Pour the ruby glaze evenly over each dome and allow excess glaze to drip off.
- Combine graham cracker crumbs, butter, sugar, and salt. Press into small rounds and place each dome on top.
- Garnish with watermelon cubes, mint leaves, and sugar crystals.
- Chill for 15 minutes before serving.
Nutrition
- Calories: 405
- Sugar: 29 g
- Fat: 27 g
- Carbohydrates: 34 g
- Protein: 6 g
Tried This Recipe? Leave a Comment!
Did you make this recipe? I’d love to hear how it turned out! Please leave a comment and a rating below. Your feedback helps other home cooks and supports cheerychop.com!
For more delicious inspiration, follow me on Pinterest!


