
Table of Contents
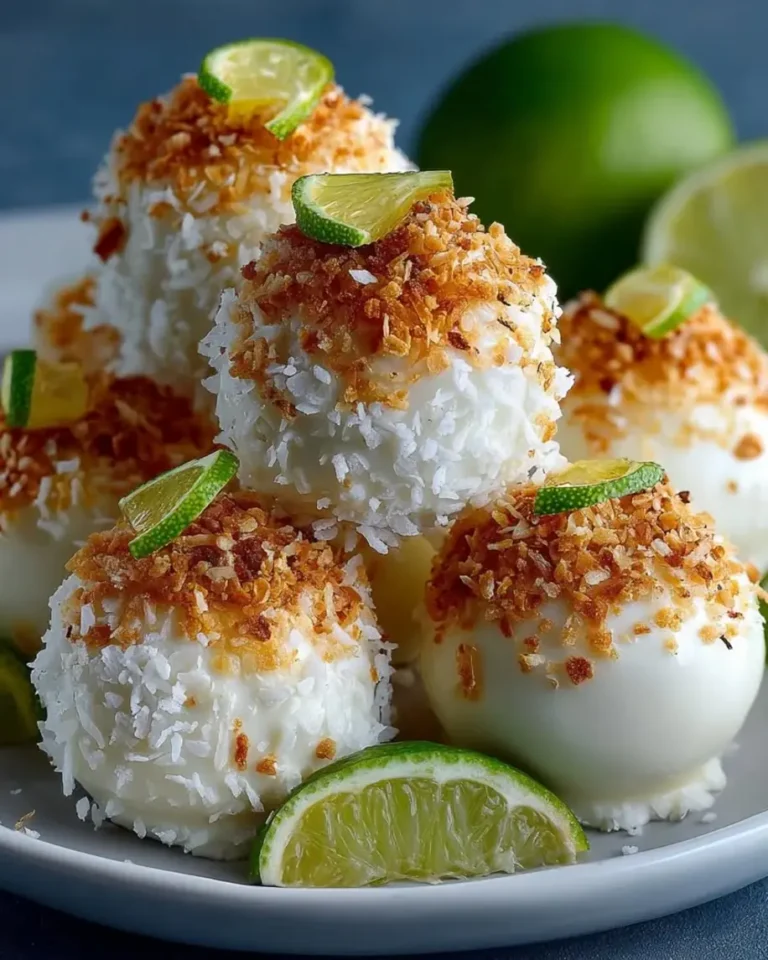
Tropical Coconut Lime Dream Bombs with Gloss Finish – A No-Bake Taste of Paradise
Let me take you on a little journey. Growing up in Morocco, my mother’s kitchen was where I first fell in love with the bright, unapologetic punch of lime paired with the lush sweetness of coconut. She’d use these flavors in everything from tagines to simple chilled desserts. Fast forward to my pastry training in Paris, where I learned the art of creating perfectly balanced, glossy finishes that feel as luxurious as they look. Now, living in New York City, I’m constantly inspired by the energy and diversity of flavors around me. This coconut lime dream bombs recipe is the beautiful intersection of all three worlds—a no-bake, bite-sized tropical escape that’s sophisticated enough for a dinner party but easy enough for a weekday treat. These tropical coconut lime desserts are my go-to when I need a hit of sunshine, no matter the season.
Imagine sinking your teeth into a perfectly chilled, creamy center that bursts with tangy lime and rich coconut cream. The exterior is a tender blanket of shredded coconut, giving way to a stunning, crackling shell of glossy white chocolate. It’s a textural symphony: creamy, chewy, and snappy all at once. The aroma alone—zesty lime intertwined with sweet vanilla and toasted coconut—is enough to transport you to a beachside cabana. I love using key limes when I can find them at the Union Square farmers market; their floral, aromatic juice is unparalleled. Every element is designed to sing in harmony, making these no bake coconut lime treats an absolute showstopper on any dessert board.
What sets this easy coconut lime balls recipe apart from the rest is my “Gloss Finish” technique. I’ve spent years perfecting the art of the chocolate shell, and the secret lies in a tiny amount of coconut oil blended into high-quality white chocolate. This ensures a mirror-like sheen without any of the dullness that can happen when chocolate seizes. As a trained chef, I’ve also optimized the texture of the center by using a specific ratio of cream cheese to coconut cream, guaranteeing a scoopable, rollable dough that firms up beautifully without becoming icy. Whether you’re a seasoned baker or just starting out, I promise you can nail these. Keep reading for my foolproof tips and the one common mistake to avoid that will guarantee perfect, glossy results every single time.
Why This Tropical Coconut Lime Dream Bombs Recipe Is the Best
The Flavor Secret: This isn’t just another sweet coconut ball. The base combines cream cheese for a luscious tang and velvety mouthfeel with coconut cream for an intense, pure coconut flavor that extract simply can’t mimic. The lime is used both as juice and zest, giving a double hit of citrus that cuts through the richness perfectly. It’s a balanced, sophisticated flavor profile that I honed using classic French pastry principles—every component has a purpose, and no single flavor overwhelms the others.
Perfected Texture: From my Parisian chef days, I learned that texture is just as important as taste. The filling is luxuriously creamy but sturdy enough to hold its shape. The shredded coconut coating provides a tender, slightly chewy crunch that contrasts beautifully with the silky center. And that glossy white chocolate shell? It shatters delicately as you bite, creating a multi-sensory experience that makes these feel like an artisanal confection, right from your own kitchen. The key is chilling the mixture in stages, which allows every layer to set perfectly.
Foolproof and Fast: One of the best things about this coconut lime dream bombs recipe is that it requires zero oven time and uses simple, straightforward techniques. Whether you’re making these for a birthday party, a holiday cookie exchange, or just a weekend treat, the steps are clear and forgiving. I’ve designed this recipe to be a success on the first try. The detailed visual cues and my “Chef Sara” pro tips will guide you through each stage, from rolling the perfect ball to achieving that envy-inducing glossy chocolate coconut bite finish. It’s gourmet-level results with minimal fuss.
Ingredients
One of my favorite things about living in NYC is having access to incredible ingredients from all over the world. For this recipe, I’m using pantry staples you can find at any major grocery store, but I’ll let you in on how to pick the absolute best ones—just like I learned scouring the markets in Marrakech and the specialty shops in Paris.
Ingredients List
For the Coconut Cream Center:
- 8 oz (225 g) cream cheese, softened to room temperature
- 1/2 cup coconut cream (from a can, not coconut milk)
- 1/4 cup powdered sugar
- 1 tsp vanilla extract
For the Lime Layer:
- 2 tbsp fresh lime juice (from about 1 large lime)
- 1 tbsp lime zest (about 1 large lime)
- 2 tbsp sweetened condensed milk
For the Coconut Coating:
- 1 1/2 cups shredded coconut (fine, unsweetened)
- 2 tbsp coconut oil, melted
For the Gloss Finish:
- 1/3 cup white chocolate, melted (chips or chopped bar)
- 1 tsp coconut oil
For Garnish (optional):
- Lime zest curls
- Toasted coconut flakes
Ingredient Spotlight
Cream Cheese: This is the backbone of our filling. It provides stability and a subtle tang that balances the sweetness. Make sure to use a full-fat block cream cheese (like Philadelphia) for the best texture. Avoid whipped or spreadable versions, as they contain too much air and water, which can make your filling soft and difficult to roll.
Coconut Cream: Don’t confuse this with coconut milk. Coconut cream is thicker, richer, and has a much higher fat content, which is essential for a luscious, firm truffle center. I always recommend buying a can of full-fat coconut milk and scooping the thick cream off the top, or buying a specific “coconut cream” product (like Coco Lopez or Trader Joe’s).
White Chocolate: For a flawless gloss finish, quality matters. Use a good brand of white chocolate that contains real cocoa butter (like Ghirardelli, Lindt, or Guittard). Chips are fine, but a chopped bar melts more evenly. The addition of coconut oil is my non-negotiable chef’s trick—it thins the chocolate perfectly for dipping and guarantees a high-shine, snappy shell that doesn’t bloom.
| Original Ingredient | Best Substitution | Flavor / Texture Impact |
|---|---|---|
| Cream Cheese | Dairy-free cream cheese (e.g., Kite Hill or Tofutti) | Slightly less tangy, still creamy. Ensure it’s a block-style for proper firmness. |
| Coconut Cream | Heavy cream + 1/2 tsp coconut extract | Lighter texture, less intense coconut flavor. Great in a pinch. |
| White Chocolate | Dark chocolate (60-70% cacao) + 1 tsp coconut oil | Rich, bittersweet shell. Less sweet, beautiful contrast with lime. |
| Lime | Lemon (zest and juice) | Brighter, slightly less floral acidity. Still deliciously citrusy. |
How to Make Tropical Coconut Lime Dream Bombs — Step-by-Step
Alright, let’s get rolling! I’ve broken down every step so you feel like I’m right there beside you in my tiny NYC kitchen. Don’t forget to check the table at the end for a quick visual reference.
Step 1: Create the Creamy Base
In a large mixing bowl, beat the softened cream cheese, coconut cream, powdered sugar, and vanilla extract together until the mixture is completely smooth, fluffy, and free of any lumps. This should take about 2-3 minutes with a hand mixer or a sturdy spatula.
💡 Sara’s Pro Tip: Make sure your cream cheese is truly at room temperature. Cold cream cheese will leave you with a lumpy filling. If you’re in a hurry, cut it into small cubes and let it sit on the counter for 15 minutes.
Step 2: Add the Lime Zest and Juice
Stir in the fresh lime juice, lime zest, and sweetened condensed milk until everything is fully incorporated and the color is uniform. The mixture will look quite soft and shiny at this point—that’s exactly what we want.
⚠️ Common Mistake to Avoid: Zest your lime before you juice it! It’s nearly impossible to zest a limp, juiced lime, and the zest is where the most aromatic oils live. Trust me on this one.
Step 3: Chill the Mixture
Cover the bowl tightly with plastic wrap and place it in the refrigerator. Chill for 25–30 minutes, or until the mixture is firm enough to scoop and hold its shape when rolled into a ball. This is a crucial step for structure.
💡 Sara’s Pro Tip: If the mixture feels too sticky after 25 minutes, give it another 10-15 minutes. Every refrigerator is different! You should be able to scoop it with a cookie scoop and have it hold its mound shape.
Step 4: Roll into Bombs
Using a small cookie scoop or a tablespoon, portion out the chilled mixture and roll it firmly between the palms of your hands into smooth, bite-sized balls. Place them on a parchment-lined baking sheet as you go.
⚠️ Common Mistake to Avoid: Don’t over-roll! If your hands are too warm, the balls will start to melt and become sticky. If this happens, simply wash your hands with cold water and dry them before continuing.
Step 5: Coat in Shredded Coconut
In a shallow bowl, combine the finely shredded unsweetened coconut with the melted coconut oil. Roll each ball in the coconut mixture, pressing gently so the coconut adheres evenly to all sides. This creates the first delicious layer of texture.
💡 Sara’s Pro Tip: For a deeper flavor, toast the shredded coconut in a dry pan over medium heat for 2-3 minutes, stirring constantly, until it’s golden and fragrant. Let it cool completely before mixing with the oil.
Step 6: Second Chill to Set
Place the coconut-coated balls back on the baking sheet and return them to the refrigerator. Chill for another 20 minutes to allow the coconut coating to set firmly against the filling. This ensures a clean dip into the chocolate later.
⚠️ Common Mistake to Avoid: Don’t skip this chill! If the balls are too soft, they will fall apart or leave crumbs in your glossy chocolate coating. They need to be cold and firm.
Step 7: Prepare the Gloss Finish
While the balls are chilling, melt the white chocolate together with 1 teaspoon of coconut oil. You can do this in a microwave in 20-second intervals, stirring after each, or in a double boiler on the stovetop. Stir until completely smooth and liquid.
💡 Sara’s Pro Tip: The coconut oil is the magic ingredient! It lowers the melting point of the white chocolate, making it thin enough for a perfect drizzle or dip without adding a greasy taste. It guarantees that high-shine “gloss finish.”
Step 8: Dip or Drizzle
Remove the chilled balls from the fridge. Using a fork or a dipping tool, dip each ball completely into the melted white chocolate, or use a spoon to generously drizzle the chocolate over the top for a more rustic look. Allow any excess to drip back into the bowl.
⚠️ Common Mistake to Avoid: Don’t let the white chocolate get too hot. If it exceeds 110°F, it can seize or become thick and lumpy. If it starts to thicken while you’re working, simply reheat it gently for 5 seconds.
Step 9: Final Chill
Place the dipped or drizzled bombs back onto the parchment-lined sheet. Return them to the refrigerator for about 15-20 minutes, or until the white chocolate coating is completely hard and snappy to the touch.
💡 Sara’s Pro Tip: For an extra-special touch, sprinkle a pinch of flaky sea salt or some extra lime zest on top of the wet chocolate before it sets. The contrast of salty and sweet is incredible!
Step 10: Garnish and Serve
Once the chocolate is fully set, you can add the finishing touches. Garnish with delicate lime zest curls and a sprinkle of toasted coconut flakes for a beautiful presentation. Serve the bombs directly from the refrigerator for the best texture contrast between the firm shell and the creamy, cold center.
⚠️ Common Mistake to Avoid: Don’t store these at room temperature for more than an hour. For optimal texture and food safety, keep them chilled until you’re ready to serve.
| Step | Action | Duration | Key Visual Cue |
|---|---|---|---|
| 1 | Beat cream cheese base | 2-3 mins | Smooth, fluffy, no lumps |
| 2 | Incorporate lime | 1 min | Uniform pale yellow color |
| 3 | Chill mixture | 25-30 mins | Firm enough to scoop |
| 4 | Roll into balls | 5-10 mins | Smooth, round, uniform |
| 5 | Coat in coconut | 5 mins | Evenly covered, sticky |
| 6 | Second chill | 20 mins | Firm to the touch |
| 7 | Melt white chocolate | 1-2 mins | Smooth, glossy, liquid |
| 8 | Dip or drizzle | 5-10 mins | Fully coated shell |
| 9 | Final chill | 15-20 mins | Hard, snappy shell |
| 10 | Garnish & serve | 5 mins | Beautifully presented |
Serving & Presentation
These little beauty bombs are incredibly versatile. I love serving them on a simple white platter with some fresh mint sprigs and thin slices of lime for a pop of color. They make a stunning ending to a Moroccan-inspired meal or a refreshing addition to a summer afternoon tea party. If you want to go full NYC bakery vibe, arrange them in a small, elegant box lined with crinkle paper.
For the best flavor and texture, serve them directly from the fridge. The contrast between the cold, creamy center and the snappy chocolate shell is the whole point. If you’re serving them at a party, you can leave them out on a cool plate for up to 30 minutes—they’ll soften slightly, becoming incredibly mousse-like inside.
| Pairing Type | Suggestions | Why It Works |
|---|---|---|
| Hot Beverage | Earl Grey tea, Mint tea, Espresso | The floral/tannic notes contrast the sweetness. Mint tea is a classic Moroccan pairing. |
| Fruit | Fresh mango slices, Pineapple chunks, Raspberries | Tropical fruits enhance the coconut-lime theme; raspberries add a tart contrast. |
| Dessert Wine | Late Harvest Riesling, Moscato d’Asti | Light, sweet wines complement the creamy texture without overpowering the citrus. |
| Garnish | Lime zest curls, Toasted coconut, Edible flowers | Adds visual appeal, aromatic pop, and a touch of elegance. |
Make-Ahead, Storage & Reheating
As a busy NYC food blogger and mom, I am ALL about make-ahead desserts. These dream bombs are perfect for that. You can prepare the filling completely and store it in the fridge for up to 2 days before rolling and dipping. Alternatively, you can fully assemble the bombs and freeze them for up to a month—just add the gloss finish after they thaw.
| Method | Container | Duration | Reheating / Serving Tip |
|---|---|---|---|
| Refrigerator | Airtight container (layered with parchment) | Up to 5 days | Serve directly from the fridge. No reheating needed. |
| Freezer | Freezer-safe container or Ziploc bag | Up to 3 months | Thaw overnight in the fridge. The creamy texture stays perfectly intact. |
| Make-Ahead | Store filling in a bowl covered with plastic wrap | Up to 2 days in advance | Let the filling sit at room temp for 5 mins before rolling if it’s too hard. |
I often make a double batch of these around the holidays. They’re the perfect treat to pull out of the freezer when unexpected guests drop by. Just give them about 15-20 minutes at room temperature after thawing in the fridge to soften slightly for that perfect creamy bite. My family in Morocco loves them with a glass of hot mint tea—it’s a cross-cultural combination that just works!
Variations & Easy Swaps
One of the things I love most about cooking is the ability to adapt and play. This recipe is a fantastic canvas for your creativity. Here are a few of my favorite twists, whether you’re accommodating dietary needs or just craving a different flavor profile.
| Variation | Key Change | Best For | Difficulty Impact |
|---|---|---|---|
| Key Lime Pie Bombs | Use graham cracker crumbs in the coating | Classic Key Lime Pie lovers | Easy (No extra steps) |
| Dark Chocolate & Coconut | Use dark chocolate (70%) for the gloss finish | Those who prefer less sweetness | Easy (Swap ingredient) |
| Tropical Mango Twist | Add 2 tbsp dried mango powder or finely chopped dried mango | A fruity, chewy texture surprise | Medium (Ingredient prep) |
Key Lime Pie Bombs
If you’re a fan of the classic Florida pie, this one’s for you. Simply mix 1/4 cup of finely crushed graham crackers into your coconut coating mixture. The buttery, crumbly texture of the graham crackers echoes the pie crust beautifully, while the creamy, tart filling does the rest. I love adding a tiny pinch of cinnamon to the crust mix—a little warm spice that reminds me of American diner pies since moving to NYC.
Dark Chocolate & Coconut Bombs
For a more sophisticated, less sweet version, swap the white chocolate for high-quality dark chocolate (70% cacao is my sweet spot). The bittersweet notes of the dark chocolate are a stunning counterpoint to the tangy lime and sweet coconut. Still add the 1 tsp of coconut oil to the chocolate—this is my chef’s secret for that high-gloss finish, regardless of the chocolate type. It also helps the dark chocolate set up with a satisfying snap.
Tropical Mango Twist
Inspired by the vibrant fruit stalls of Marrakech, I sometimes add a tropical twist to these bombs. Finely chop 2 tablespoons of dried mango and fold it into the filling before chilling. Alternatively, you can roll the finished bombs in freeze-dried mango powder (often called “dragon’s breath” in pastry kitchens) for a sour-sweet punch that will surprise and delight. It adds a beautiful pop of color and a chewy texture that pairs perfectly with the creamy base.
Frequently Asked Questions
What is the best way to get a smooth, glossy finish on coconut lime truffles?
The best way to guarantee a mirror-like gloss finish is to mix 1 teaspoon of coconut oil into your melted white chocolate. This is a classic French plasticienne technique that lowers the chocolate’s melting point, making it thinner and shinier without being greasy. Always use high-quality white chocolate that contains real cocoa butter, and melt it gently—never exceeding 110°F. The coconut oil prevents the white chocolate from seizing and ensures a beautiful, snappy shell that stays glossy even after refrigeration.
Can I substitute fresh coconut for dried coconut in tropical coconut lime dream bombs?
I don’t recommend using fresh coconut for the coating in this specific recipe. Fresh coconut has a much higher moisture content and is often softer, which means it won’t provide the same firm, tender crunch as finely shredded unsweetened dried coconut. The dried coconut also absorbs the melted coconut oil better, creating a cohesive layer that sticks to the creamy center. If you have fresh coconut, I recommend toasting it in a low oven to dry it out completely before using it as a coating.
How long do coconut lime dream bombs need to chill before they are firm enough to dip?
You need two separate chilling phases for perfect dipping. First, the prepared filling needs to chill for a solid 25–30 minutes until it’s firm enough to scoop and roll without sticking to your hands. Secondly, after you’ve rolled the balls and coated them in shredded coconut, they need another 20 minutes in the fridge. This second chill firms up the outer layer so they hold their shape perfectly when you dip them into the warm, glossy white chocolate. Rushing this step will lead to messy dipping.
What can I use instead of white chocolate for the coating on these coconut lime bombs?
Absolutely! The most seamless swap is high-quality dark chocolate (60-70% cacao) or even milk chocolate. Just be sure to still add the 1 teaspoon of coconut oil to whichever chocolate you choose—it’s my non-negotiable trick for that glossy finish we’re after. If you want to avoid chocolate altogether, you can create a simple icing using powdered sugar and a bit of lime juice, or simply roll the finished bombs in more toasted shredded coconut mixed with a little cinnamon and sugar for a completely different, but equally delicious, texture.
Can I make these coconut lime dream bombs dairy-free?
Yes, you can absolutely make a dairy-free version of these tropical treats. Substitute the cream cheese with a high-quality block-style dairy-free cream cheese (like Kite Hill or Tofutti). For the condensed milk, use a vegan sweetened condensed coconut milk (such as Nature’s Charm). The rest of the ingredients, including the coconut cream and shredded coconut, are naturally dairy-free. For the gloss finish, use a good dairy-free white chocolate (many brands are available now) and the same amount of coconut oil for the perfect sheen.
How should I store leftover coconut lime dream bombs?
Store any leftover dream bombs in an airtight container in the refrigerator. They will stay fresh and delicious for up to 5 days. Layer them between sheets of parchment or wax paper to prevent them from sticking to each other. I do not recommend storing them at room temperature for more than a couple of hours, as the cream cheese filling needs to stay cold for food safety, and the chocolate shell can soften or bloom. For a quick treat, I love grabbing one straight from the fridge on a warm New York evening.
Can I freeze coconut lime dream bombs to use later?
Yes, these beauties freeze wonderfully! For the best results, freeze the bombs on a baking sheet until they are solid, then transfer them to a freezer-safe bag or airtight container. They will keep for up to 3 months. When you’re ready to enjoy them, simply thaw them overnight in the refrigerator. The texture of the creamy center and the coconut coating remains perfect. I often make a triple batch and keep them stashed in my NYC freezer for spontaneous entertaining or a little taste of summer during a blizzard.
Share Your Version!
I absolutely love seeing pictures of these little sunshine bombs in your kitchens! Did you try the classic version, or did you go wild with one of my variations? Leave a star rating and a comment below—your feedback helps other home cooks find the courage to step into their kitchens and create something beautiful. Nothing makes my day like hearing that one of my recipes brought a smile to your family’s table.
Share a photo on Instagram and tag me @cheerychop, or pin your creation to Pinterest! I’m always curious to know—what’s one flavor combination that instantly transports you back to a special place or memory? For me, it’s always the bright, floral scent of lime and coconut. Tell me about yours in the comments. 😊
From my NYC kitchen to yours — I hope this recipe brings as much warmth to your table as it does to mine. — Sara 🧡
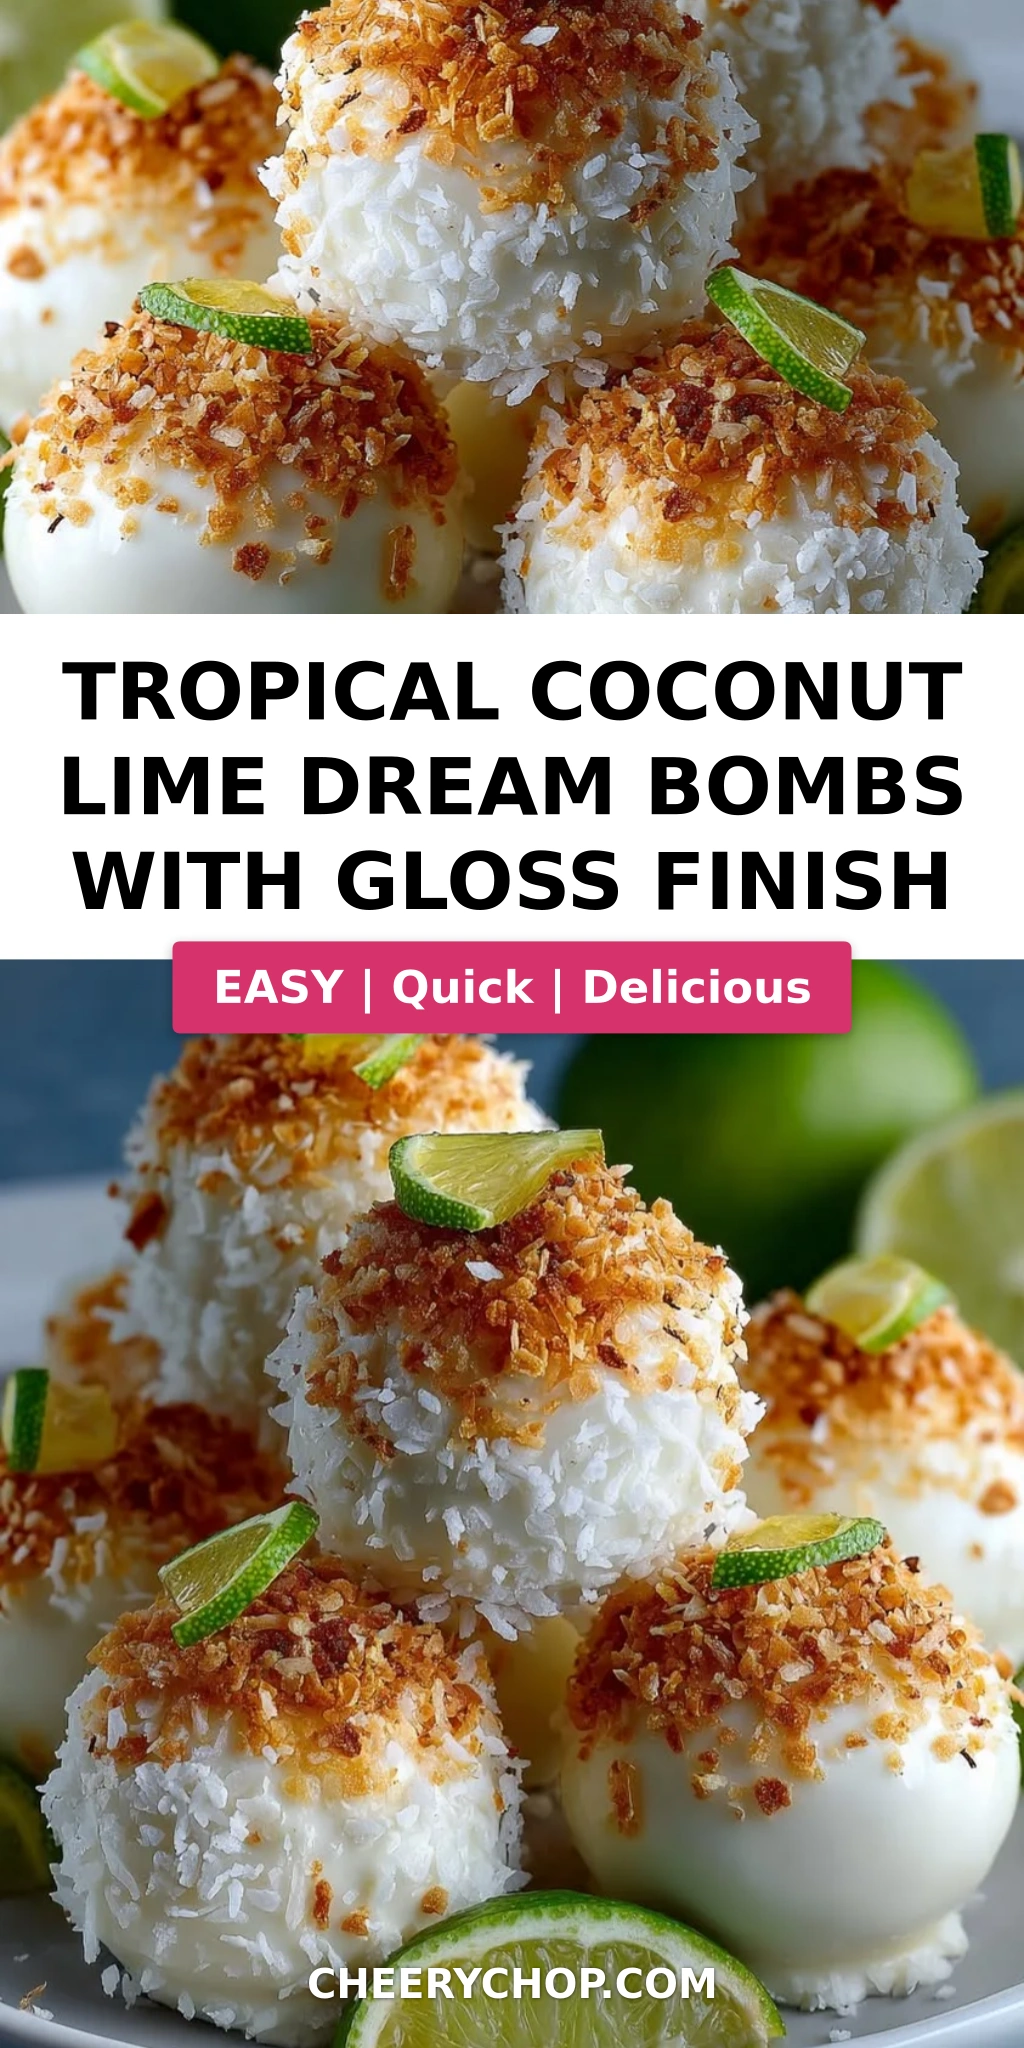
Love This Recipe? Save It to Pinterest!
If you enjoyed this Tropical Coconut Lime Dream Bombs recipe, don’t let it get lost in your browser tabs! 😄 Pin it now so you can find it again anytime — and explore hundreds more tried-and-tested recipes waiting for you on my Pinterest boards.
👉 Follow Sara on Pinterest @chefrecipes2
📌 Pin this recipe · 🔁 Re-pin your favorites · 💬 Tag me when you make it — I love seeing your creations!
Tropical Coconut Lime Dream Bombs with Gloss Finish
Bite-sized tropical treats with a creamy coconut-lime center, coated in shredded coconut and finished with a glossy white chocolate drizzle.
- Yield: 10 1x
Ingredients
- For the Coconut Cream Center:
- 8 oz (225 g) cream cheese, softened
- 1/2 cup coconut cream
- 1/4 cup powdered sugar
- 1 tsp vanilla extract
- For the Lime Layer:
- 2 tbsp lime juice
- 1 tbsp lime zest
- 2 tbsp sweetened condensed milk
- For the Coconut Coating:
- 1 1/2 cups shredded coconut (fine, unsweetened)
- 2 tbsp coconut oil, melted
- For the Gloss Finish:
- 1/3 cup white chocolate, melted
- 1 tsp coconut oil
- For Garnish (optional):
- Lime zest curls
- Toasted coconut flakes
Instructions
- 1. In a bowl, beat cream cheese, coconut cream, powdered sugar, and vanilla until smooth and fluffy.
- 2. Stir in lime juice, lime zest, and sweetened condensed milk until fully incorporated.
- 3. Chill the mixture for 25–30 minutes until firm enough to shape.
- 4. Scoop and roll into small bite-sized balls.
- 5. Roll each ball in shredded coconut mixed with melted coconut oil.
- 6. Place on a tray and chill for 20 minutes to set.
- 7. Dip or drizzle each bomb with melted white chocolate mixed with coconut oil for a glossy finish.
- 8. Chill again until the coating is fully set.
- 9. Garnish with lime zest curls and toasted coconut flakes if desired.
- 10. Serve chilled for best texture and flavor contrast.
Nutrition
- Calories: 240
- Sugar: 15 g
- Fat: 18 g
- Carbohydrates: 18 g
- Protein: 3 g
Tried This Recipe? Leave a Comment!
Did you make this recipe? I’d love to hear how it turned out! Please leave a comment and a rating below. Your feedback helps other home cooks and supports cheerychop.com!
For more delicious inspiration, follow me on Pinterest!


