
Table of Contents
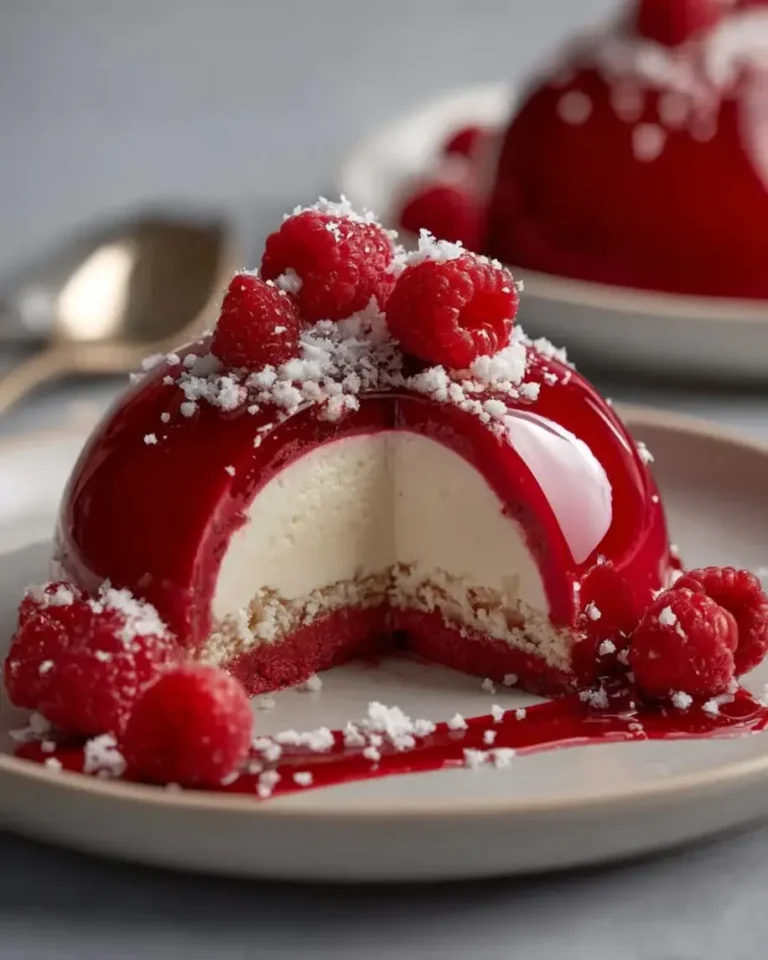
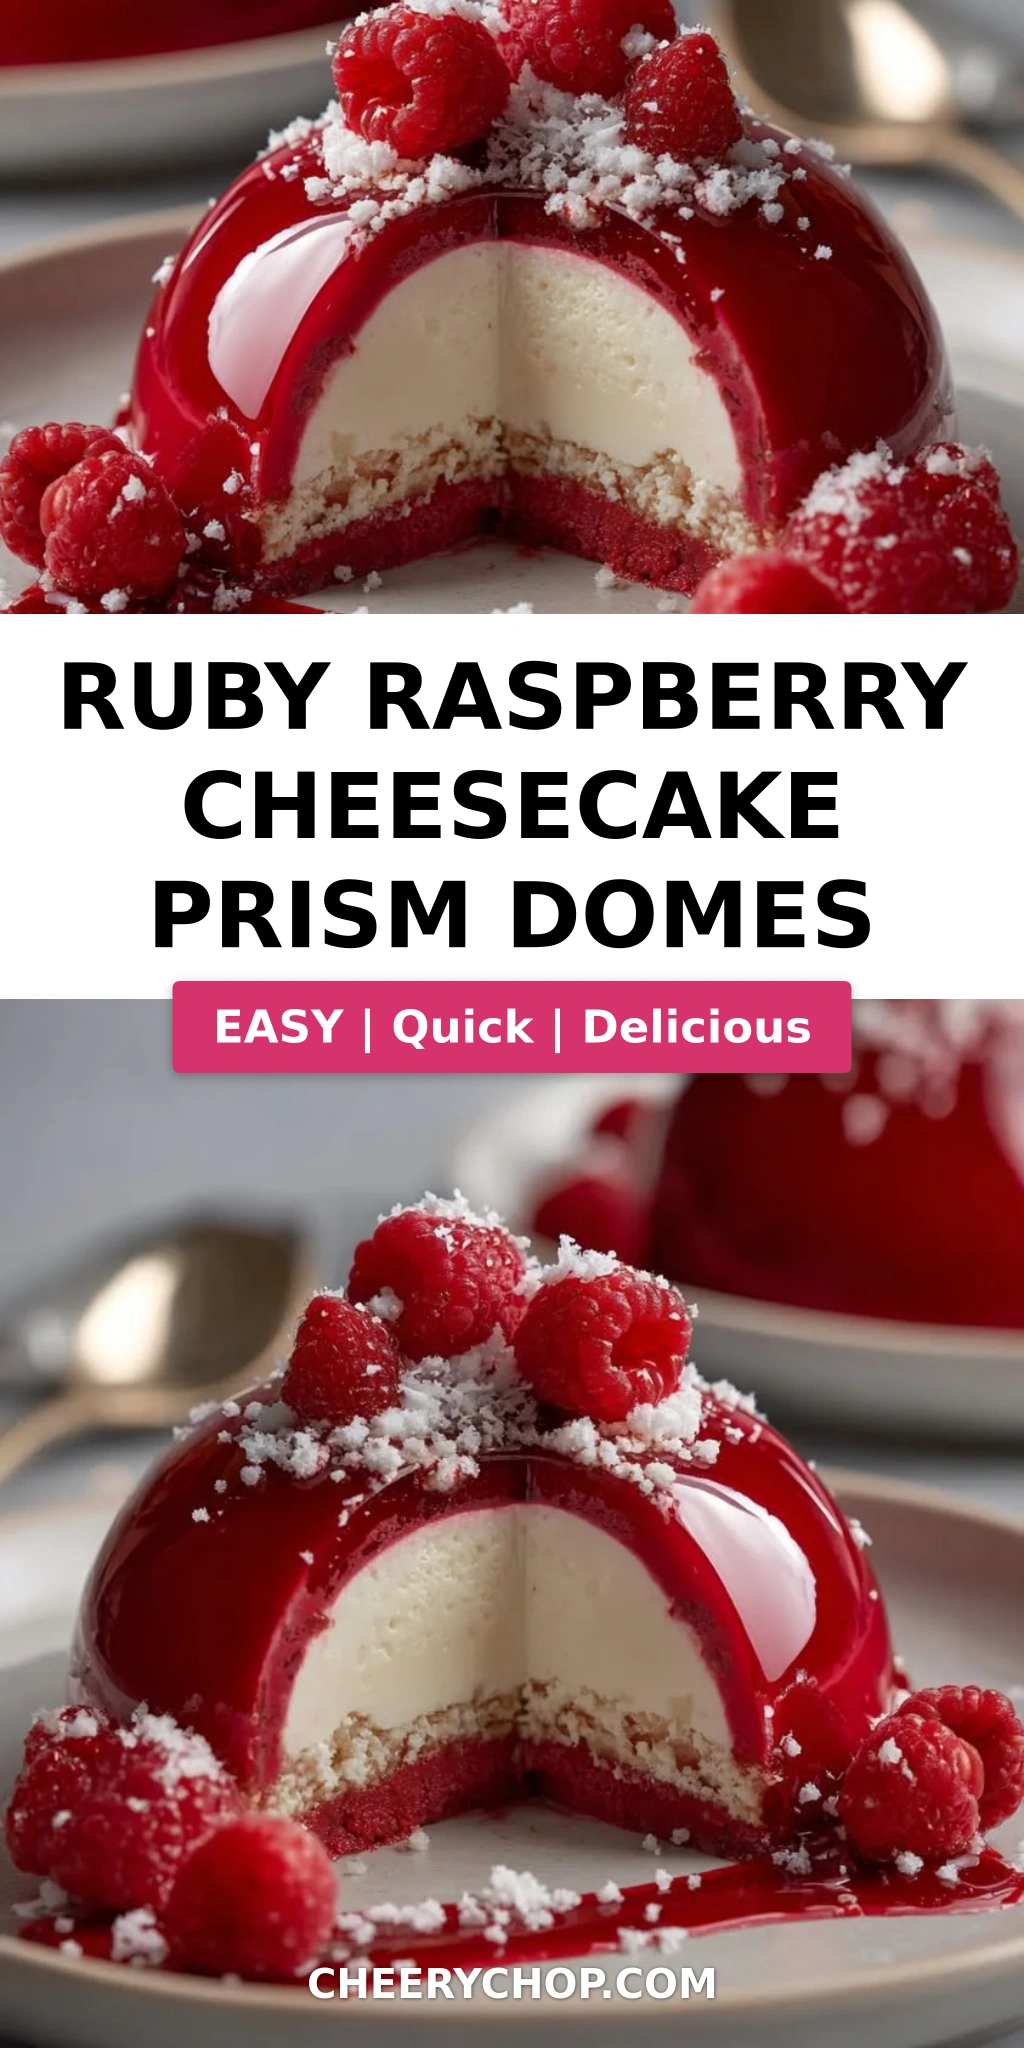
Ruby Raspberry Cheesecake Prism Domes – A Stunning Mirror Glaze Dessert with a Hidden Vanilla Cream Core
I still remember the first time I saw a mirror glaze cake in a pastry shop window in Paris — that flawless, jewel-like surface seemed almost magical. I was a young cook at Le Cordon Bleu then, still dreaming in spices from my mother’s kitchen in Morocco, and I knew right then that I had to learn everything about that technique. These Ruby Raspberry Cheesecake Prism Domes are the result of blending that Parisian training with the bright, tangy flavors I grew up with in North Africa. The raspberry cheesecake domes get their show-stopping finish from a shimmering ruby mirror glaze that catches the light exactly like a cut gemstone — and when you cut into one, there’s a hidden vanilla cream core waiting inside.
The first bite hits you with the glossy, sweet-tart brightness of the ruby glaze, then gives way to the silky, creamy raspberry cheesecake. Right in the center, the vanilla cream core adds a cool, luscious surprise that balances the fruitiness beautifully. It’s the kind of dessert that makes people stop and ask, “Wait, how did you do that?” The aroma alone — bright raspberry, creamy vanilla, and white chocolate — fills your kitchen with that special kind of anticipation that only comes with a truly special dessert. These mirror glaze desserts are meant to be the centerpiece of a celebration, and they deliver on every level.
My version of this prism mirror cake technique is designed to be achievable for the home cook who loves a challenge. I’ve simplified the steps and added my tested tips so you can get that crystal-clear finish without the stress. The key is patience with the freezing and getting the glaze temperature just right — and I’ll walk you through every detail. One common mistake is rushing the cooling stage, which creates a dull or streaky surface, but I’ll show you exactly how to avoid that. Let me show you how to make these Ruby Raspberry Cheesecake Prism Domes and wow your guests.
Why This Ruby Raspberry Cheesecake Prism Domes Recipe Is the Best
The flavor secret here comes from using fresh raspberry puree in the cheesecake layer — not just extract or jam. Growing up in Morocco, I watched my mother cook with fresh fruit daily, and that principle of letting real ingredients shine is something I’ve carried into every recipe I create. The raspberry puree gives the cheesecake a vibrant, natural tartness that perfectly balances the sweetness of the white chocolate mirror glaze. I also add a touch of vanilla bean paste to the cream core because the tiny specks of vanilla bean make the flavor feel more luxurious and intentional.
The texture of these prism domes is where my French pastry training really comes through. The raspberry cheesecake layer is set with just enough gelatin to hold its shape while staying silky and mousse-like on the tongue. The vanilla cream core is made with mascarpone and heavy cream, which keeps it soft and luscious even after freezing. And the mirror glaze — that’s where precision matters. By using high-quality white chocolate and blooming the gelatin properly, you get a glaze that pours like silk and sets to a shiny, flawless finish that mirrors your reflection.
What makes this raspberry cheesecake domes recipe surprisingly foolproof is the make-ahead nature of the dish. The freezing step does most of the work for you, and the glaze comes together in minutes once you have your ingredients measured. I’ve tested this recipe six times in my NYC kitchen to make sure the ratios are spot-on for home cooks. Whether you’re a confident baker looking for a showpiece dessert or someone who wants to try mirror glaze for the first time, I’ve designed these steps to build your confidence with every stage.
Ruby Raspberry Cheesecake Prism Domes Ingredients
I love sourcing my ingredients for these ruby cheesecake domes from the Union Square Greenmarket in NYC, where I can find the freshest raspberries and farm-fresh cream cheese. It reminds me of the open-air souks in Marrakech where my mother would pick out the brightest berries for her jams. For the mirror glaze, I use a good-quality white chocolate (I like Valrhona or Guittard) because the better the chocolate, the shinier and more stable your glaze will be. Let’s get everything together before we start.
Ingredients List
For the Raspberry Cheesecake Domes:
- 2 cups fresh raspberries, pureed (about 12 oz)
- 8 oz cream cheese, softened to room temperature
- 1 cup heavy cream (cold)
- 1/3 cup powdered sugar
- 1 tsp vanilla extract
- 2 tsp unflavored gelatin powder
- 2 tbsp cold water (for blooming gelatin)
- Red gel food coloring (optional, for deeper color)
For the Vanilla Cream Core:
- 1/2 cup mascarpone cheese (about 4 oz)
- 2 tbsp heavy cream
- 1 tbsp powdered sugar
- 1 tsp vanilla bean paste (or seeds from 1 vanilla bean)
For the Prism Mirror Glaze:
- 1 cup white chocolate, finely chopped (about 6 oz)
- 1/2 cup sweetened condensed milk
- 2 tsp unflavored gelatin powder
- 2 tbsp cold water (for blooming)
- 1/4 cup warm water (about 100°F)
- 1 tsp edible ruby shimmer dust (or pink/red luster dust)
For Garnish (optional):
- Fresh raspberries
- Edible sugar crystals
- White chocolate shards
Ingredient Spotlight
Raspberries: Fresh raspberries are ideal because they puree smoothly and offer bright, natural acidity. When you select raspberries at the grocery store, look for berries that are plump, deep red, and not leaking juice. Frozen raspberries can work in a pinch — just thaw them completely and drain off any excess liquid before pureeing, as too much water can make the cheesecake layer weepy.
White Chocolate: This is the backbone of your mirror glaze, so don’t skimp. Use a high-quality white chocolate that contains real cocoa butter (at least 28%). Chips or cheap white morsels often contain stabilizers that prevent smooth melting and create a streaky glaze. I recommend Valrhona Ivoire or Guittard 35% white chips for the most reliable shine.
Edible Ruby Shimmer Dust: This is what gives the mirror glaze its prism-like, crystalline sparkle. You can find it at specialty baking supply stores or online. If you can’t find ruby shimmer dust, a high-quality pink or red luster dust mixed into the glaze will still produce a gorgeous jewel-toned finish. Start with 1 tsp and adjust for intensity.
Mascarpone: For the vanilla cream core, mascarpone adds a velvety richness that regular cream cheese can’t replicate. It’s less tangy and more buttery, which lets the vanilla bean paste shine. If mascarpone is hard to find, you can substitute equal parts cream cheese and heavy cream blended together, though the texture will be slightly less luxurious.
| Original Ingredient | Best Substitution | Flavor / Texture Impact |
|---|---|---|
| Fresh raspberries | Frozen raspberries (thawed, drained) | Slightly less bright; may need extra gelatin if excess water remains |
| Mascarpone cheese | 2 tbsp cream cheese + 2 tbsp heavy cream, blended | More tangy, less buttery; still creamy but firmer |
| Edible ruby shimmer dust | Pink or red luster dust (1 tsp) | Less prismatic sparkle; still a beautiful jewel tone |
| Vanilla bean paste | 1 tsp vanilla extract + seeds from 1/2 vanilla bean | Similar vanilla flavor; slightly less intense visual speckle |
How to Make Ruby Raspberry Cheesecake Prism Domes — Step-by-Step
I’ve broken this down into clear, manageable stages so you can work through the process with confidence. The freezing steps are crucial, so plan ahead — but the active work is much less than you’d think!
Step 1: Bloom the Gelatin
In a small bowl, sprinkle 2 tsp unflavored gelatin over 2 tbsp cold water. Let it sit for 5 minutes until the gelatin absorbs the water and becomes a firm, spongy mass. This process, called blooming, ensures the gelatin dissolves evenly without lumps later.
💡 Sara’s Pro Tip: Always use cold water for blooming — hot water will cause the gelatin to clump and won’t activate evenly. Think of it like giving the gelatin a cold bath before it goes into the warm mixture.
Step 2: Make the Raspberry Cheesecake Base
In a large mixing bowl, beat the softened cream cheese with an electric mixer until smooth and creamy, about 2 minutes. Add the powdered sugar, vanilla extract, and raspberry puree, and beat until fully combined and uniformly pink. The mixture should be smooth and slightly thick.
⚠️ Common Mistake to Avoid: Don’t overbeat the cream cheese — that can incorporate too much air and create bubbles in your cheesecake layer. Mix just until smooth.
Step 3: Melt and Incorporate the Gelatin
Gently warm the bloomed gelatin in the microwave in 10-second bursts (or in a small saucepan over low heat) until it melts into a clear, liquid state. Immediately stir it into the raspberry cream cheese mixture, whisking vigorously to distribute evenly. The mixture will become slightly thinner.
💡 Sara’s Pro Tip: If you see any streaks of gelatin in the mixture, keep whisking — you want a completely homogenous base. Streaks of gelatin can create uneven texture in the set cheesecake.
Step 4: Fold in the Whipped Cream
In a separate chilled bowl, whip the heavy cream to soft peaks — it should hold its shape but still be soft and billowy. Gently fold the whipped cream into the raspberry mixture in three additions, using a rubber spatula. Fold just until no white streaks remain; the mixture should be light, airy, and uniform in color.
⚠️ Common Mistake to Avoid: Over-folding will deflate the whipped cream and make your cheesecake layer dense instead of mousse-like. Stop as soon as the mixture is combined — a few tiny lumps are better than a deflated batter.
Step 5: Make the Vanilla Cream Core
In a small bowl, combine the mascarpone cheese, heavy cream, powdered sugar, and vanilla bean paste. Stir with a spatula until smooth and thick — this should take only about 30 seconds. The mixture should be pipeable but not runny. Transfer it to a small piping bag fitted with a 1/4-inch round tip.
💡 Sara’s Pro Tip: For the most intense vanilla flavor, I use vanilla bean paste because it has those gorgeous little black specks that look beautiful against the white cream. If you only have extract, it will still taste great — just without the visual effect.
Step 6: Pipe and Freeze the Cream Cores
Pipe small dollops of the vanilla cream into a mini dome or round silicone mold (about 1-inch size), filling each cavity halfway. Freeze for at least 2 hours, until the cream cores are solid and can be easily popped out. These frozen cores will stay solid enough to handle in the next steps.
⚠️ Common Mistake to Avoid: If your cream cores aren’t fully frozen, they’ll sink into the raspberry mixture when you place them. Test one by gently tapping — it should feel rock-solid.
Step 7: Assemble the Domes
Fill your 3-inch dome-shaped silicone molds halfway with the raspberry cheesecake mixture. Place one frozen vanilla cream core into the center of each mold, pressing it gently into the mixture so it’s centered. Cover with the remaining raspberry mixture, filling each mold to the brim. Smooth the tops with an offset spatula, then freeze for at least 5 hours or preferably overnight, until the domes are solid and can be unmolded cleanly.
💡 Sara’s Pro Tip: Make sure the cream core is fully enclosed by the raspberry mixture — if it’s exposed at the top, it will create a different texture under the glaze. A little extra raspberry mixture on top is better than too little.
Step 8: Make the Prism Mirror Glaze
Bloom 2 tsp gelatin in 2 tbsp cold water for 5 minutes. In a small saucepan, heat the sweetened condensed milk and 1/4 cup warm water over medium heat until it’s warm to the touch (about 100°F). Remove from heat and whisk in the bloomed gelatin until fully dissolved. Pour this warm liquid over the finely chopped white chocolate in a heatproof bowl. Let it sit for 2 minutes, then whisk gently until the chocolate is fully melted and the mixture is smooth and glossy. Stir in the ruby shimmer dust until evenly dispersed — the glaze will take on a beautiful, translucent ruby color.
⚠️ Common Mistake to Avoid: Don’t whisk the glaze vigorously — that creates bubbles that will show on your finished domes. Use a gentle, sweeping motion with the whisk, then tap the bowl on the counter to release any air that does form.
Step 9: Cool the Glaze to the Right Temperature
Let the glaze cool at room temperature, stirring occasionally, until it reaches 90–95°F. This usually takes 10–15 minutes. The glaze should flow like thick syrup — if it’s too hot, it will slide off the domes; if too cool, it will set in thick streaks. Test the consistency by drizzling a little over the back of a spoon — it should coat evenly and have a shiny finish.
💡 Sara’s Pro Tip: The temperature window is your best friend here. Use an instant-read thermometer to be precise. If the glaze cools too much, you can gently reheat it in the microwave in 5-second bursts, stirring between each, until it flows again.
Step 10: Unmold and Glaze the Domes
Carefully unmold the frozen domes from the silicone molds. Place each dome on a wire rack set over a baking sheet to catch the excess glaze. Working quickly, pour the cooled glaze over each dome from the top, letting it cascade down the sides to cover the entire surface. The excess will drip onto the baking sheet below. Let the glazed domes sit on the rack for a minute to allow any excess glaze to drip off.
⚠️ Common Mistake to Avoid: Don’t touch the domes after glazing — fingerprints will ruin the mirror finish. If you need to transfer them, use an offset spatula or your hands (wearing gloves) to gently lift from the base of the rack.
Step 11: Garnish and Chill
Before the glaze fully sets (while it’s still slightly tacky), garnish each dome with fresh raspberries, a sprinkle of edible sugar crystals, and a white chocolate shard placed artfully on top. Transfer the glazed domes to a parchment-lined baking sheet and refrigerate for at least 2 hours to allow the glaze to stabilize and the domes to thaw to a soft, creamy texture.
💡 Sara’s Pro Tip: For the cleanest garnish placement, have all your garnishes prepped and ready before you start glazing. The glaze sets quickly once it hits the cold dome, so you only have about 30 seconds to decorate before it firms up.
| Step | Action | Duration | Key Visual Cue |
|---|---|---|---|
| 1 | Bloom gelatin | 5 min | Gelatin becomes firm, spongy mass |
| 2 | Make raspberry cheesecake base | 5 min | Smooth, uniformly pink mixture |
| 3 | Incorporate melted gelatin | 1 min | No streaks remain |
| 4 | Fold in whipped cream | 3 min | Light, airy, no white streaks |
| 5 | Make vanilla cream core | 2 min | Smooth, thick, pipeable |
| 6 | Freeze cream cores | 2+ hours | Rock-solid to the touch |
| 7 | Assemble domes | 10 min | Domes fully filled, smooth tops |
| 8 | Make mirror glaze | 10 min | Glossy, smooth, ruby-colored |
| 9 | Cool glaze | 10–15 min | Coats spoon evenly, temp 90–95°F |
| 10 | Unmold and glaze | 5 min | Smooth, even coverage |
| 11 | Garnish and chill | 2+ hours | Glaze set, raspberries fresh |
Serving & Presentation
These Ruby Raspberry Cheesecake Prism Domes deserve a grand entrance. Place each dome on a chilled white plate — the contrast between the ruby-red mirror glaze and the white plate is stunning. I like to add a small quenelle of lightly sweetened crème fraîche or a dusting of freeze-dried raspberry powder on the plate for an extra pop of color and flavor. A few fresh raspberries and a tiny sprig of mint complete the look beautifully.
When I serve these at dinner parties in my NYC apartment, I love to watch guests’ faces as they discover the vanilla cream core. That hidden layer is part of the magic — it feels like a little secret inside each dome. For a truly dramatic presentation, serve the domes on a mirrored tray or a slate board, and consider adding a few edible flowers like borage or violas for an elevated, garden-party feel.
These mirror glaze desserts pair wonderfully with a cup of strong coffee or a dessert wine like a late-harvest Riesling or a Moscato d’Asti. The sweetness of the wine complements the tart raspberries and the creamy interior. If you’re serving them after a heavy meal, a small espresso with a twist of lemon is a perfect, refreshing finish.
| Pairing Type | Suggestions | Why It Works |
|---|---|---|
| Side Dish | Crème fraîche, vanilla ice cream, fresh berries | Adds cool creaminess and acidity to balance sweetness |
| Sauce / Dip | Raspberry coulis, salted caramel, white chocolate ganache | Enhances fruit or adds salty-sweet contrast |
| Beverage | Late-harvest Riesling, Moscato d’Asti, espresso | Wine complements fruit; espresso cuts richness |
| Garnish | Edible flowers, mint sprigs, raspberry powder, gold leaf | Adds elegance, color contrast, and visual intrigue |
Make-Ahead, Storage & Reheating
These domes are actually designed to be made ahead — which is perfect for my busy NYC lifestyle. I often prepare the cheesecake domes and freeze them unglazed a week before a party, then make the glaze and finish them the day before serving. The glaze itself keeps beautifully, and the domes hold their texture well when properly stored.
| Method | Container | Duration | Reheating Tip |
|---|---|---|---|
| Refrigerator | Airtight container in single layer | Up to 3 days | Serve cold; no reheating needed |
| Freezer (unglazed) | Tightly wrapped in plastic, then foil | Up to 1 month | Thaw in fridge 3 hours before glazing |
| Make-Ahead | Glaze can be made 2 days ahead, stored airtight | Up to 2 days | Reheat gently to 90°F, whisk smooth before using |
If you’re storing glazed domes in the refrigerator, place them on a parchment-lined tray and cover loosely with plastic wrap — don’t seal them tightly or the glaze may sweat and lose its mirror shine. Let the domes sit at room temperature for about 10 minutes before serving to take the chill off, but serve them still cold for the best texture contrast between the creamy interior and the firm glaze.
One thing I’ve learned from my cooking days in Paris: the glaze is at its most brilliant within 24 hours of application. If you’re making these for a special occasion, I recommend glazing them no more than 24 hours ahead. The domes themselves can stay frozen unglazed for up to a month, so you can do all the heavy lifting well in advance and just finish the glaze the day before your event.
Variations & Easy Swaps
| Variation | Key Change | Best For | Difficulty Impact |
|---|---|---|---|
| Lemon-Blueberry Prism Domes | Swap raspberry for blueberry puree + lemon zest | Summer parties, citrus lovers | Same |
| Dairy-Free / Vegan Version | Use vegan cream cheese, coconut cream, and agar-agar | Dairy-free guests, vegan entertaining | Intermediate (different setting agent) |
| Spiced Chocolate Prism Domes | Add 1 tsp cinnamon + pinch cayenne to chocolate glaze | Fall/winter celebrations, spice lovers | Same |
Lemon-Blueberry Prism Domes
For a bright, citrusy twist, substitute the raspberry puree with an equal amount of blueberry puree and add the zest of one lemon to the cheesecake base. The lemon zest brightens the blueberries and adds a fragrant note that reminds me of the lemon trees that grew in my grandmother’s garden in Marrakech. The vanilla cream core works beautifully with this combination, and you can use a purple or blue shimmer dust in the glaze for a completely different look.
Dairy-Free / Vegan Version
To make these domes dairy-free, use a high-quality vegan cream cheese (like Miyoko’s or Kite Hill), full-fat coconut cream instead of heavy cream, and a vegan mascarpone alternative. The key change is using agar-agar instead of gelatin — use 1 tsp agar-agar powder bloomed in the same amount of water, and bring it to a boil in the liquid before incorporating. The texture will be slightly firmer and less silky than the original, but still beautiful. For the glaze, use a dairy-free white chocolate alternative and coconut condensed milk.
Spiced Chocolate Prism Domes
This variation is perfect for colder months. Replace the raspberry puree with 1/2 cup melted dark chocolate (70%) and add 1 tsp cinnamon and a pinch of cayenne pepper to the cheesecake base. For the glaze, use dark chocolate instead of white and omit the ruby shimmer dust — or use gold shimmer dust for a gilded effect. The warmth of the spices combined with the rich chocolate creates a dessert that feels deeply comforting, like the spiced hot chocolate I used to drink at the cafes in Paris. This version pairs wonderfully with a strong espresso.
What is the best way to achieve a mirror-like glaze on raspberry cheesecake domes?
The key to a flawless mirror glaze is all about temperature control and the quality of your ingredients. First, use a high-quality white chocolate with real cocoa butter — it melts more smoothly and creates a glossier finish. When you pour the warm liquid over the chopped chocolate, let it sit for 2 minutes before whisking gently (no vigorous whisking, which creates bubbles). Cool the glaze to exactly 90–95°F — too hot and it will slide off the frozen dome, too cool and it will set in thick, uneven streaks. Strain the glaze through a fine-mesh sieve before pouring to catch any undissolved bits. Finally, make sure your domes are completely frozen when you pour the glaze — the temperature shock helps the glaze set in a smooth, even layer.
Can I use frozen raspberries for the ruby raspberry gel center in these cheesecake domes?
Yes, you can absolutely use frozen raspberries if fresh ones aren’t available or are out of season. The key is to thaw them completely first, then drain off any excess liquid before pureeing. Frozen raspberries often release more water than fresh, and too much extra liquid can make your cheesecake layer softer and may require a slight adjustment in the gelatin. I recommend measuring the puree after draining — you need about 1 cup of puree for this recipe. If your puree seems very thin, you can simmer it gently for 5–7 minutes to reduce and concentrate the flavor before cooling and using it. The color may be slightly less vibrant than fresh, so a tiny drop of red gel food coloring can help restore that beautiful ruby hue.
How far in advance can I prepare Ruby Raspberry Cheesecake Prism Domes for a party?
These domes are wonderfully make-ahead friendly, which is one of the reasons I love them for entertaining. You can prepare the unglazed cheesecake domes up to 1 month in advance and store them tightly wrapped in the freezer. The vanilla cream cores can be frozen separately for up to 2 weeks. The mirror glaze can be made up to 2 days ahead and stored in an airtight container in the refrigerator — just reheat it gently to 90°F before using. For the best visual impact, I recommend glazing the domes no more than 24 hours before serving, as the mirror finish is most brilliant within the first day. Once glazed, keep them refrigerated in a single layer, loosely covered, for up to 3 days.
What can I substitute for the gelatin in the raspberry glaze to make this recipe vegetarian?
To make this recipe vegetarian (or specifically to replace gelatin), the best substitute is agar-agar, a plant-based setting agent derived from seaweed. Use 1 teaspoon of agar-agar powder for every 2 teaspoons of gelatin called for in the recipe. The process is slightly different: instead of blooming in cold water, you need to bring the agar-agar to a boil in the liquid (the sweetened condensed milk mixture) and let it simmer for 2–3 minutes to fully activate its setting power. Agar-agar sets at a higher temperature than gelatin and creates a firmer, more brittle texture. The glaze will still be glossy, but it won’t be quite as silky as the gelatin version. Note that agar-agar doesn’t re-melt as easily, so work quickly once you’ve incorporated it into the glaze.
Why did my mirror glaze crack or look streaky after pouring?
A cracked or streaky mirror glaze is usually caused by one of three issues. First, the glaze was too cold when poured — if it’s below 85°F, it becomes too thick and will set in uneven streaks rather than flowing smoothly. Second, the domes weren’t cold enough — they need to be fully frozen solid so the glaze sets instantly on contact. If the dome is even slightly thawed, the glaze will pool and slide rather than forming a smooth, even coating. Third, your white chocolate might have seized or not melted smoothly. Always use finely chopped chocolate and let the hot liquid sit on it for 2 minutes before whisking. If you see any lumps or graininess, strain the glaze through a fine-mesh sieve. Finally, avoid over-whisking, which introduces air bubbles that leave tiny craters in the finished surface.
Can I make these prism domes without a silicone mold?
Silicone molds are the ideal choice for these domes because they’re flexible and release the frozen domes cleanly without damaging the shape. If you don’t have dome-shaped silicone molds, you can use large muffin tins lined with plastic wrap — press the wrap firmly into each cup so you can lift the domes out after freezing. The shape won’t be as perfectly round, but it will still work. Another option is to use a glass or metal bowl lined with plastic wrap as a single large mold, then cut slices for serving. For the best results, I recommend investing in a set of 3-inch half-sphere silicone molds — they’re inexpensive and widely available online or at baking supply stores. The clean release makes a huge difference when it comes time to glaze.
How do I store leftover mirror glaze and can I reuse it?
Yes, you can absolutely store and reuse leftover mirror glaze! Pour any remaining glaze into an airtight container and refrigerate for up to 5 days. When you’re ready to use it again, warm it gently in the microwave in 10-second bursts, stirring between each, until it reaches 90–95°F and flows smoothly. You may need to add a teaspoon of warm water if it seems too thick. The glaze can also be frozen for up to 3 months — thaw it in the refrigerator overnight, then reheat as directed. Keep in mind that each time you reheat the glaze, the texture becomes slightly less glossy, so I recommend using it within 2 reheat cycles for the best finish. Leftover glaze is wonderful for dipping strawberries, drizzling over ice cream, or spreading on cookies.
What is the difference between a mirror glaze and a regular glaze for cheesecake domes?
A mirror glaze is specifically designed to create a high-shine, reflective surface that looks like polished glass or a gemstone. It’s made with white chocolate, sweetened condensed milk, and gelatin, which together create a smooth, fluid coating that sets to a glossy finish. A regular glaze, on the other hand, is typically a simple mixture of powdered sugar and liquid (milk, cream, or lemon juice), or a chocolate ganache. Regular glazes can be shiny but usually don’t have the same mirror-like reflective quality. The mirror glaze also sets firmer and stays more stable at room temperature, making it ideal for domes that need to hold their shape during serving. The trade-off is that mirror glazes require precise temperature control, while regular glazes are more forgiving for beginners.
Can I use white chocolate chips instead of a white chocolate bar for the mirror glaze?
I recommend using a high-quality white chocolate bar or callets (wafer disks) rather than standard white chocolate chips. Many white chocolate chips contain stabilizers and preservatives that prevent them from melting smoothly, which can result in a grainy or streaky glaze. Look for white chocolate that lists cocoa butter as one of the first ingredients — brands like Valrhona Ivoire, Guittard, or Callebaut are excellent choices. If you only have white chocolate chips on hand, check the ingredient list: if they contain palm oil or other vegetable fats instead of cocoa butter, they may not produce a smooth, glossy glaze. In a pinch, you can try using them, but be prepared to strain the glaze through a fine-mesh sieve to remove any lumps, and the shine may be slightly less impressive.
How do I get the raspberry cheesecake filling perfectly smooth without lumps?
The secret to a perfectly smooth raspberry cheesecake filling starts with room-temperature cream cheese — if it’s too cold, it will form lumps that are nearly impossible to beat out. Let the cream cheese sit on the counter for at least 30 minutes before starting. Beat it alone first for 2 minutes until it’s completely creamy before adding any other ingredients. When you add the raspberry puree, make sure it’s strained through a fine-mesh sieve to remove any seeds — this is a step I learned in pastry school in Paris and it makes a huge difference in the final texture. If you still see small lumps after mixing, you can gently heat a small portion of the mixture in the microwave for 10 seconds and whisk it back in — the warmth helps dissolve any cream cheese lumps. Finally, fold in the whipped cream gently but thoroughly to ensure a uniform, mousse-like consistency.
Share Your Version!
I’d love to see how your Ruby Raspberry Cheesecake Prism Domes turn out! There’s something so satisfying about watching that mirror glaze flow over the frozen dome and transform into a jewel-like finish — and I want to celebrate that moment with you. Leave a star rating and a comment below telling me how it went, or share a photo on Instagram and tag @cheerychop so I can see your beautiful creations.
I’d especially love to hear if you tried one of the variations — did you go for the lemon-blueberry twist, or maybe the spiced chocolate version? What did your guests say when they cut into the dome and found that hidden vanilla cream core? Your questions and stories help me create better recipes and also help other readers discover new ways to make these prism domes their own. From my NYC kitchen to yours — I hope this recipe brings as much warmth to your table as it does to mine. — Sara 🧡
Love This Recipe? Save It to Pinterest!
If you enjoyed this Ruby Raspberry Cheesecake Prism Domes recipe, don’t let it get lost in your browser tabs! 😄 Pin it now so you can find it again anytime — and explore hundreds more tried-and-tested recipes waiting for you on my Pinterest boards.
👉 Follow Sara on Pinterest @chefrecipes2
📌 Pin this recipe · 🔁 Re-pin your favorites · 💬 Tag me when you make it — I love seeing your creations!
Ruby Raspberry Cheesecake Prism Domes
A stunning dessert featuring raspberry cheesecake domes with a vanilla cream core and a shimmering ruby mirror glaze.
- Yield: 8 1x
Ingredients
- For the Raspberry Cheesecake Domes:
- 2 cups fresh raspberries, pureed
- 8 oz cream cheese, softened
- 1 cup heavy cream
- 1/3 cup powdered sugar
- 1 tsp vanilla extract
- 2 tsp unflavored gelatin
- 2 tbsp cold water
- Red gel food coloring (optional)
- For the Vanilla Cream Core:
- 1/2 cup mascarpone cheese
- 2 tbsp heavy cream
- 1 tbsp powdered sugar
- 1 tsp vanilla bean paste
- For the Prism Mirror Glaze:
- 1 cup white chocolate, finely chopped
- 1/2 cup sweetened condensed milk
- 2 tsp unflavored gelatin
- 2 tbsp cold water
- 1/4 cup warm water
- 1 tsp edible ruby shimmer dust
- For Garnish (optional):
- Fresh raspberries
- Edible sugar crystals
- White chocolate shards
Instructions
- 1. Bloom gelatin in cold water for 5 minutes.
- 2. Beat cream cheese, powdered sugar, vanilla extract, and raspberry puree until smooth.
- 3. Melt bloomed gelatin and stir into the raspberry mixture.
- 4. Whip heavy cream to soft peaks and gently fold into the mixture.
- 5. Combine mascarpone, heavy cream, powdered sugar, and vanilla bean paste until smooth.
- 6. Pipe small vanilla cream cores into silicone molds and freeze until firm.
- 7. Fill prism molds halfway with raspberry mixture.
- 8. Place frozen cream cores into each mold.
- 9. Cover with remaining raspberry mixture and smooth tops.
- 10. Freeze for at least 5 hours until fully set.
- 11. Bloom gelatin for the glaze.
- 12. Heat condensed milk and warm water, then dissolve gelatin into it.
- 13. Pour over white chocolate and mix until glossy and smooth.
- 14. Stir in ruby shimmer dust until evenly blended.
- 15. Cool glaze to a pourable consistency.
- 16. Unmold domes and place on a rack.
- 17. Pour glaze evenly to create a crystal prism finish.
- 18. Garnish with raspberries, sugar crystals, and white chocolate shards.
- 19. Chill before serving.
- 20. Serve cold.
Nutrition
- Calories: 370
- Sugar: 27 g
- Fat: 26 g
- Carbohydrates: 31 g
- Protein: 5 g
Tried This Recipe? Leave a Comment!
Did you make this recipe? I’d love to hear how it turned out! Please leave a comment and a rating below. Your feedback helps other home cooks and supports cheerychop.com!
For more delicious inspiration, follow me on Pinterest!


